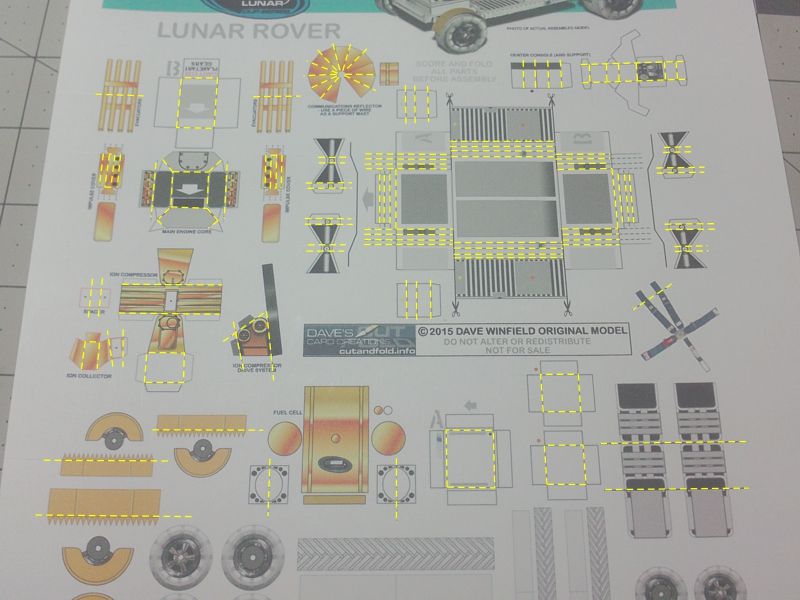
First job is to score everything that has to be folded.
There is a lot of scoring to do...and its not all marked.
Its a good idea to make yourself a good scoring tool that can score a precise fine line.
If your score lines are too wide, you are going to have a problem on this build.
Not sure why I didn't mark all the score lines on this model sheet
...maybe I thought some folds were obvious?
And, maybe I was trying not to clutter the page? (because of all the small parts, and lack of rooom?)
So, heres a diagram that should help you out.
I know its not the clearest photo, but I think you can make it all out.
Don't worry, I'll post more photos showing score lines.
...
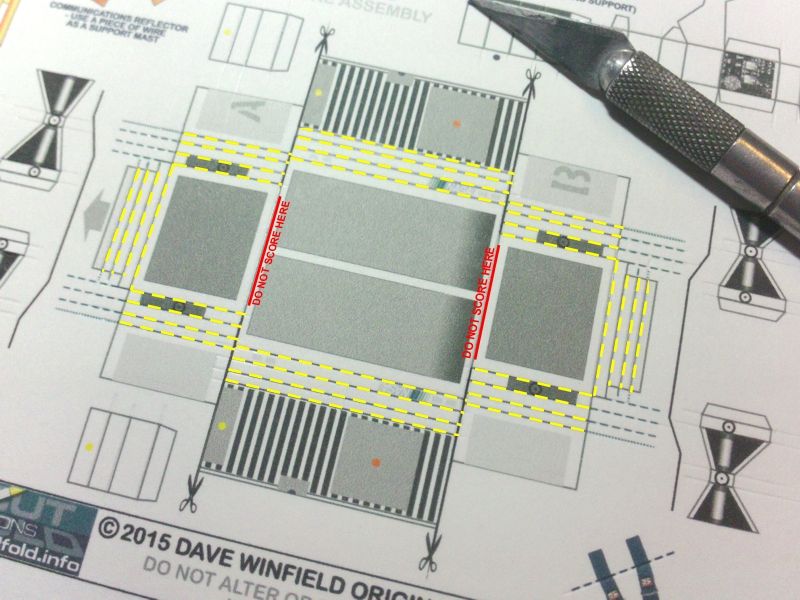
Once you have your model sheet all scored...lets focus on the main Floor Pan of the Rover.
This is the part we will build first.
As I promised, here(below) is a closer detail of all the fold/score lines (marked in yellow)
...
Yes, all those folding sections are
not all the same widths.
So, try to be precise ...score and fold exactly on the lines.
Make sure not to score horizontally across the floor pan (indicated by the red lines).
If you did so, it will weaken the floor too much and your Rover will collapse in the middle.
I recommend you reprint this part and try again, if you scored across it.
Try to understand the chassis part.
You are looking at the underside of the Floor.
Those larger solid gray rectangles in the center area are the underside of the Floor.
We are going to fold the striped side sections over and they will be the top of the Floor.
...
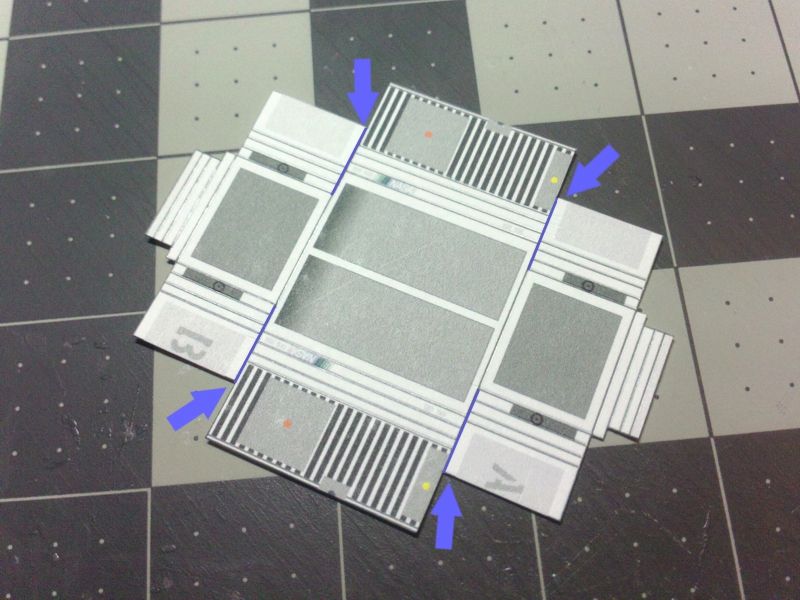
Now...Cut the chassis part out using a sharp kife and metal straight edge.
Its important to cut everything straight, precise and square.
You also need to cut into the floor pan to separate the (front and rear) narrowed sections of the floor.
I've marked these cuts in blue on the next photo.
You can make these cuts before or after you have cut out the entire part.
...
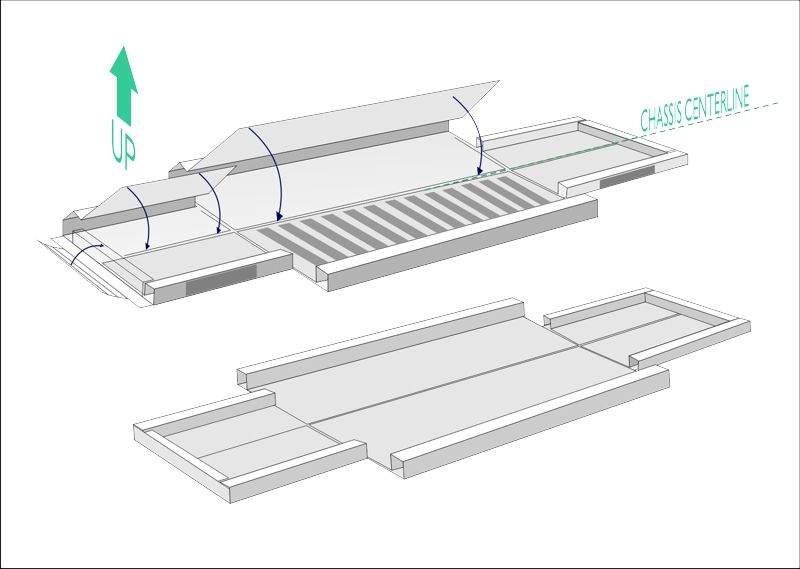
There is an Assembly Diagram available for this model.
You can find it in the KoolWheelz section at
www.papermodelforum.com
But I'll also use some of the diagrams here to help illustrate the assembly.
In the next few posts, I will show you how to fold and assemble the chassis.
In the next picture, this is what we are going to create by folding the chassis/floor pan into shape.