Dear all
So I have finally got to make the ullage rocket motors. The first thing I found out for this bit is that I can find no photo that clearly shows one of these rocket motors on an Apollo Saturn V where the fairing is on.
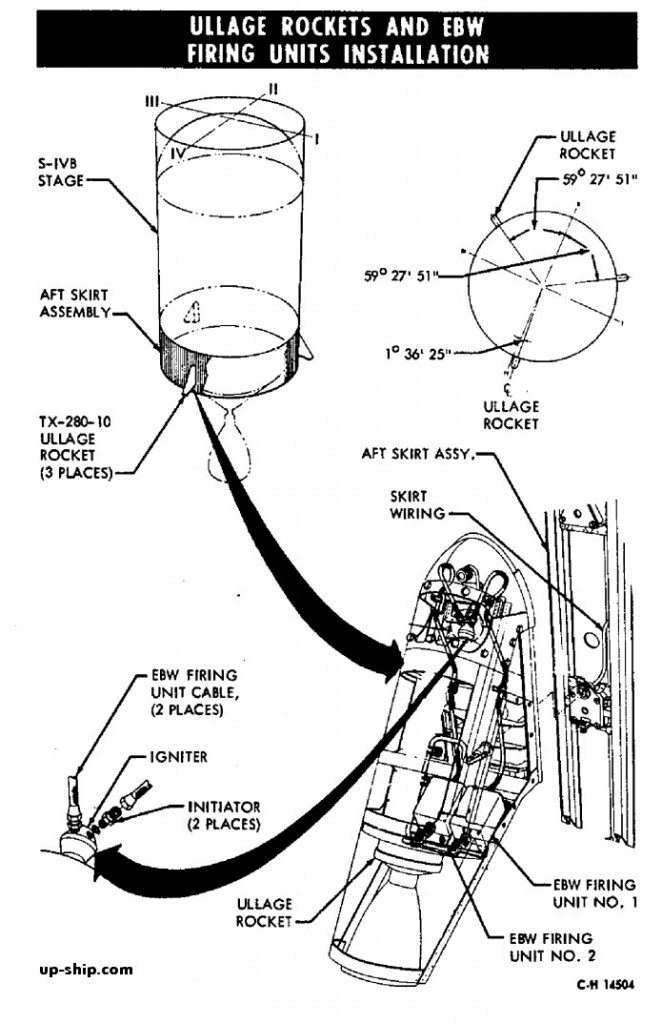
I did find this drawing of one on a Saturn 1B, from
Uhádněte, co je na obrázku | forum.kosmonautix.cz which I think is the same as the Saturn V in terms of this part (except there are three of them rather than two).
The best photo I could find was from
The Project Apollo Image Gallery and was this one

I also looked at the MSFC poster

Away, after all that here is what I did. First up you need two copies of the parts supplied

I then cut them out as shown and glued them together as shown. Notice I cut the "circle" out and after they part was glued together I trimmed out the overlap of the tab with the semi-circular tab.


The I made "full tabs" for the part that will attach to the body of the rocket and then added magnetic paper to them . Finally glued them to the main part (as shown)


Now for the "extension" pipes. Actually the "hole" they feed into should be an ellipse rather than the semi circle and half an ellipse which is what the parts are as I have made them. I did not know how to do an ellipse on the computer so just went with it. Actually the tube looks to be a truncated cone in real life so this part is all "conic sections". However I was adapting the parts in the kit as much as possible. The "cylinder part" supplied is way to big for what I did so it had to be reduced as shown (easiest to just count the rivets if you are copying this way)

After forming into a tube I pencilled in some more rivets down the seam and then added it to the main part. Finally gave them the "fridge" test.


Regards
Kevin