How to Make Aluminum Clad Card Stock (Part II)
By Gil Russell
Edited by Leif Ohlsson
7 August 2009
Adhesive
After rejecting VOC based adhesives water based glues were tried. PVA based (Polyvinyl Acetate) white glue and Carpenter’s (Aliphatic Resin) yellow glue did not achieve a good aluminum bond (It will work in a pinch but leaves unbounded voids). An ideal bond fails a peel test paper first. Aleene’s Original Tacky Glue was tried next and it surprisingly passed the peel test. After several practice runs I became proficient in producing nearly perfect aluminum clad panels every time.
Bonding the Paper to the Aluminum
Using a fairly fresh tube of Tacky Glue spread a pattern approximately the size of the paper that’s to be glued to the aluminum.
Figure 9 Applying Glue Pattern to the Aluminum
Figure 10 Spreading the Glue into a Film

Figure 11 Aluminum Ready for Bonding
Figure 12 Placing the Paper

Figure 13 Burnishing the Paper

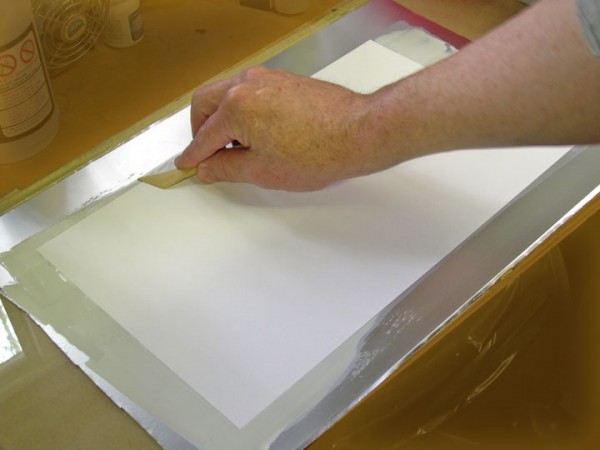
Figure 14 Burnishing the Edges
Figure 15 Cutting the Paper Out of the Foil

Figure 16 Sheet Curl
Figure 17 Rolling the Curl Out of the Sheet
Resulting Aluminum Clad Sheet:
Figure 18 Finished Aluminum Clad Card Stock Sheet
Legal size card stock was used in this tutorial. I recommend practicing with smaller sizes till you’re familiar with the process before moving on to larger pieces.
Most any weight paper can be used as long as the surface is fairly smooth. Rougher surface textures require a thicker glue film application with longer drying times. Sheets of tracing vellum make easy to apply overlay panels for models.
I regularly put the aluminum clad card stock through an inkjet printer to print part patterns on the paper backside. Remember to mirror reverse the pattern before printing.
A piece of adhesive backed shelf paper applied to the aluminum surface will protect the surface during the model building process.