Time to work on the insides of the model. Once the fuselage is complete, only 5-parts left to assemble. Time to get it done.
Gluing the Rubber Band Tube into the fuselage:
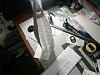
Wheels installed, gluing engine cowling top skin:

Secret internal cheat item, wing root doubler printed and then installed to shore-up the fuselage side. Not strong enough once the "huge" wings are installed, should have used 110# Index instead of the 90#:

Loading the Rubber Band:

Close-up of Rear Rubber Band Mount Bamboo Skewer, used drill to drill through rolled paper tube:

Gluing Rear Fuselage Top Skin:

Gluing Canopy, note that canopy is oversized, once glued will trim excess with a knife before sanding:

Canopy view of area needing trim, both sides were identical after trimming, used 400-grit sandpaper at first, switched to 600-grit when the 400-started removing ink but not the edge needing cleaned up, 600-grit worked perfect:

Canopy sanding done, Fuselage Complete, Ready for Wings and Tailfeathers:

Simple design and construction. Started on Friday to change my little paint project model into this. Worked on a vehicle for 5-hours on Saturday, finished model design Sat. evening, built on Sunday, re-design on computer kept me busy while glue was drying.
More to follow, 5-items left to glue on!
Mike