


|
|
|
#1
 09-10-2010, 07:17 AM
|
|||
|
|||
|
Stargate Atlantis Puddle Jumper (pic heavy)
I saw the Stargate Atlantis Puddle Jumper build by Martin Sanger, as built by CMAGS. CMAGS had built his using raised panels on the exterior, which gave a more 'realistic' look. I myself have built this same model, with both the drive pods extended and retracted. For the former, I decided to attempt an interior build as well. Pics can be found here: Stargate Atlantis - Puddle Jumper.
After seeing CMAGS's build, it inspired me to revisit this model, but to attempt another, more screen accurate, interior build. In doing some internet research, I've discovered that there are 4 'screen accurate' versions. Take for instance, these 3 shots of the cockpit:  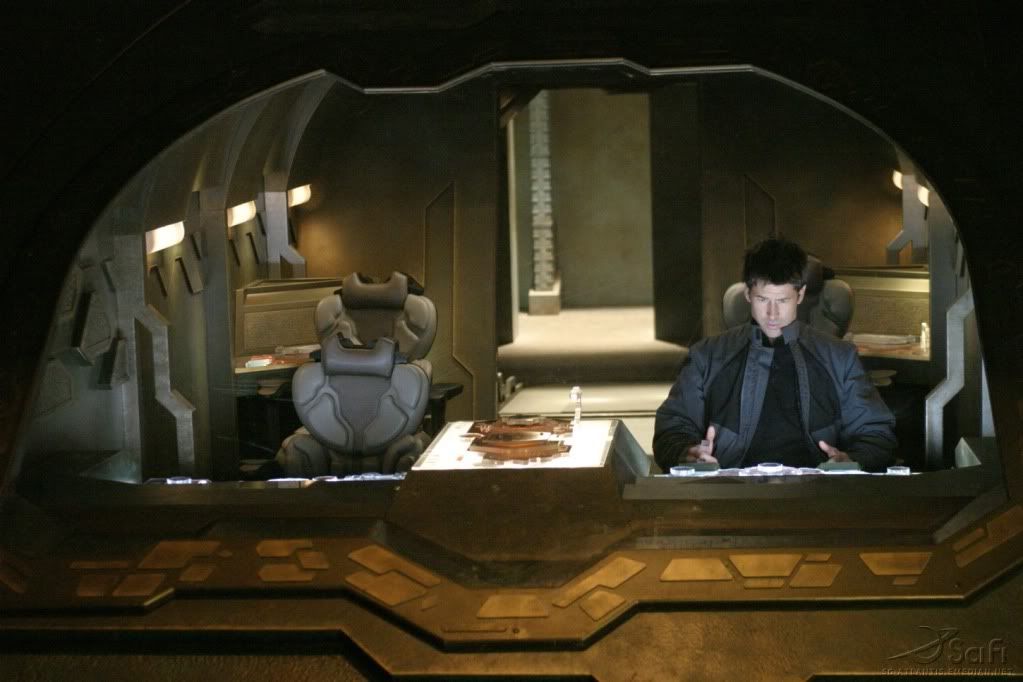  . .Each one has a different level of configuration. The first 2 have bulkhead mounted lights, while the third one is completely different. The third one, if i remember correctly, was one that they had acquired from the human replicators in season 3, and used thereafter. The first is the same as the second, with the addition of various equipment (including the microphone boom above col. sheppard). Then there's this one, used in Stargate SG1, which omits the rear compartment bench seats in order to make room for the addition of the time machine device:  One the supbject of the rear compartment, here's a shot of a jumper being built on location before filming: 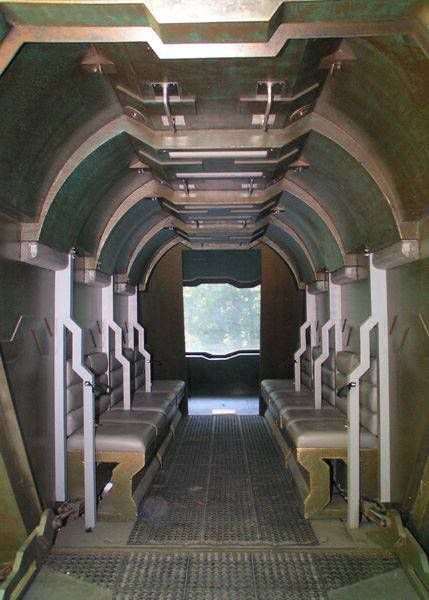 Here, we can see that the bulkhead of the rear compartment is flush with the ramp, allowing space for the drive pods to retract into the body, and the cockpit is actually bigger, spanning the entire width of the Jumper. This shot:  shows a completely sparse rear compartment, compared to this one:  which has the addition of the various gear the Atlantis expedition added. So, from these screen shots, there are 4 versions to consider building: 1) as found when they arrived at Atlantis, 2) after they crammed all of their gear into them, 3) the time machine version with no rear seating, and 4) the human replicator version. As far as i can tell, no outside appearance changes were made. For my build, I'm going to start with version 1), and then attempt to build it up to version 2). 
|
| Google Adsense |
|
#3
09-10-2010, 11:14 AM
|
||||
|
||||
|
Looking pretty good, Will. Just one note - the texture on the ramp isn't symmetric. Nothing overly noticeable, other than to nit-pickers like me.

__________________
Put on hold build (someday I'll finish): F-35A Lightning II 1:72 Previous builds: cMags' Card Model Builds
|
|
#5
09-10-2010, 10:51 PM
|
||||
|
||||
|
Looking good so far.
Are you just designing the interior for Martin Saengers Puddle Jumper, or are you designing your own complete Puddle Jumper?
__________________
If it can be thought of, it can be done.
|
| Google Adsense |
|
#6
09-11-2010, 08:17 AM
|
|||
|
|||
|
I'm using Martin Sanger's PJ as the base. All I'm doing is adding the interior to his. I'm not altering his in any way, shape or form. From the Jumper of his that I've built, I see no reason to redesign the entire thing

|
|
#8
09-12-2010, 01:32 AM
|
||||
|
||||
|
Quote:
Thank you for doing this. Keep up the good work.
__________________
If it can be thought of, it can be done.
|
|
#9
09-12-2010, 09:25 AM
|
||||
|
||||
|
Hi will71,
nice project, looks very good. Here some additional pictures for you. Martin
|
|
#10
09-12-2010, 11:32 AM
|
|||
|
|||
|
Thank you everyone for the kind remarks. And thank you, Martin, for the pics. Some of those I already had, but the one of the dhd, the 2 soldiers and the one with Dr. Carson I did not. Great shots for detail work when i get to the console.
I was thinking about something the other night, and it dawned on me that this model wouldn't be too difficult to reconfigure just a touch to make the drive pods retractable. All they would have to do is slide in and out. So once I get the interior details complete that will be my next project. I think it'll just be a matter of printing out the pod attachments, and cutting slits in the bottom of the jumper, where they attach to the ship. The part I haven't figured out yet is how to get the engines themselves to slide up and down. Have a look at this http://www.youtube.com/watch?v=zsM0AvhdhZ8. Any suggestions?
|
| Google Adsense |
 |
|
|


 Linear Mode

