


|
|
|
#1
 06-20-2017, 12:02 PM
|
||||
|
||||
|
Robinson complex
Looks like the thread was lost during last week's mutiny of machines (thanks to admins for rescuing the forum at all!), so let's restart.
The ship:   The website: Robinson - Alienspapercraft 3 The story: A space-age civilization is wiped out by a mysterious explosion of their sun. Survivors gathered on the periphery of the system, assembled an improvised interstellar vessel out of several interplanetary ships and set off to look for a new home. The plan: Disassemblable spaceships have always been my favorite toy idea, so I'm gonna build this baby with all the bells and whistles she deserves: electric lights and fairly large amount of added 3D details. The build: I've started with a quick and dirty B&W prototype to check how things fit together and where problems are. First caveat: the PDFs fill A4 from edge to edge, so be sure to use "fit to page" or they get clipped. First ship to test was the Neucom cruiser:   Large flat surfaces, long straight tabs. If you manage to avoid warping, there's nothing to worry about. Be sure to laminate the bottom where landing gear attaches, or it will buckle. And possibly add a docking magnet for the shuttle (which is included with some other ship).
__________________
...to boldly glue what no man has glued before... Any criticism of my work is welcome. 
|
| Google Adsense |
|
#2
06-20-2017, 12:07 PM
|
||||
|
||||
|
Luckily I prepared the next posts offline while waiting for the server to come up again - backups be blessed!
Second part is Opalia which looked simplest:   And indeed she was. The only nontrivial place is the recessed stern where you need to close almost the whole circumference at once and there is no way to hold the tabs from inside. I used edge gluing for the petals, half-millimeter tabs don't work. I think the intake textures on wing leading edges are a little bit wrong:  But maybe they are meant to be vertical thrusters, not intakes, so they may be OK  . I'll be cutting them out anyway, so it doesn't matter. . I'll be cutting them out anyway, so it doesn't matter.Solar Explorer was far from trivial:  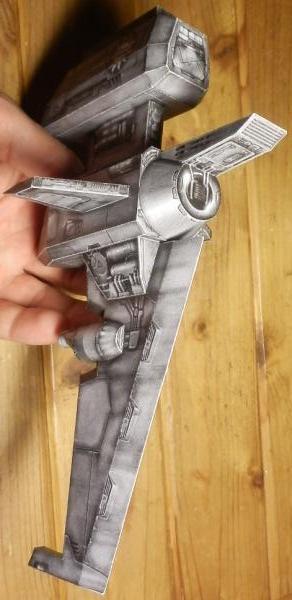 Main hull is quite long and fingers can't reach all the way in to hold bow tabs, but it's not really a problem. Rear end of the top pod is: a sloping-edged open box has to be glued to seven tabs at once (eighth one can be glued beforehand). My implementation of the joint is not pretty. An internal former would be very helpful, as well as having the sloped segment unfolded as one curved strip instead of petals. But I'll use another technology for the final build (cutting to individual thickly laminated panels), so it's not going to bother me any more. Leading edge of the bottom wing is also tricky, but doable with a sufficiently long tweezer. I plan to modify the wing by adding internal cardboard beams and formers and sticking the "roof" to the front edge of the resulting stiff slab. Be careful with the side wings, they tend to twist. Main engine nozzle looked scary at first (the whole shape is hollow, without any internal formers at all), but came together surprisingly well. Crooked round emitter on the bottom wing is easy, I'm just too lazy to cut out all the little tabs, so I edge-glued it almost exclusively. From the structural integrity point of view, the most critical spot is the "neck" between hull and top pod. It's necessary to stick some vertical skewers through the whole ship, or at least thoroughly stiffen the two flat walls where the neck attaches, otherwise you get a flapping ornithopter-like wing .The next liner to build is... the Next Liner, obviously.  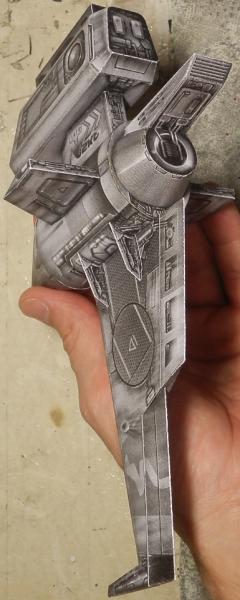 Oval hull is quite rare among sci-fi spacecraft, they usually come in either circular or boxy shapes. Even paper is a traditionalist and tries to unroll to an ordinary cylinder, but fortunately it's no problem to trace the rear bulkhead on a cardboard and make a second one at the front:  It worked well, unlike the idea to edge-glue the front cone to avoid tab work. I'll add a tab strip next time. Round bodies keep their shape relatively well, so the top of the ship is quite strong, but there is still the floppy flat bottom of the top pod, so the ship needs a skewer again. Bottom wing needs tweezers, as before. As a "guinea pig" prototype is being trained on, final version has been printed: 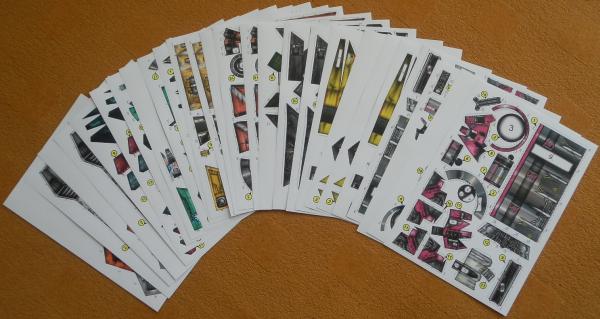 This time with proper fitting to page, on a nice paper, in laser and full colors. 28 pages total. I don't remember how much time I spent flipping through the kit, planning and drooling :D . Thanks, Jan!
__________________
...to boldly glue what no man has glued before... Any criticism of my work is welcome.
|
|
#3
06-20-2017, 12:18 PM
|
||||
|
||||
|
Are you just doing the first four that are posted, or has Jan given you special access to the second four?
__________________
A fine is a tax when you do wrong. A tax is a fine when you do well.
|
|
#4
06-20-2017, 12:18 PM
|
||||
|
||||
|
Going on:
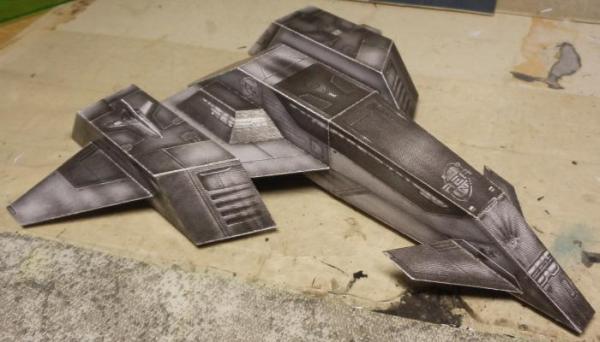
 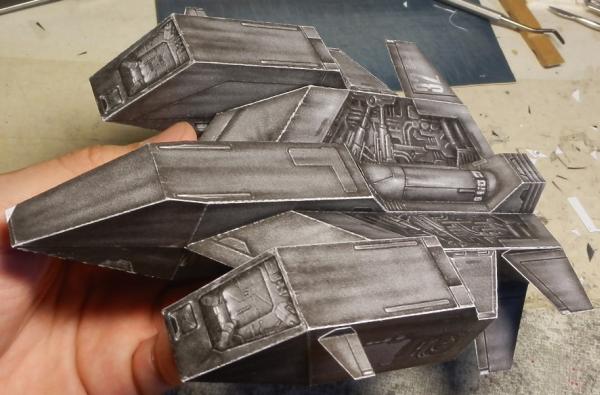 Orca is not completely easy, there are lots of weird angles - watch the geometry. Don't forget to trim side tabs on the "bathtub" on the main hull top, or they will not fit inside. Speaking of the tub: Neucom's front landing leg fits inside tightly, which is both good (no need for a magnet) and bad (paint may get scratched if you play with the model frequently), depending on your priorities. It's essential to laminate main hull sides where the two sloping boxes with tubing at the bottom attach. Without it, it can't be assembled without buckling and gaps. Laminating is also needed at both inner and outer sides of the outboard hulls (not critical during the build, but important later when two more ships get attached there). After a dry-fit of all ships together, I can see why Neucom's rear landing legs are so tall: they straddle around top pods of the tug ships (SE+NL) and sit on the connecting necks without magnets. I want to make all three legs of the same height, so the node between Orca and Opalia will need a major redesign. But it's no problem, it fits my alternative story perfectly .
__________________
...to boldly glue what no man has glued before... Any criticism of my work is welcome.
|
|
#5
06-20-2017, 12:23 PM
|
||||
|
||||
|
Quote:
__________________
"Rock is Dead, Long Live Paper and Scissors" International Paper Model Convention Blog http://paperdakar.blogspot.com/ "The weak point of the modern car is the squidgy organic bit behind the wheel." Jeremy Clarkson, Top Gear's Race to Oslo
|
| Google Adsense |
|
#6
06-20-2017, 12:26 PM
|
||||
|
||||
|
->Vermin king: all the kits are already available, but you can only get to them through the top navbar from the main page (not the Robinson subpage). I'm not sure if it's a bug or a feature
.
__________________
...to boldly glue what no man has glued before... Any criticism of my work is welcome.
|
|
#7
06-20-2017, 03:05 PM
|
||||
|
||||
|
Thanks for the info. I'll get right on that
__________________
A fine is a tax when you do wrong. A tax is a fine when you do well.
|
|
#8
06-20-2017, 03:18 PM
|
||||
|
||||
|
Thanks. Now I will really be following with interest
__________________
A fine is a tax when you do wrong. A tax is a fine when you do well.
|
|
#9
07-09-2017, 04:39 AM
|
||||
|
||||
|
After a little break, I'm back:
  It looks like a soda can with several straws, but it's actually a ion refinery. The trickiest part is the main hull: big barrel with chamfered edges where many things can warp and twist. I added two internal formers to be sure:  It might not have been the best idea ever to edge-glue the chamfering strips, but I wanted to try it. It's actually possible and the result doesn't look bad, just the inner circle must be glued step by step. Sticking the whole lid to the barrel is trivial. Joint of the cylinder is located at the top where it will be visible, so it's necessary to make it look good and at least use a separate tab strip. The starboard winglike structure is surprisingly strong because its trailing edge overlaps the chamfered end of the hull, so no lamination is needed. Just the boxes at the end are a bit floppy, but it doesn't matter since they carry no load. Pay attention to alignment of the long tube - it's good to install it together with the box it sticks out from, after the wing base has been glued to the hull. The four smaller wings like to twist, they would benefit from being stuffed with cardboard (this applies to following two ships as well, their wings look the same). The flange connecting the ship to Orca needs to be installed backwards to align airlock doors (but it only affects textures, not buildability).
|
|
#10
07-09-2017, 04:40 AM
|
||||
|
||||
  REA Liner requires lamination of fuselage sides and inner sides of engine pods, otherwise they would buckle when wings are being glued on. Outer winglets are not so critical, but a little stiffening does no harm. I'd recommend to attach the front landing leg as the very last thing because fuselage bottom is in the same plane as front halves of engine pods; it helps to be able to put the model on a table during assembly:  Otherwise a troublefree build. Looking at the finished model, I think the nozzles in inner wing trailing edges are drawn vertical and Orca misses an airlock in the central bow, but those are just graphic details with no impact on assembly.
|
| Google Adsense |
 |
| Thread Tools | |
| Display Modes | |
|
|


 Linear Mode

