


|
|
|
#11
 02-13-2019, 02:46 AM
|
||||
|
||||
|
Ok, Jedi and Sith, quiet please. I have to focus today
 I thought I tackle the cockpit next so I have the interior covered before I go on with the hull. And this already brought me to my limits. Are some parts small here! These are the prepared parts ...  ... and the seat!  I think that's some areas in the sub 1mm region! The assembly worked surprisingly. I started to use toothpicks to deliver the glue. All my previous methods were too coarse.  After this step I realized that I glued the inner side things on the wrong way. The texture details will now be hidden under the front part. When I glued it on, I thought they should be in front of the pilot in his vision. But no big deal, I will draw some details manually later in the vacant areas I am very happy with how the seat turned out. That was very small detail work for me. I have new appreciation of all those builders showing assembly steps next to small coins!!! Also I was hoping this will be the warm up to another build with the added extra detail, but I am not sure now. Have to see how the rest goes and if I get better at this micro detail scale. But the result is impressive! Here's the final assembly of the cockpit finished.  I better make sure when I put the nose structure together that this cockpit will fit in there! To be continued ... Chris
__________________
website: http://www.papierschnitzel.com - patreon: https://www.patreon.com/papierschnitzel - facebook: https://www.facebook.com/papierschnitzel 
|
|
#12
02-13-2019, 08:20 AM
|
||||
|
||||
|
Can you make a duplicate of the part and use it, instead of having to draw a new piece?
__________________
A fine is a tax when you do wrong. A tax is a fine when you do well.
|
|
#13
02-13-2019, 09:59 AM
|
||||
|
||||
|
Quote:
I guess I could but to me (for this first try build) it's not worth it. Once the canopy is on one would have a hard time to see that kind of detail anyway. I'll leave that kind of detail for when I am done with this one and dare to make the extended detail version.
__________________
website: http://www.papierschnitzel.com - patreon: https://www.patreon.com/papierschnitzel - facebook: https://www.facebook.com/papierschnitzel
|
|
#15
02-13-2019, 01:13 PM
|
||||
|
||||
|
Quote:
Thank you sir
__________________
website: http://www.papierschnitzel.com - patreon: https://www.patreon.com/papierschnitzel - facebook: https://www.facebook.com/papierschnitzel
|
| Google Adsense |
|
#16
02-13-2019, 02:52 PM
|
||||
|
||||
|
It looks very good, and now that I want to do something science fiction this thread is encouraging me to try.
|
|
#19
02-14-2019, 04:23 AM
|
||||
|
||||
|
Thank you gentlemen ... and today it's about all about the nose!
 Here I have glued the upper half of the internal structure ... 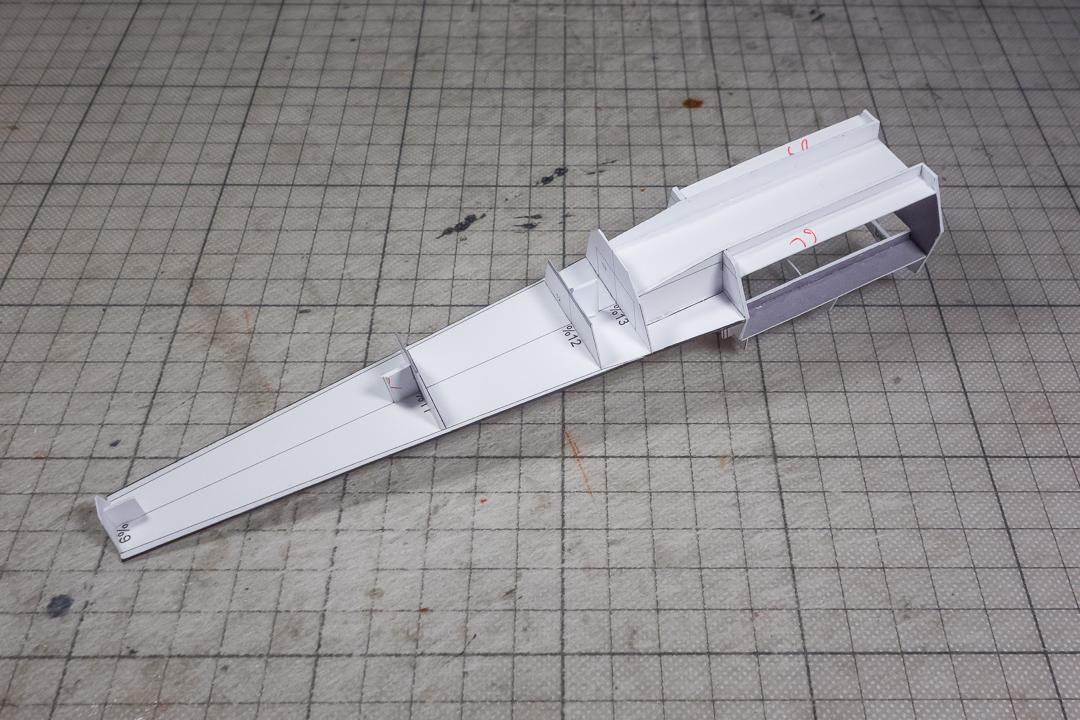 ...and then the lower half.  When I tried to insert the cockpit I noticed that the 11-part had to be moved. So out it went (very glad it could be removed easily without damaging the rest) and reglued with the right space for the cockpit.  Now it all fits very nice.  I think that is the end of the internal parts. Now it's time to start thinking about the actual hull! To be continued ... Chris
__________________
website: http://www.papierschnitzel.com - patreon: https://www.patreon.com/papierschnitzel - facebook: https://www.facebook.com/papierschnitzel
|
|
#20
02-14-2019, 11:21 AM
|
||||
|
||||
|
Looking good! This seems to be a fairly sturdy construction.
|
| Google Adsense |
 |
| Tags |
| star wars; x-wing |
|
|


 Linear Mode

