


|
|
|
#21
 02-14-2019, 02:36 PM
|
||||
|
||||
|
Quote:
Yes the interior seems very sturdy. It's a promising start. Looking forward to the outside though.
__________________
website: http://www.papierschnitzel.com - patreon: https://www.patreon.com/papierschnitzel - facebook: https://www.facebook.com/papierschnitzel 
|
|
#22
02-14-2019, 04:54 PM
|
||||
|
||||
|
It looks great, and as they say it seems very firm and compact. Very good progress.
|
|
#23
02-15-2019, 03:59 AM
|
||||
|
||||
|
Before I continue with the main hull I wanted to first finish the tip of the nose.
Here are the parts.  Looks like I need to do a lot of edge glueing again. I started with one side.  Once the first edge glue is dry I glue "weld" from the inside just to make sure it will hold.  After I completed both sides, it will be ready to be closed shut. That is something I don't like as I cannot manipulate for a good fit, but the interior shaper should be helping with that. 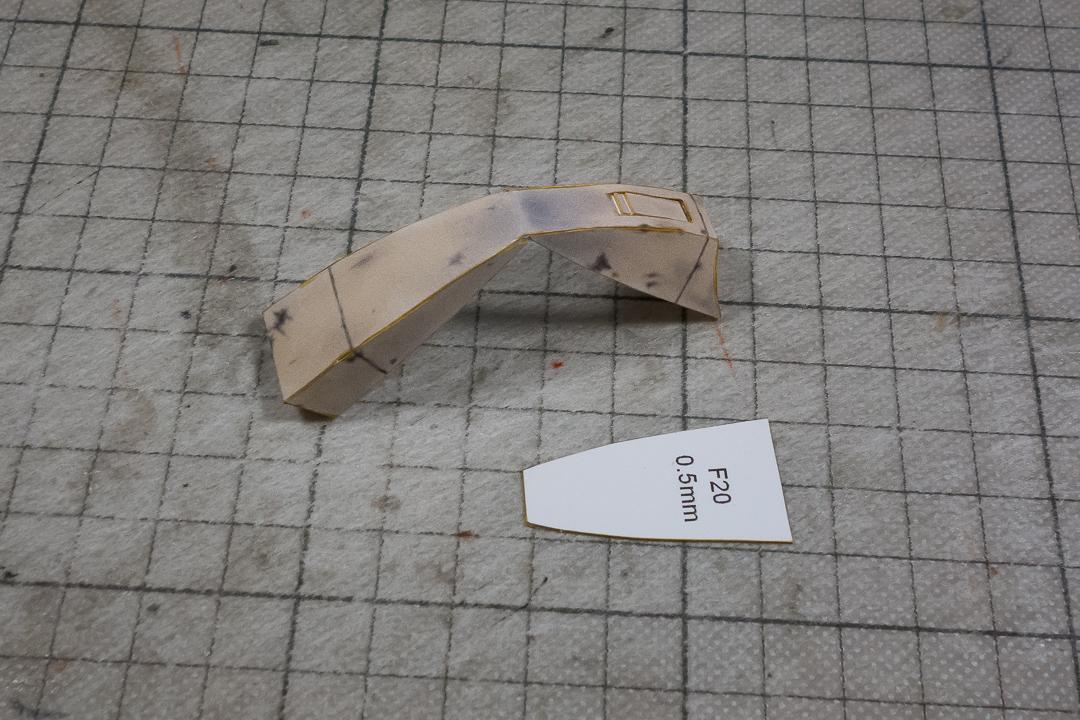 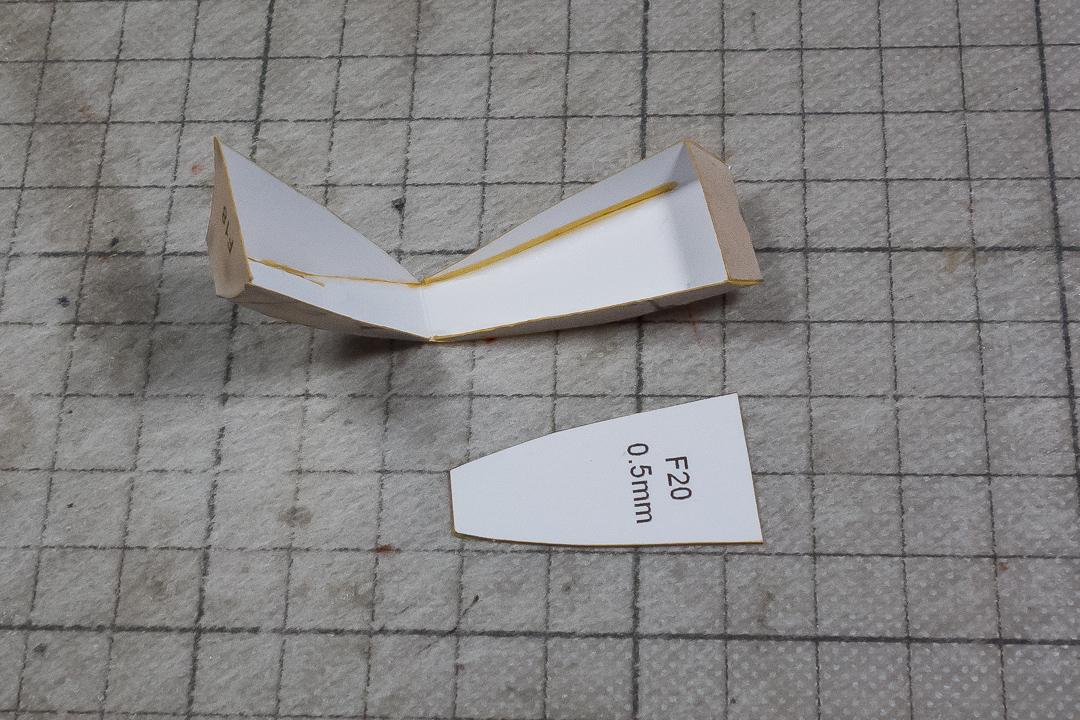 I decided to glue the shaper in like this on one side.  The final result is good enough for me :-)  I am just wondering if it would have been better to leave the end sides open and only glue them shut after the top and bottom half have been glued together. Maybe it would leave better control while closing the halves? In any case, I am happy that this shape worked out without major problems. To be continued ... Chris
__________________
website: http://www.papierschnitzel.com - patreon: https://www.patreon.com/papierschnitzel - facebook: https://www.facebook.com/papierschnitzel
|
|
#24
02-15-2019, 06:30 AM
|
||||
|
||||
|
I do not like to stick border with edge, usually or fabico tabs or before cutting the piece I draw them on one side and it is incorporated. For me it is easier to join later.
|
|
#25
02-15-2019, 08:26 AM
|
||||
|
||||
|
Quote:
Same here ... or let's say I am not used to that. I was surprised who well they have worked so far. But often, when there are no tabs, I just make some extra from left over paper and glue under.
__________________
website: http://www.papierschnitzel.com - patreon: https://www.patreon.com/papierschnitzel - facebook: https://www.facebook.com/papierschnitzel
|
| Google Adsense |
|
#26
02-16-2019, 12:34 PM
|
||||
|
||||
|
Today just a short WIP. I made the little "red" R2-D2 (don't know what the official name of the red one is).
So out of this ... 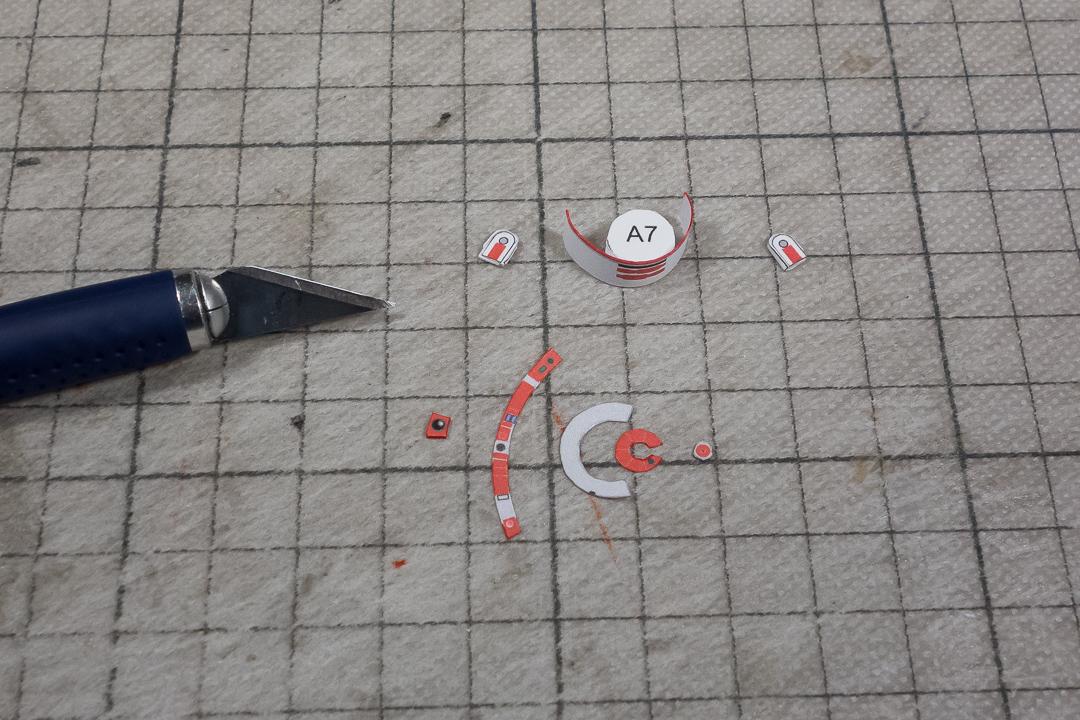 ... I was able to make this.  And then I have started the underbelly of the hull. Here are the parts. 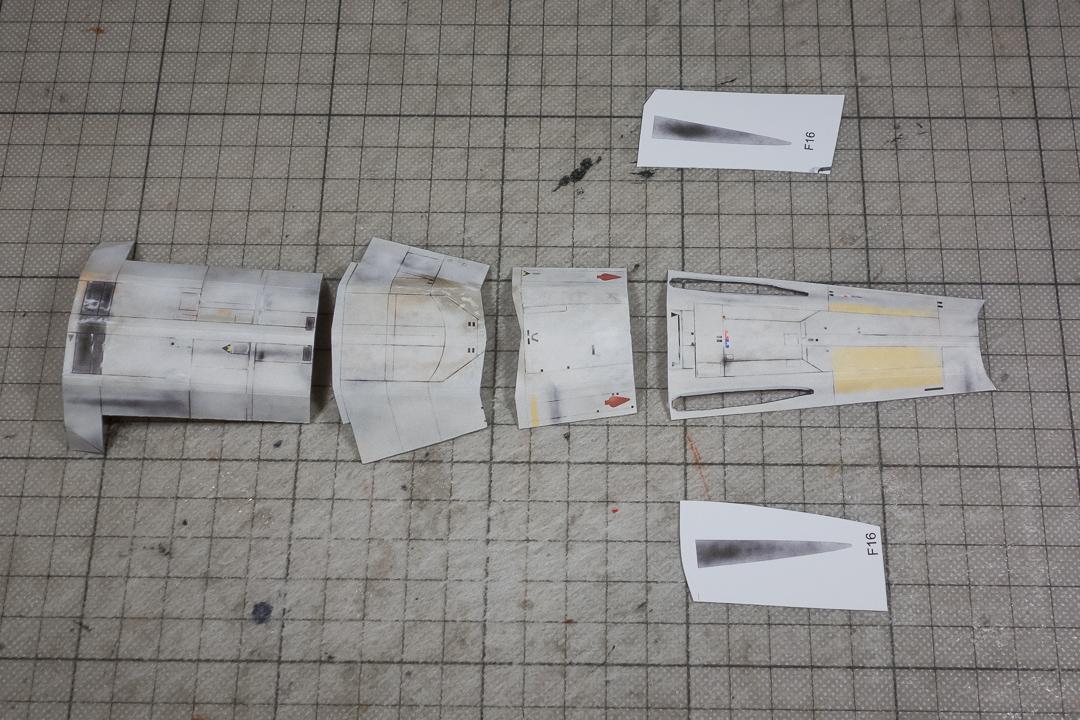 I gave these parts a good rounding!  Glued these interior parts on and getting comfortable with the on edge glue   From the outside.  So the hull is starting to form ... under the supervision of the assistant droid! To be continued ... Chris
__________________
website: http://www.papierschnitzel.com - patreon: https://www.patreon.com/papierschnitzel - facebook: https://www.facebook.com/papierschnitzel
|
|
#27
02-16-2019, 10:50 PM
|
||||
|
||||
|
Nice, that astromech droid looks ready for duty!
|
|
#28
02-17-2019, 02:02 AM
|
||||
|
||||
|
Quote:
Yes, he is! On we go with the lower hull parts. I am not sure how the original intention was to glue them on but I made these connector tabs so I can get the hull into one piece. I cannot imagine another controllable way to get a clean seam between the parts.   I glue these two section together due to the different angles.  Then I started gluing on the parts one by one. First one one side ...  ... and then the other.  That way I worked step by step to the front.  For the upper hull I also started to connect parts. 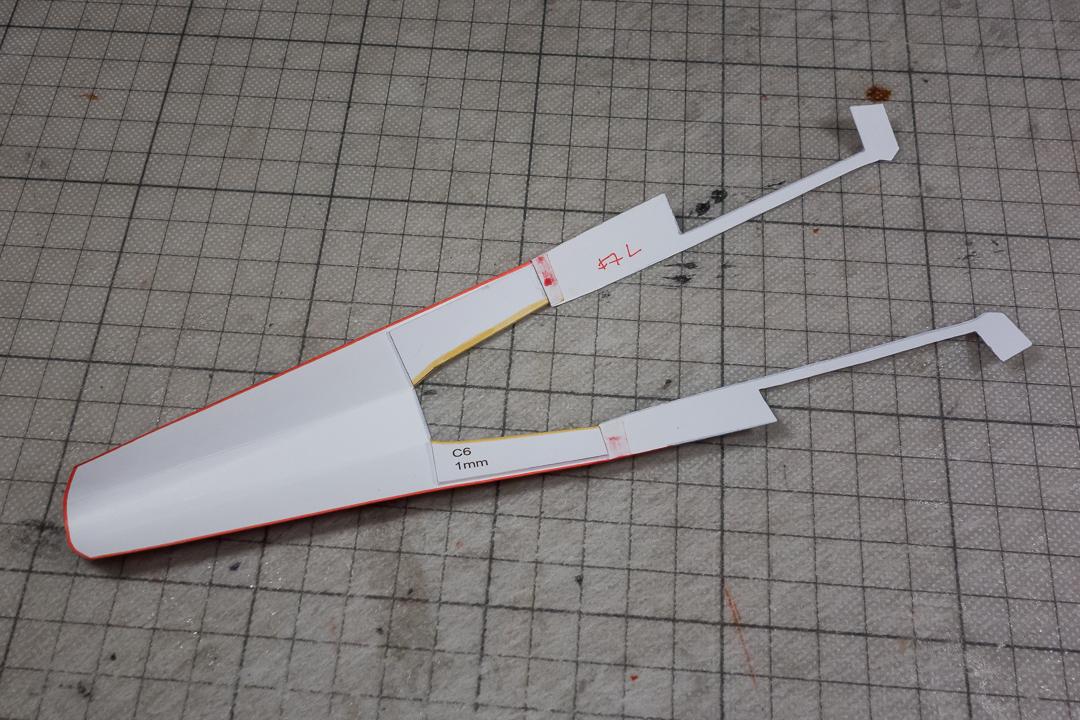 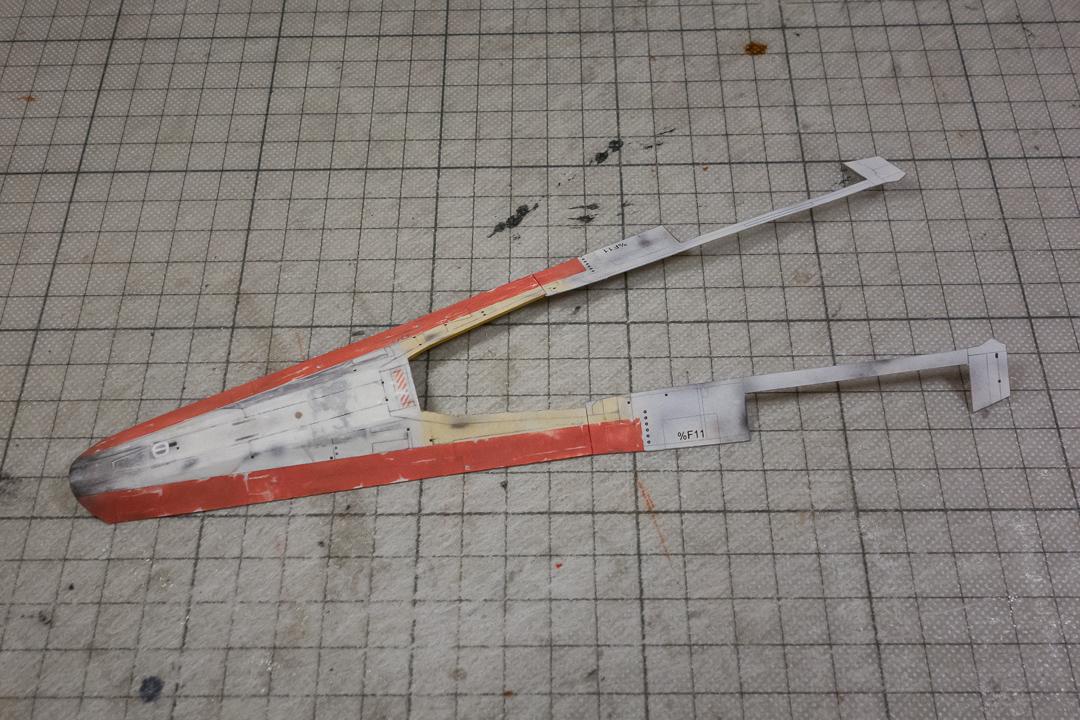 I think these are all the parts.  Adding helping tabs again ...  ... and going step by step.  Reaching this stage.  Now I made the decision to first add this part to the hull. (I would do it different now and add the droid plate first and then add the complete upper hull to the main assembly) I thought it would be better to work the droid plate in afterwards but it posed a couple of problems. For example I should have checked the fitting of the plate. I had to cut out more space on the formers which was a little tricky. Well, you try it and you learn So this is the main section ... 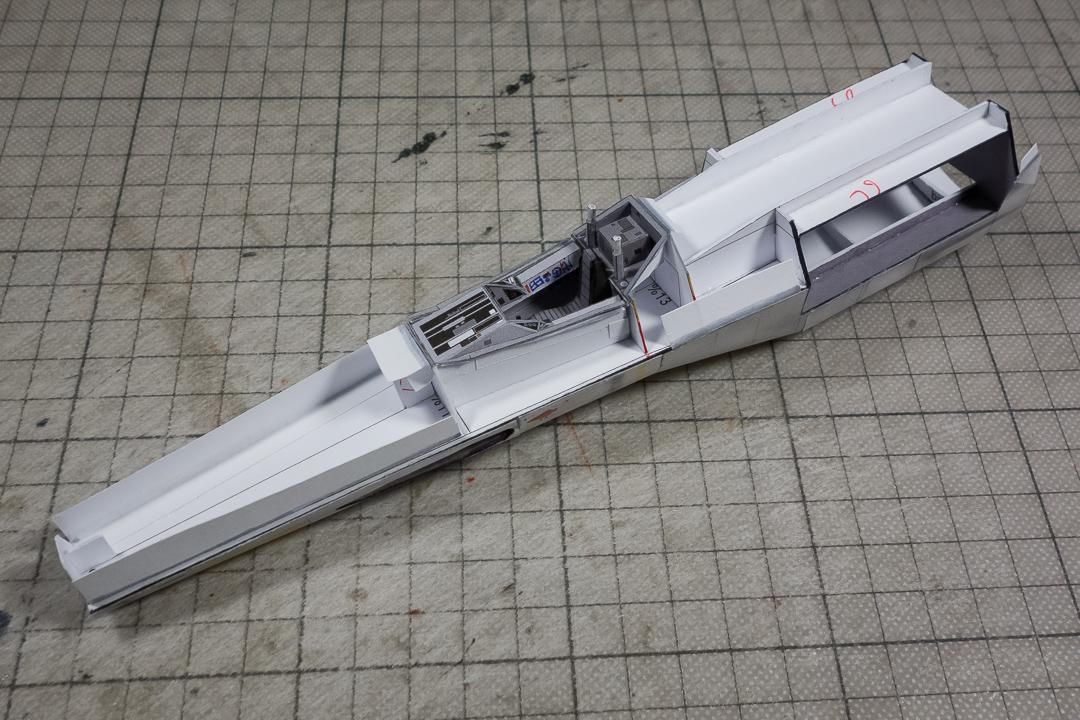 ... and this is with the upper hull and nose glued on!  I am very happy with the result. There are only minor gaps I wasn't able to fill. Not sure how I can avoid that. In the instructions there is a part where it is advised to fill space between the formers and the hull with extra paper bits, but here if have the other problem But with my colored under-glue-tabs they don't really show that much. And then there are parts coming later on the side that will help cover it up even more.   To be continued ... Chris
__________________
website: http://www.papierschnitzel.com - patreon: https://www.patreon.com/papierschnitzel - facebook: https://www.facebook.com/papierschnitzel
|
|
#29
02-17-2019, 04:29 AM
|
||||
|
||||
|
I think the slight gaps here and there between hull plates makes the subject look more 'real'. The Rebel craft are supposed to look 'used', not 'showroom'.
Great looking build.🤯
__________________
"It's all in the reflexes."
|
|
#30
02-17-2019, 07:23 AM
|
||||
|
||||
|
Quote:
Totally agree
__________________
A fine is a tax when you do wrong. A tax is a fine when you do well.
|
| Google Adsense |
 |
| Tags |
| star wars; x-wing |
|
|


 Linear Mode

