


|
|
|
#31
 01-31-2022, 05:33 AM
|
|||
|
|||
|
did i really write "10h" last time?
Well... just three parts on and under the nose alone took up 4 of those... But the front section is almost* done, only about 10 square inches on the rear to go. Then a few fins... and on to painting! *almost: mostly fine-tuning on sloppy edges on some parts where the gule refused to keep them in place   

|
|
#32
01-31-2022, 07:18 AM
|
||||
|
||||
|
I think part of your issue with glue sticking can be fixed by pre-shaping your parts. By shaping them so that they will 'sit' in place before gluing them, you shouldn't have as many issues
__________________
A fine is a tax when you do wrong. A tax is a fine when you do well.
|
|
#33
01-31-2022, 10:34 AM
|
|||
|
|||
|
Quote:
Thank you, a most welcome advice and i think that would have worked on the most parts. Alas, not on all. This effect gets the most nasty on parts that need to be bent in two dimensions - which also requires some stretching and squeezing. That's what i achieve by soaking the parts in watered glue (which is what i do to "persuade" the paper to take more organic, rounder shapes) - and soaking ruins all preshaping. An idea i stole from my daughters when they made paper&glue-lampions on balloons in kindergarten  But to make things worse, the parts sometimes gain back some of their original shape/tension during drying. That's something that can be countered by gluing one part in place in several steps - which is easier on the larger parts. Glue a few mm in place, let dry and then glue the next section. I think i just lost patience during the last moments where i should have taken two more steps.
|
|
#34
02-05-2022, 02:16 AM
|
|||
|
|||
|
top and bottom of the rear (without thruster nacelles attached)
The bottom is getting a few more parts just now.  
|
|
#35
02-13-2022, 10:07 AM
|
|||
|
|||
|
No building progress - but here is the missing photo of the chin gun
Small (in WH40k terms)... but i would say just the right size. 
|
| Google Adsense |
|
#36
02-26-2022, 05:54 AM
|
|||
|
|||
|
building phase completed.
Next comes the traditional CA-soaking and then painting.    
|
|
#37
02-26-2022, 08:59 AM
|
||||
|
||||
|
Already a thing of beauty
__________________
A fine is a tax when you do wrong. A tax is a fine when you do well.
|
|
#38
02-26-2022, 11:47 AM
|
|||
|
|||
|
Thank you.
I like too how it turned out so far 
|
|
#39
03-05-2023, 10:02 AM
|
|||
|
|||
|
oh... more than a year since i posted the last time about that...
progress has been pretty sparse, but i have started painting. Drybrushing was really no good idea and i need to clean this step up thoroughly before i can concentrate on details and weathering. anyway... the direction is ok. 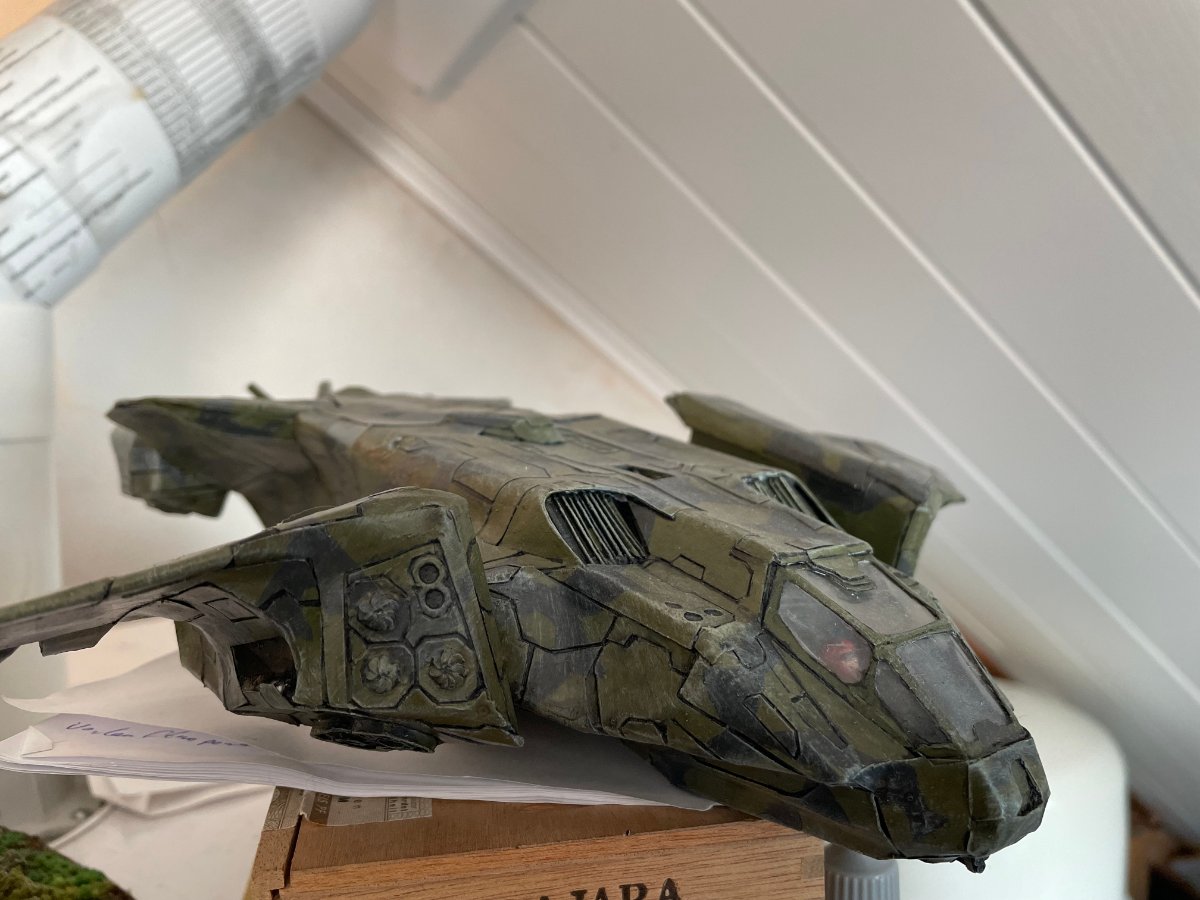
|
 |
| Thread Tools | |
| Display Modes | |
|
|


 Linear Mode

