


|
|
|
#1
 11-04-2019, 11:25 AM
|
||||
|
||||
|
Papierschnitzel Graveyard With Transparencies
I did a test build of the example in the instructions of the Papierschnitzel graveyard.
Inkjet transparency sheets were used to print out the iron fence parts. It worked out so-so. If I print on transparencies again the saturation will be upped to try to get darker fences. Instead of folding the prints to make 2X thickness just 1X thickness was used. That way lining up the prints was not needed and the possibility of dried glued areas showing was eliminated. It made for a kind of flimsy section, but with some adhesive putty under the posts the fence sections were sort of straightened out. Here are some pictures of the finished display. 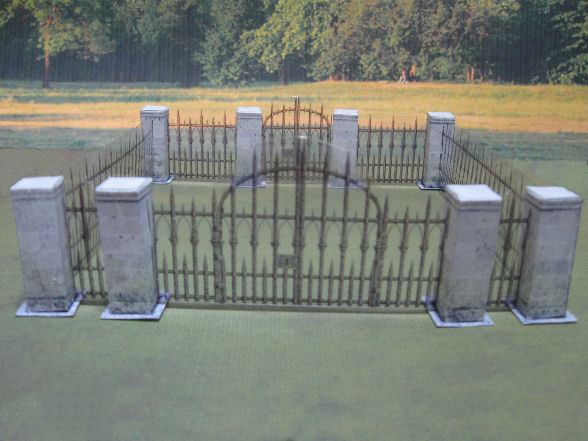  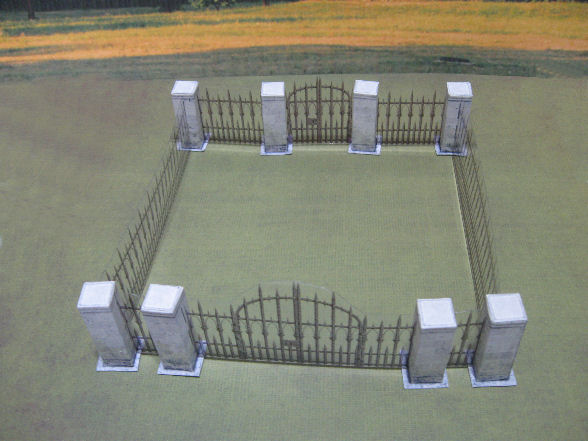 A little more added for the following pictures.     There are a lot of layers so you can make choices to change the appearence of the set when printing. Mosly in the stone work of the posts. For $2 it ain't too bad. 
__________________
~Doug~ AC010505 EAMUS CATULI! Audere est Facere THFC 19**-20** R.I.P. it up, Tear it up, Have a Ball 
|
| Google Adsense |
|
#2
11-04-2019, 11:38 AM
|
||||
|
||||
|
These look great! I will have to start working more with transparencies. So much easier than cutting out all the spaces manually :-)
Thank you so much for sharing! Chris
__________________
website: http://www.papierschnitzel.com - patreon: https://www.patreon.com/papierschnitzel - facebook: https://www.facebook.com/papierschnitzel
|
|
#3
11-04-2019, 12:02 PM
|
||||
|
||||
|
Turned out way better than I would expect!
__________________
"The world is big" On hold: Fuyuzuki, Zao, Zara, Akizuki, Past works: XP55 Ascender, CA Ibuki, Seafang F32, IS-3, Spitfire V, J-20
|
|
#5
11-04-2019, 02:56 PM
|
||||
|
||||
|
That looks cool. Did your family like it, too?
__________________
Give me a pigfoot and a bottle of beer. On Flickr: https://www.flickr.com/photos/153077...57692694097642
|
| Google Adsense |
|
#6
11-04-2019, 03:05 PM
|
||||
|
||||
|
The family thought it looked good.
I set it up, took the photos, then broke it down for storage. That is why I used the adhesive putty to secure the stone posts instead of gluing them down. Makes it easier to disassemble.
__________________
~Doug~ AC010505 EAMUS CATULI! Audere est Facere THFC 19**-20** R.I.P. it up, Tear it up, Have a Ball
|
|
#7
11-05-2019, 12:40 AM
|
||||
|
||||
|
The adhesive putty also sounds very interesting. I had some ideas in mind to make the connection enforcing more the "straight" line but they were quite complicated to build, so I went for the easy slot-in solution.
__________________
website: http://www.papierschnitzel.com - patreon: https://www.patreon.com/papierschnitzel - facebook: https://www.facebook.com/papierschnitzel
|
|
#8
11-05-2019, 06:29 AM
|
||||
|
||||
|
The adhesive putty I used is called Loctite Fun-Tak mounting tabs. It looks like small blue rectangles that are 14 mm long x 6 mm wide x 3 mm thick. I broke off pieces from one of the rectangles and put two small dots under the base of each fence post. I slotted the fence section into the posts the stuck the posts to the ground, adjusting the tension of the fence sections as needed and making sure everything was aligned.
When done it was easy to remove the fence sections from the slots in the fence posts then remove the fence posts from the ground. That slot-in solution is a good one.
__________________
~Doug~ AC010505 EAMUS CATULI! Audere est Facere THFC 19**-20** R.I.P. it up, Tear it up, Have a Ball
|
 |
| Thread Tools | |
| Display Modes | |
|
|


 Linear Mode

