


|
|
|
#131
 01-07-2020, 07:13 PM
|
||||
|
||||
|
Nice work, as always. Great photos too, love the green background.
You're really making me want to build this kit. 
|
|
#134
01-08-2020, 01:55 AM
|
||||
|
||||
|
Olo - go ahead! A lot to choose from on any level
 Boris - thanks man. Quote:
Regarding to photos with background - thanks. As with previous Pz.Kpfw III tank, I tried to picture every part I assemble on a background, because it is more aesthetic and clean. But because this model is very complex, there's too many parts to picture. My building "spot" is always temporary (every time I deploy my stuff at the begining and collect at the end of work). Also I don't have fixed background to throw parts in there for photos. So I've limited it only to milestone assamblies. I don't like it, but that what it is for now.
__________________
Welcome to my gallery
|
|
#135
01-08-2020, 11:12 AM
|
||||
|
||||
|
I bought a little LED lit photo booth from wish.com to see if it was any good... it's actually very good but it's too small for most of my models so I rarely use it, it would be good for sub-assemblies etc.
|
| Google Adsense |
|
#136
01-09-2020, 04:20 AM
|
||||
|
||||
|
Quote:
That what I use for subassemblies as well, but I need to fold and unfold it every time.
__________________
Welcome to my gallery
|
|
#137
01-16-2020, 01:35 PM
|
||||
|
||||
|
Well, this is a critical stage in the process and i have a decision about the engine...
It's going in! I thought a lot about it and found theoretical solution that serves both goals: to keep the integrity of a hall and to try to expose to the most this beautiful engine. Option with engine beside the tank - no go. To fragile and to complex. Option to build another one for the side - no go. I don't have another half a year for this So, in theory i want to make removable top, like i did in Pz.Kpfw.III and then the engine will be exposed enough to examine it from most sides, like in this stage on pictures below. In addition, there some big openings in engine bay from the side and on top, so even with closed top it will be seen good. I was a little worried in process of putting it in, since this model is to complicated to make little mistakes and i hope i placed it in right spot and everything will come together nice, in later stage... Overall, engine set easy in to place, though i was in need to temporary remove and put back later two fire system hoses, that were in the way of big bottom tube. The partition also entered well. IMHO, the engine looks great inside, as it is outside  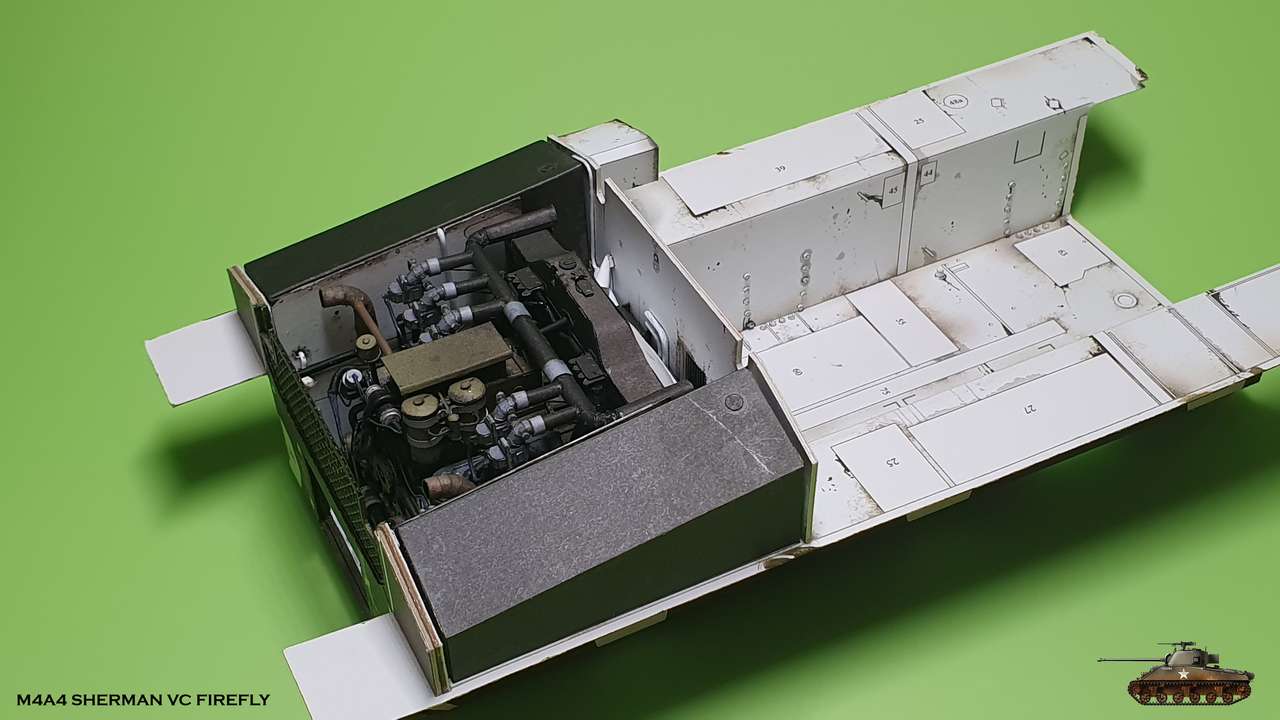  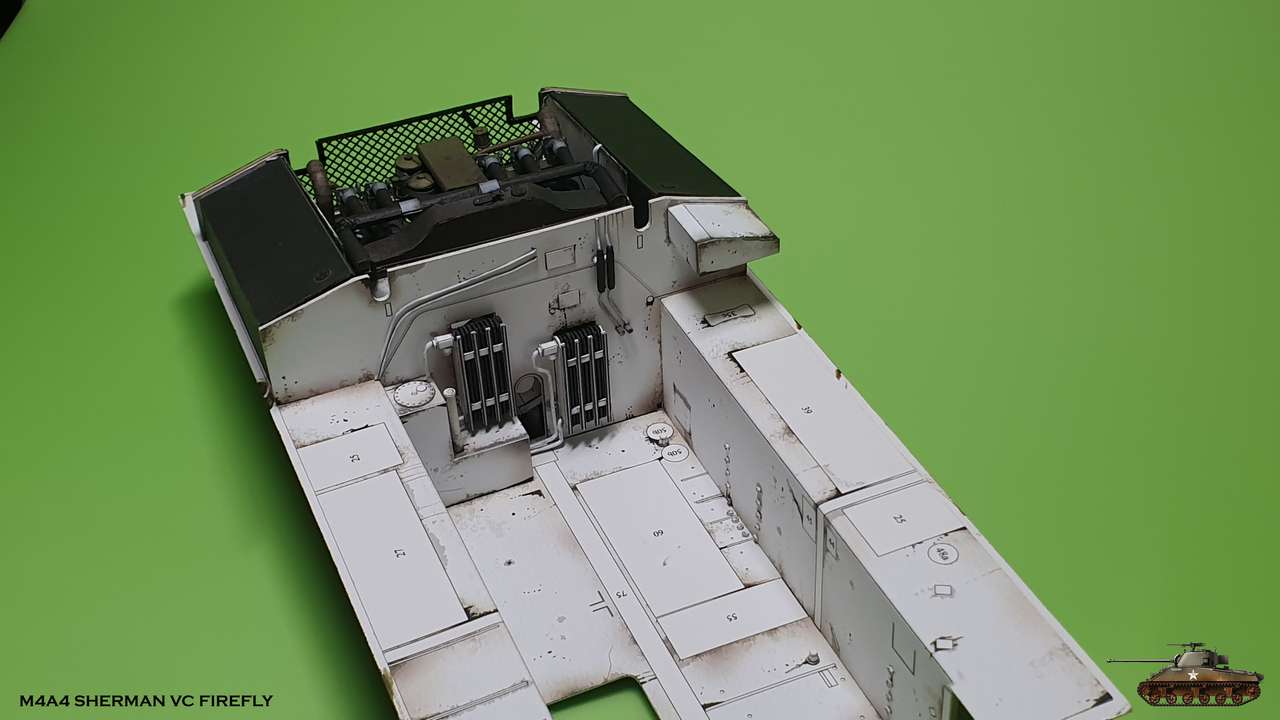
__________________
Welcome to my gallery
|
|
#138
01-16-2020, 02:08 PM
|
||||
|
||||
|
"Perfect"...
__________________
Replicating Excellence-> https://ecardmodels.com/vendors/replicating-excellence
|
|
#140
01-16-2020, 08:12 PM
|
|||
|
|||
|
Hi Igor. Saw this piece on Youtube and instantly thought of you and your build.
https://www.youtube.com/watch?v=uYyh2NGPo3U
__________________
"perfection is finally attained not when there is no longer anything to add, but when there is no longer anything to take away" - Antoine de Saint Exupéry
|
| Google Adsense |
 |
|
|


 Linear Mode

