


|
|
|
#361
 12-05-2020, 02:22 PM
|
||||
|
||||
|
Thanks you friends.
Still working on next bunch of details. Stay tuned. Quote:
__________________
Welcome to my gallery 
|
|
#362
12-06-2020, 10:53 AM
|
|||
|
|||
|
Igor, it is just amazing well done!
|
|
#363
12-12-2020, 02:44 PM
|
||||
|
||||
|
Thanks Abir
Next part was suspension lever. A lot of lamination here to make a very detailed part. And again a lot of repetitions.   In this picture you can see that i didn't cut the parts all the way, so i can touch edges with paint in comfort way.  Here is conveyer process of assembling I choose certain order, that i though was optimal. 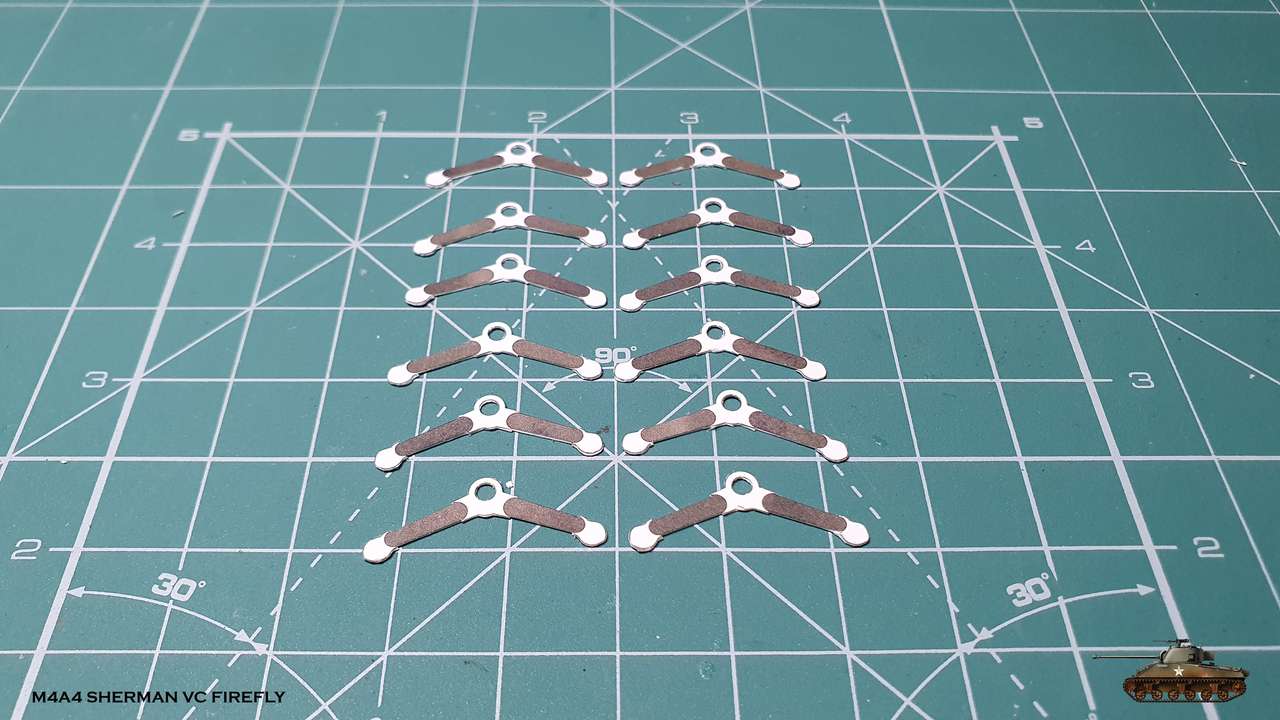 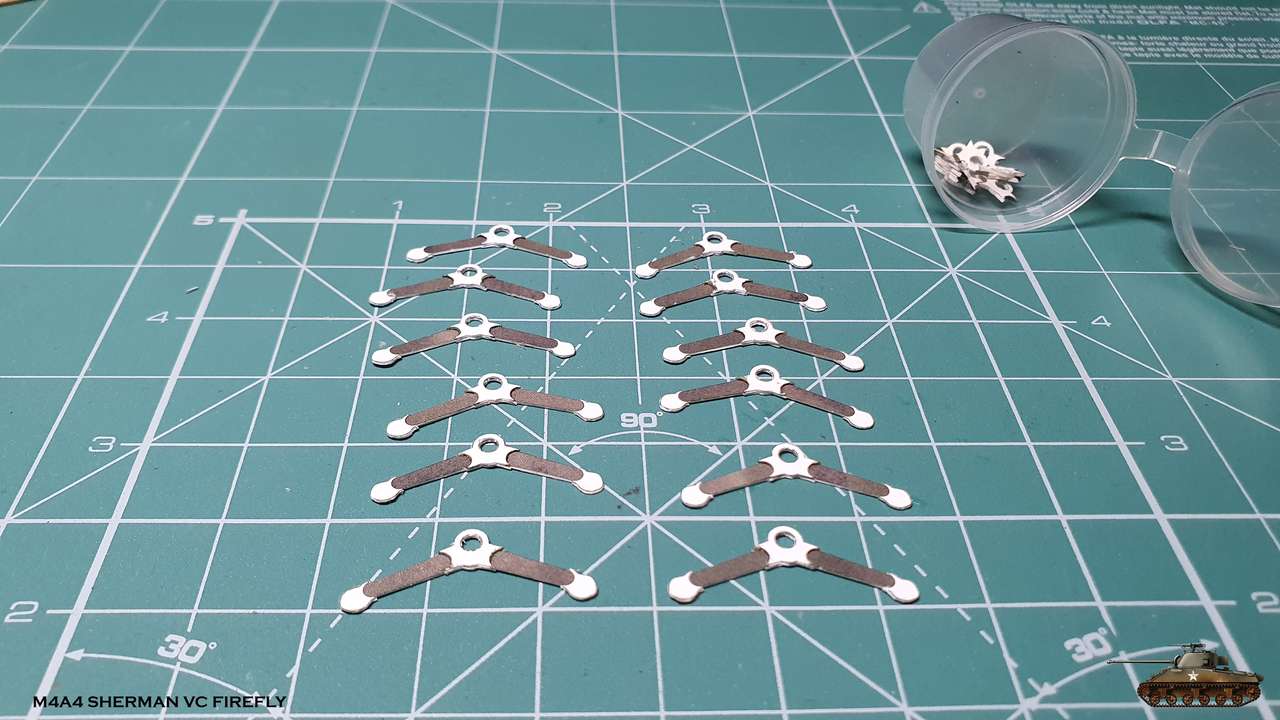 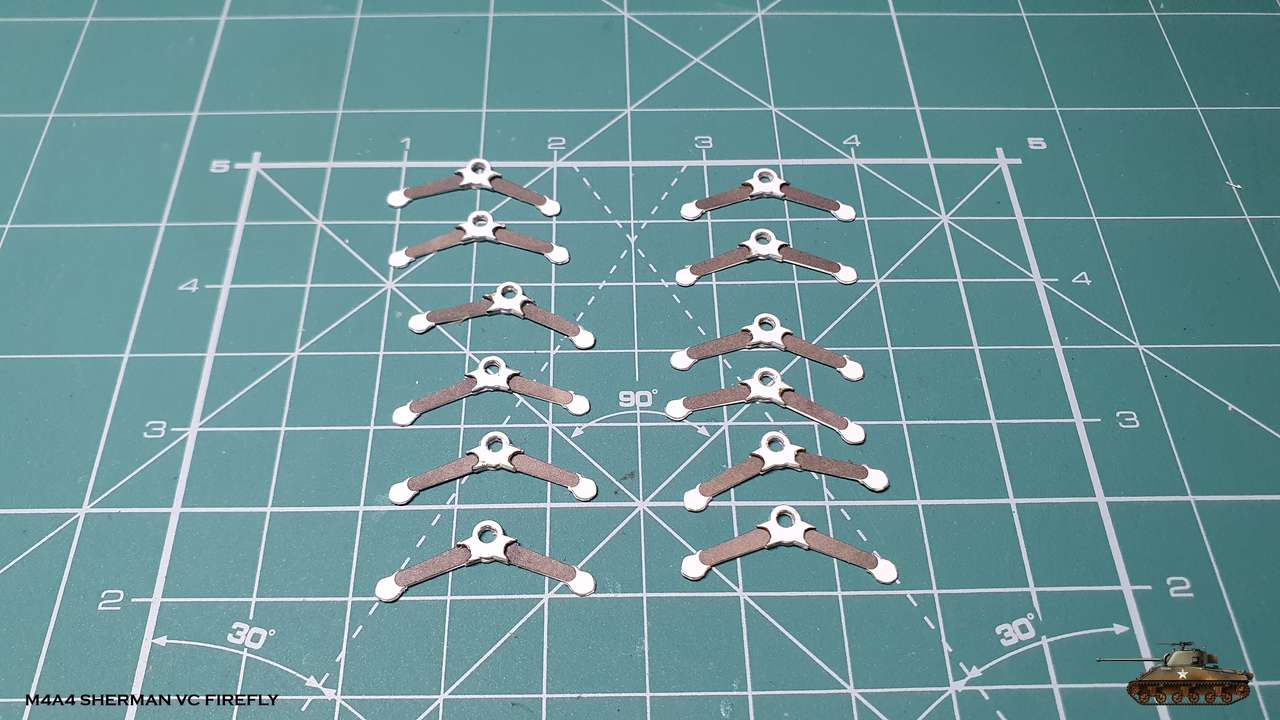 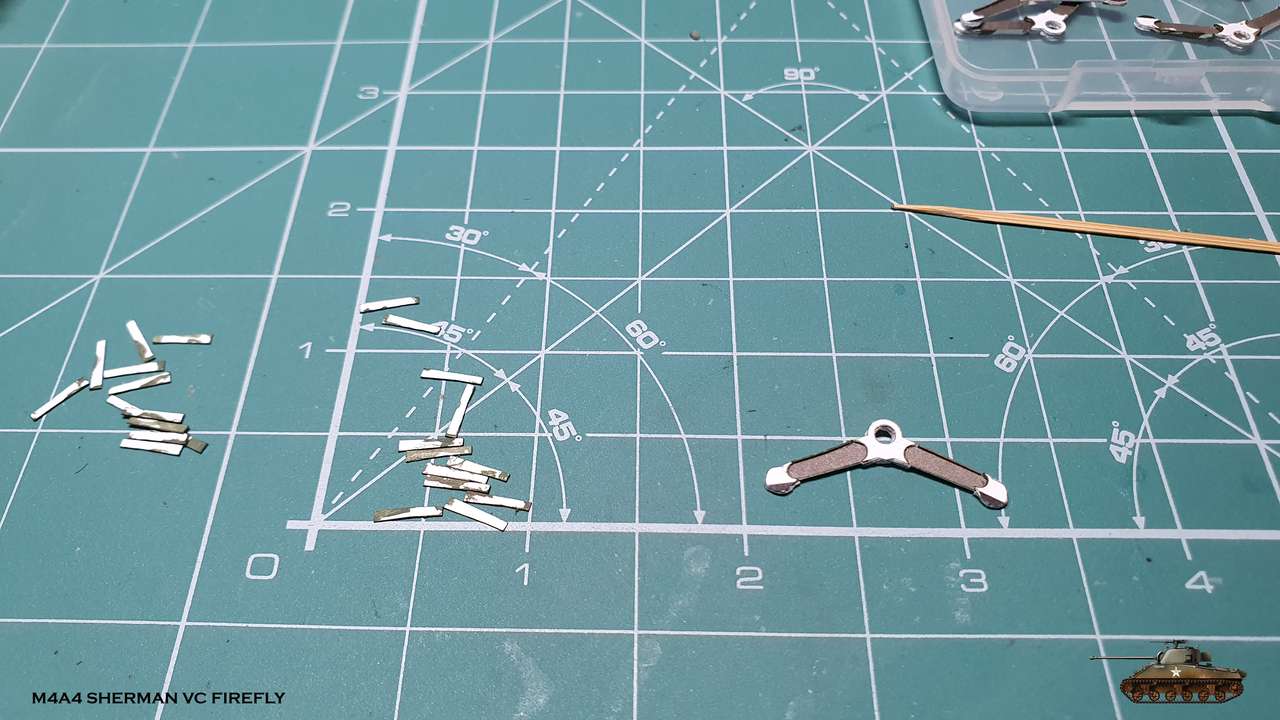 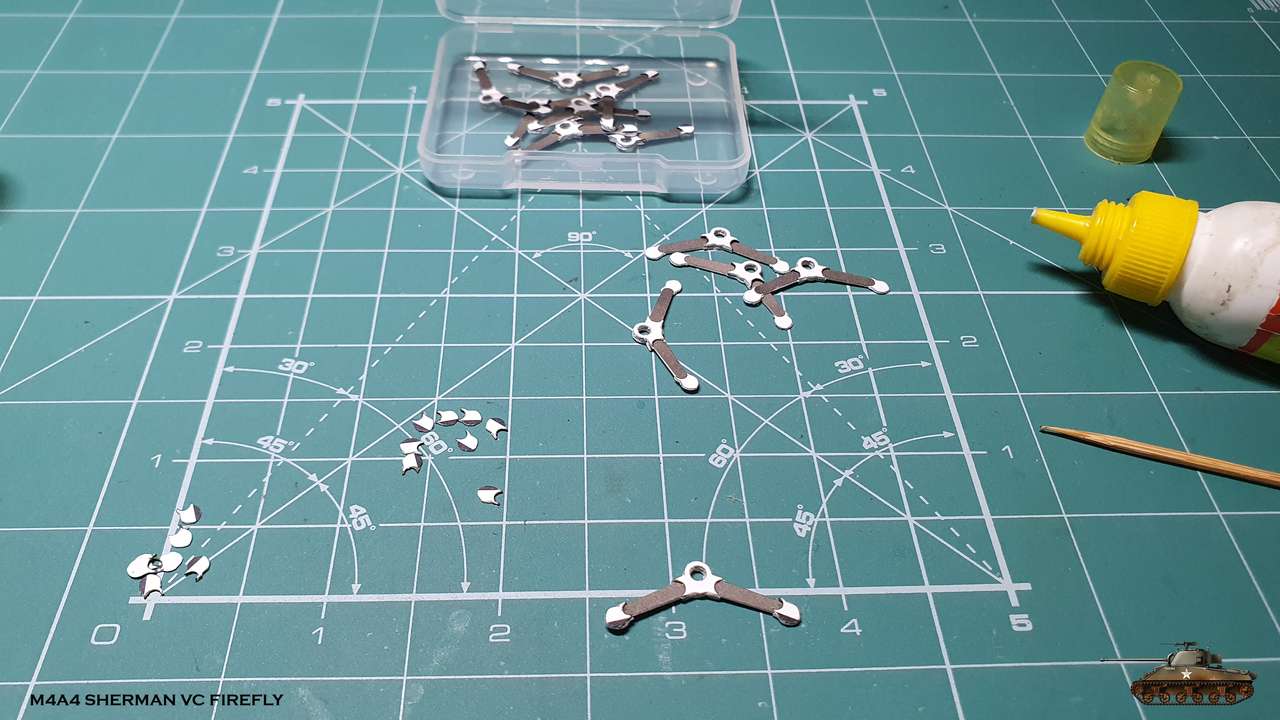 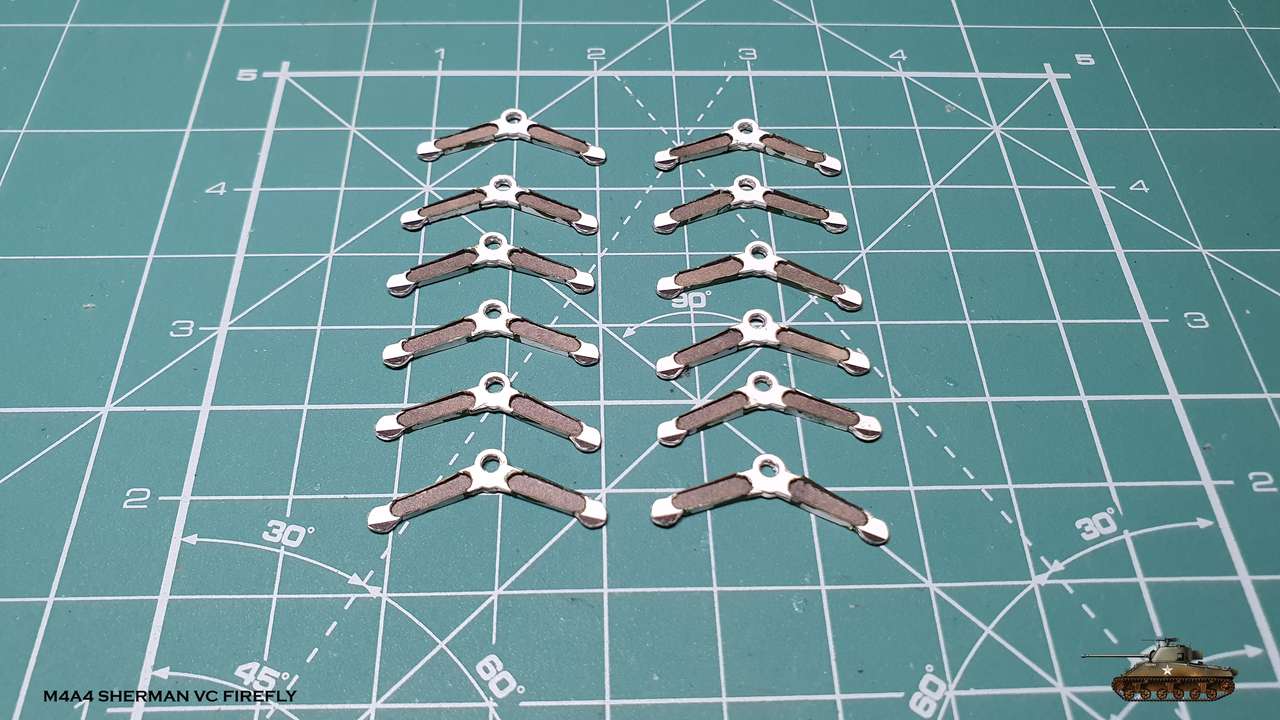  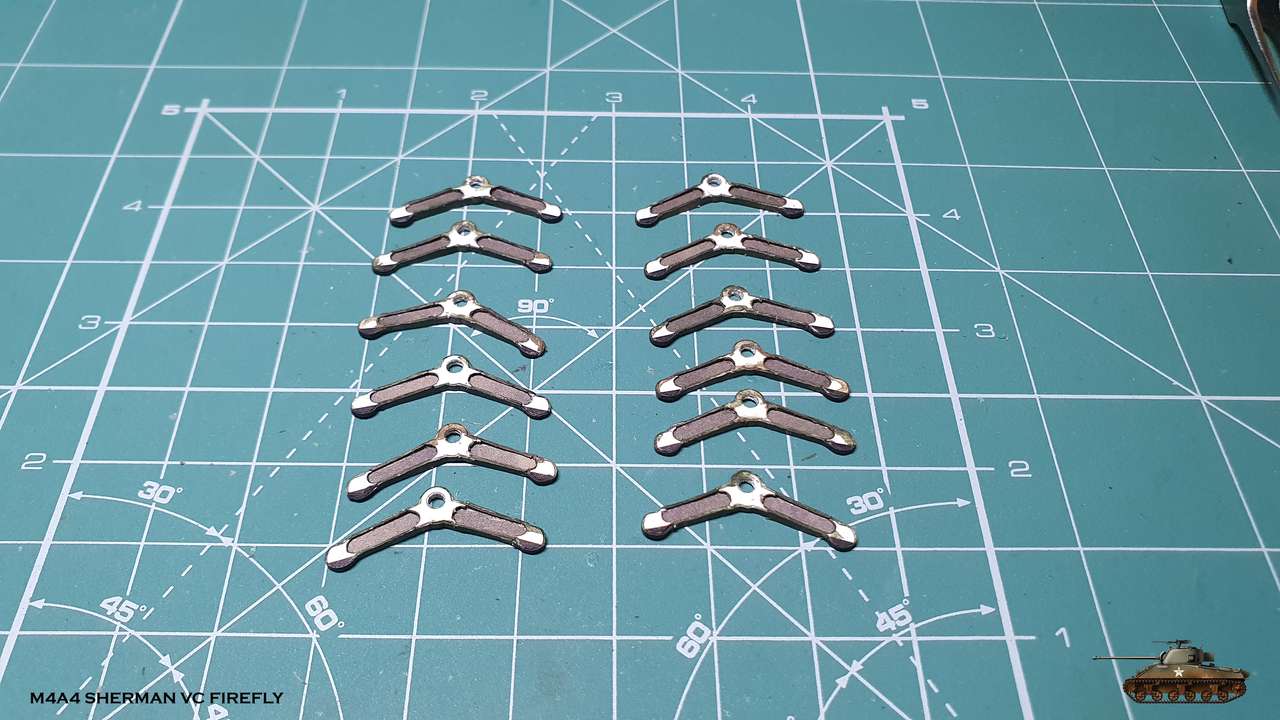 Last details put on and the levers are ready 
__________________
Welcome to my gallery Last edited by Igor; 12-12-2020 at 02:58 PM.
|
|
#364
12-12-2020, 07:39 PM
|
||||
|
||||
|
Impressive quality in every detail Igor.
|
|
#365
12-26-2020, 02:34 PM
|
||||
|
||||
|
Thanks Sergio
One more step is made - spring seat with volute suspension spring. There are six, one for each bogey.  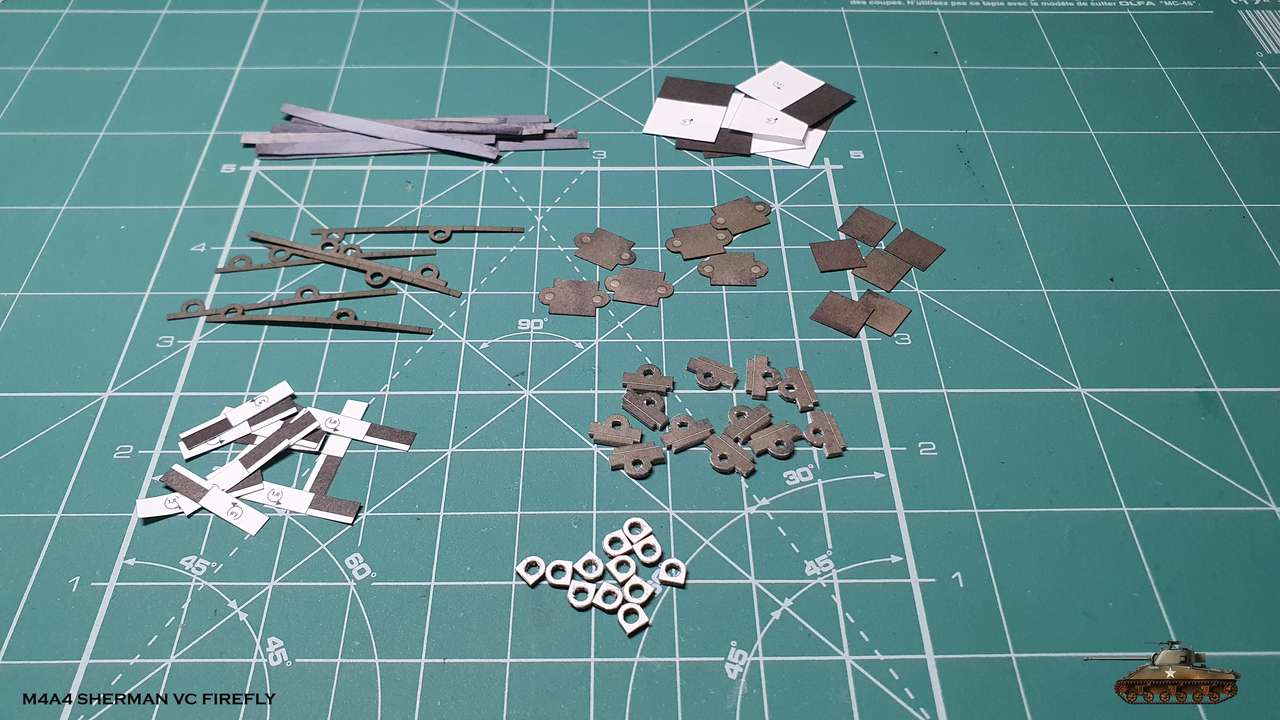 I made one ring where spring will enter at top, so i can know the diameter spring must be rolled. (There no marking or explanation ho to roll it) 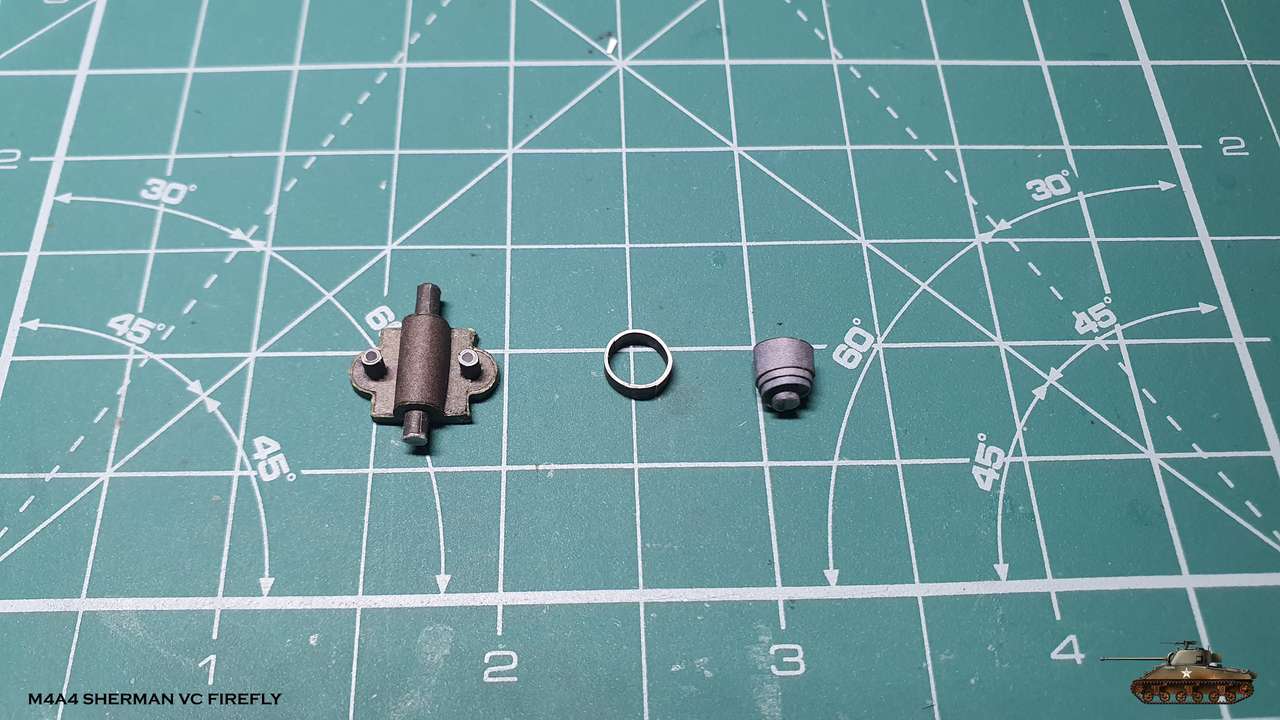 Ready 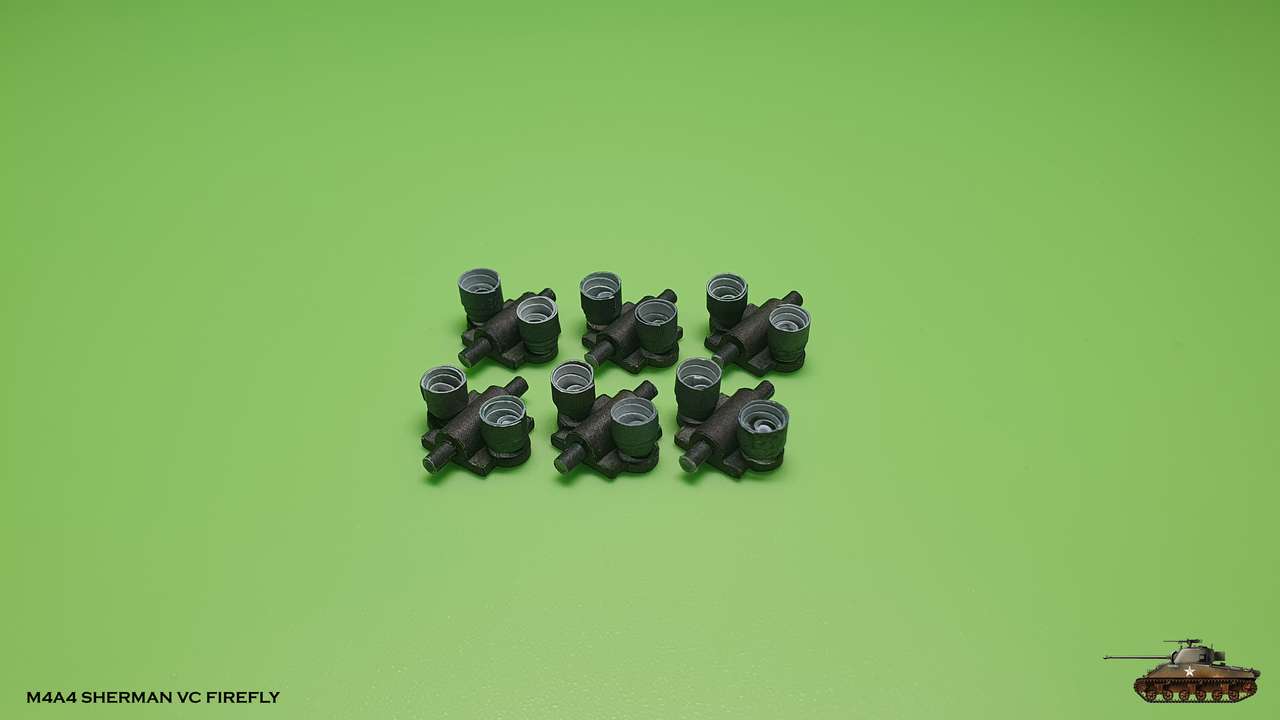 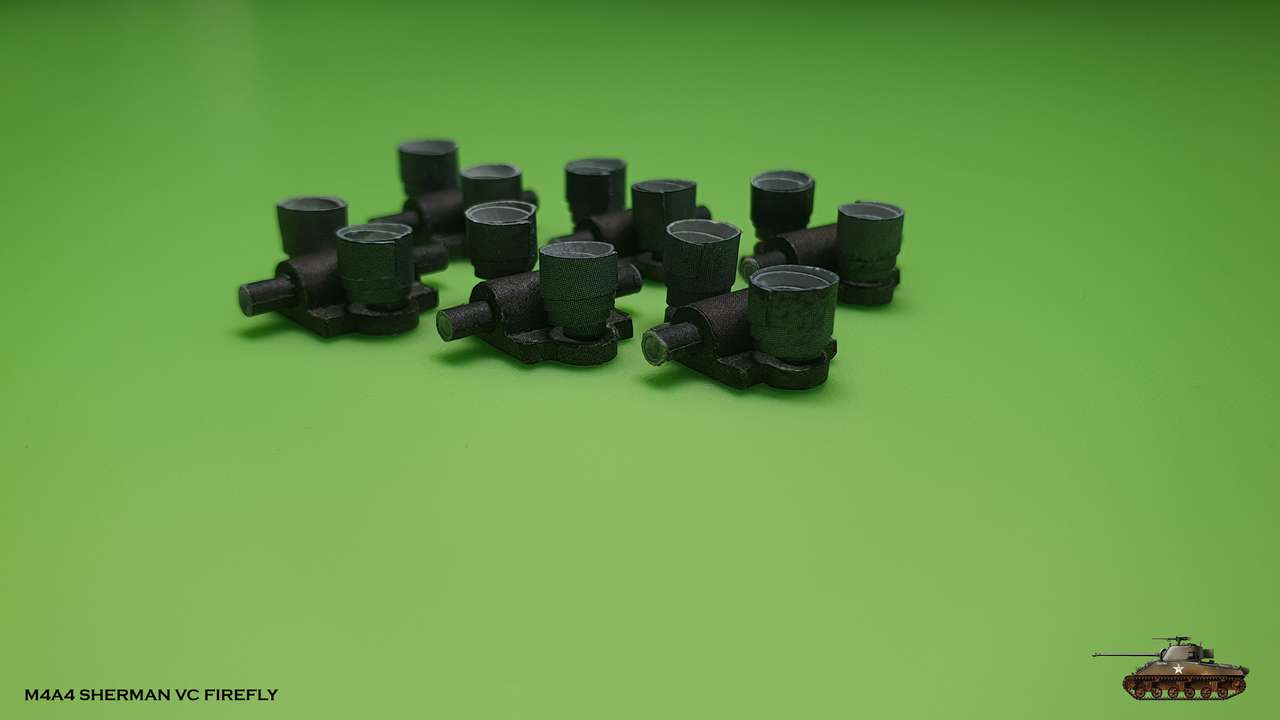
__________________
Welcome to my gallery
|
| Google Adsense |
|
#366
12-26-2020, 04:52 PM
|
||||
|
||||
|
good work Igor I enjoyed doing the suspension it's well worth the effort.
__________________
David........... Paper modelling gives you a happy high. currently building. c GAZ 51 ALG 17, wagon 111a. unex DH411 excavator and spitfire Mk 9
|
|
#367
01-08-2021, 08:29 AM
|
||||
|
||||
|
Thanks David. It is really enjoyable process despite of repetitions.
Assembled upper springs bed. You need to glue a ring from two pieces: inner and outer. So i bent them and glued together asymmetrically, which gave a little tab to close the ring. 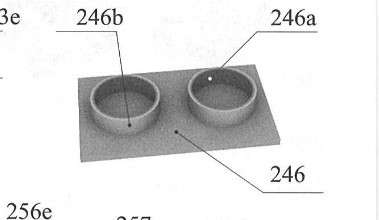 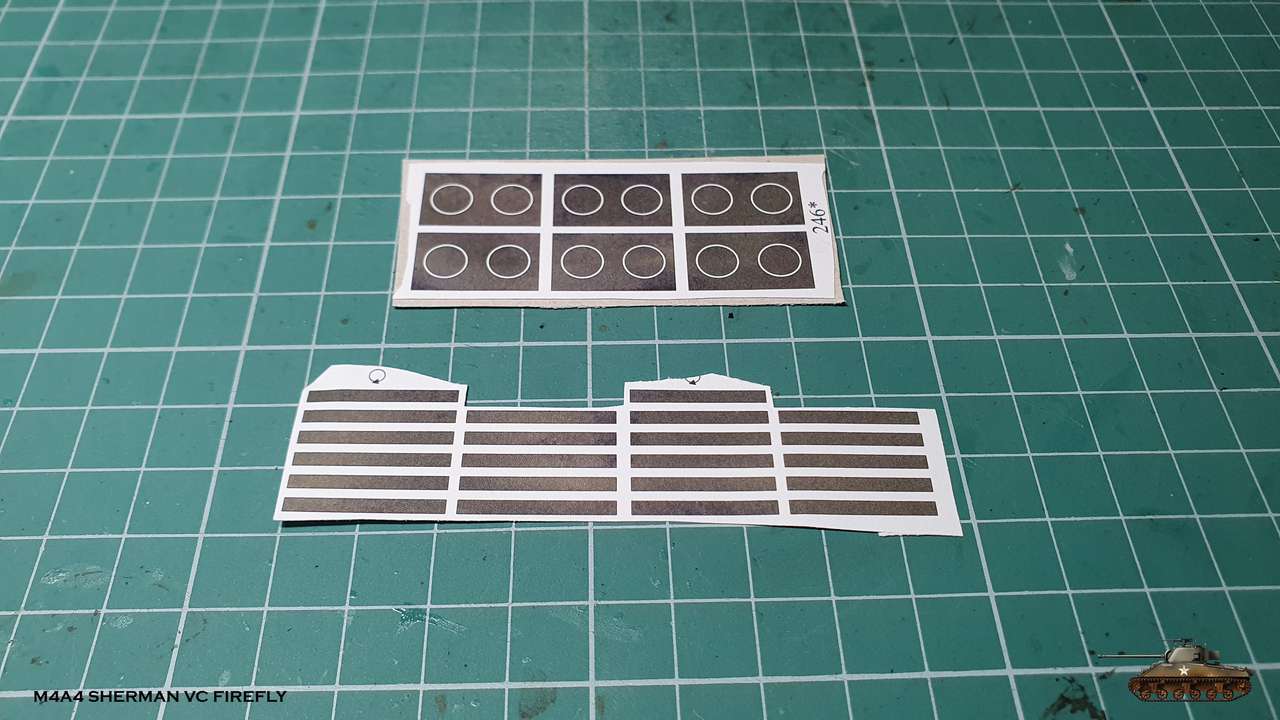 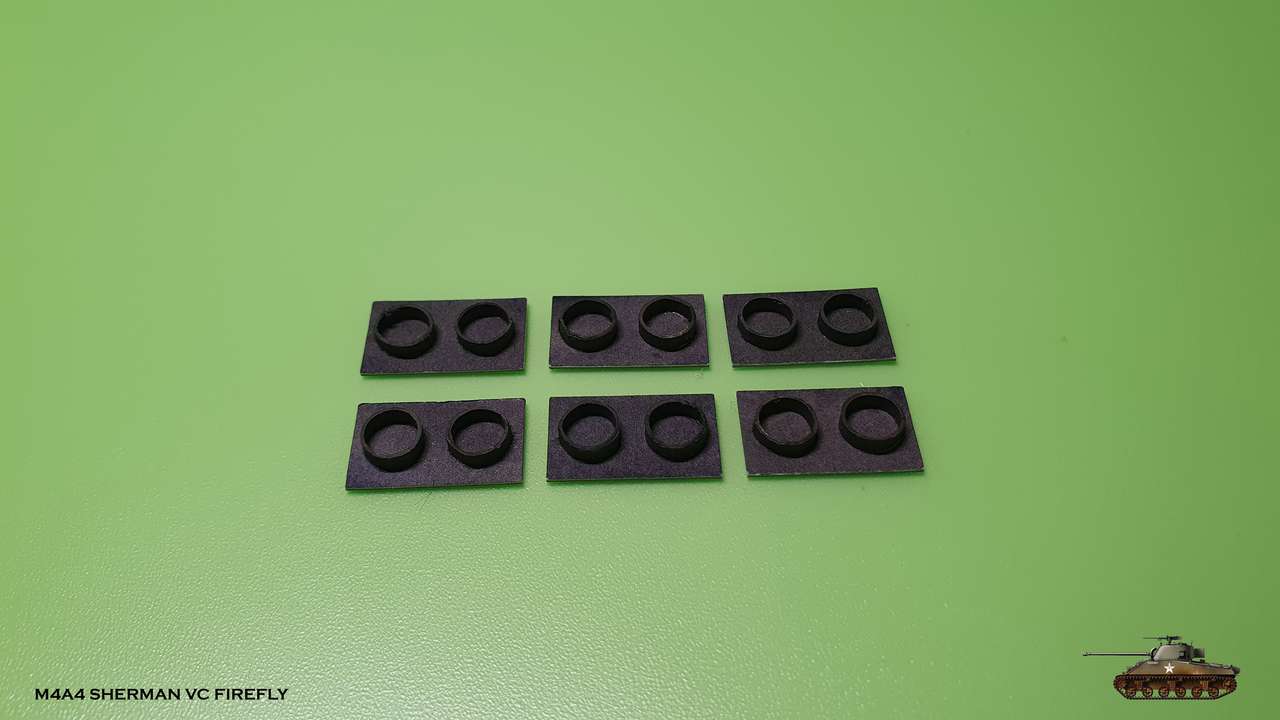 Also spent several evenings to cut bogie frame parts At this stage i used three (!) different thickness carboards: 0.7, 1, 1.5 mm 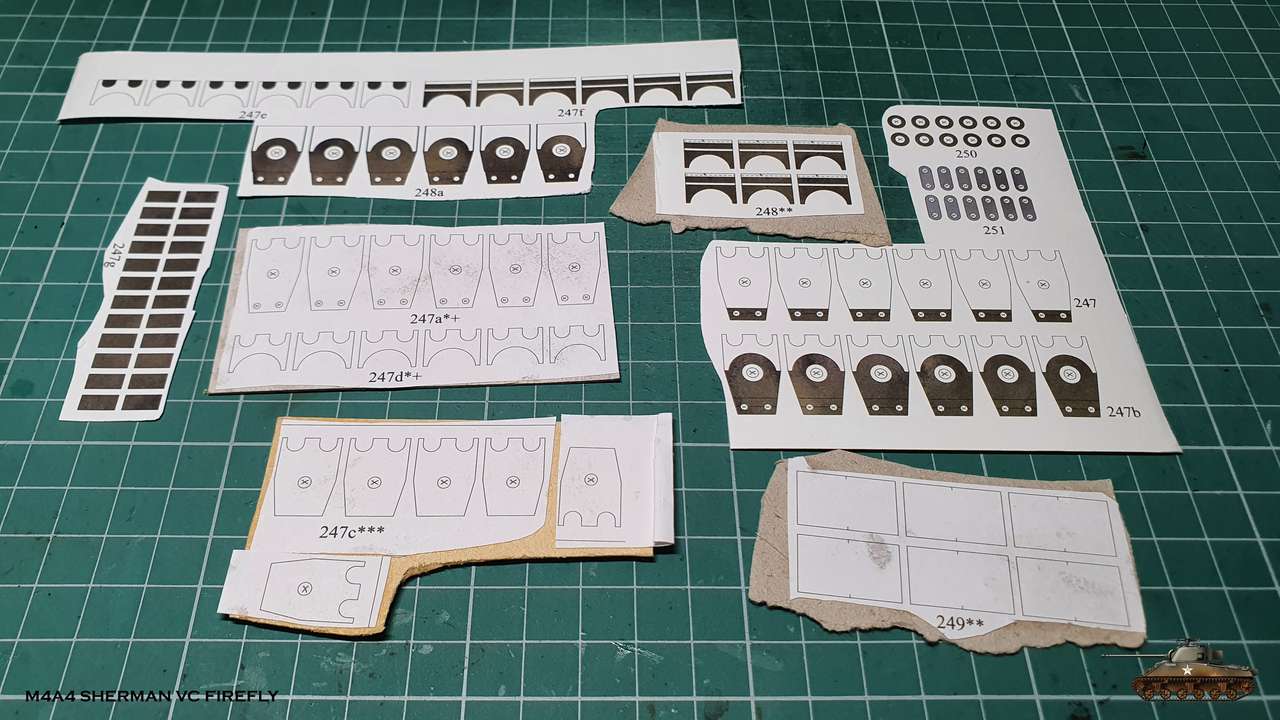 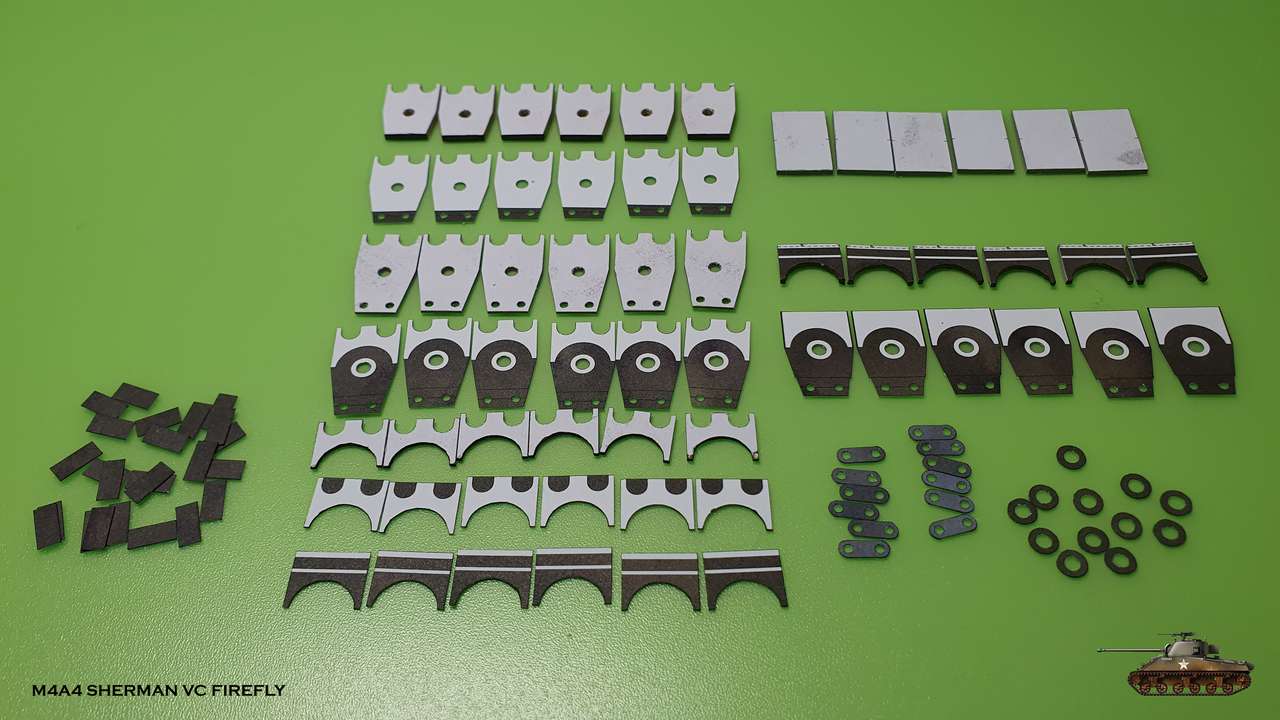
__________________
Welcome to my gallery Last edited by Igor; 01-08-2021 at 08:41 AM.
|
|
#368
01-08-2021, 02:42 PM
|
||||
|
||||
|
coming along nicely Igor
__________________
David........... Paper modelling gives you a happy high. currently building. c GAZ 51 ALG 17, wagon 111a. unex DH411 excavator and spitfire Mk 9
|
|
#370
01-13-2021, 02:08 PM
|
||||
|
||||
|
Thanks David and Gotham.
Finished bogie frame parts. 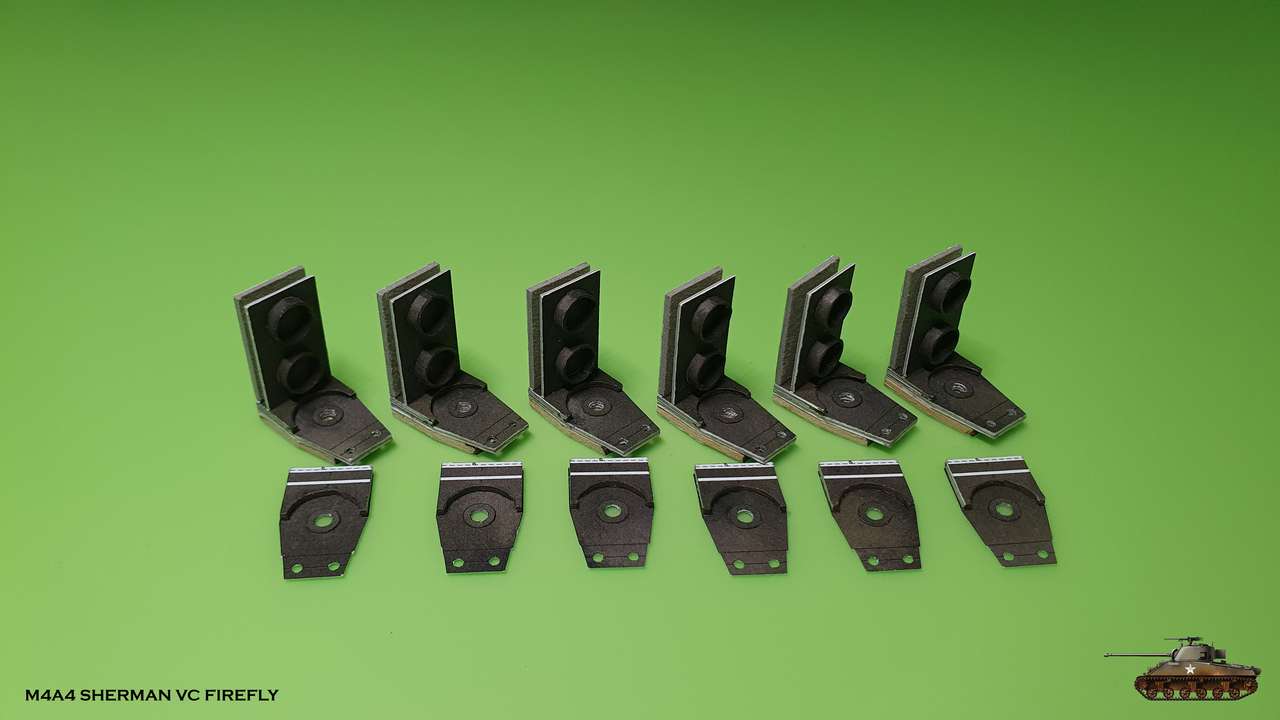 A lot of lamination here 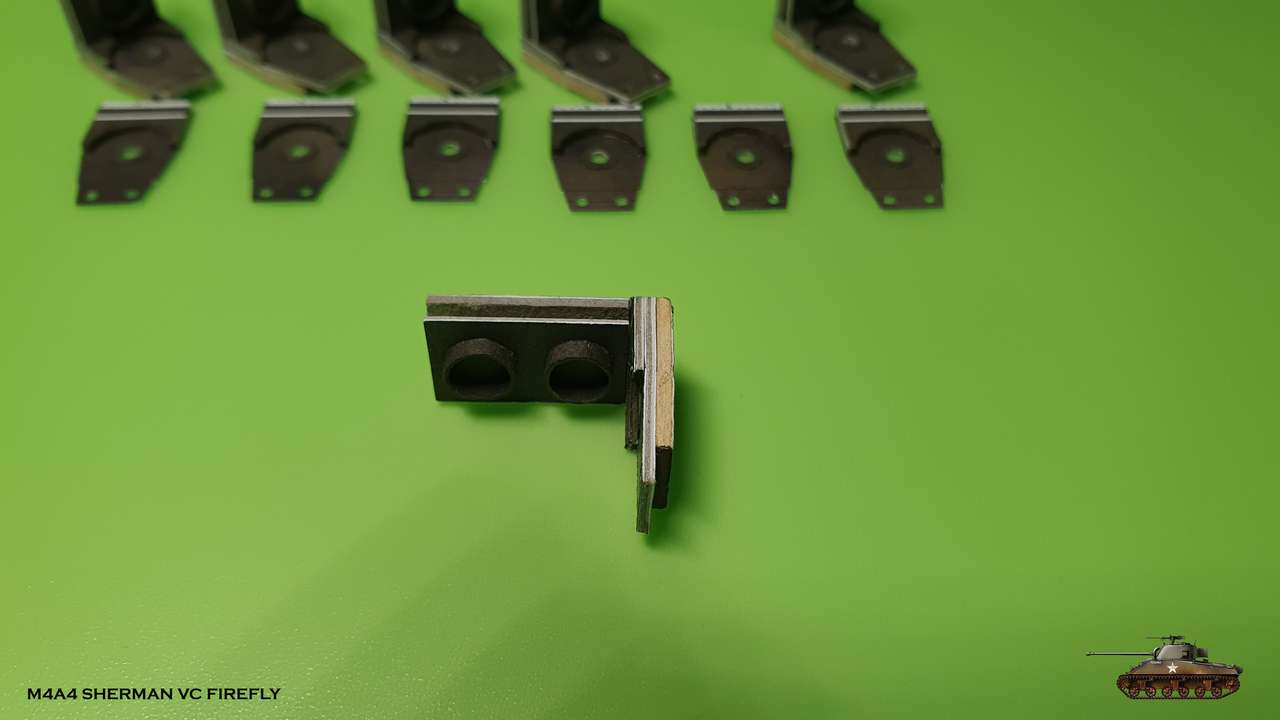 Here you can see that detail 248 was rounded on one edge to make slim corner 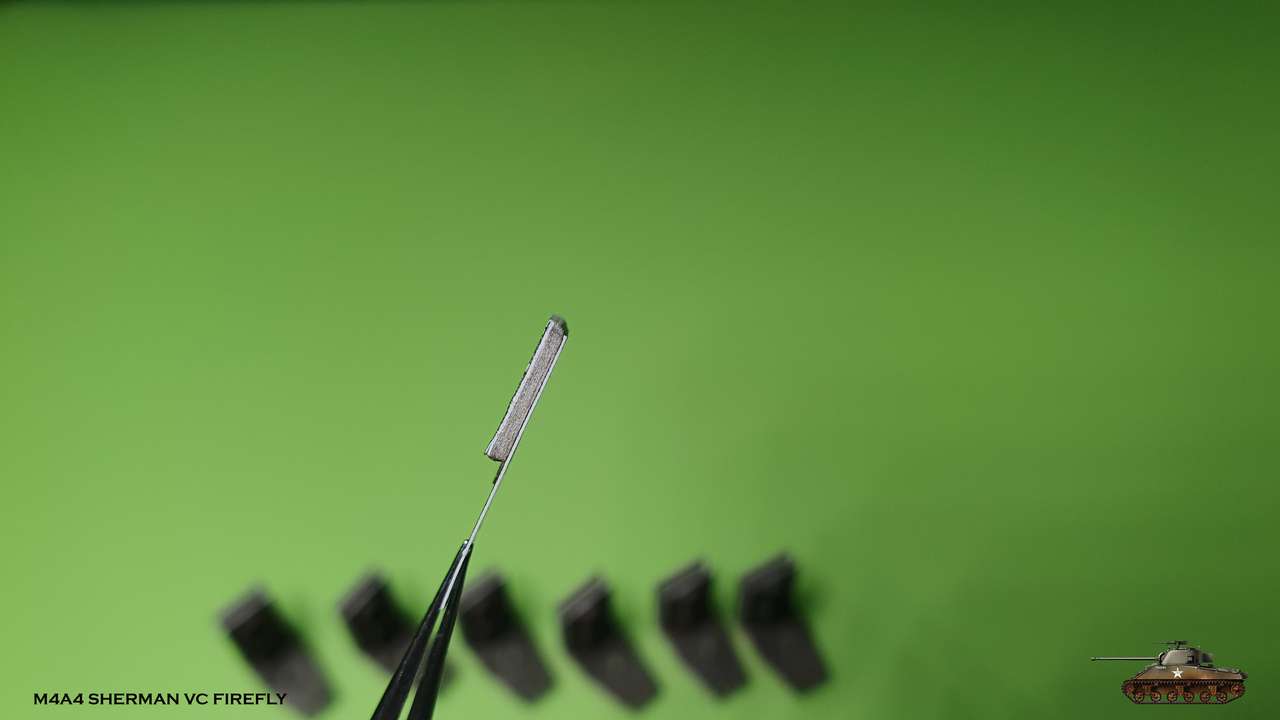 And all parts are ready to be assembled together 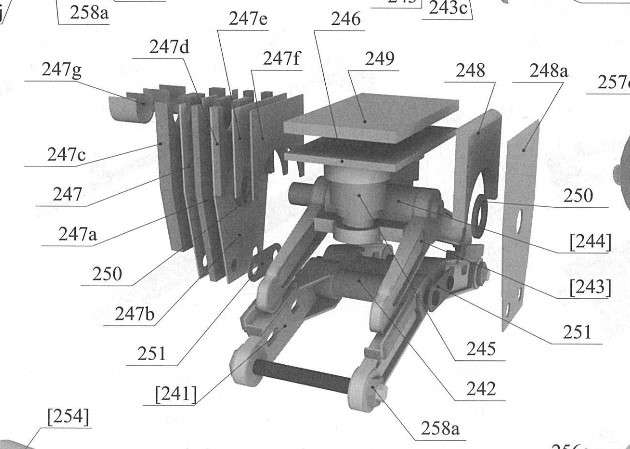 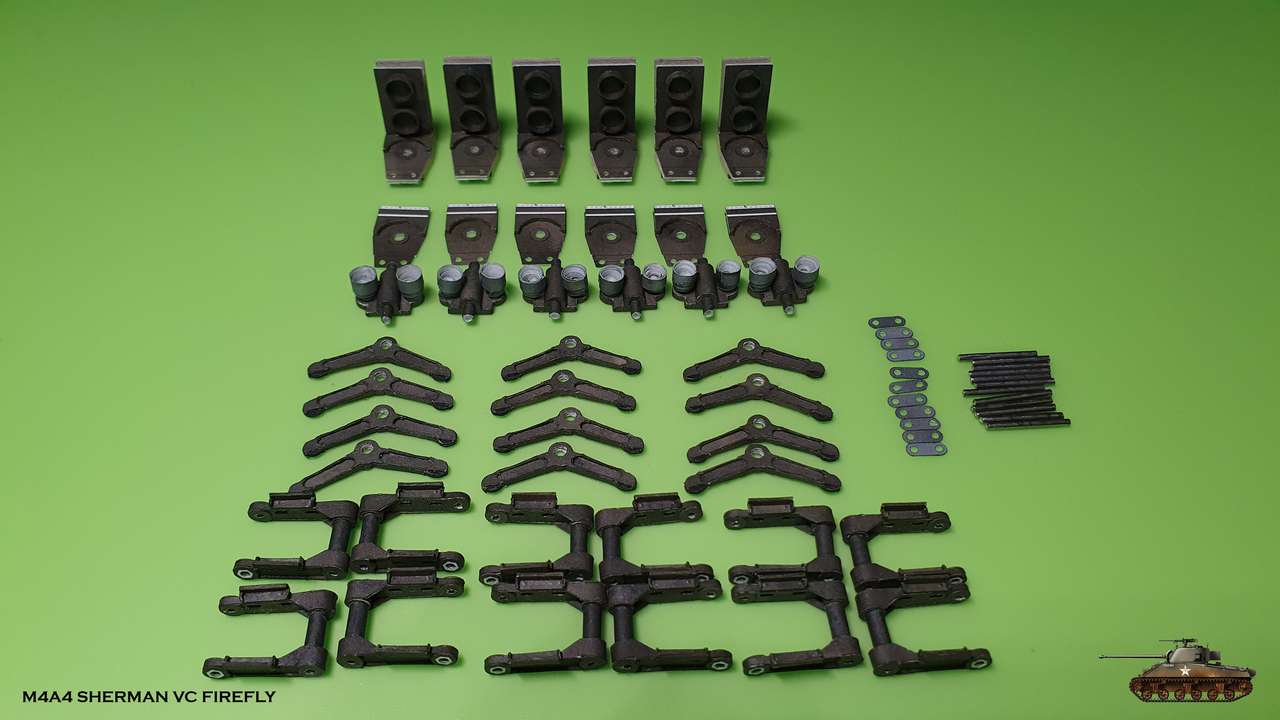
__________________
Welcome to my gallery
|
| Google Adsense |
 |
|
|


 Linear Mode

