


|
|
|
#261
 05-24-2020, 12:35 PM
|
||||
|
||||
|
Quote:
 Most important then blankets wouldnt look like chain mail, and the tank commander wasnt called Ilya Muromets. 
__________________
My personal site. 
|
|
#262
05-25-2020, 02:09 AM
|
||||
|
||||
|
Quote:
It really looks like chain mail, because of the zoom photo... I'll try to find some other material for it
__________________
Welcome to my gallery
|
|
#264
05-25-2020, 03:50 PM
|
||||
|
||||
|
i used some old cotton sheet soaked in some green paint Igor
__________________
David........... Paper modelling gives you a happy high. currently building. c GAZ 51 ALG 17, wagon 111a. unex DH411 excavator and spitfire Mk 9
|
|
#265
05-26-2020, 03:38 AM
|
||||
|
||||
|
Just thought I'd highlight the fact that isn't it funny that the first thing to be 'criticised' on this magnificent build is something that isn't made from paper. 😂
__________________
"It's all in the reflexes."
|
| Google Adsense |
|
#266
05-26-2020, 02:35 PM
|
||||
|
||||
|
This build is indeed a testament to what a craftsman can do with an exceptionally well-designed kit. Breathtaking work, sir!
|
|
#267
05-29-2020, 12:43 PM
|
||||
|
||||
|
Quote:
Thanks to all for criticism and advices. I took it and changed material of blankets. Now it is from kitchen cloth, that in my opinion looks like wool. I'm more than satisfied with the result. 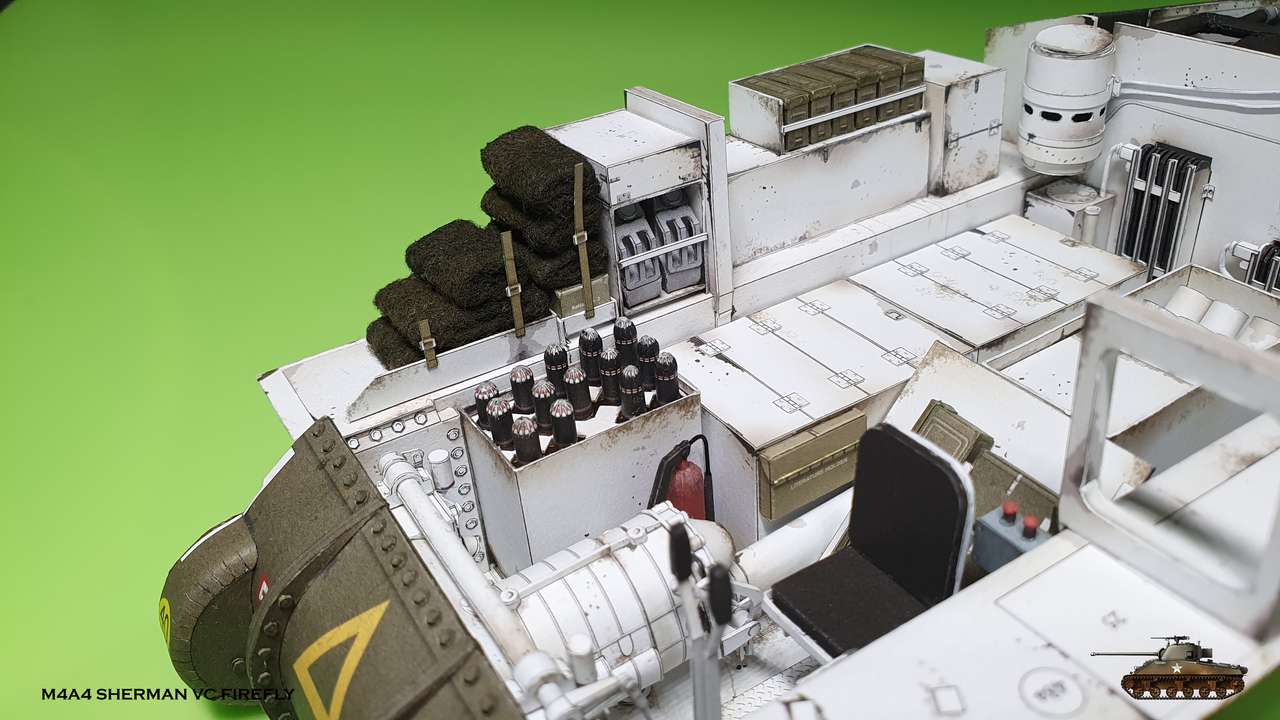 And back to left side - auxiliary generator unit. 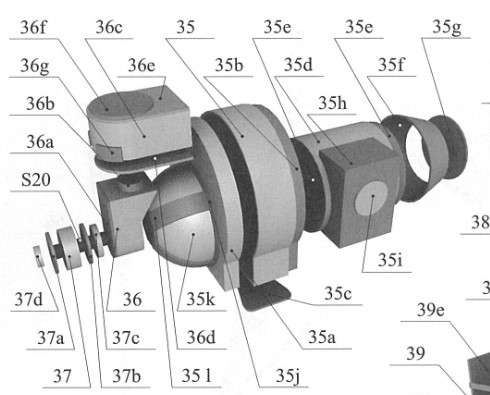 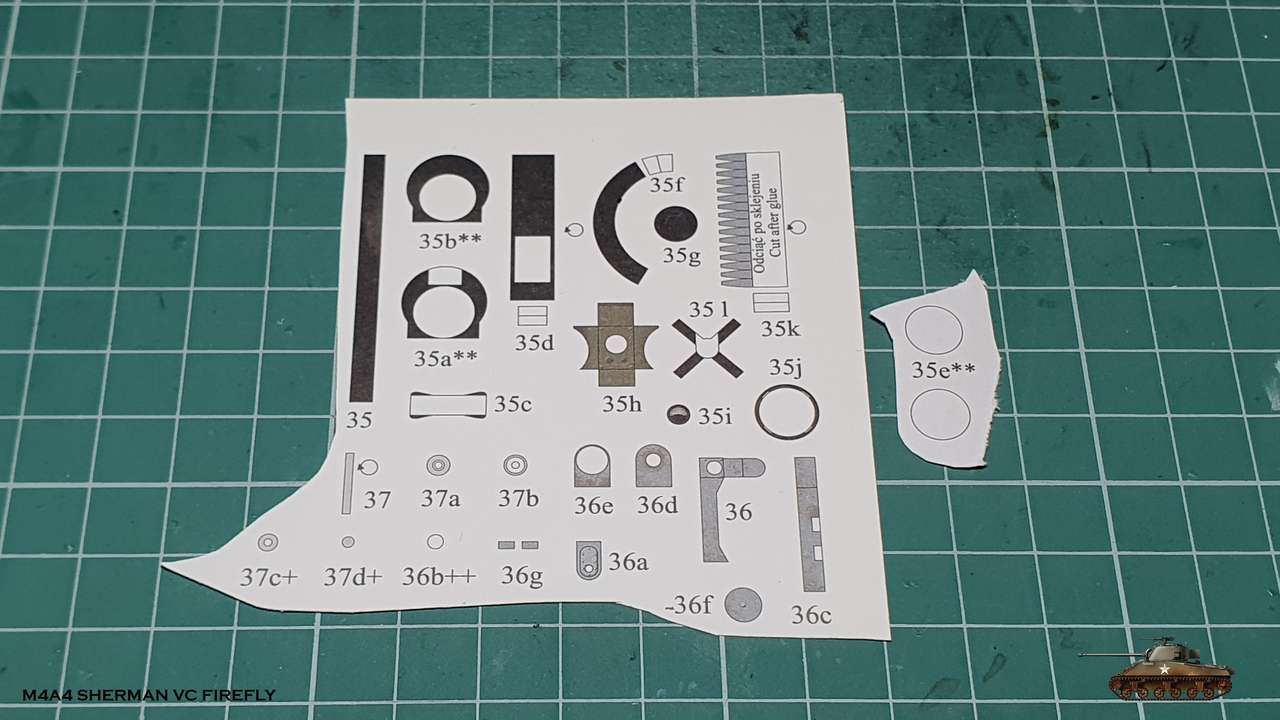 Here i met another interesting solution to make assembler's days easier. There is a need to assemble spherical part. It comes with spare strip. You cut it all together and then it is easier to roll and glue the part. After you glue the sphere itself you must to remove the strip. When i cut the detail from book - i drew along a line weakly with knife and that give me easy start to remove the spare strip after.  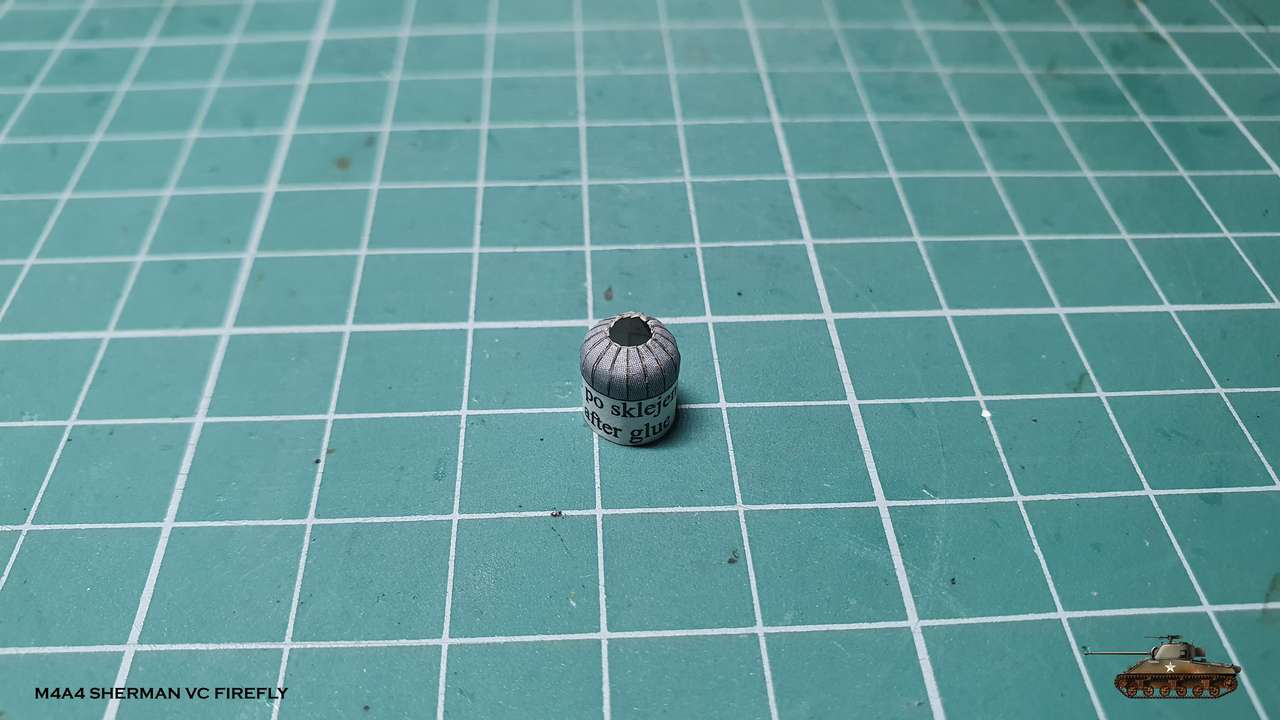 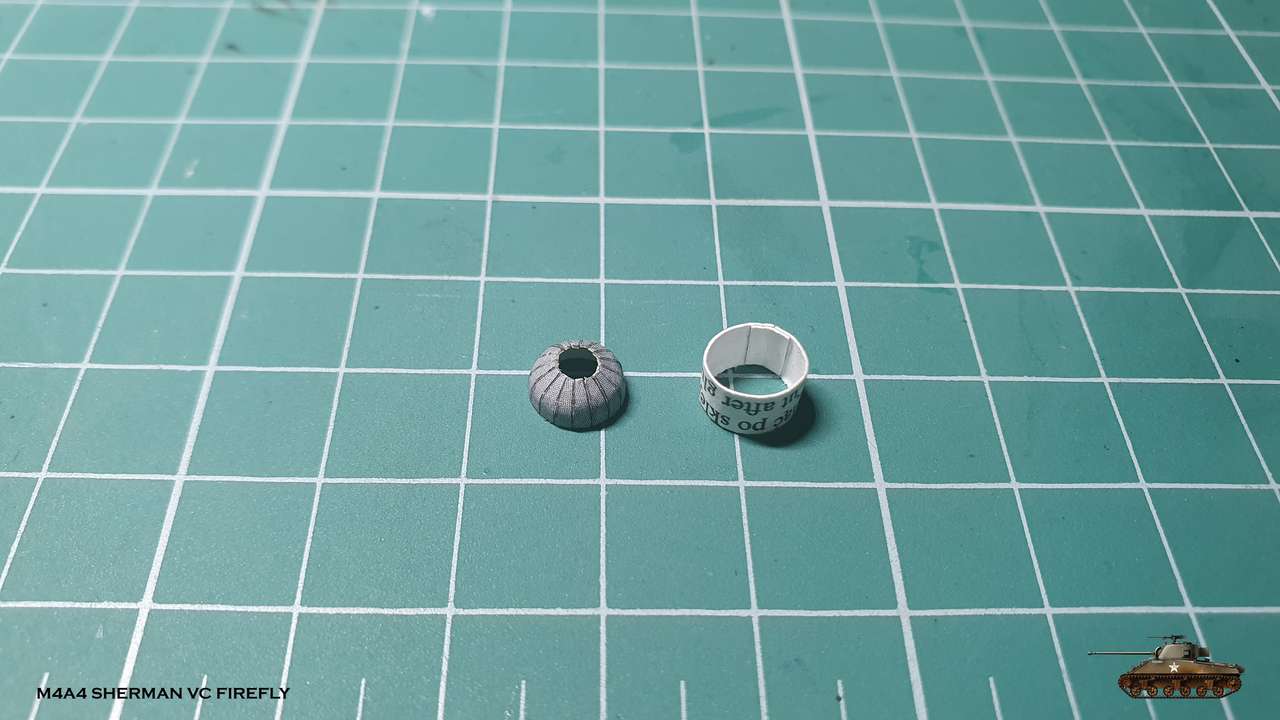 Then i assembled the rest of the generator parts and glued it to place, where exhaust pipe was already awaiting to join 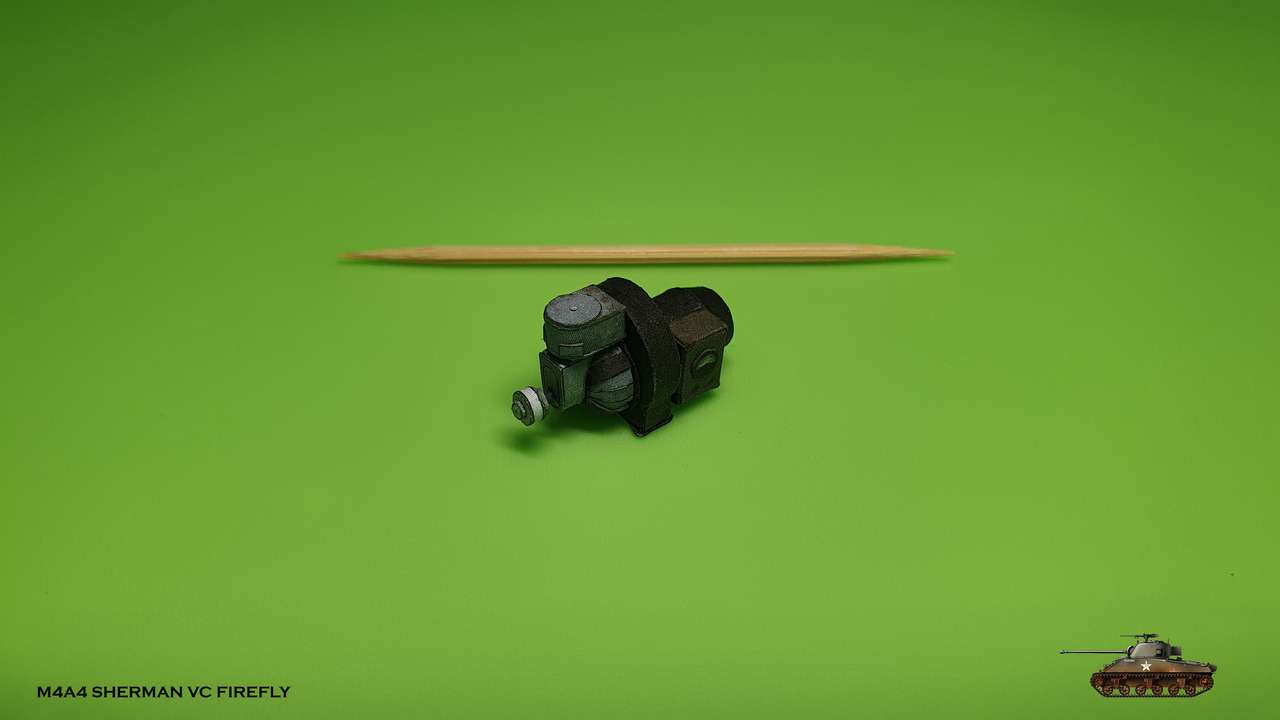 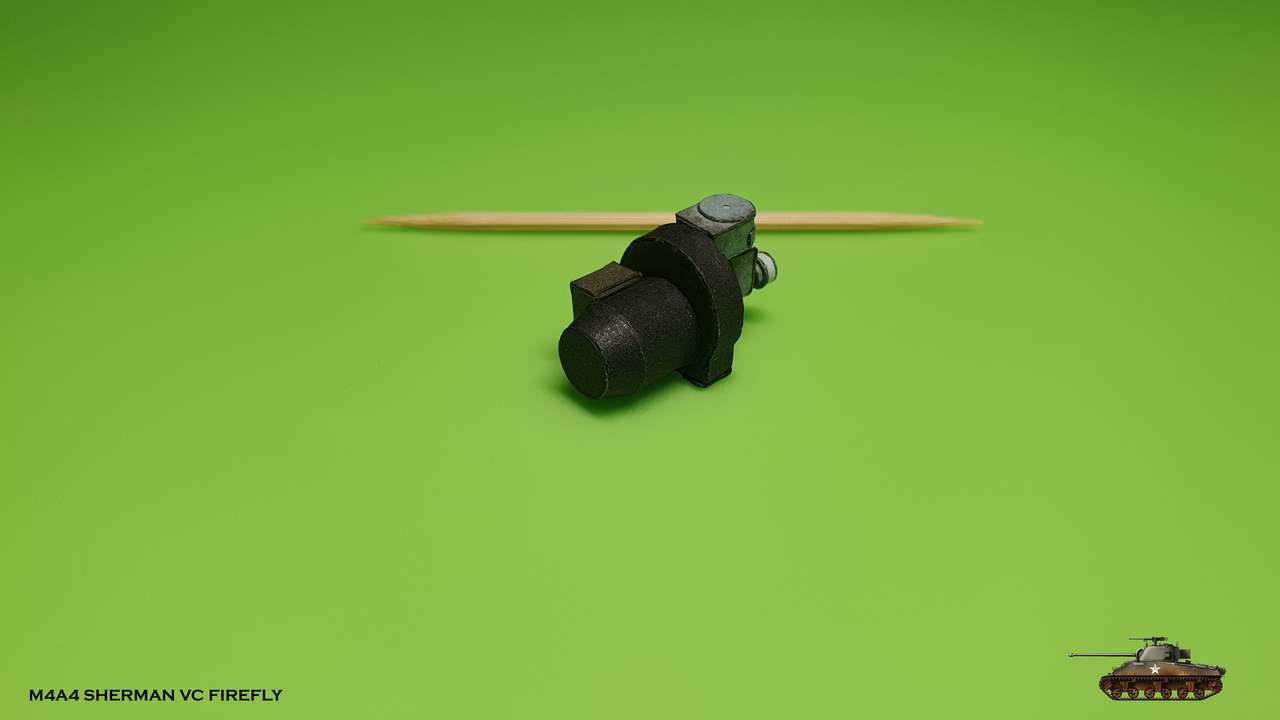 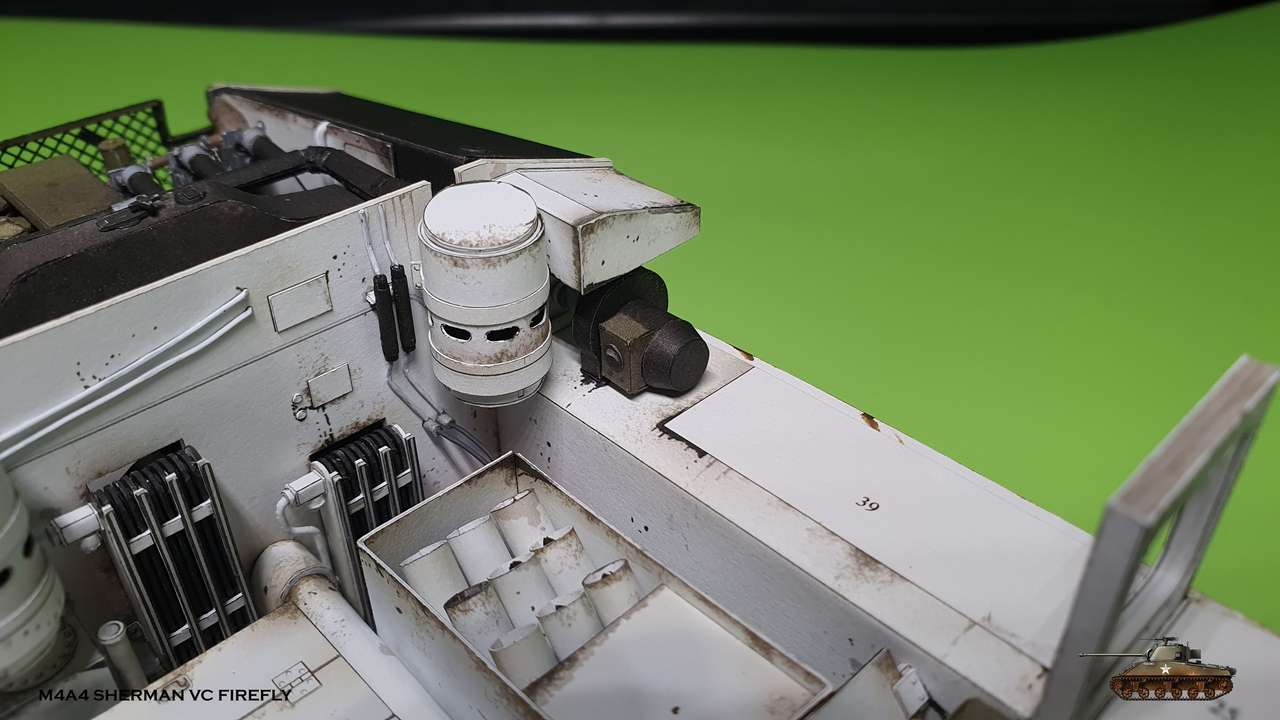 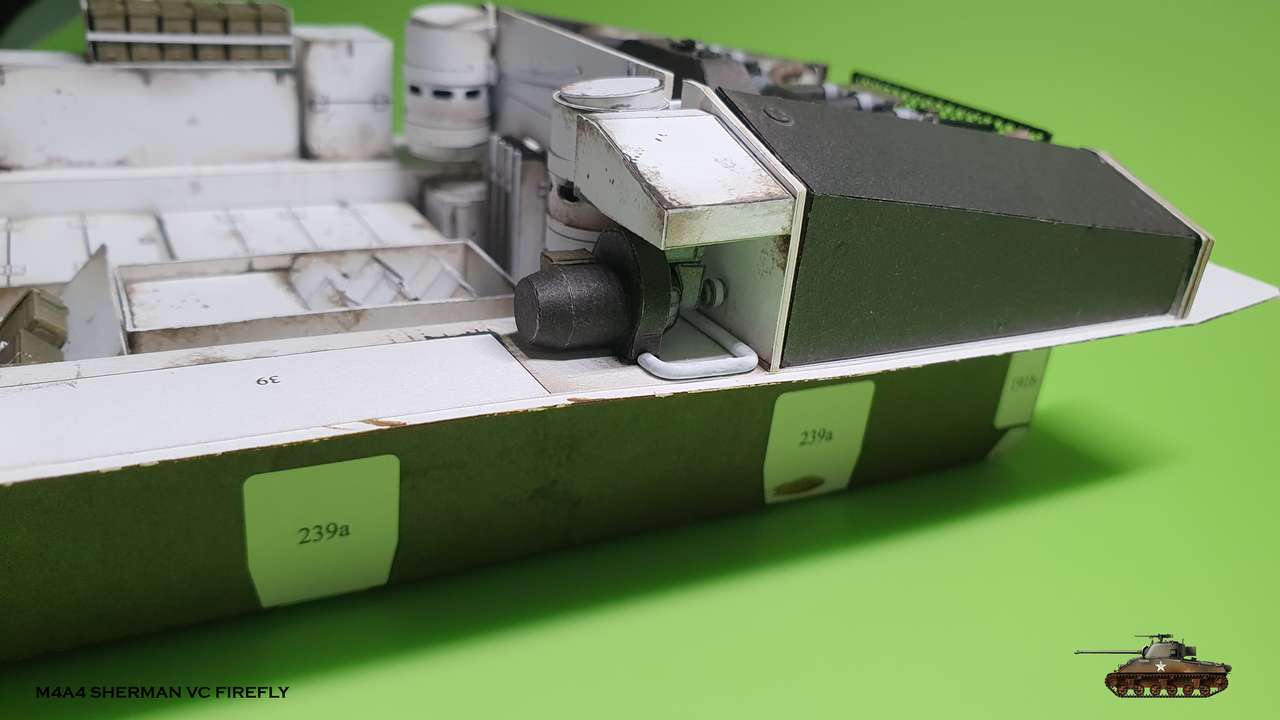
__________________
Welcome to my gallery
|
|
#268
05-30-2020, 03:13 AM
|
||||
|
||||
|
Madness 🙀. All that small detailed work and you are not really going to see it once the model is built. At least you are taking lots of clear pictures of the parts as they are built. When you finish this project, you should print out all of the photos and put them into a special album to accompany this model.
__________________
"It's all in the reflexes."
|
|
#269
06-03-2020, 02:41 PM
|
||||
|
||||
|
Thanks Gotham
In a matter of fact i did something similar with FAMO 9 - printed all the inside with other pictures of engine and mechanisms and i always take it to exhibitions. Well, continued with another big storage box for spare parts and rack for remaining MG rounds. Also there are 2 oil cans and one spares and tools pauch + one periscope spare heads box. In addition i assembled instruments panel. Added transparent film between layers, to imitate glass.  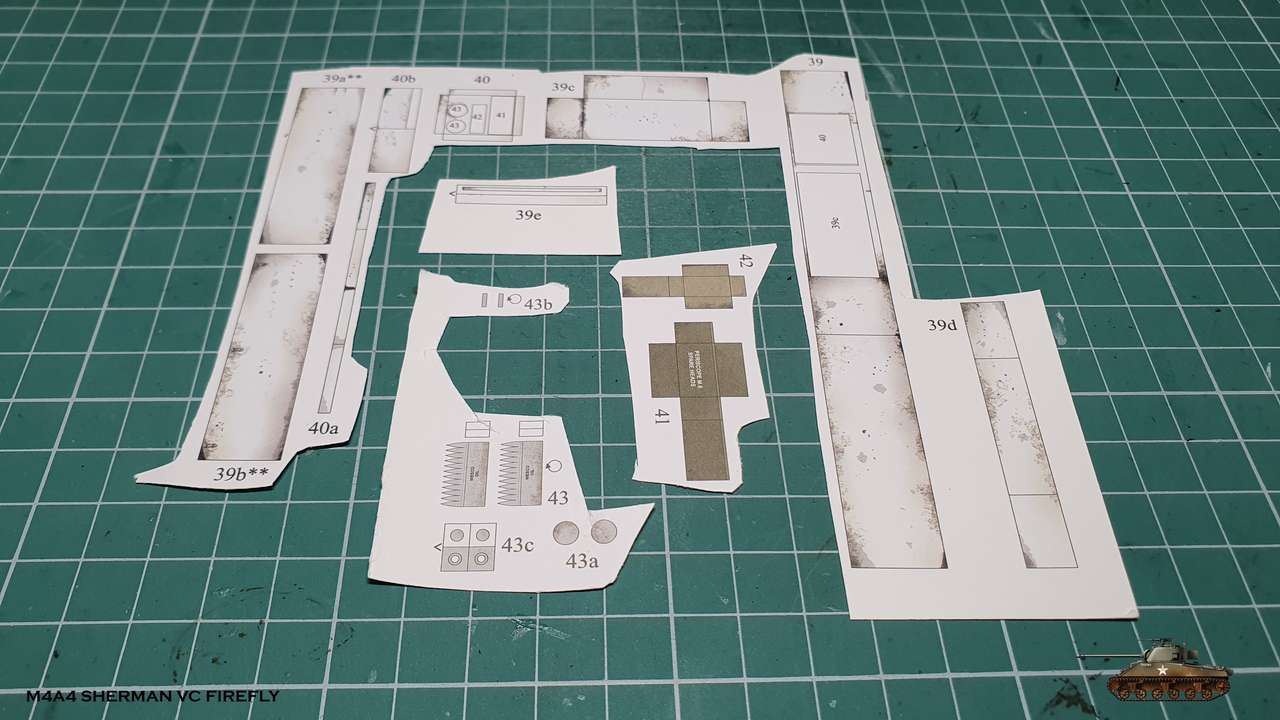 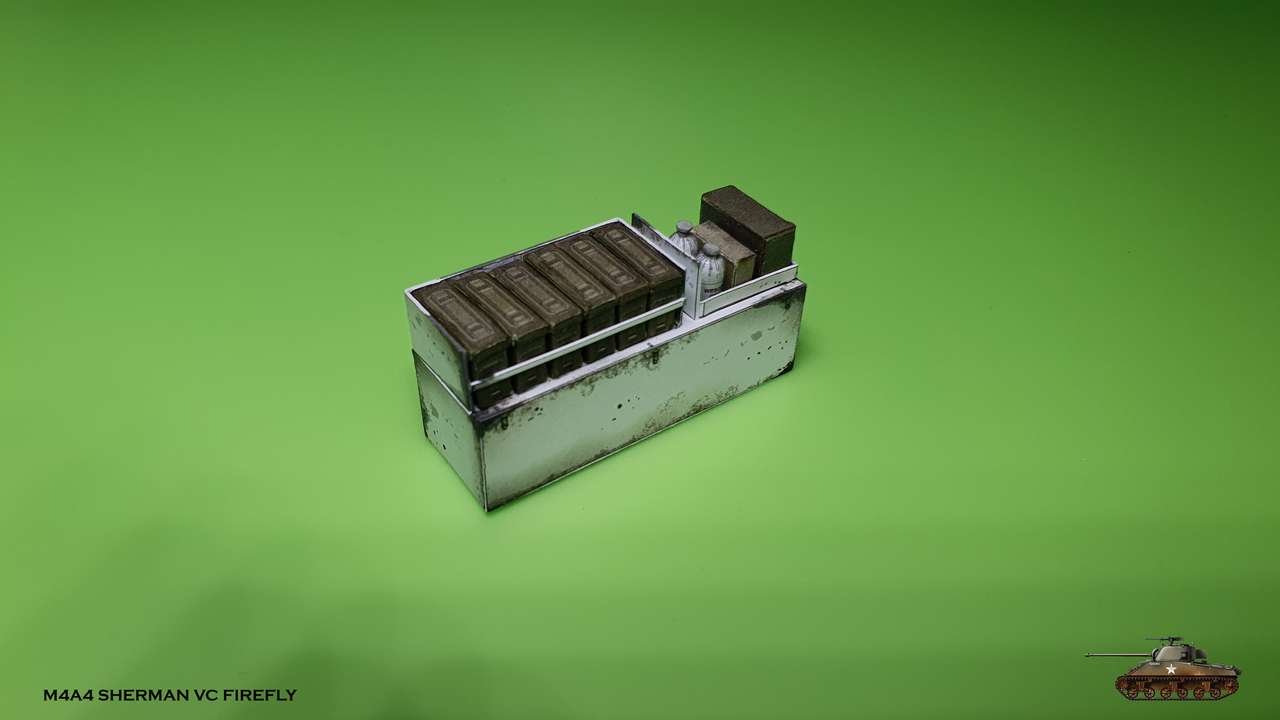 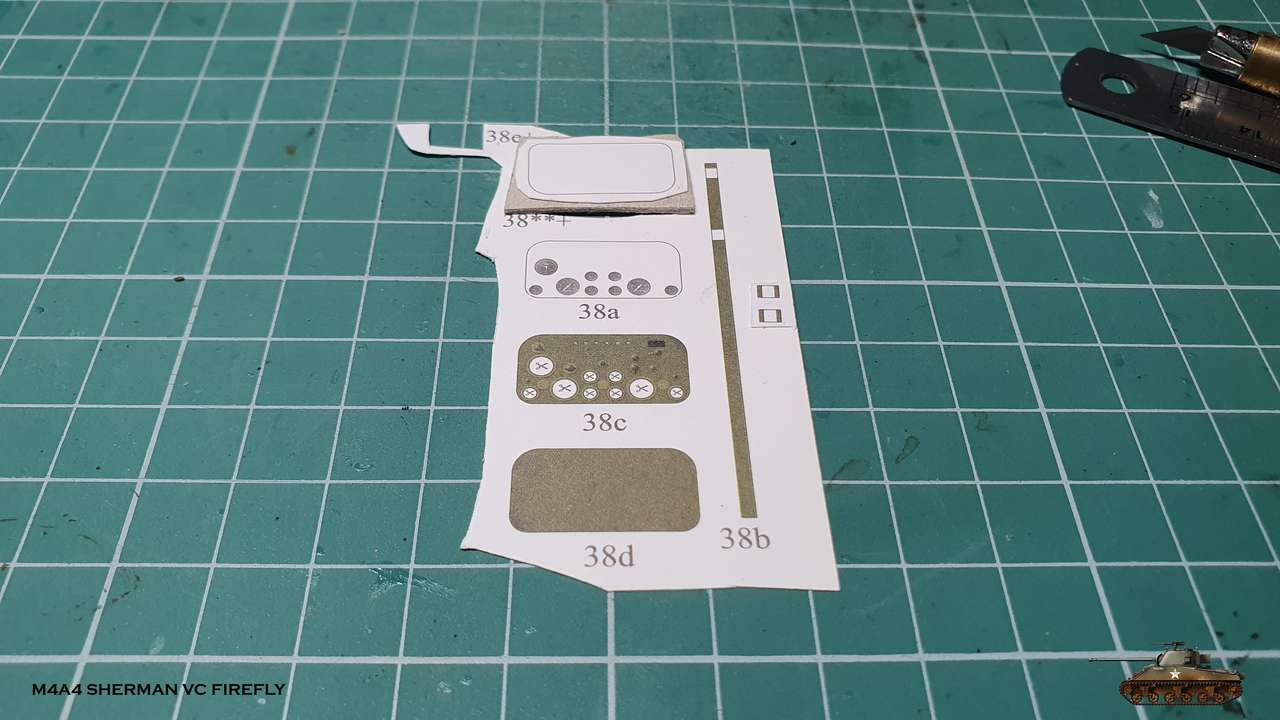 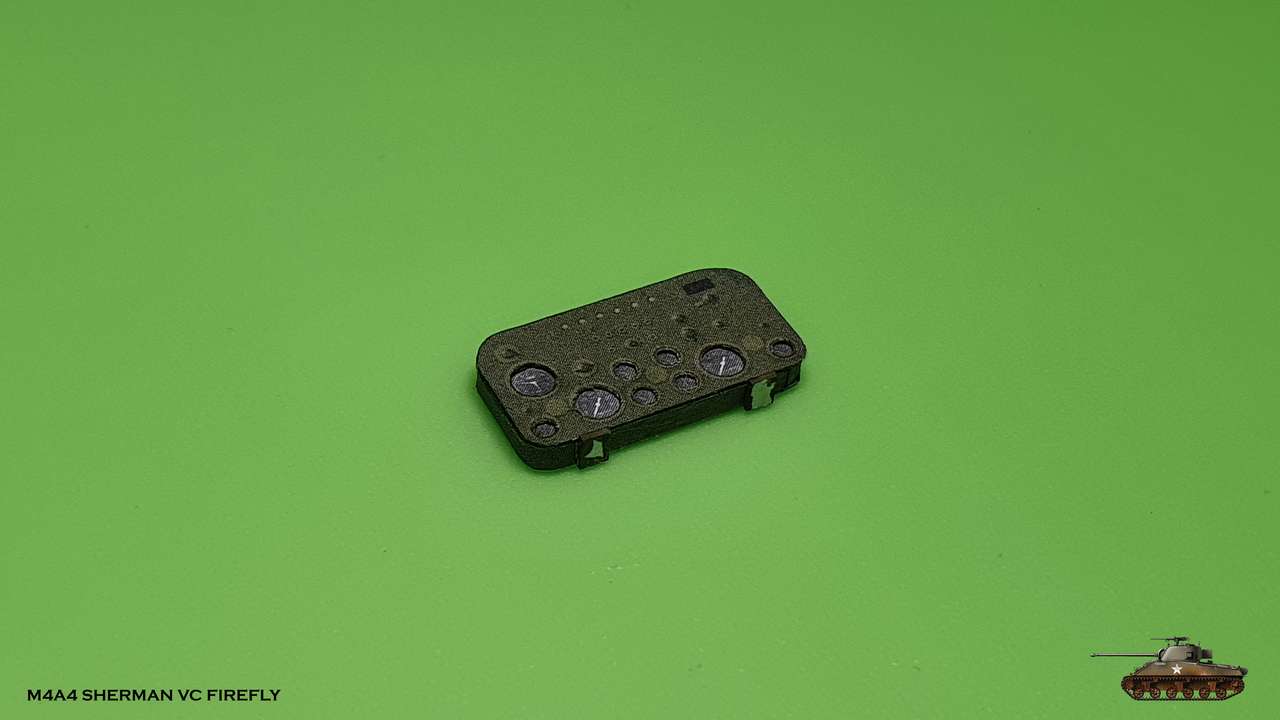 Other parts for left side were already been assembled (tools box and extinguisher), so this side filled up fast 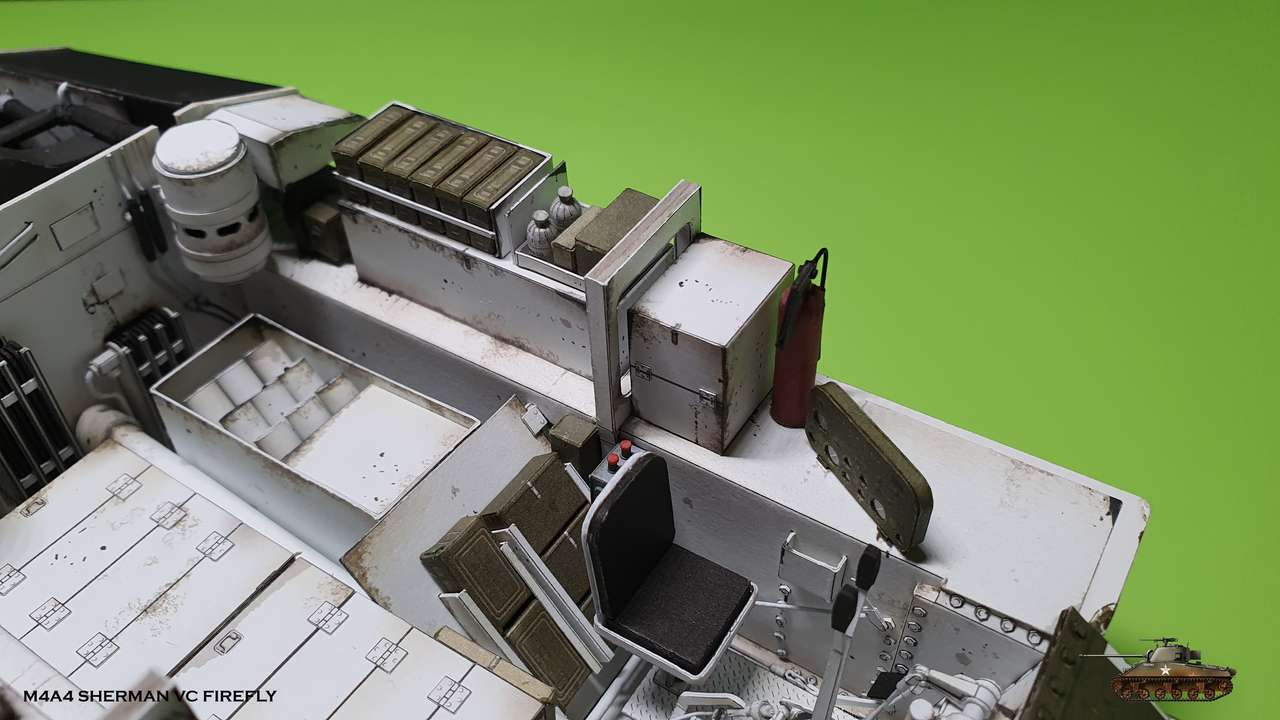 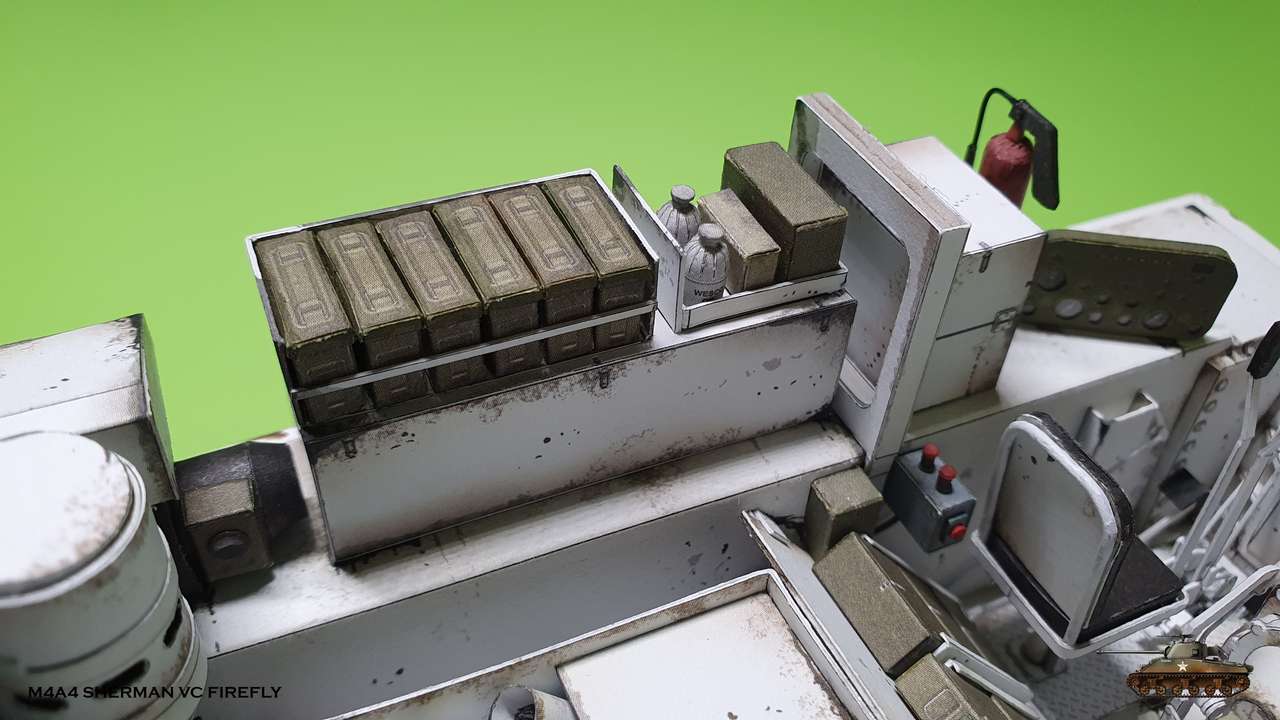 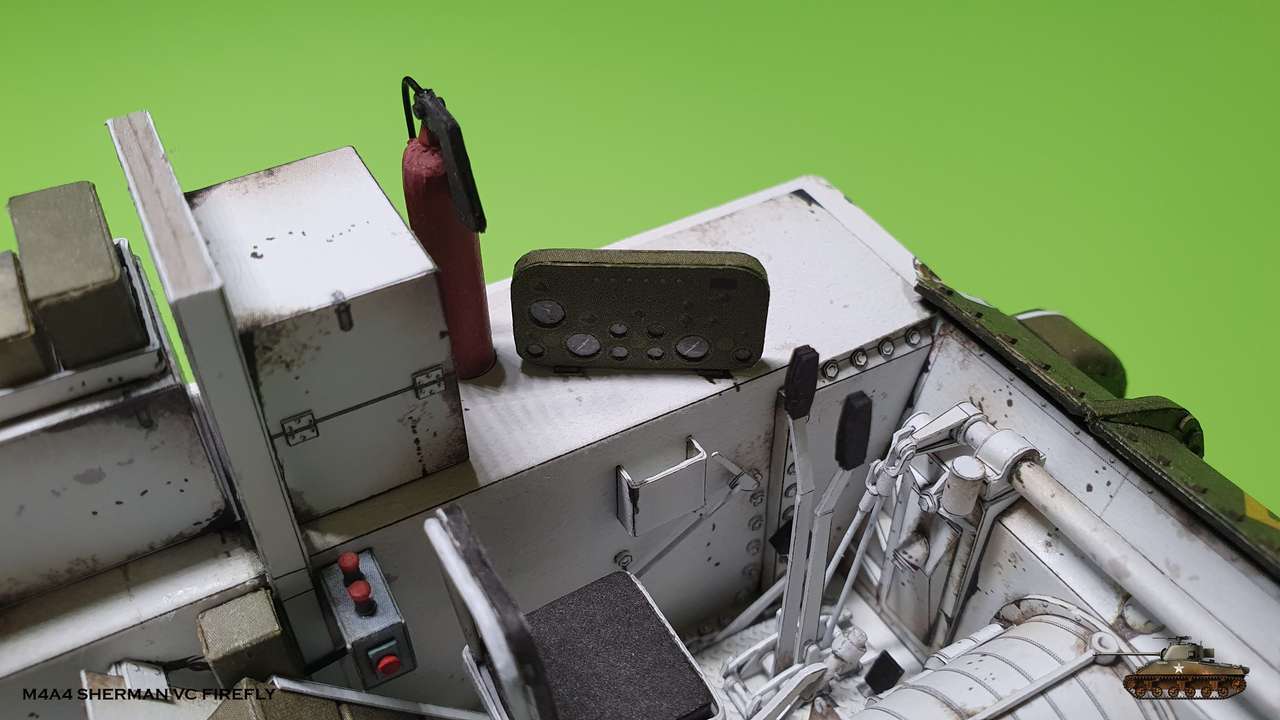 And suddenly all the interior for now was finished, as also another big step in assembling! 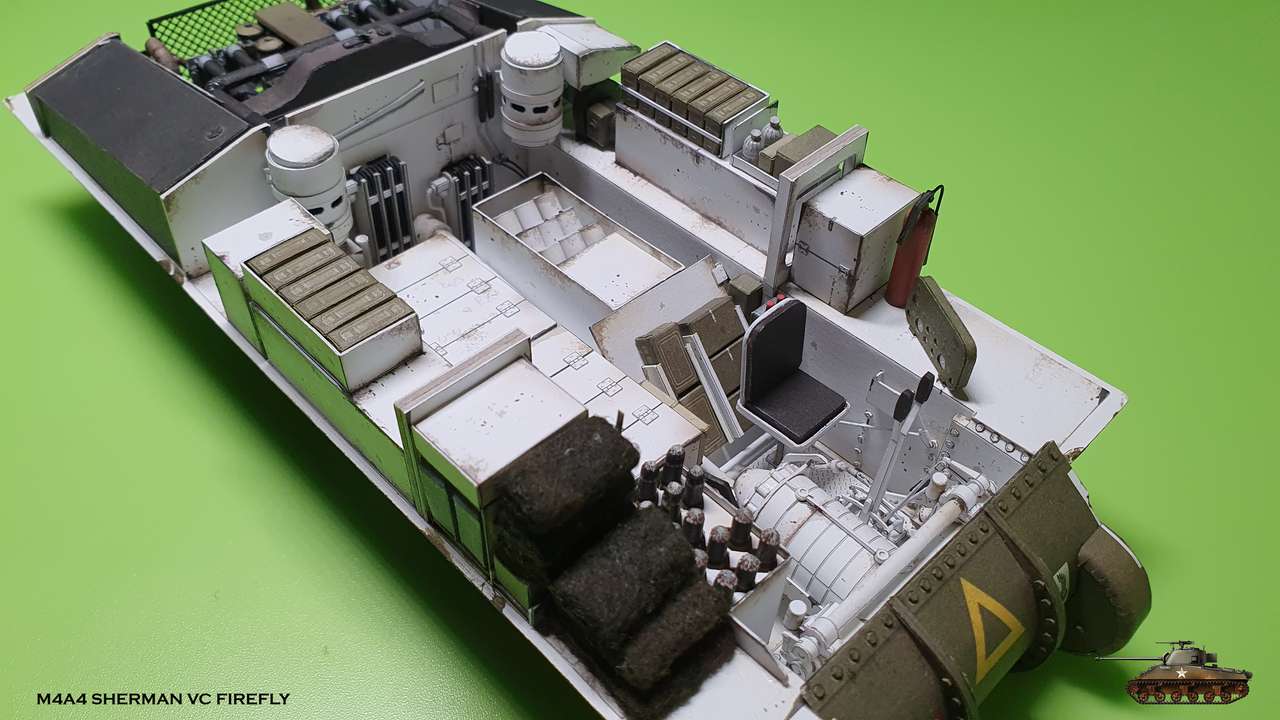 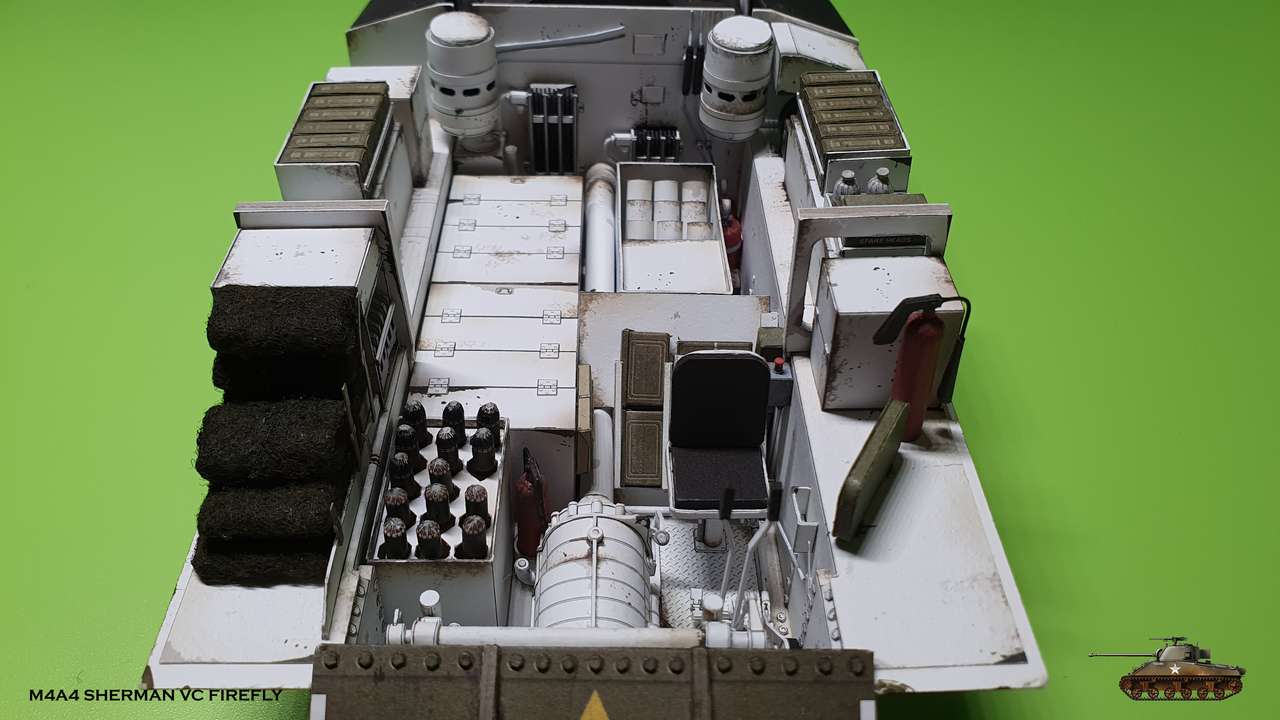 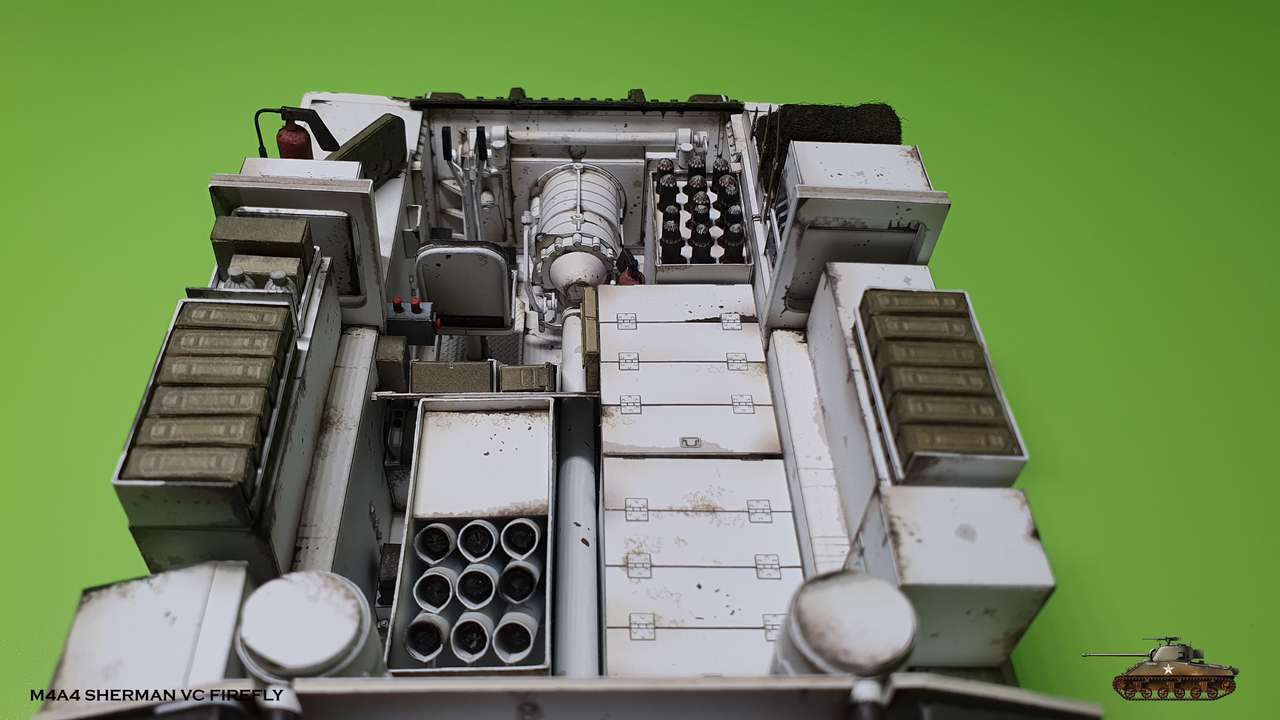 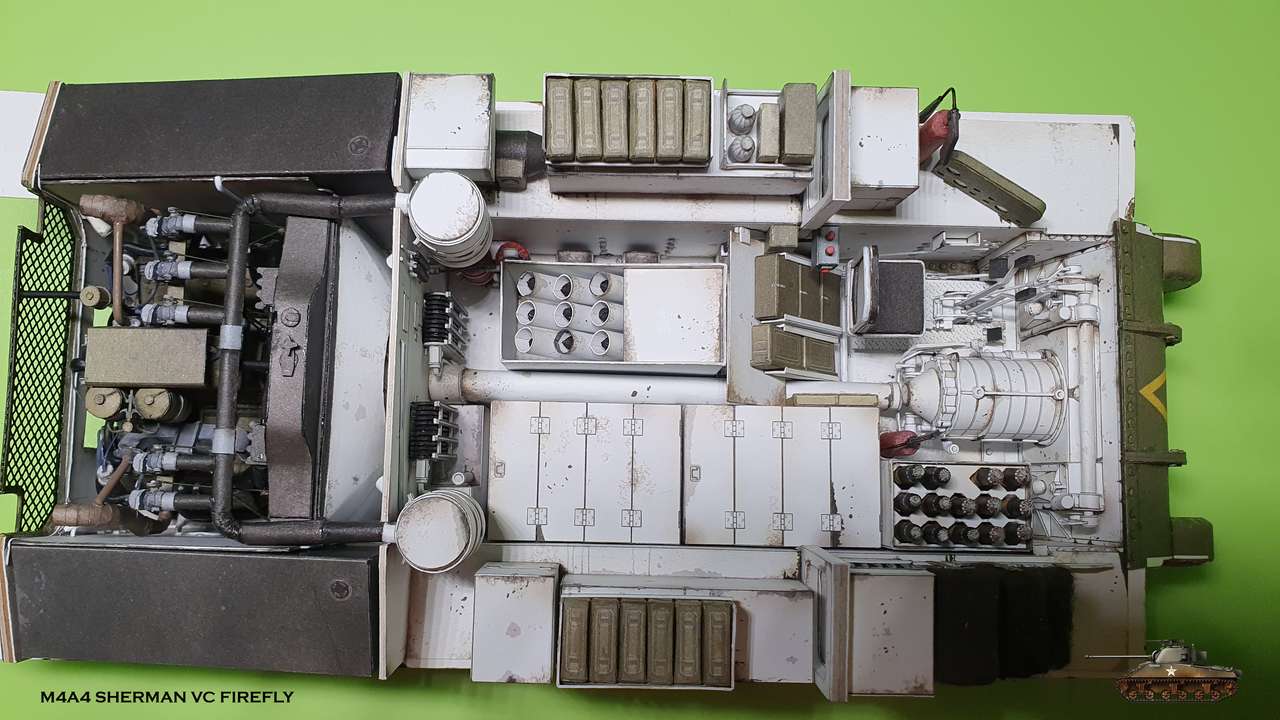 Next step is to close the "stern" and then to assemble upper hull part Stay tuned...And a little bonus, as usual  Click here Click here
__________________
Welcome to my gallery
|
 |
|
|


 Linear Mode

