PaperModelers.com

Go Back   PaperModelers.com > Card Models > Model Builds > The Armory

Reply
 
Thread Tools Display Modes
  #11  
Old 10-09-2007, 07:02 AM
rlwhitt's Avatar
rlwhitt rlwhitt is offline
Member
 
Join Date: Jul 2007
Location: Clemmons, NC, USA
Posts: 274
Total Downloaded: 12.31 MB
Those rivets are just great and add a ton of realism! Tedious though...
__________________

Reply With Quote
  #12  
Old 10-09-2007, 08:51 AM
Johnny's Avatar
Johnny Johnny is offline
Member
 
Join Date: Jul 2007
Location: Odda , Norway
Posts: 1,128
Total Downloaded: 1.95 MB
Send a message via ICQ to Johnny
Well guys! I'm glad you think that the rivetwork is worth it in the end

And don't be afraid of the screw puncher Chris!!
__________________
Johnny
" I'LL BE BACK "
http://www.papirmodeller.com/
Reply With Quote
  #13  
Old 10-11-2007, 12:26 PM
Johnny's Avatar
Johnny Johnny is offline
Member
 
Join Date: Jul 2007
Location: Odda , Norway
Posts: 1,128
Total Downloaded: 1.95 MB
Send a message via ICQ to Johnny
An update of the progress....

Some hatch...


Finished riveting the turret


A pic that shows some of the rivets on the underside


Making wheels..


Exhaust pipe


The rivet count is now over 900.....so I hope that part of this build is almost over.There are some left on the wheels,but thats just peanuts
__________________
Johnny
" I'LL BE BACK "
http://www.papirmodeller.com/
Reply With Quote
  #14  
Old 10-11-2007, 02:02 PM
milenio3's Avatar
milenio3 milenio3 is offline
Member
 
Join Date: Jul 2007
Location: San Antonio, Texas
Posts: 2,541
Total Downloaded: 25.92 MB
Johnny, you have your hands full with new models! Congratulations!!

Keeping a close eye on those little details.
__________________
- Gerardo Escobedo Sainz
Like me on Facebook
PaperJerry Blog
Reply With Quote
  #15  
Old 10-12-2007, 04:16 AM
Johnny's Avatar
Johnny Johnny is offline
Member
 
Join Date: Jul 2007
Location: Odda , Norway
Posts: 1,128
Total Downloaded: 1.95 MB
Send a message via ICQ to Johnny
Thanks Gerardo!

Speaking about details....
Headlights.
I guess I have too much time on my hands with all this vacations....
So I decided to try to enhance the headlights a bit.

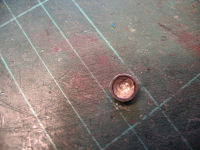
First I made the body of the lights.This is a tiny part with a diameter of 6mm.
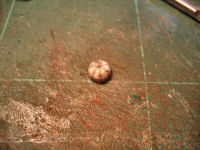

Next I made a reflector of aluminium foil
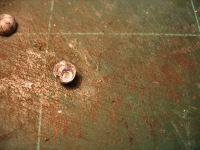

And glued that to the "cup"
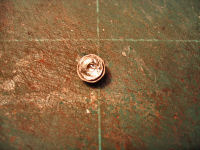

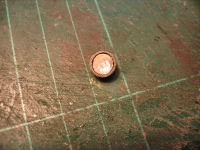
Then I made the glass and frame
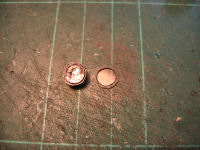

I made a light bulb of a 1,8mm disk painted silver and hang it upside down for a bit with a drop of gloss varnish to simulate the glass part of it.It's a bit tiny so you can barely see it inside the light

And at last I added the "leg"
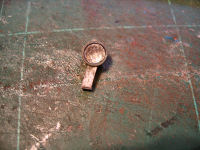
__________________
Johnny
" I'LL BE BACK "
http://www.papirmodeller.com/
Reply With Quote
Google Adsense
  #16  
Old 10-12-2007, 10:09 PM
Gil's Avatar
Gil Gil is offline
Member
 
Join Date: Jun 2007
Location: Northern Bear Flag Republic (Known as Water World in L.A.)
Posts: 1,870
Total Downloaded: 11.99 MB
Johnny,

Your build thread is illuminating and full of riveting detail...,

Sorry, but I just had to get it out of my mind and onto the net...,

It looks like you're punching the rivets out of a copy of the surrounding surface in order to preserve the texture?

+Gil
Reply With Quote
  #17  
Old 10-13-2007, 06:33 AM
Johnny's Avatar
Johnny Johnny is offline
Member
 
Join Date: Jul 2007
Location: Odda , Norway
Posts: 1,128
Total Downloaded: 1.95 MB
Send a message via ICQ to Johnny
Hello Gil!

I'm not sure what you ment in your post about the illuminate thing on your mind?
But the rivets are made of a coloring sample in the kit.
I guess it's there if you mess up a part you can make a new one out of the samlpe color piece.
__________________
Johnny
" I'LL BE BACK "
http://www.papirmodeller.com/
Reply With Quote
  #18  
Old 10-13-2007, 11:36 AM
Gharbad's Avatar
Gharbad Gharbad is offline
Member
 
Join Date: Jul 2007
Location: Ontario Canada
Posts: 938
Total Downloaded: 21.91 MB
Your cutting mat looks like a warzone Johnny!

The headlight looks really good. How did you do the initial dome shape?
Whenever I try to do those, I always end up with gaps between the wedge segments.
__________________
- Kuba
Reply With Quote
  #19  
Old 10-13-2007, 01:19 PM
Johnny's Avatar
Johnny Johnny is offline
Member
 
Join Date: Jul 2007
Location: Odda , Norway
Posts: 1,128
Total Downloaded: 1.95 MB
Send a message via ICQ to Johnny
Making the domes is actually quite easy when you have done it a couple of times.
First I cut out the part with the flips and connect the ends to eachother.So I try to find something with almost similar shape and use that as a mold.Then I glue one and one flip to eachother bending them down over the mold and holds them there as the glue does it's job.So it's to repeat it til all flips is done.
I'm not sure if you understand what I mean here..I'm not good explaining in english.
__________________
Johnny
" I'LL BE BACK "
http://www.papirmodeller.com/
Reply With Quote
  #20  
Old 10-13-2007, 02:42 PM
Gharbad's Avatar
Gharbad Gharbad is offline
Member
 
Join Date: Jul 2007
Location: Ontario Canada
Posts: 938
Total Downloaded: 21.91 MB
Ah, so you use a mold.

The only thing I didn't catch was the glueing part. Do you glue the entire edges together, or just the tips, or what?
__________________
- Kuba
Reply With Quote
Google Adsense
Reply


Posting Rules
You may not post new threads
You may not post replies
You may not post attachments
You may not edit your posts

BB code is On
Smilies are On
[IMG] code is On
HTML code is Off

Forum Jump


All times are GMT -6. The time now is 06:39 AM.


Powered by vBulletin®
Copyright ©2000 - 2024, Jelsoft Enterprises Ltd.

Parts of this site powered by vBulletin Mods & Addons from DragonByte Technologies Ltd. (Details)
Copyright © 2007-2023, PaperModelers.com