
 |
|
#11
|
||||
|
||||
|
#12
|
||||
|
||||
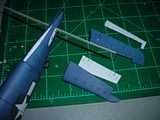 Now, let's start with the horizontal stabilizers. This model has the option to separate the elevators, to give it more realism. The instruction diagrams do not give much details about how to build them; but the diagram of the horizontal stabilizer and rudder give a very good idea. Believe me, I spent two hours trying to figure out this step. Now, let's start with the horizontal stabilizers. This model has the option to separate the elevators, to give it more realism. The instruction diagrams do not give much details about how to build them; but the diagram of the horizontal stabilizer and rudder give a very good idea. Believe me, I spent two hours trying to figure out this step.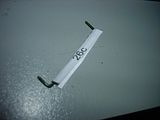 Before anything goes glued, a wire goes in a piece of plain paper and then glued to the internal former of the elevator. Before anything goes glued, a wire goes in a piece of plain paper and then glued to the internal former of the elevator. 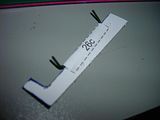 The idea is that the wire stays loose. The idea is that the wire stays loose. 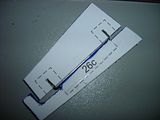 Next thing, try the wire ends on the former. This is a test. Next thing, try the wire ends on the former. This is a test. 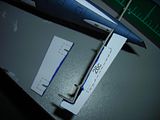 The two pieces go to the structure of the stabilizer support, besides the fuselage. The two pieces go to the structure of the stabilizer support, besides the fuselage. 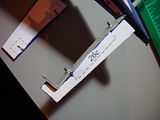 The wire goes thru the holes made on the support. The wire goes thru the holes made on the support. 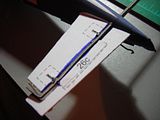 Then the wire is glued to the internal structure of the set. Then the wire is glued to the internal structure of the set. 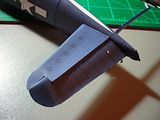 At the end, the pieces are glued. Note that the elevator stays somehow out of the stabilizer, and it looks detached. This is needed for the elevator to move, and hide the empty spaces. At the end, the pieces are glued. Note that the elevator stays somehow out of the stabilizer, and it looks detached. This is needed for the elevator to move, and hide the empty spaces.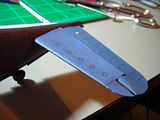 With a little and careful help you can move it so the whole set goes appart. But at the end, it remains really solid. With a little and careful help you can move it so the whole set goes appart. But at the end, it remains really solid.
|
|
#13
|
||||
|
||||
|
#15
|
||||
|
||||
|
Nice job on the moveable surfaces!
__________________
-Dan |
| Google Adsense |
|
#16
|
||||
|
||||
|
Thanks for the series of construction photos of the moving tail surfaces, Gerardo. I have never built moving tail surfaces before and will soon be trying to do so with my GreMir Ki-44. These photos and your explanation will be very helpful, even though there are some differences in approach between the two models.
Don |
|
#17
|
||||
|
||||
|
Nice work Gerardo! Can't wait to see it finished!
"we are poor little lambs, who have lost our way, Baa,Baa,Baa..."
__________________
"even though he never learned I hope he showed you some concern"... |
|
#18
|
||||
|
||||
|
Thank you very much, friends. Phil, Dan, Lex, Don... I'm glad you like the way this is proceeding.
But as I say... "Honor goes to whom honor deserves". The designer is Lukasz Fuczek, and the method is his. I just "follow orders", hehe. Nevertheless, you have to be careful on doing it. That's a modeler's work. And yes, maybe you can add a method of doing things to another model. That's more credit to the modeler. Don, I found very interesting about your neighbor. Thanks for sharing. Last edited by milenio3; 04-21-2008 at 11:33 AM. |
|
#19
|
||||
|
||||
|
The internal structures for the wing base.
This, again, took me about one hour to figure out. 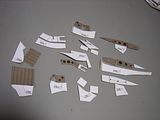 The pieces to build the wing base support. There are also the pieces for the wheel wells. The pieces to build the wing base support. There are also the pieces for the wheel wells. 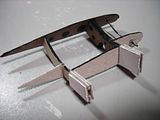 The pieces at the right of the photo are the slots where the outlets (?) of the fuselage go. A wire is on the front of the wheel well (upper right of the photo) that I don't know what it is for... yet. The pieces at the right of the photo are the slots where the outlets (?) of the fuselage go. A wire is on the front of the wheel well (upper right of the photo) that I don't know what it is for... yet.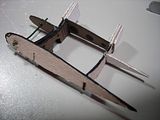 Another view of the set. You can see the wheel well internal pieces fit in their place. Another view of the set. You can see the wheel well internal pieces fit in their place. 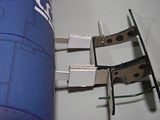 A dry fit test to attach the base to the fuselage outlets (?). I just wanted to know if there were going to be any problems at the time the whole part were completed and didn't fit. But it went all right. A dry fit test to attach the base to the fuselage outlets (?). I just wanted to know if there were going to be any problems at the time the whole part were completed and didn't fit. But it went all right. 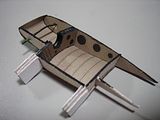 Now I glue the pieces to have a complete wheel well part. I painted all the edges with black... better than white. Now I glue the pieces to have a complete wheel well part. I painted all the edges with black... better than white. 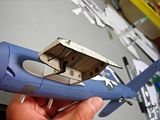 Another dry fit test of the set. Here you can see how the seagulls wing of the Corsair is achieved. I really liked this!! Another dry fit test of the set. Here you can see how the seagulls wing of the Corsair is achieved. I really liked this!!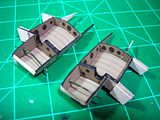 Second well/support ready. Second well/support ready. 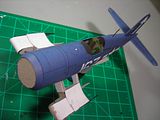 Dry fit test of both sets. Dry fit test of both sets. 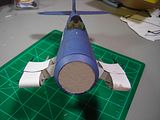 Uneven balance is very little. As you can see, I left the wires larger than the instructions show. I didn't know why I did that (instinct maybe). Then last night in the middle of my insomnia... I had an idea!!! I better reserve it to myself for now, or I'll burn it beforehand. Uneven balance is very little. As you can see, I left the wires larger than the instructions show. I didn't know why I did that (instinct maybe). Then last night in the middle of my insomnia... I had an idea!!! I better reserve it to myself for now, or I'll burn it beforehand. 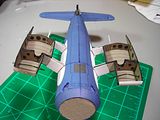 A view from beneath to the set, on dry fit. A view from beneath to the set, on dry fit. 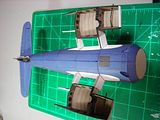 Another one. Another one.By the way, if you wonder.. .or not... I tell you what I used to laminate the pieces... it was the back carton of the kit!! The kit comes in form of a book... a BIG book I may add, and the back of the book is the carton alone. I don't know if the Polish instructions suggest to use the back of the kit to laminate, but I used it, and it is exactly the width needed to laminate this kit. |
|
#20
|
||||
|
||||
|
Bravo, Gerardo!
This is an excellent build thread with MUCH useful information. Don |
| Google Adsense |
 |
|
|