


|
|
|
#11
 05-11-2008, 08:54 PM
|
||||
|
||||
|
Bruce-
I love it so far. I'm toying with a clear canopy for one of my models, and will be using pretty much the same process. Let me know when if you plan on coming here. I'll see if I can work something out for the museum. I may be busy working flight camps or something, but I might be able to work a deal for you. 
|
|
#13
05-19-2008, 07:09 AM
|
||||
|
||||
|
Rough Weekend for the Forum!
Well, the forum was off the air for the weekend, and so as I continued the build I was suffering withdrawals from all this fun!!! Glad to have it back. Seems we have reverted to an earlier page so some of the postings I uploaded last week are gone...oh well, I'll try to recover some of what was here and carry on.
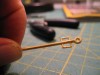
Got the tires done and installed on the tow bar. They were cut from three layers of black mat board using the Orlik tires as a pattern.     Cheers! Bruce
|
|
#16
05-19-2008, 04:38 PM
|
||||
|
||||
|
Thank you, friends.
Now to start on the front part of the dolly chassis. I built the V shaped part from the kit- it involved laminating pieces and shaping them into two halves of an I-beam, then gluing the halves together.    Upon completion I was unhappy with the result. The part didn't have I-beam straightness- it was hard to make crisp bends in the double-thick paper, and attempting to lightly scribe the bend lines proved disappointing when the paper laminations separated on bending them. I decided to chuck it and build the part from scratch. I took my trusty National Geographic cover and cut a large yellow strip, spray-glued the back and folded it over:  Then using the kit part as a template, cut the top and bottom of the I-beam out.   I tacked the center piece in place with CA and followed on with white glue. Then came the top and side strips.   I was much happier with this outcome:  Then came the rivets    No further progress tonight is likely- I have to build a stand for my daughter's Fender Guitar! http://www.papermodelers.com/forum/s...ead.php?t=1340 See you soon, Bruce
|
|
#19
05-21-2008, 02:32 PM
|
||||
|
||||
|
Nice going, it seems we lost some posts, did you see this one?
http://nl.youtube.com/watch?v=PisUjsXSUZU
|
|
#20
05-21-2008, 03:23 PM
|
||||
|
||||
|
Hi, Billy...I did get that one- in fact that's where I got the shot in my opening of this build. Glad to have you back!
Willygoat, yes those were individual rivets. The print has them as little circles and I wanted to do better. Now I might be sorry I started that  Cheers! Bruce Bruce
|
| Google Adsense |
 |
|
|


 Linear Mode

