


|
|
|
#1
 08-21-2008, 01:45 PM
|
||||
|
||||
|
Halinski A6M2 Zero
Here is my A6M2 Zero build. I'll post a few of my past pictures here, but if you want to read the descriptions and see them all here is the link http://www.zealot.com/forum/showthread.php?t=155131
From now on though, I will post up to date pictures here and at kartonbau. I've done a bit more work to the wings and will post an update shortly. BTW, this is the first and will probably be the last model that punch every rivet detail into. It takes FOREVER and is very very boring. I think it will make this model turn out great though. 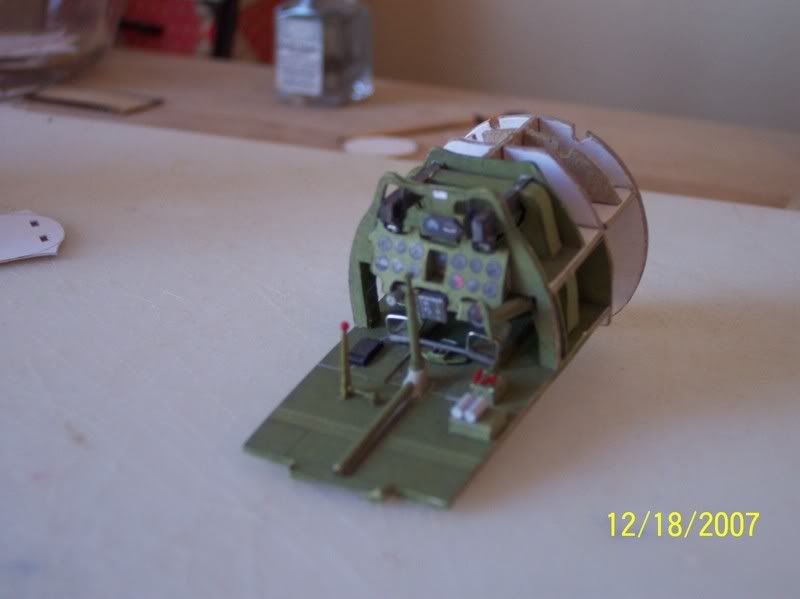 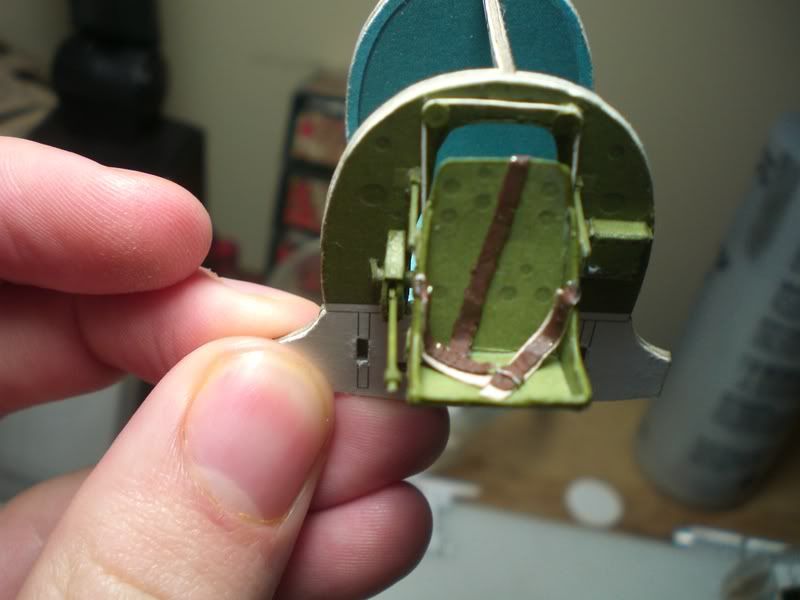  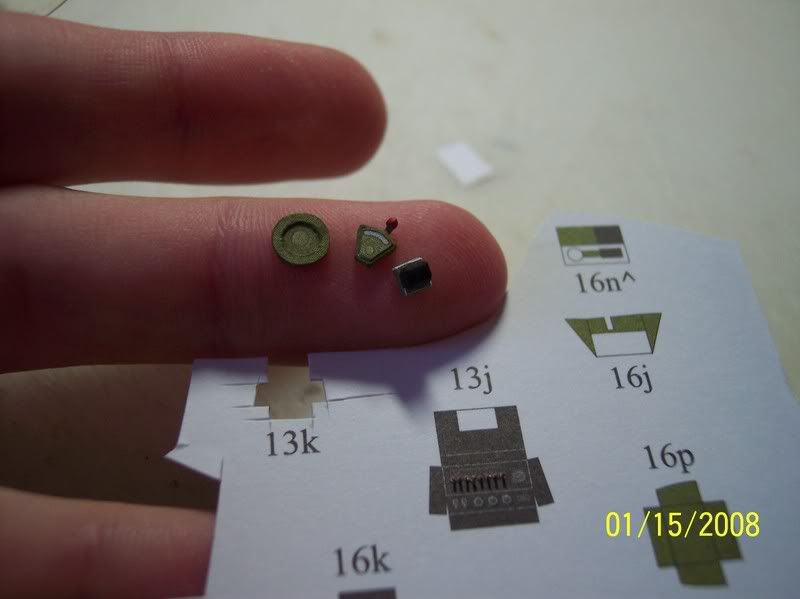 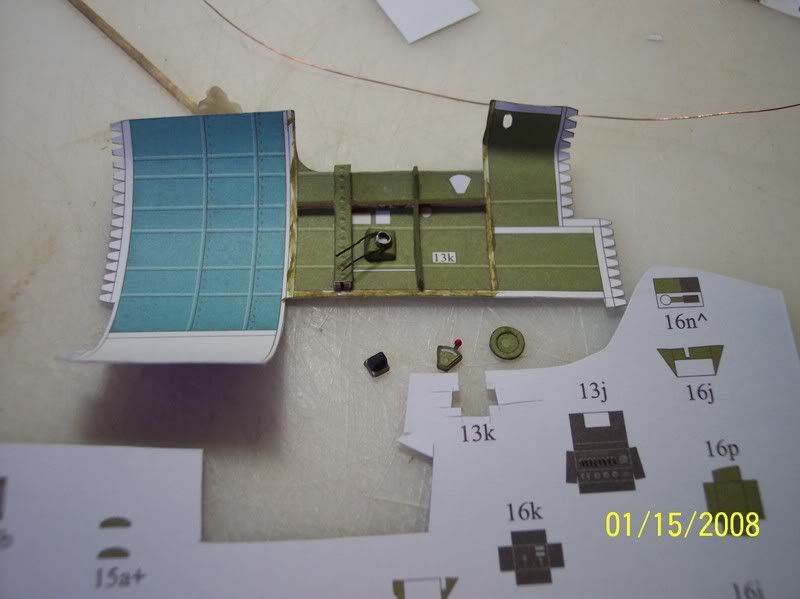  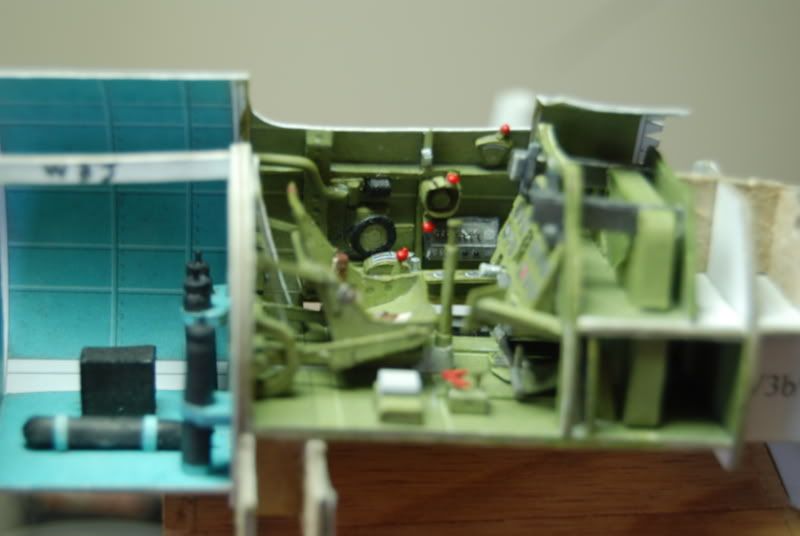 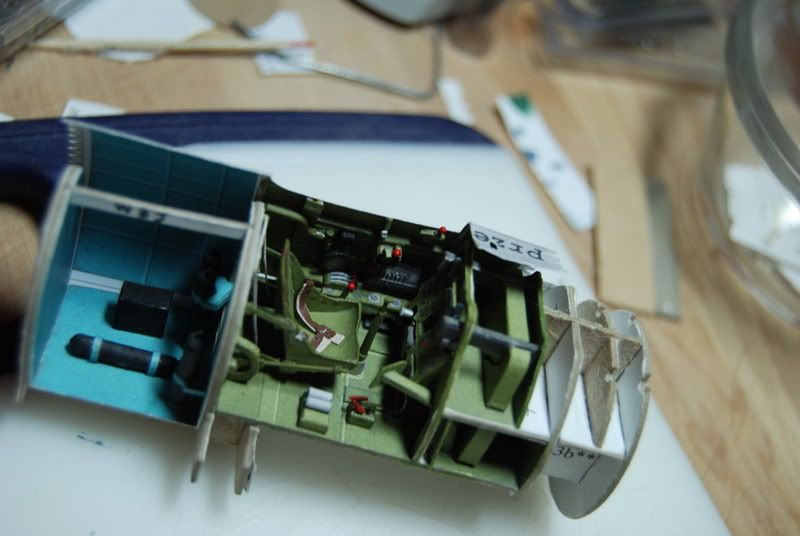 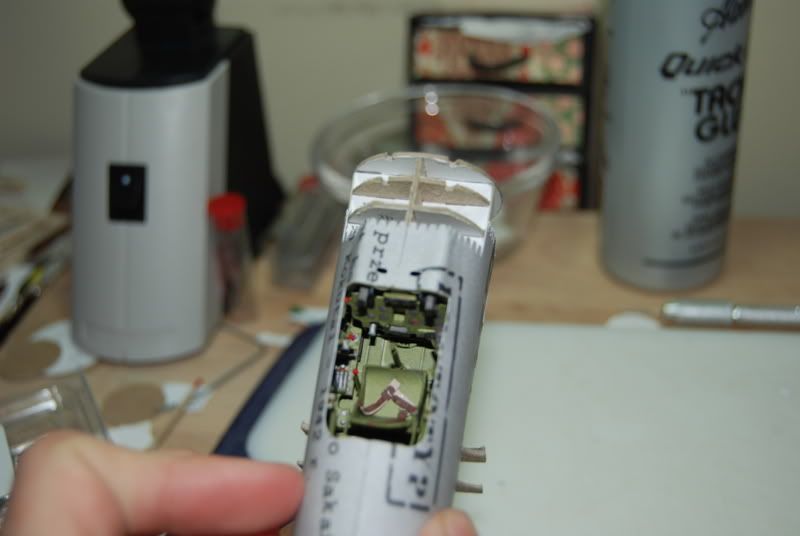 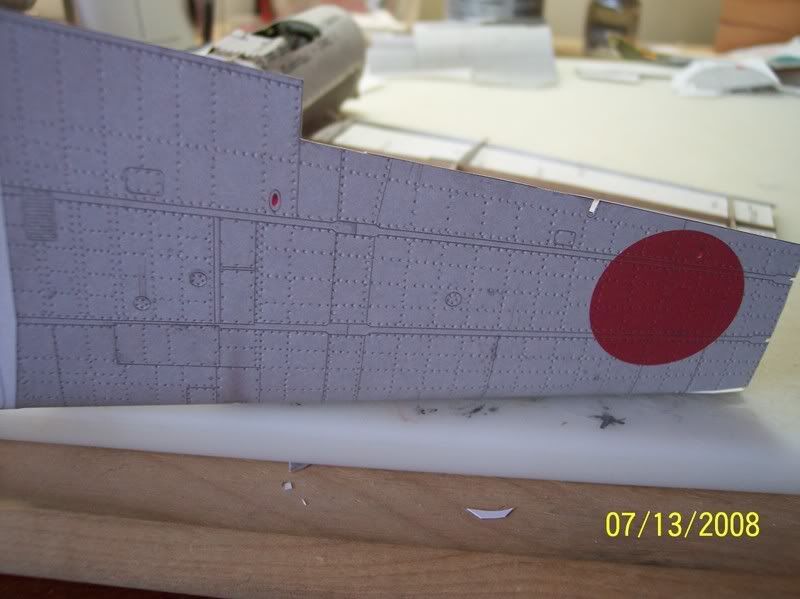  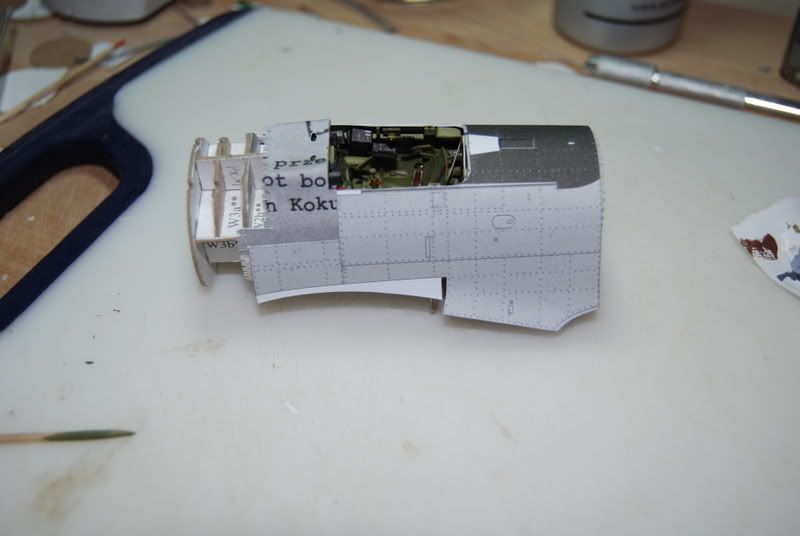
__________________
-Dustin Basler 
|
| Google Adsense |
|
#3
08-21-2008, 06:02 PM
|
||||
|
||||
|
Holy Crap! Dustin is 20? Seems like only yesterday I can remember you being like 15/16 (if I am remembering far enough back).
Nice zero. Where'd you get the stand in fingers? How do I know? They're not covered in glue and scars! Well Done Dustin, waiting for the finish. Ray
__________________
Ray Respect the Paper, RESPECT IT! GET OFF MY LAWN!
|
|
#4
08-21-2008, 08:12 PM
|
||||
|
||||
|
Thanks guys!
Haha yeah I just turned 20 at the end of July. I guess that means I'm no longer and invincible teenager...though I like to think that I'm definitely invincible until I'm 21 and most likely still invincible until 30.  And you're right, I was about 15/16 when I started posting on cardmodels.net. Wow...I guess that means I've been building paper models for about a decade and models as a whole for 17 years! Crap I'm getting old fast! And you're right, I was about 15/16 when I started posting on cardmodels.net. Wow...I guess that means I've been building paper models for about a decade and models as a whole for 17 years! Crap I'm getting old fast!
__________________
-Dustin Basler
|
|
#5
08-21-2008, 08:40 PM
|
||||
|
||||
|
Quote:
"I have been your age, You have not been mine" If you think that at 20 you are old, I perish the thought of what you will think when you finish college and start working in the Real World Rick
__________________
"Rock is Dead, Long Live Paper and Scissors" International Paper Model Convention Blog http://paperdakar.blogspot.com/ "The weak point of the modern car is the squidgy organic bit behind the wheel." Jeremy Clarkson, Top Gear's Race to Oslo
|
| Google Adsense |
|
#7
08-22-2008, 02:58 AM
|
||||
|
||||
|
Good to see your Zero again! - L.
|
|
#8
08-22-2008, 09:36 AM
|
||||
|
||||
|
Dustin you do very nice work, I saw your zero on the other forum, and how very nice it is. I think if I'd seen it before doing mine I would have borrrowed some of your ideas, looks great!
__________________
regards Glen
|
|
#10
08-25-2008, 02:09 PM
|
||||
|
||||
|
Thanks for all of the comments guys. I can only hope that my skills continue to improve as I continue to get older. I'll be bloody pissed if I develop parkinsons later on in life.
 @Birder, thanks for your pointers regarding the wings. I've been using several sets of build photos for a guide for my build. I suggest you borrow as many ideas from other builders as possible. I honestly can't think if any ideas that I currently use that I had not previously seen or read about in somebody else's build thread....not all from Zero builds of course, but once you learn a technique it's transferable to almost any model. I've spent quite a bit of time working on my model recently, but visually there isn't much to show for it. I hoping that progress with move a little faster once the wings are done. The only really boring repetitive part left will be the engine, and I have yet to decide how overboard I want to go on engine detail. Now that I have part of the wings in place, I am extremely happy with how the rivets are looking. It's hard to capture in a photo, but here I'm trying to show the contrast between punched and not punched rivets. 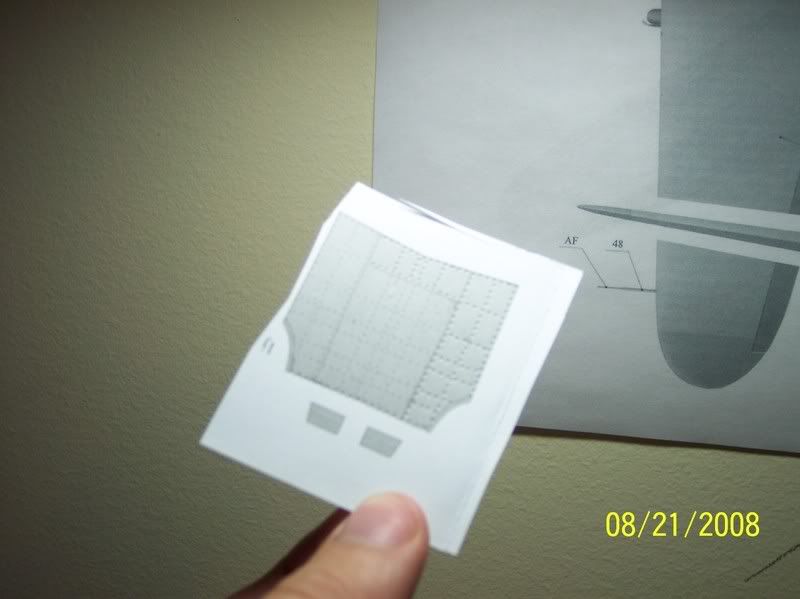 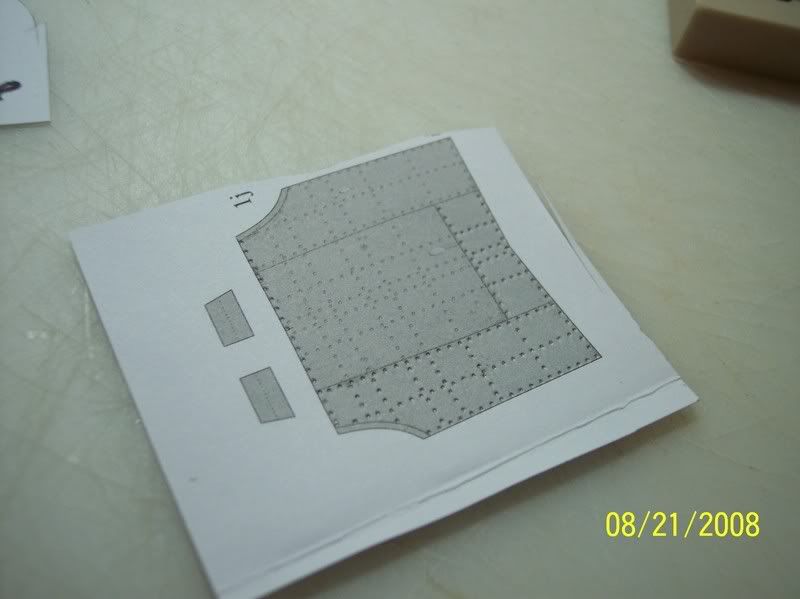 Wheel well details. 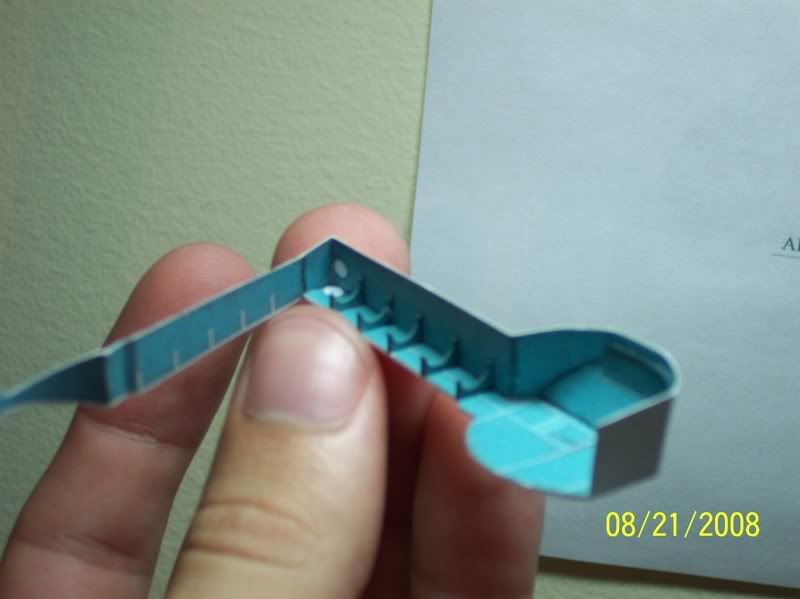 I did run into a few adjustments that needed to be made with the wings. First, everything "inside" the wing skin fit just fine within the cardboard wing frame. However, the blue wingtip rib, which is only used when making folded wingtips, came flush to the edge of the wing skin. It needed to be sunk into the skin about 1mm to leave room for the blue border. In the picture below I've already trimmed off a bit of the wingframe cardboard and pushed the blue rib back so that it is properly aligned. 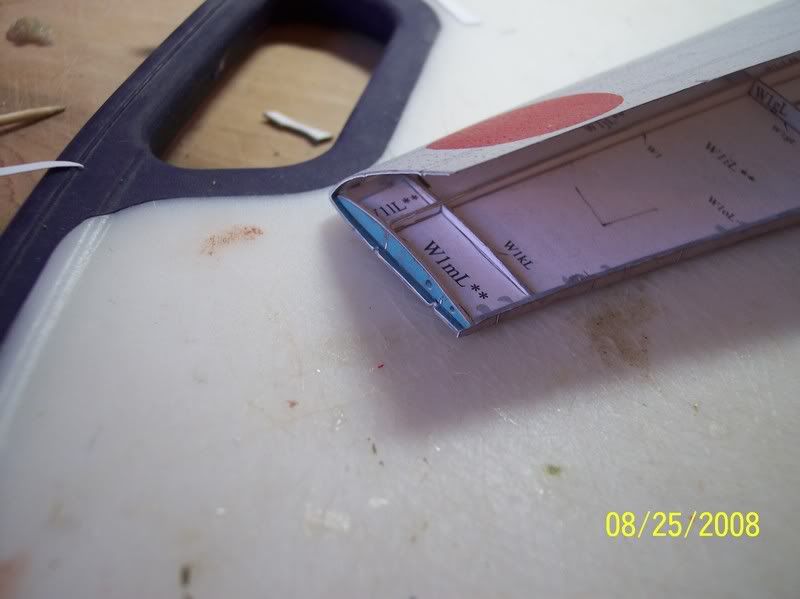 Again, everything else lined up pretty well. 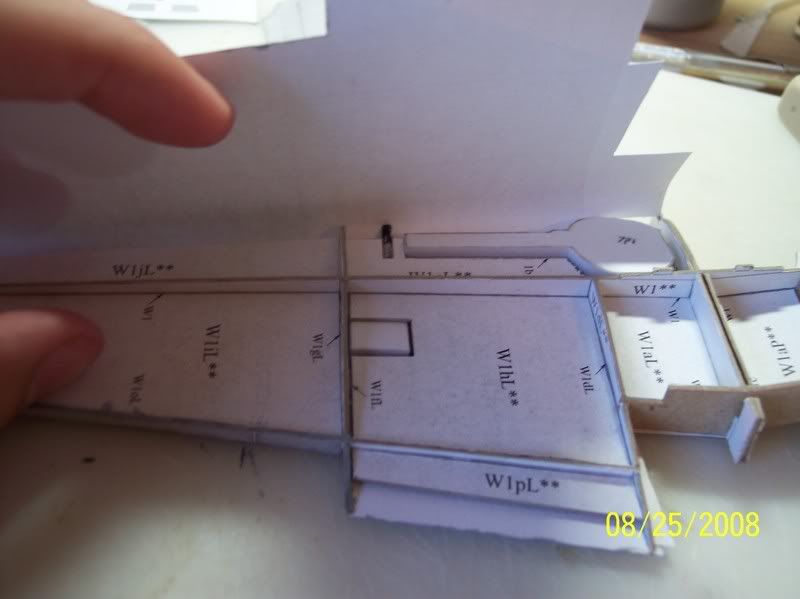 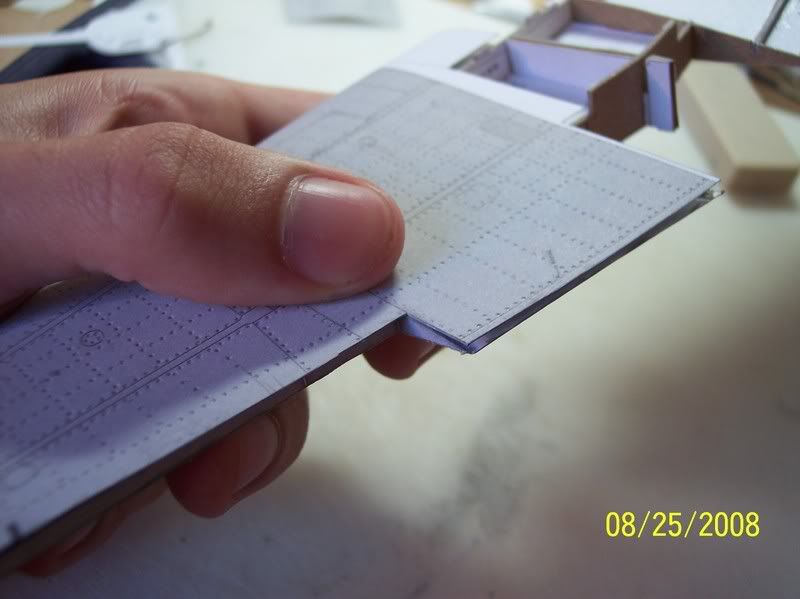 I'm thinking this is builder error. I'll patch the problem with some acrylic paint and hopefully make it "go away". 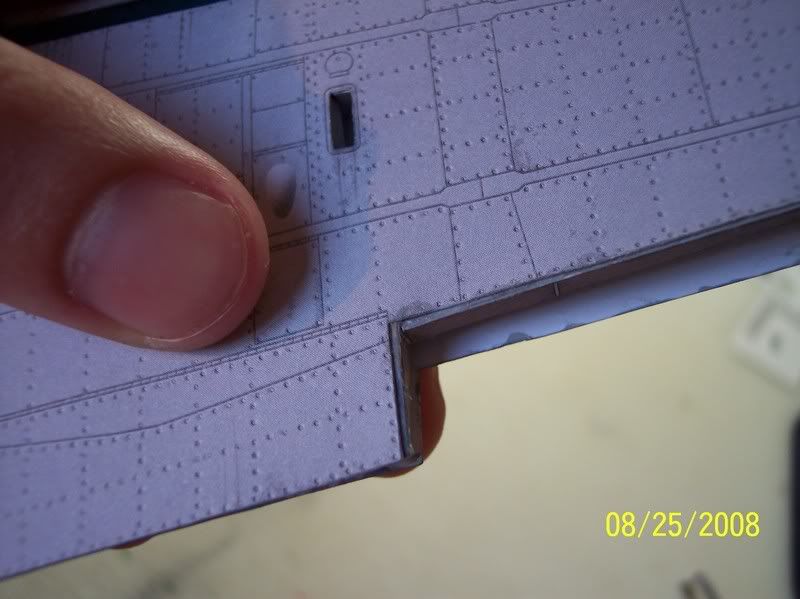 Now we come to the second issue I ran into with the folded wingtips. The part 2fP and 2fL have "male nobs" as they should. However, 2P and 2L do not have "female notches" to accept them. The actual wing skins have the notches like they should. I simply had to glue 2P and 2L to the wing skin first, and then cut the necessary notches.   Things are starting to take shape!! The second half of the wing should move a little faster now that I know exactly what I'm doing. 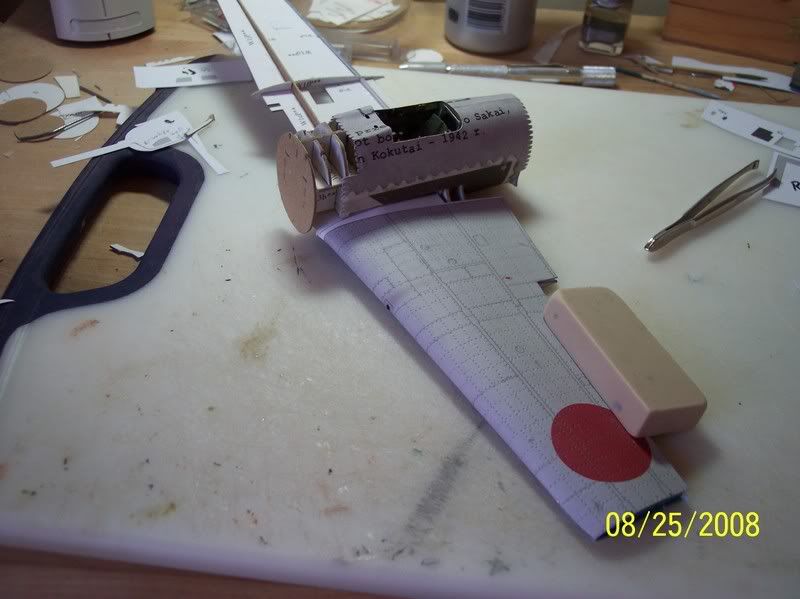
__________________
-Dustin Basler
|
| Google Adsense |
 |
|
|


 Linear Mode

