


|
|
|
|||||||
| View Poll Results: What do you think? | |||
| Finish the design. |
|
61 | 63.54% |
| Make it very detailed. |
|
46 | 47.92% |
| Make it a one page quick build plane |
|
9 | 9.38% |
| Get another hobby and let the pros take care of this. |
|
0 | 0% |
| Multiple Choice Poll. Voters: 96. You may not vote on this poll | |||
 |
|
|
Thread Tools | Display Modes |
|
#111
 03-21-2012, 06:59 PM
|
|||
|
|||
|
Man, you have nailed this concept right on the head. I had asked about this a long time ago. The response was, "eh", but seeing you do it, I knew this would work. The result will and could be as accurate a skinning yo the level anyone wanted to take it to. Think how easy it would be to make a press to emboss rivet points on panels, by lining adjoining overlapping panels, they would lock them in place (for reference points)... the paper would have to be extremely thin. Very cool Mike!


|
|
#112
03-22-2012, 07:01 AM
|
||||
|
||||
|
Quote:
__________________
Mike Dixon Anything in paper is fine with me
|
|
#113
03-22-2012, 02:31 PM
|
||||
|
||||
|
Mike, in one fell swoop, you have just advanced the art of paper modeling into the 21st century. Your egg crate subframe opens up a host of options! As far as the Harpoon is concerned, you can easily model the torpedo bay into the design.
One comment about panel lines, and this is my version of the discussion that has "raged" among the plastic modeling community since forever! I come from the school of aviators who insist that there were no cables or trenches cast over or cut into the aircraft we fly. Similarly, the manufacturers did not laboriously paint black lines all over the aircraft to delineate the demarcation of panel lines. The other side of the story insists that there must be something to break up the outline of the model or else it becomes a boring blob. Both sides of the argument were and remain absolutely correct. Therefore, about 2 decades ago, various and sundry modelers began experimenting with a number of techniques to represent panel lines in more subtle ways, undersurface shading, counter-shading, even pencil lines (which I used on an airplane and won a the National level). So, I humbly, and I do mean humbly, suggest since you are doing ALL the work, that instead of bold black lines that seem to festoon many of the models we build, that you either shade the panel lines of use a more subtle gray line to suggest the presence of the panel. The shade of grey would depend on where an imaginary light source was hitting the seam. Logically, those on the upper part of the aircraft would be lighter and those on the bottom darker. In both cases, the lines would be fine. Those areas where there are gaps between panels such as flaps, ailerons, etc. might reasonably executed in black. Since this is going to be a large model, you might even simulate rivets in the areas where they would have been most prominently visible on the aircraft. Ruben Andres Martinez is doing just that on his restoration of the huge Alan Rose DC-3. Again, ideas for you to use or loose as you see fit. Thanks for even taking them into consideration!
__________________
Maj Charles Davenport, USAF (Ret)
|
|
#114
03-22-2012, 06:52 PM
|
||||
|
||||
|
Charles, I agree with you as far as drawing the panel lines in a lighter shade of grey or have the line shaded. Also, please forgive me for being picky but most of the "dots" that you see printed on models of planes this size are not rivets. All of the removeable panels on this plane are held on by either screws or the aforementioned dzues fasteners. Any rivets on the plane would be unseen at this scale, the dzues fasteners however are quite large on the actual plane and would need to be drawn on (a challange I would not want to undertake as I know from experiance how many screws and fasteners there are on this beast!).
|
|
#115
03-22-2012, 08:12 PM
|
|||
|
|||
|
Quote:
|
| Google Adsense |
|
#116
03-22-2012, 08:14 PM
|
||||
|
||||
|
Quote:
However, a picture is worth a thousand words. I did this in a few minutes in Photoshop. As you look at an airplane from ground level, in this case one painted OD, you see a gradation of colors based on sun angle, wear, and who knows what else! Here is a sample panel complete with rivets. I created one rivet and copied it. There is no scaling, just a demonstration. You'll note that the rivets are even worn to the aluminum on one side. Sun angle is above and to the left. Notice that there is a clear, yet subtle, panel line but no lines to speak of. That's a pictorial view of my concept. Also note that the only place I used grey, and a light one at that, was to simulate paint weathering to the aluminum. Othewise, I shaded the panels in successive shades of OD. The only place you can "see" the original color is just above the darkened area. Above that and below the darkened area you see only shades of OD.
__________________
Maj Charles Davenport, USAF (Ret)
|
|
#117
03-22-2012, 08:17 PM
|
||||
|
||||
|
If you can send a closeup picture of the style of Dzus fastener used on Hot Stuff, I'll draw one and send it to Mike for shading. Once drawn, it's just a matter of copying and scaling....I hope!
Those would look really good on cowl sections and inspection panels.
__________________
Maj Charles Davenport, USAF (Ret)
|
|
#118
03-23-2012, 08:21 AM
|
||||
|
||||
|
Your drawing looked good Charles. I probably wouldn't be able to get a very good picture of the fastener as I only have a cheap digital camera, but they are nothing speacial. From the exterior of the plane they only appear as very large standart flat head screws (about 1/2" in diameter) that sit flush to the panel.
|
|
#119
03-23-2012, 11:00 AM
|
|||
|
|||
|
It appears, except for the nose section, the plane had super thin panel lines and no rivets! I think the panel lines appear in this plane because it been sitting in the sun for over half a century. The photos were obtained from this site:
Warbirds and Airshows - Lockheed PV-2 Harpoon Photo Gallery 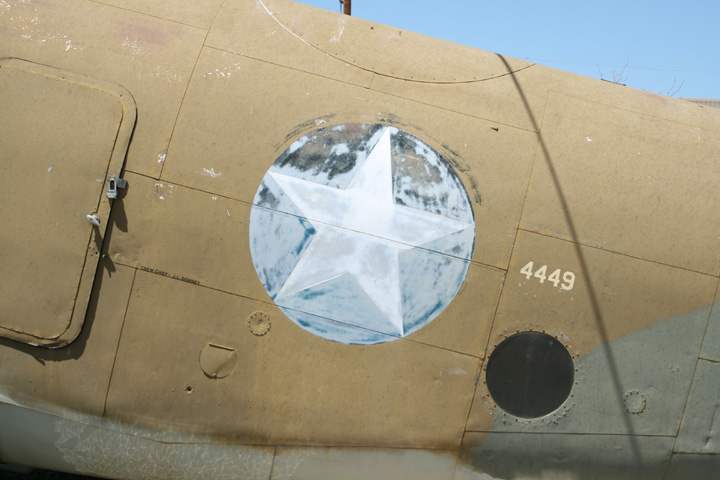 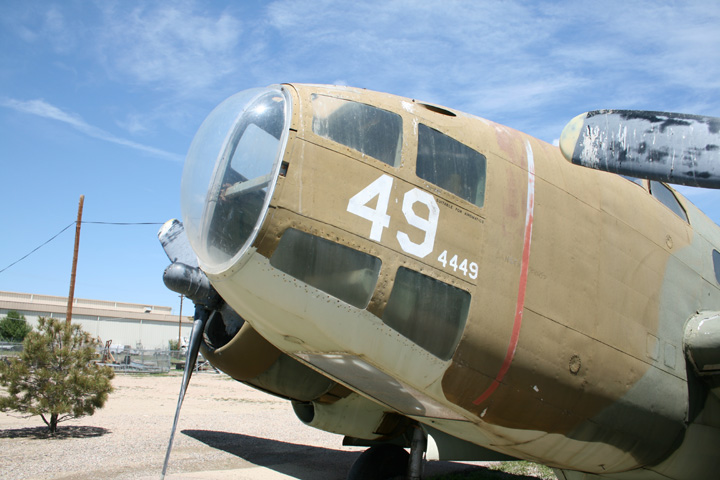 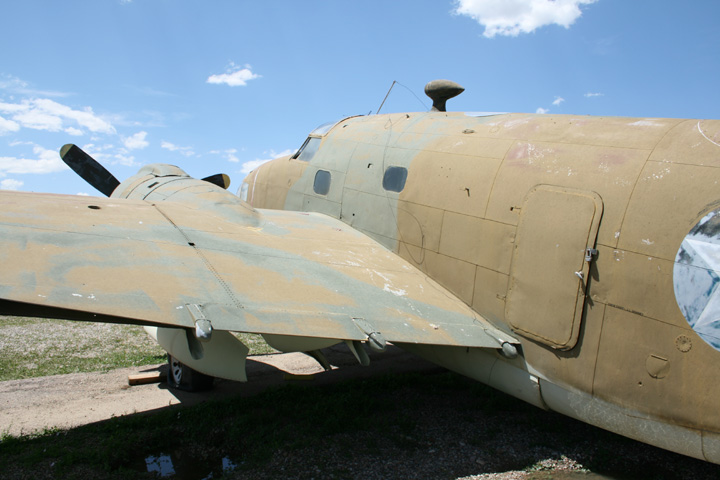
|
|
#120
03-24-2012, 03:24 PM
|
||||
|
||||
|
Quote:
Quote:
Here is a closeup of the fastener in question.
__________________
Mike Dixon Anything in paper is fine with me
|
| Google Adsense |
|
|
|


 Linear Mode

