


|
|
|
#11
 07-10-2013, 02:09 PM
|
||||
|
||||
|
NICE!!
gerardo, you have a small error. the two small strips, for the cockpit instrument panel cowling, are installed incorrectly. The cowling has a padded(?) edge or some sort of edge thickener. It covers each side of the panel cowling, leaving an opening in the middle for the Gun Sight. The curved cowling is squared off slightly at the edge. The two little strips need to be attached on top of the cowling edge and creased to create the slight square shape. Then the extended tabs are wrapped underneath the cowling. This will also create the thicker padded edge. 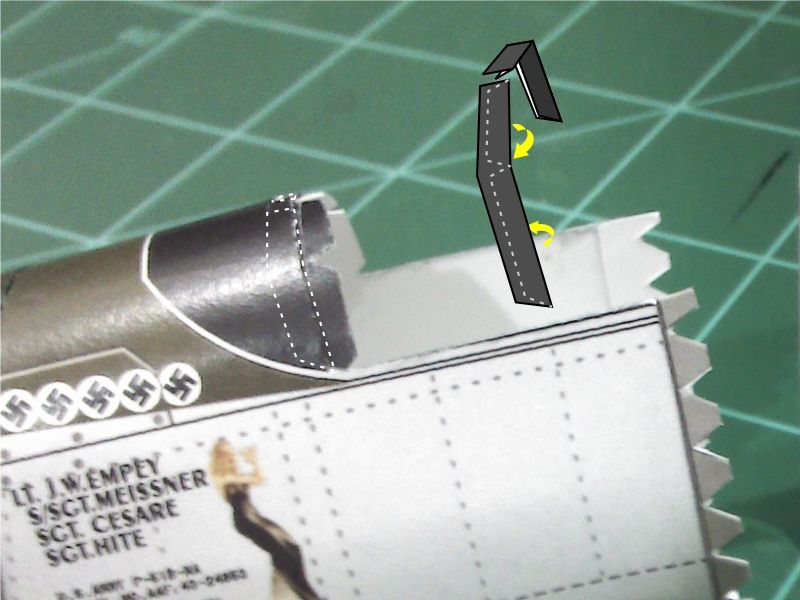
__________________
SUPPORT ME PLEASE: PaperModelShop Or, my models at ecardmodels: Dave'sCardCreations 
|
|
#12
07-10-2013, 05:06 PM
|
||||
|
||||
|
Coming together very nicely. Great work.
Gary
__________________
"Fast is fine, but accuracy is everything" - Wyatt Earp Design Group Alpha https://ecardmodels.com/vendors/design-group-alpha
|
|
#13
07-10-2013, 06:36 PM
|
||||
|
||||
|
Teriffic story story and build!
Dave
|
|
#14
07-11-2013, 09:15 AM
|
|||
|
|||
|
This model is awesome. Your build is great.
How do you get such great vibrant color on the model. I am sitting here with a dull drab Ta-152H from GPM with wrong color to boot and it should be multi-green and colorful
|
|
#15
07-11-2013, 09:30 AM
|
||||
|
||||
|
funny you ask that (about the colour)...
I'm sitting here looking at the yellow fuselage stripe and wondering why it is so pale? Every printer and paper gives varying results. Gerardo likes to use professional printers services and glossy papers which usually give clearer and more vibrant colour. In this case, I think the Ink was low or someone ran it at a reduced saturation. (Although, the cowling Green and Insignia Blue seemed to have printed properly. But they have such a high blue content) The yellow I used for these stripes is #FFFF00 (RGB 255-255-0) which when printed on my printer with normal saturation gives a yellow tone somewhere between lemon and schoolbus . This is considerably lighter than the I.D.Yellow normally used by the USAF in WW2. But its more in line with the yellow used by other USAF Squadrons for engine cowlings and stripes. gerardo? have you printed the Wing sheets yet? How do they look? Do you think we need to make an adjustment? So it might be that I chose a yellow that is a bit too light...but with no actual colour photographic evidence, I can't be completely sure. Just park it out in the bright Sun...the glare will even out the colours!
__________________
SUPPORT ME PLEASE: PaperModelShop Or, my models at ecardmodels: Dave'sCardCreations
|
| Google Adsense |
|
#16
07-11-2013, 09:33 AM
|
||||
|
||||
|
Quote:
Clearcoat can improve colour vibrancy and contrast (of the printed paper).
__________________
SUPPORT ME PLEASE: PaperModelShop Or, my models at ecardmodels: Dave'sCardCreations
|
|
#17
07-11-2013, 11:37 AM
|
||||
|
||||
|
Thank you everyone for the words of encouragement!
Got it, Dave. Thanks for the correction! I will fix it. I'm shoing now how I put the formers "G" and "G2", which are just behind the radio box. According to the instructions, G goes just on the edge of the fuselage part that contains the back of the radio box, and the latter will be fixed to this former G. 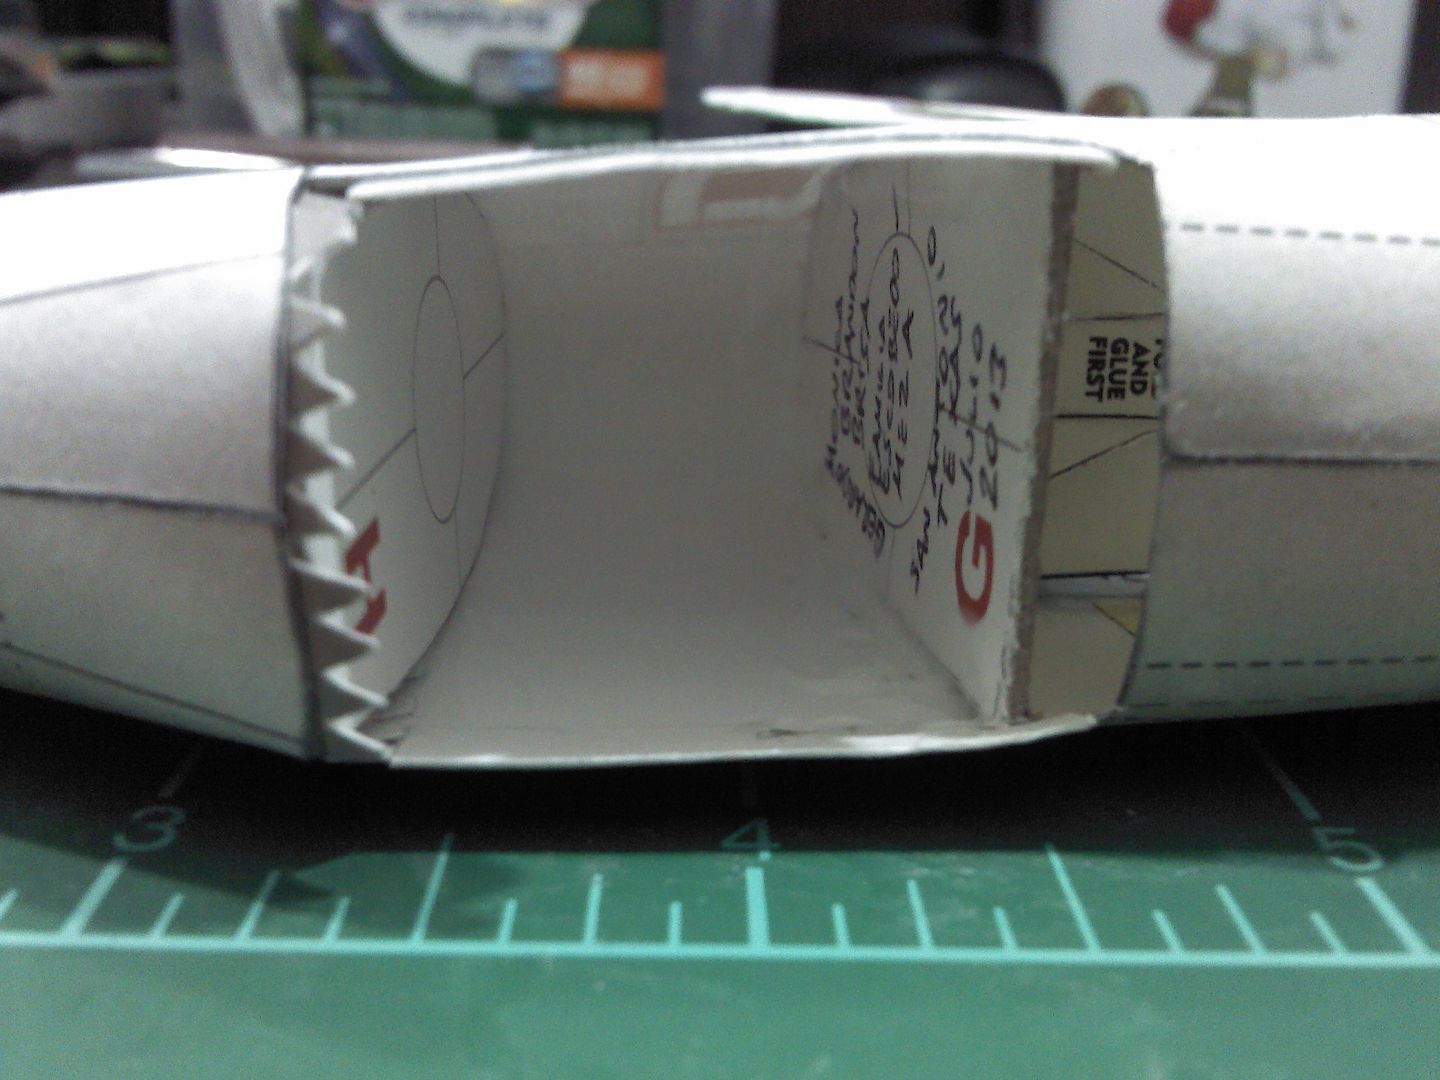 Then G2 goes somewhat in the middle between H and G. 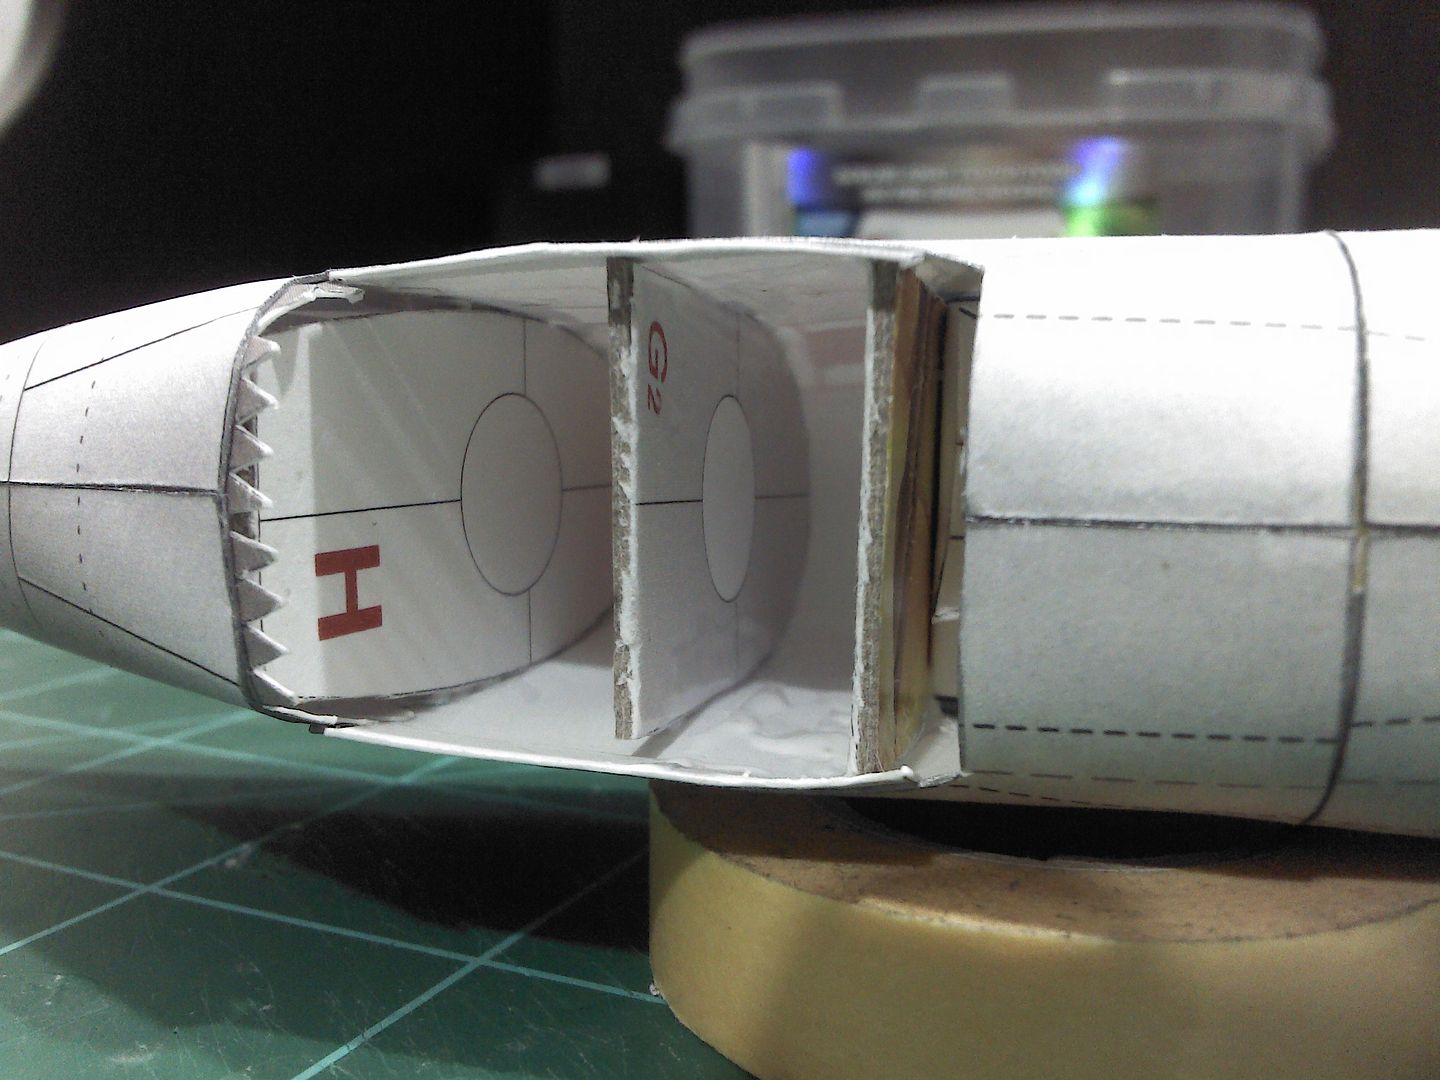 I noticed that former H is skewed a little. This did not affected the fuselage, though I will make sure I don't have a "banana fuselage". Once I put those formers, I went to glue the radio box secition; after which, I slided the cockpit to the area in the fuselage. I had no issues getting the cockpit in place, just as the instructions say. 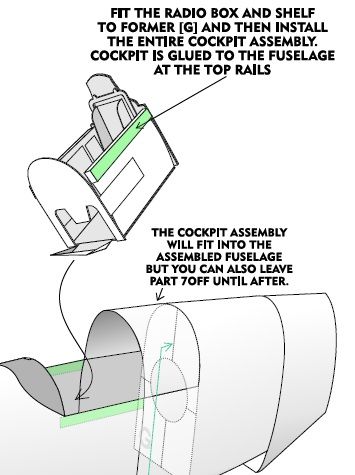 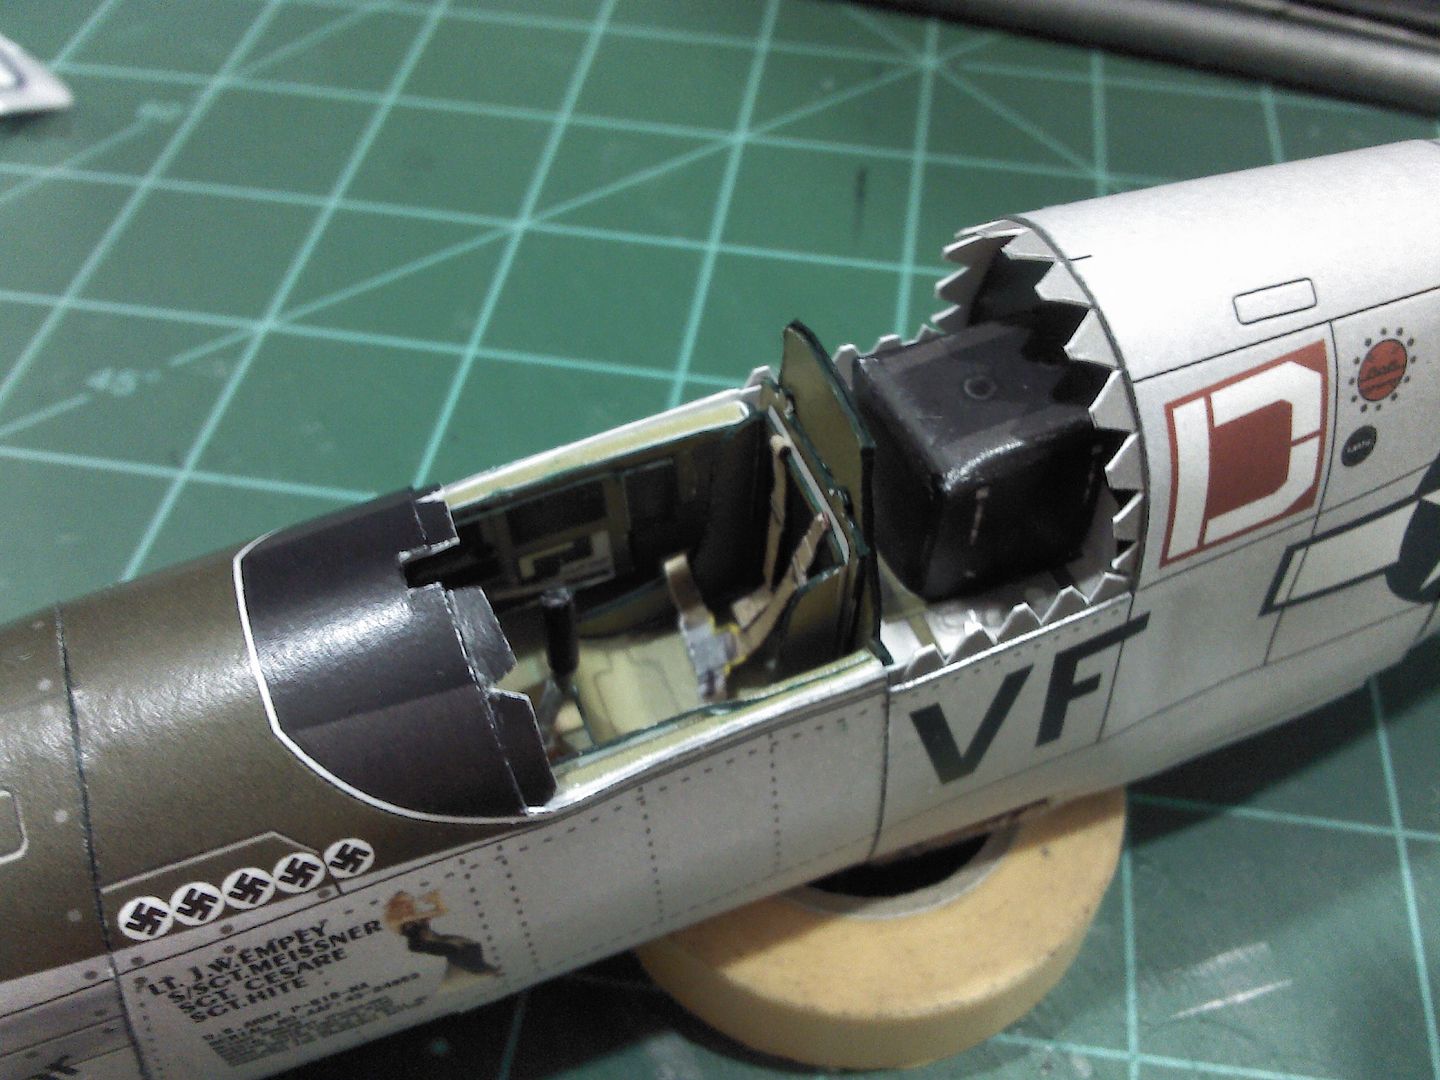 Another view inside Lt. Empey's office (again, I will fix the tabs Dave mentioned). 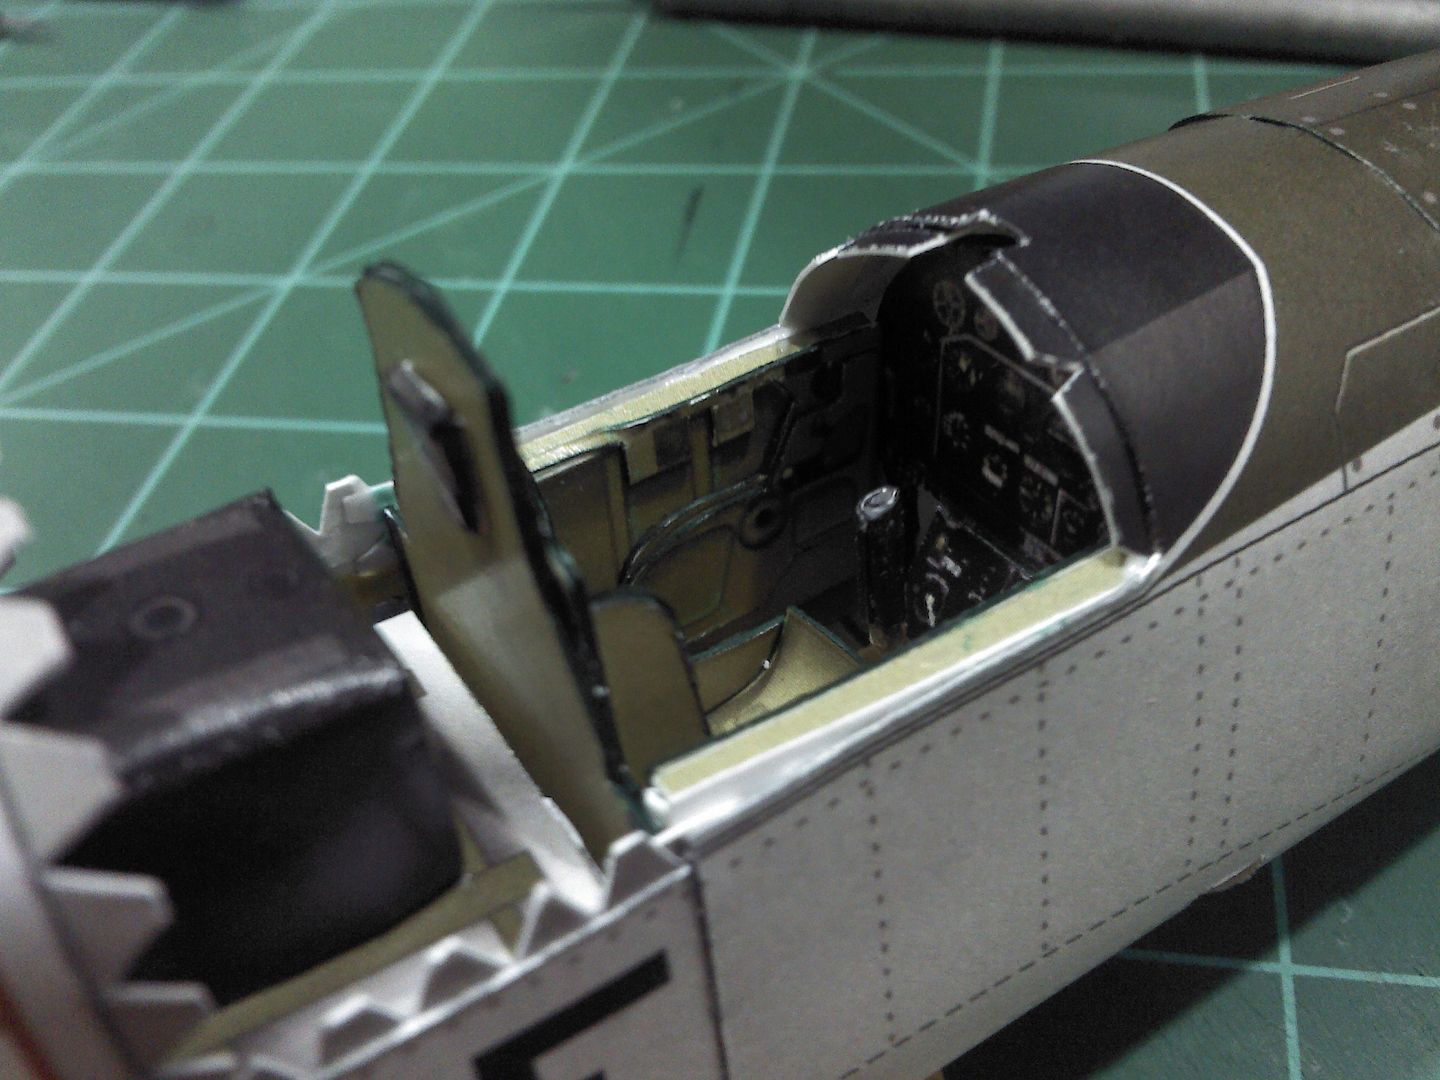 And the tail is also ready. 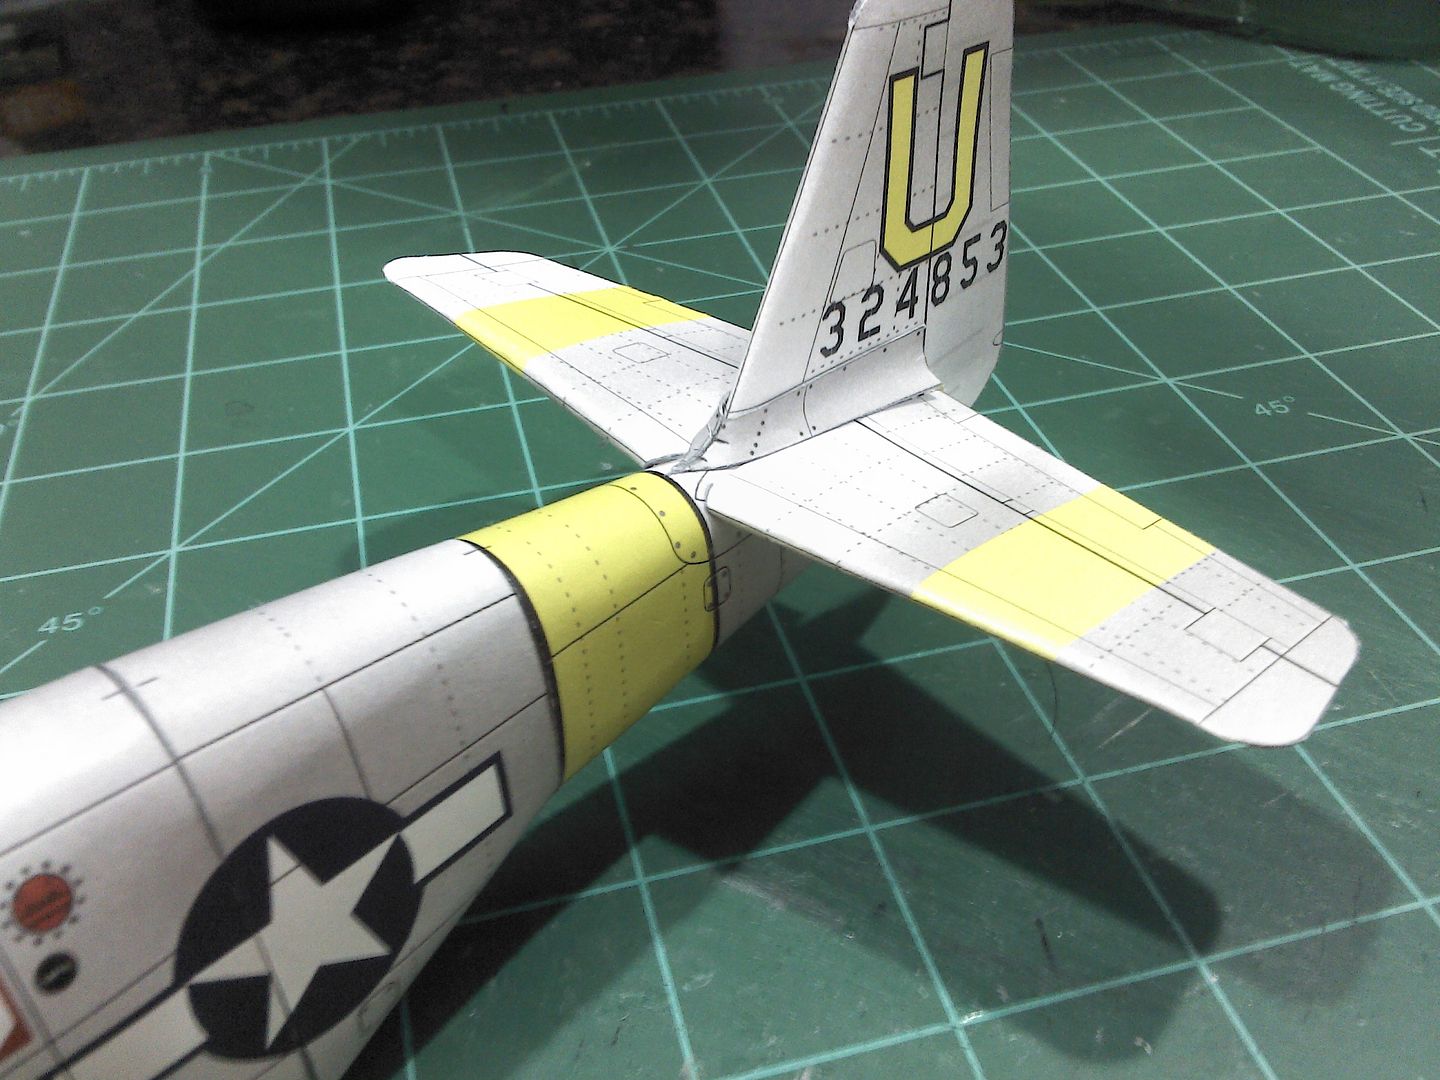 About the yellows... coincidently today is the Alamo Squadron meeting here in San Antonio, and I will have a chance to ask Mr. Forbes (also friend of Lt. Empey and the gentleman who gave me the specifics of the airplane for Dave to desing it), about the colours. I will take what I have of the model, and the wing sheets. Here's a couple of photos of the model so far, and the wing sheets. Note, photos are taken using my Motorola cell phone, 5.0 MP, and then somewhat automatically reduced by Photobucket. Inside the house> 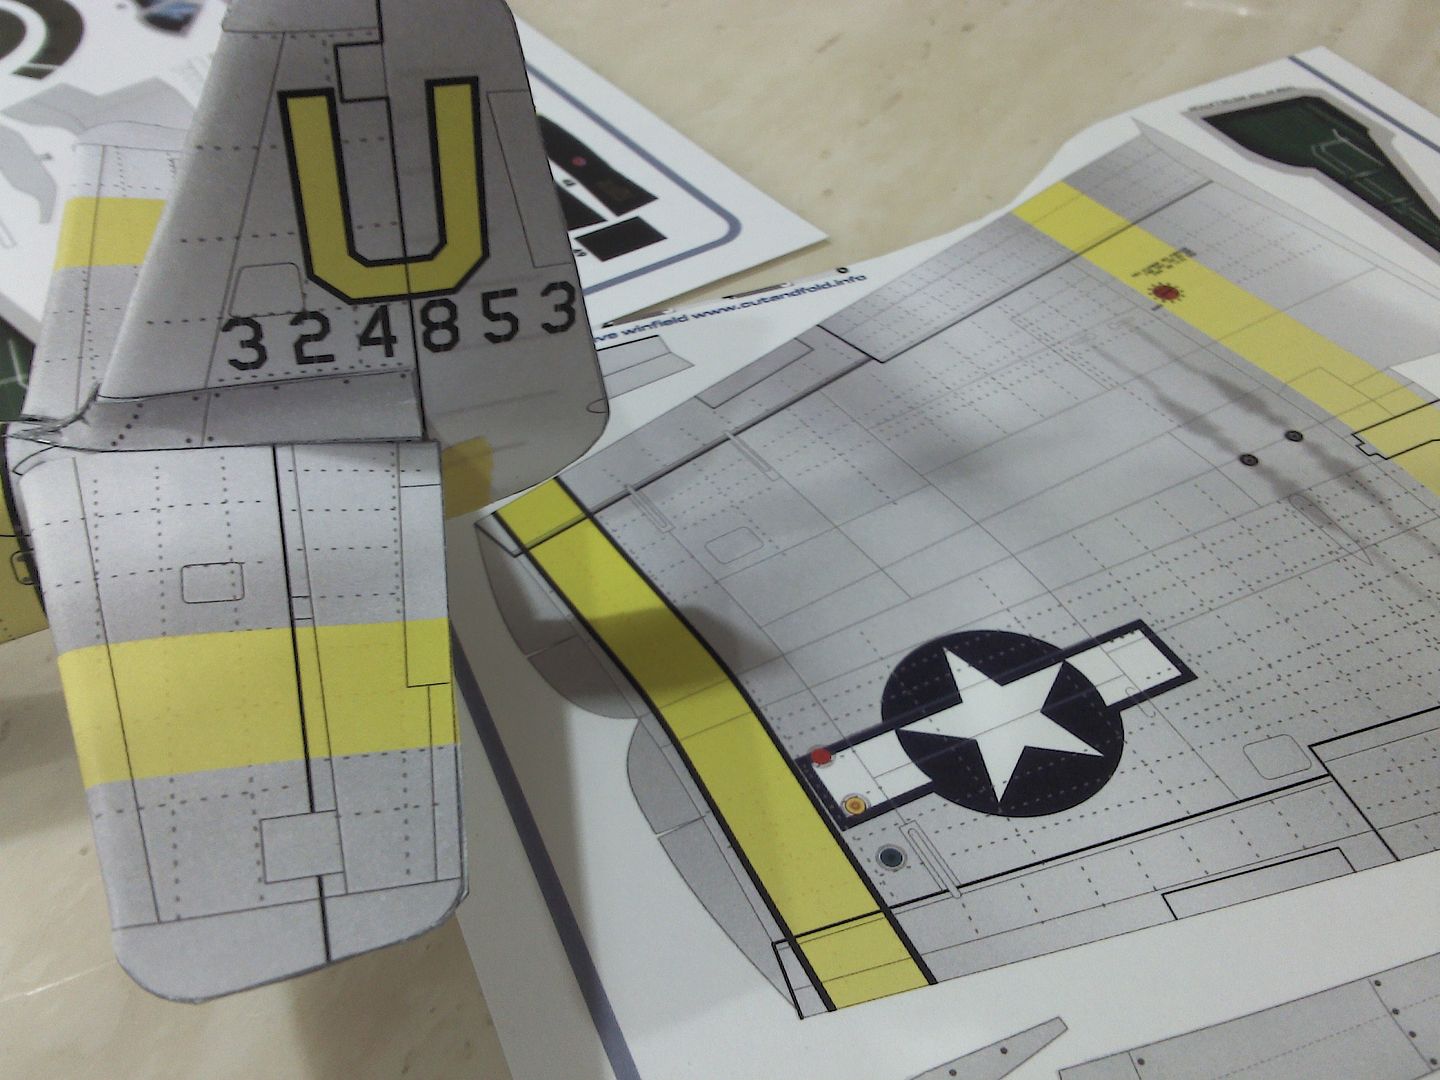 In the sun> 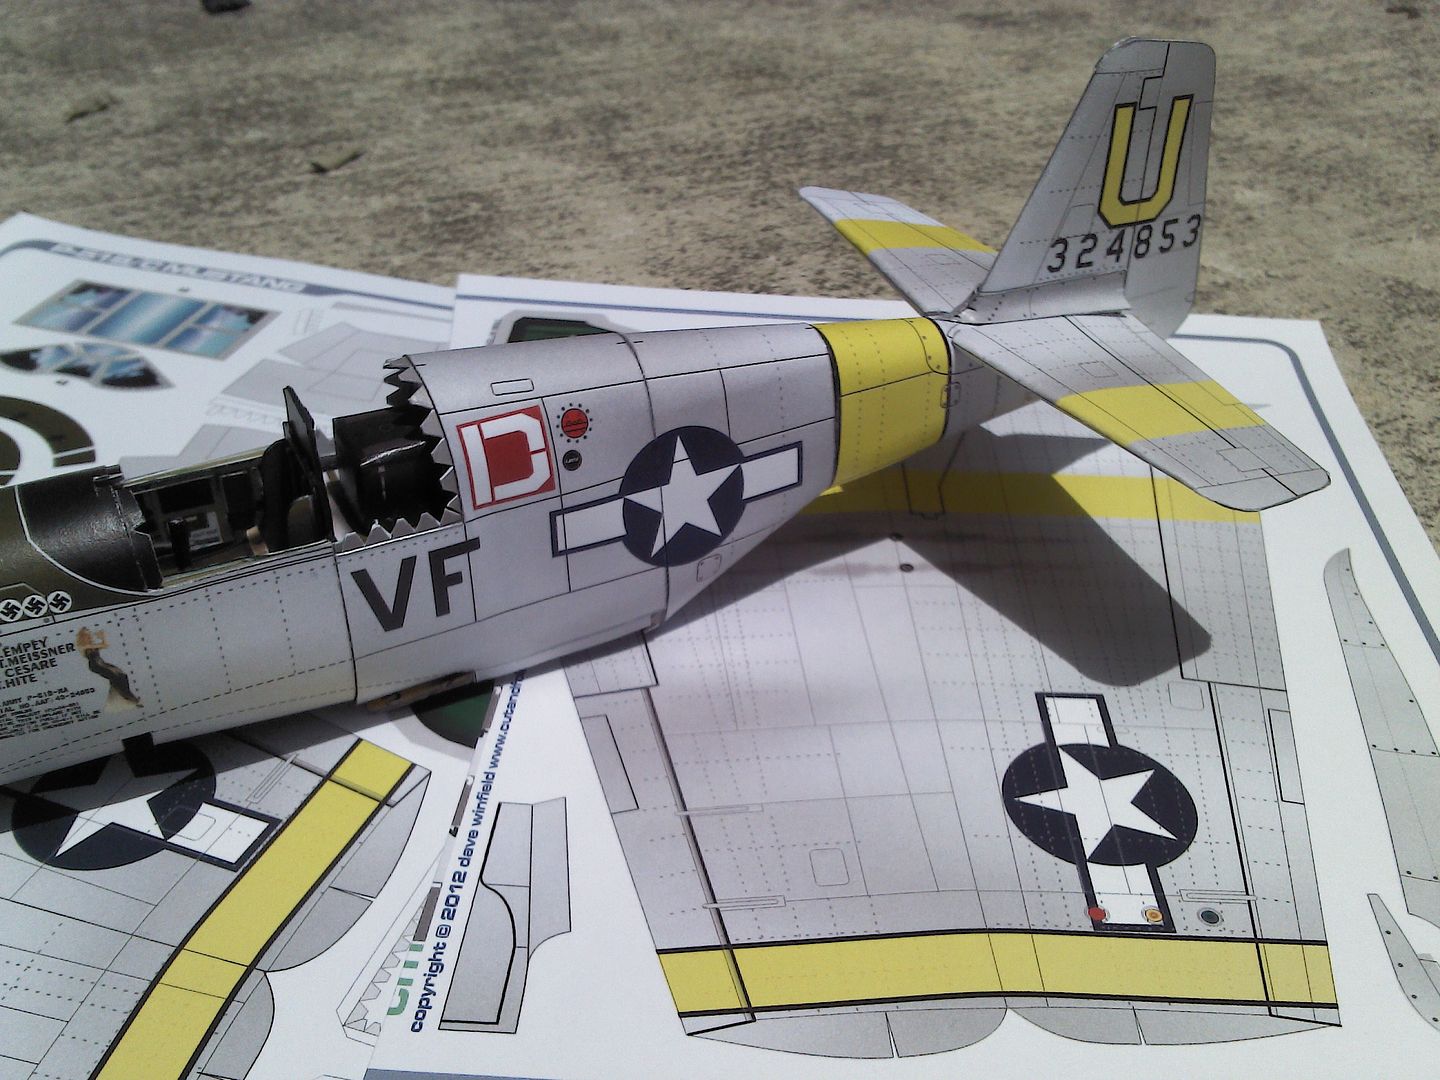
|
|
#18
07-11-2013, 12:09 PM
|
||||
|
||||
|
nope...sorry...I don't like that colour!
your print is a little different than mine, but I still think the colour is too pale. and another thing!! lol I just started work on the file...to adjust the yellow colour...and I found that the spinner and front of the plane is green (like the cowling). Its supposed to be RED!! In fact, I do have a red colour layer in my design...only its buried under the green layer!! Somehow I never noticed it got hidden. probably happened because I did the cowling green colour later in the design process. And then I went ahead and did the cover artwork using the visible colours in my model artwork. So its wrong too. I am so sorry Gerardo...but I will have to send you a whole new kit. I will fix the model right away!...and get a new version sent off to you as well as update the model at ecardmodels. BIG APOLOGIES for this blunder.
__________________
SUPPORT ME PLEASE: PaperModelShop Or, my models at ecardmodels: Dave'sCardCreations
|
|
#19
07-11-2013, 12:48 PM
|
||||
|
||||
|
Looking great, keep it coming.
Gary
__________________
"Fast is fine, but accuracy is everything" - Wyatt Earp Design Group Alpha https://ecardmodels.com/vendors/design-group-alpha
|
|
#20
07-11-2013, 04:12 PM
|
||||
|
||||
|
Ok, guys... I will re-print the model later today, and start anew tomorrow.
No problem, we still have time. Thanks Dave!
|
| Google Adsense |
 |
| Thread Tools | |
| Display Modes | |
|
|


 Linear Mode

