


|
|
|
#1
 04-26-2014, 01:52 PM
|
||||
|
||||
|
Thai Paperwork P-51D model
Completed my first serious aircraft model. Creamer's Dream P-51D from Thai Paperwork available at ecardmodels.com.
It was enjoyable but there are quite a few mistakes by me in the finished product. Necrosoping was used to bond the structural parts to some cereal box material. It did not work out, probably because I did not apply the correct heat for the correct amount of time. The cereal box material was also not really stiff enough. It got distorted with handling. Bristol board and cardstock will be used next time. The structural parts had "+" indicators so I figured that meant bond to 0.5mm material. Unfortunately the joining strips are included on the same sheet as the structural parts so some separation had to be done. The outer parts were printed on some grey metallic 120gsm (81lb) paper. That is why the graphics are so dull. Non-industrial camo.  I have some 176gsm/65lb white metallic(Crystal) cardstock that will be used on the next one. I finally figured out that you use the lines on the fuselage to gauge where the parts are attached. Some had to be flared out a little. Did not do such a good job on those, though. I did not get the wing assembly matched up with the area on the fuselage and far enough back so the wing root part did not go on correctly. Next time I will try to get the wing assembly closer to the indicator lines on the fuselage and figure out a better way to attach that wing root. I see now why some people have trouble with those parts You will notice in the pictures that the wings are a bit funky. I had to take one of them apart after the glue dried to fix a problem and made it worse. All of that manipulating kind of mess up the other wing too. The thin paper did not help with the final shape. Surface gluing the main landing gear did not seem strong enough, or seemed too easy to knock loose so I made some small holes in the bottom of the fuselage and inserted them into those. I had to guess where the landing gear went. I also cut a small slit to insert the antenna. It kept getting knocked off. You will notice one of the propeller blades is a bit crooked too. That is what happens when you don't pay enough attention to the orientation of the blade to the root. The propeller hub had indicators for the placement of the blades. It turned out to look like the blades are pitched in neutral. If the model is to be built without the landing gear down to make it look like it is in flight the angle of the blades will need to be changed or a clear disk attached to look like a spinning propeller. So, next time use thicker paper, follow the clues on the fuselage for placement of parts, pay more attention to how the pieces are going together, use some different material. Still lots of fun, though.  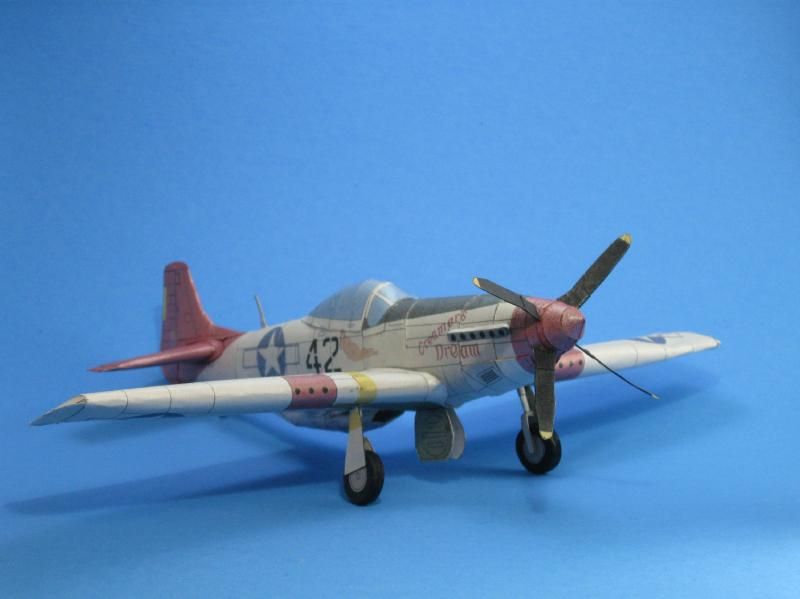 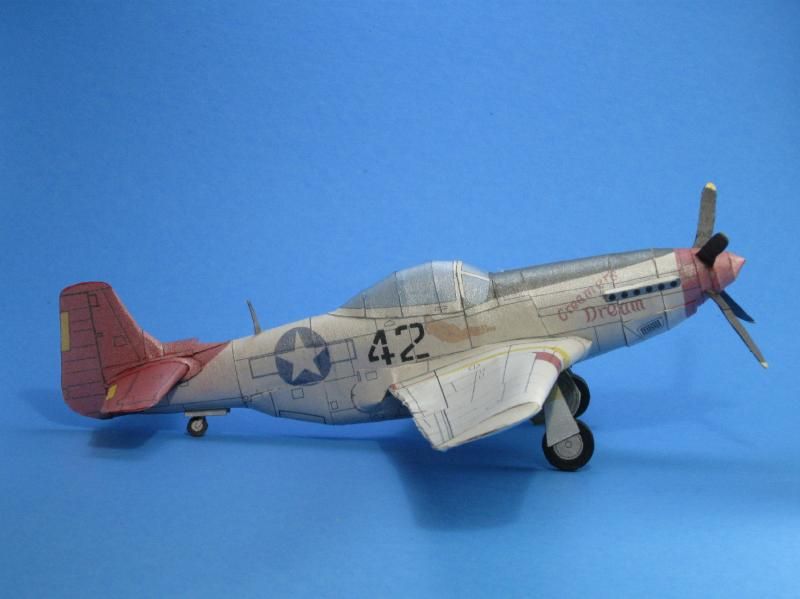 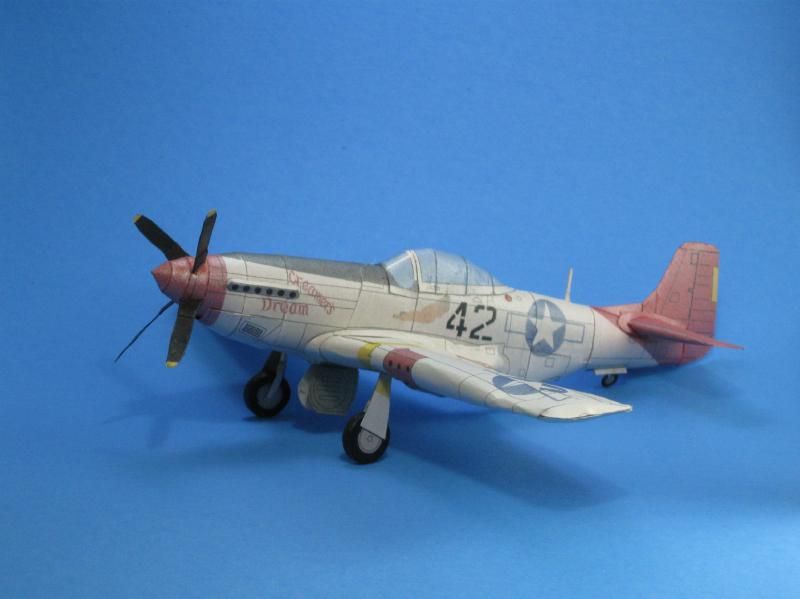
__________________
~Doug~ AC010505 EAMUS CATULI! Audere est Facere THFC 19**-20** R.I.P. it up, Tear it up, Have a Ball 
|
| Google Adsense |
|
#2
04-26-2014, 02:09 PM
|
||||
|
||||
|
nice job doug.
|
|
#4
04-26-2014, 05:11 PM
|
|||
|
|||
|
I am constructing "Gunslinger" P-51. I too have had to study the instructions and ensure I am installing a part correctly. Like you, my wings are not quite fitting properly. I still have not decided on how to overcome that problem. Thanks for sharing your findings on constructing this model. But, it is a whole lot of fun and very good therapy! LOL
|
|
#5
04-26-2014, 05:14 PM
|
||||
|
||||
|
I love it, nice job Doug.
Gary
__________________
"Fast is fine, but accuracy is everything" - Wyatt Earp Design Group Alpha https://ecardmodels.com/vendors/design-group-alpha
|
| Google Adsense |
|
#6
04-26-2014, 05:45 PM
|
||||
|
||||
|
Nice build, Doug. I think you overcame any problems.
JoeG
__________________
Currently building Heinkel Models/Ron Miller Authentic Nautilus.
|
|
#7
04-27-2014, 06:07 AM
|
||||
|
||||
|
good one Doug,i know what you are saying,i have nearly completed the same p51d in Israeli markings and the vagueness of the instuctions re placement of parts and lack of fold line indicators took away much of my build pleasure.looking forward to your next build
__________________
I think life is a big game, and i keep loosing because i never learned the rules.
|
|
#8
04-27-2014, 07:23 AM
|
||||
|
||||
|
Thanks for the comments.
It wasn't actually the lack of fold lines that presented the problems. Most of the doubled over parts did not require a sharp bend, like the wings and tail. It was me at first not noticing the lines on the fuselage that gave the positions for the parts to be attached. No biggie since after a while my brain engaged. Listening to some Tull did not help either. Another small annoyance was the same part number on two structural pieces. 13a+ was used twice. One was a black piece with a centerline, the other was a white piece with a semicircle cutout to make it look like a fat "u" and a center line . The graphic on the instruction page showed part 13a+ looking like the black part without a semicircle cutout used to shape part 13. That did not work. The other part 13a+ with the semicircle cutout is what should be used. The black 13a+ seems to be used inside the air scoop part 12 to help shape it and to hide some of the interior. There were some small black lines on parts to help align them with other parts that they were attached too. That was a great help. However there where some other small black lines on some parts that seemed to indicate that a small cut would be needed to help shape a curve. At least that is what I got from it when remembering the same convention on other models constructed before. Those models had clear instructions, either written or in graphc form to indicate the need for a cut. There was no explanation in the P-51D graphic instructions, though. I figured the cuts could be made and if that is not what was intended then some glue could be used to fix it. It all worked out in the end, sort of. Those wing root pieces were a bear. The use of the joining strips for the fuselage parts is good. Much better look. The model is a nice one and looks good even with the gross errors on my part. Those P-51D offerings from Thai Paperwork are worth the effort. And in reference to the landing gear attachment in my earlier post, they were attached to the wings not the fuselage. ")
__________________
~Doug~ AC010505 EAMUS CATULI! Audere est Facere THFC 19**-20** R.I.P. it up, Tear it up, Have a Ball
|
|
#9
04-27-2014, 01:49 PM
|
||||
|
||||
|
i just printed out Nobi's 'Hurry Home Honey' p-51d mustang. the color scheme imo is just among the most gorgous paint schemes ever applied to a mustang. only topped by 'Miss America' and 'lady alice'.i appreciate your imput for it allows me to look forward to the things i have to accmplish for this model.
|
|
#10
04-28-2014, 03:18 AM
|
||||
|
||||
|
sorry Doug
sorry to cause any confusion,i should have picked up on your title.my criticism is of the instructions provided for my E Zarkov p51d
__________________
I think life is a big game, and i keep loosing because i never learned the rules.
|
| Google Adsense |
 |
|
|


 Linear Mode

