


|
|
|
#1
 03-22-2016, 09:40 AM
|
||||
|
||||
|
CT-114 Snowbirds (by Dave Winfield) Build
Greetings folks,
This thread is dedicated to my build of Dave Winfield's superb 1:33, Canadair CL-41 (RCAF CT-114) model in the Snowbirds livery. This will be a slow build, as I don't typically get a lot of free time to work on papercrafting; but I will do my best to work on it on a regular basis. Hopefully, I'll manage to post updates of the build progress regularly also. I started the build in early February. I started by printing and clearcoating all the sheets and laminating internal formers to double thickness heavy card. The picture below shows the internal formers for the fuselage cut out and mostly ready for use, along with first couple of sections of the fuselage being assembled. 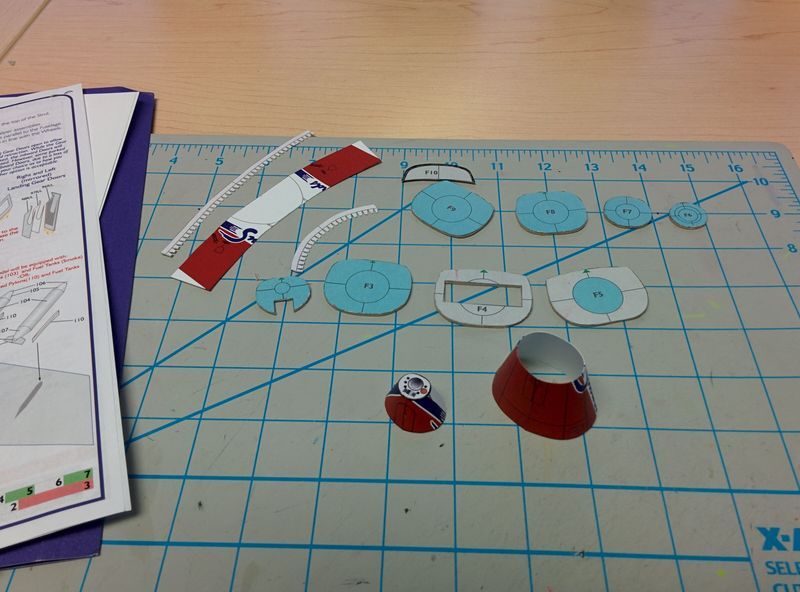 For this build, I decided to use a glue that I've never worked with before. I usually use common white PVA glue; but this time, I'm using Tombow Mono Aqua. So far, I really like this glue.  Continuing on with my build, I have proceeded to begin assembly of the fuselage, starting with the front end. The picture below shows the first two sections assembled, with former F1 in place, and the nose detail face attached. The nose detail face I've used is my own version, which I drew up before Dave posted his official version. 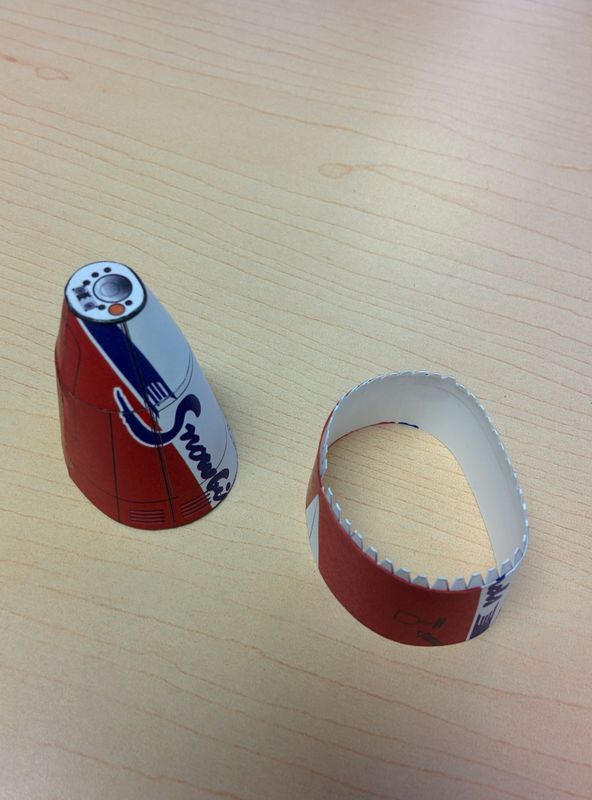 Of course, I haven't attached the 3D antenna and orange light parts to the nose face yet. It would imprudent to do so at this stage. You can also see that I've got the tab strip mostly glued onto the the third section. For this build, as with all of my aircraft builds so far, I'm planning to build wheels up. I just prefer to have my aircraft models appear to be in flight. Unfortunately, a bit of sloppy work on section 2 has forced me to rethink that decision. When I first assembled fuselage section 2 into its initial tube form, the part shifted ever so slightly open at its front end. The gap in the seam wasn't very wide; but the bright white of the tab strip below was still quite obvious. I tried to remedy this problem by coloring the exposed underlying tab strip with the brush tip of the marker I bought for edge coloring; its tip is very narrow. The marker's tip wasn't narrow enough, it seems; the sides of the brush tip contacted the edges of the piece and absorbed a significant amount of ink. You can see the marker stain on section 2, near the seam at section 1 in the image below. 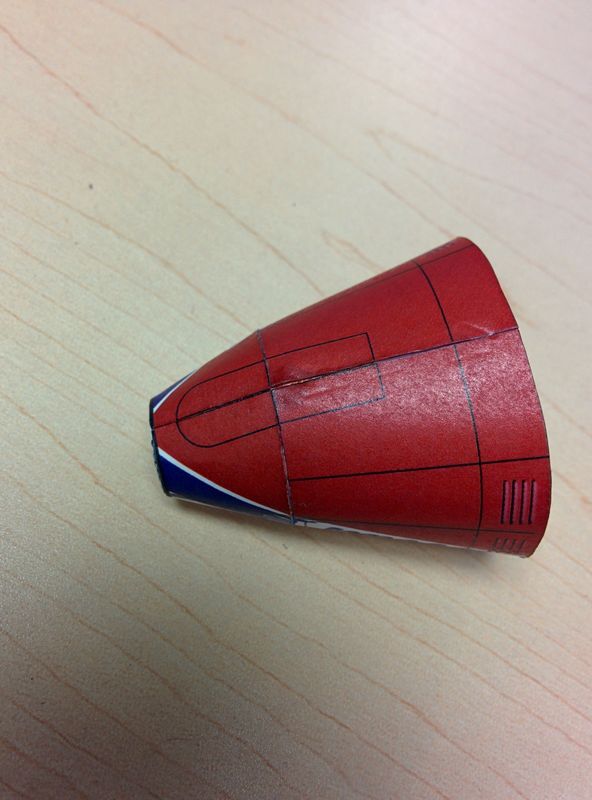 This has left me with a few options. Since I've only assembled two sections so far, I could reprint them and rebuild them from scratch. Alternatively, I could take this opportunity to build this model with wheels down, thus cutting out the stained wheel well doors. A third alternative is to cut out the stained wheel well doors and replace them with new clean wheel well doors in the closed position. The marker stain isn't too obvious when viewed from a distance; so I could just leave it as is. But, my own conscience won't likely let me do that; if left as is, that stain would haunt me like as surely as Lady Macbeth was haunted by guilt. I'll most likely start with the third option above - replace the wheel well doors in closed position. If that doesn't work, or looks bad, then I'll move to a wheels down build or restarting the build.
__________________
Leo "14thWarrior" M. Lalande 
|
| Google Adsense |
|
#2
03-22-2016, 09:44 AM
|
||||
|
||||
|
This is better Leo. Great start on the nose. I saw from your other thread that you have spent a lot of time on the nose cone. Great job and keep up the good work.
Gary
__________________
"Fast is fine, but accuracy is everything" - Wyatt Earp Design Group Alpha https://ecardmodels.com/vendors/design-group-alpha
|
|
#3
03-22-2016, 09:50 AM
|
||||
|
||||
|
I plan on building this model with a clear vacuum formed canopy; and even more ambitiously, I plan on building it with a clear nosecone to show the headlight and nose detail.
I started with the nosecone mold build, which I decided to try to fashion out of epoxy resin. It seems like a good material to use to create a positive mold for such a small part like the nosecone. I assembled a copy of the paper nosecone, inside out, then filled it with 5-minute epoxy. This is the epoxy nosecone mold after initial removal of the cardstock. 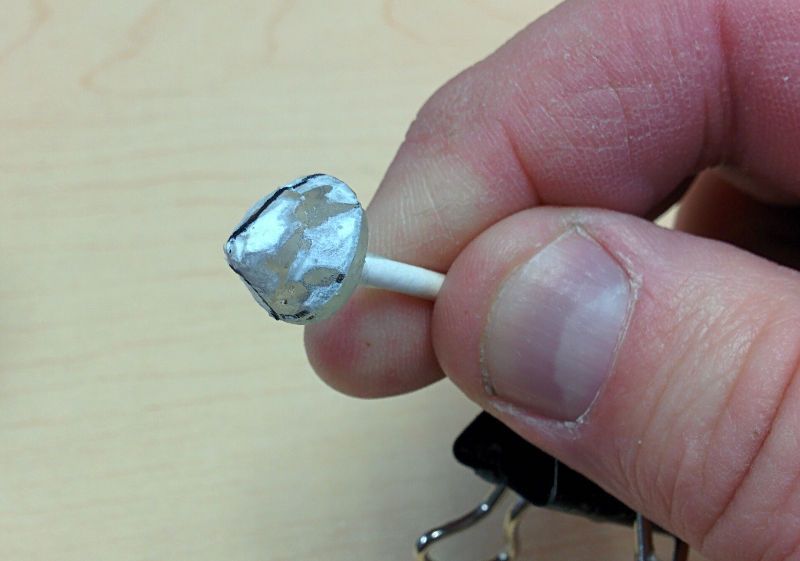 Final shaping of the nosecone would clearly require a lot of extra work. The more I looked at my epoxy nosecone mold the more I felt that it didn't look quite right. So, before I sunk a lot of work into continued smoothing of the mold, I decided to find a reference for the nosecone's profile. I was lucky enough to find this image:  Using this image, I created a nose profile gauge to check the shape of the epoxy mold. 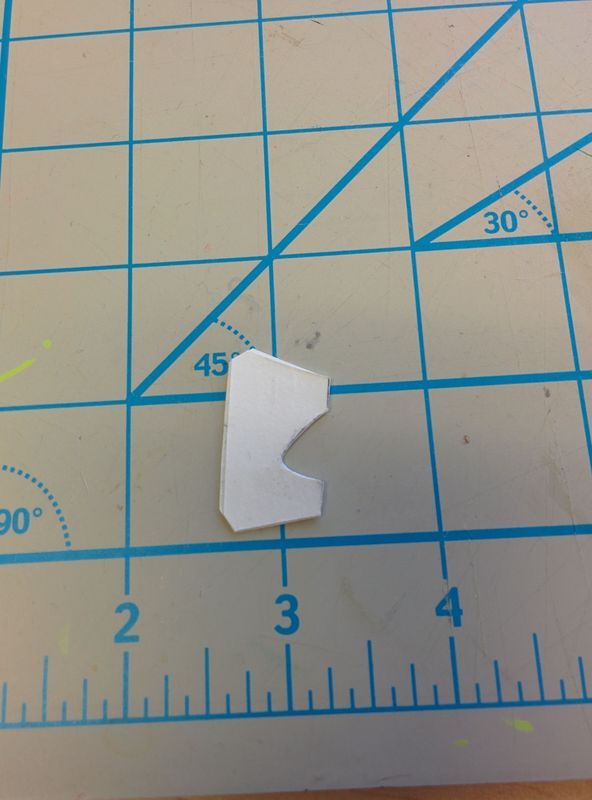 When I placed this gauge up against the epoxy mold, it became quite apparent that the mold was very wrongly shaped. 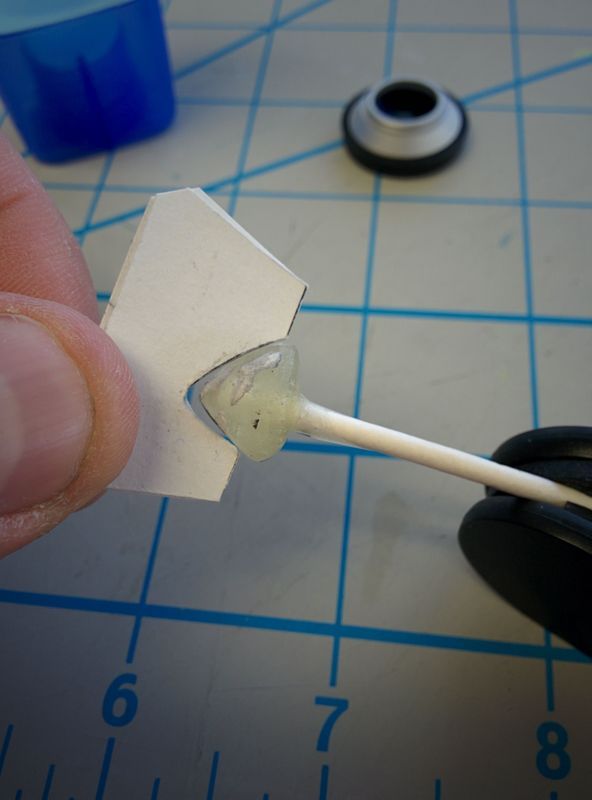 Seeing this, I decided to ditch this first epoxy mold and start on a new one. The first thing I had to do was assemble a new copy of the paper nosecone. This time, I was much more careful about the shape; and I attached it to a piece of cardstock that had the shape of the the nose faceplate/former F1. By doing so, I was able to ensure that the nosecone had the right initial shape in every way. 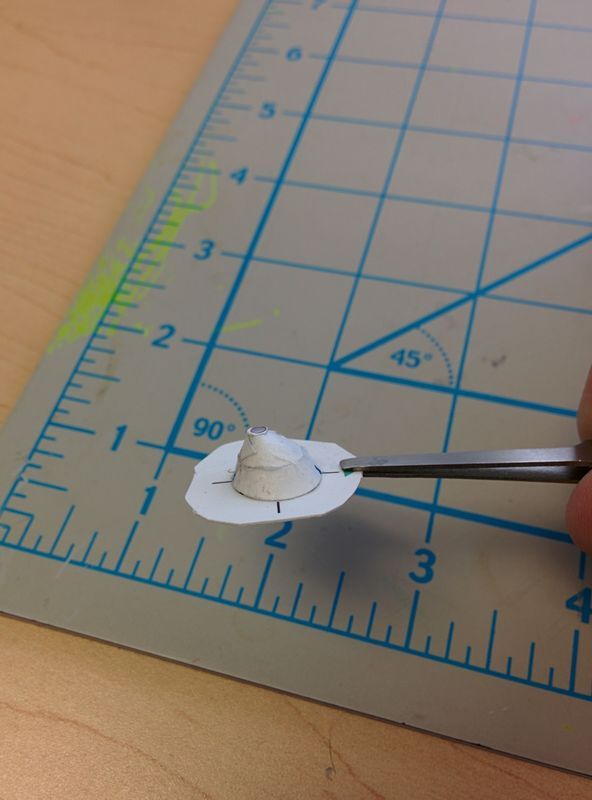 Before gluing the nosecone to the backing card, I cut a small hole for pouring the epoxy into to create the mold. 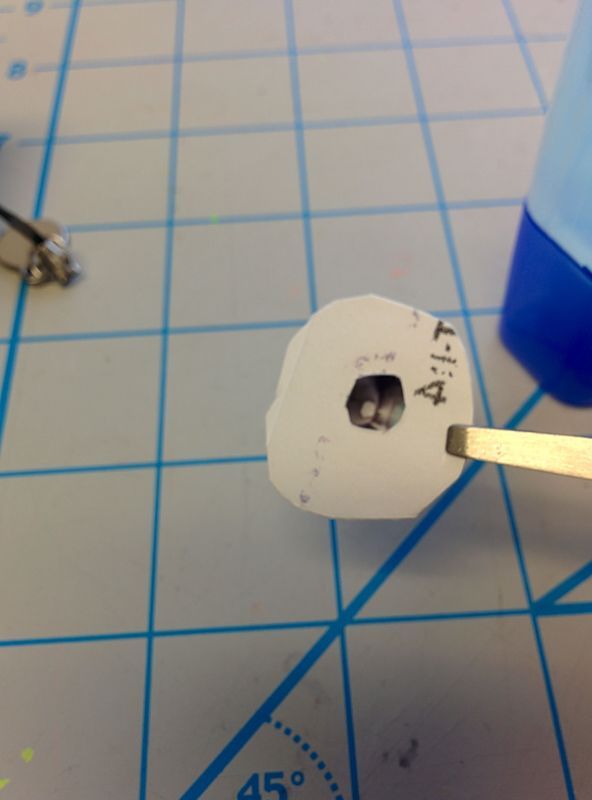 Now, putting the nose profile gauge up against this new nosecone negative mold, the initial shape is very much closer to the correct profile. 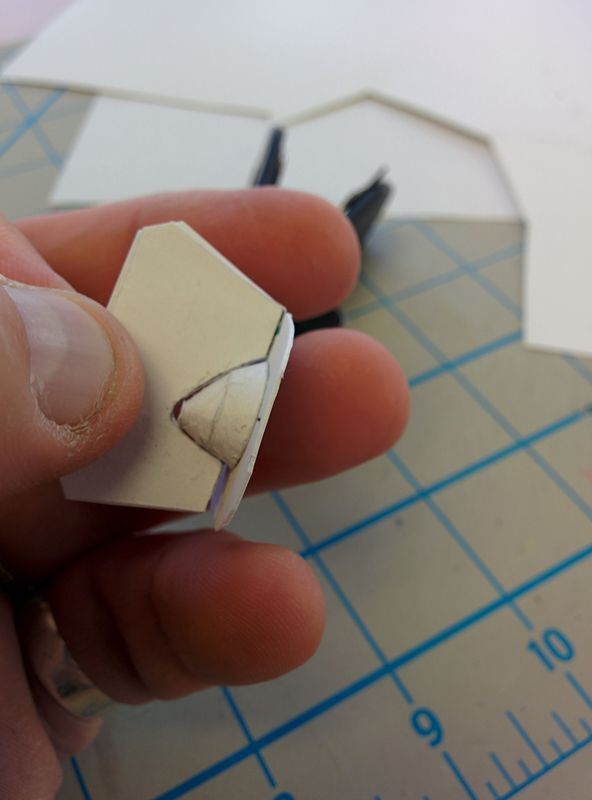 The profile gauge doesn't match the nosecone perfectly; but that's to be expected. The nosecone has glue tabs on the outside, and I also glued a layer of tissue paper onto it to provide extra support to the untabbed seam that runs around its midsection. Nevertheless, with the much closer initial profile and the backing card to give the whole thing stability, I hope to be able to produce an epoxy positive mold that is much closer to the correct shape without needing an extreme amount of additional shaping beyond sanding and smoothing. The last thing I did to the negative mold of the nosecone was to attach it to a card cylinder so that it will sit level when I fill it with epoxy. 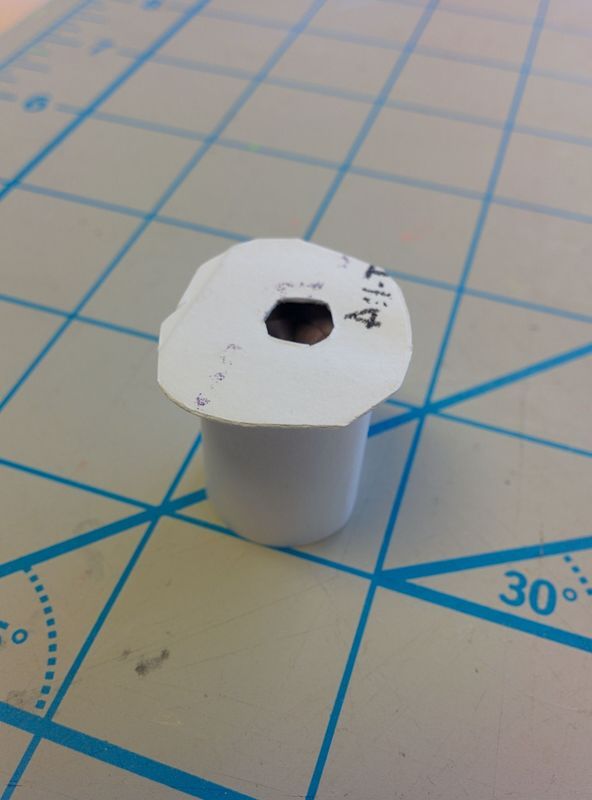 I'm now ready to fill the negative mold with epoxy to produce the positive mold for vacuum forming. I'm out of epoxy; so I won't be moving any further on this part of the build until I get to a store. But I'm in no rush to finish the mold at this early stage of the build. My next step on the nosecone and canopy front will be to actually build a vacuum former. I've got a pile of MDF panels I saved from my son's old loft bed/workstation breakdown. It was one of those massive loft beds that had steps up to the bed and drawers integrated into the steps. I pulled it apart until all that was left was a nice sizeable desk for doing his homework. Many of the drawer panels are perfectly sized for building a modest vacuum forming box. I hope to start putting it together soon; but I won't be able to get started on that until after Easter.
__________________
Leo "14thWarrior" M. Lalande
|
|
#4
03-22-2016, 09:52 AM
|
||||
|
||||
|
Quote:
I have indeed put a lot of work into the nose so far; but it's been fun and has been an excellent learning experience. I'm confident that all this work is going to significantly improve my modelling proficiency.
__________________
Leo "14thWarrior" M. Lalande
|
|
#5
03-22-2016, 03:21 PM
|
||||
|
||||
|
I can see now the pics as well!
I'm following you now
|
| Google Adsense |
|
#6
03-23-2016, 08:03 PM
|
||||
|
||||
|
I took a shot at fixing the stained wheel well doors today. I cut the original doors out of the fuselage and cleaned up the edges as best as I could. I then glued in a backing strip to provide support to the replacement doors which would be going back on in the closed position.
The next step was to cut the two wheel well doors, color their edges and glue them together using a custom made tab strip. In hindsight, I might have been able to glue each door directly into place on the fuselage; but I think that might have been more fiddly. This way, I was able to very carefully keep the doors together in the right position. After the doors were put together, I glued them into place in the fuselage. In the end, this is the result I got. 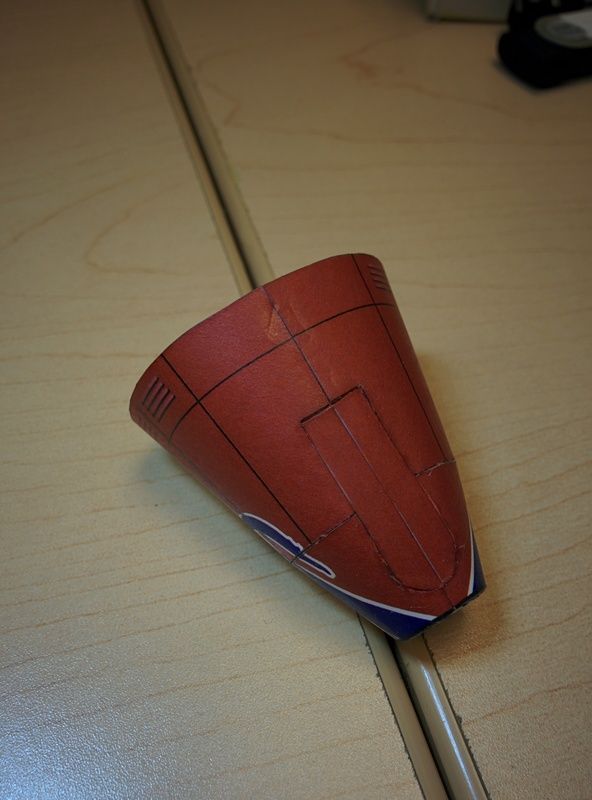 Not a terrible result, if I say so myself. It's far from perfect, but it has a certain character. The seams around the doors actually seem to make it look more real. I think I'm more bothered by the dent left by the binder clip on the back end of that section's bottom seam than I am about the little imperfections in the redone wheel well doors. This next image shows the backing strip that provides support to the new wheel well doors. You can also see the F2 internal former in place as well. 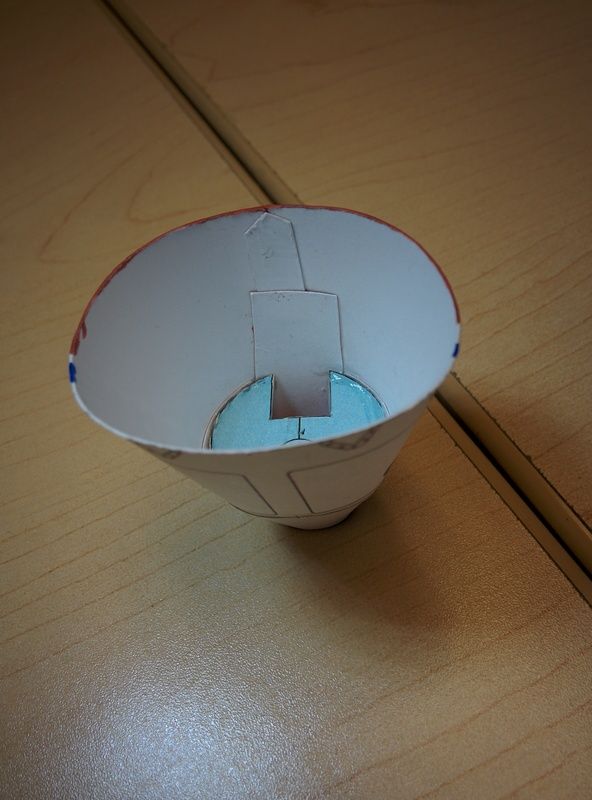
__________________
Leo "14thWarrior" M. Lalande
|
|
#7
03-23-2016, 09:13 PM
|
||||
|
||||
|
Gear doors look great.
Dent does not. All the damage is on the underside. It won't be that visible when the model is displayed. Chalk it up to experience and move on. Build another one and be more careful next time. ...you could build a different Tail number.
__________________
SUPPORT ME PLEASE: PaperModelShop Or, my models at ecardmodels: Dave'sCardCreations
|
|
#8
03-24-2016, 08:07 AM
|
||||
|
||||
|
Indeed. I'm definitely seeing myself build a few of these planes in the future, considering all the different versions there are available.
__________________
Leo "14thWarrior" M. Lalande
|
|
#9
03-27-2016, 07:08 AM
|
|||
|
|||
|
Great tutorial. I've purchased the plans and sit on the fence to start. May I ask what you used for clear coating and where you purchased the glue? I am secretly waiting for AirDave to mass produce canopies......
|
|
#10
03-27-2016, 07:58 AM
|
||||
|
||||
|
The clear coat is Krylon satin/semi-gloss. I bought it from Canadian Tire. I'll post a pic a son as I'm able. I got the Mono Aqua glue from Michael's.
__________________
Leo "14thWarrior" M. Lalande
|
| Google Adsense |
 |
|
|


 Linear Mode

