


|
|
|
#1
 07-21-2016, 03:35 PM
|
||||
|
||||
|
Hanger CZAF 1:33 Aero L-39 CM Albatros TP004
Hey all,
I have been meaning to start this build for a long while now. Agostini did an amazing job in designing this model. The printed details are great and look impressive in this scale. I'm not planning on doing an full on construction log with this, just the major steps. Here is the kit cover page  There are many former pieces to glue onto heavier card. * denotes 0.5mm card, and ** is 1mm card.  Right now, I'm working on cockpit components. I decided to start with the seats  I then went about making all of the bits and pieces that will fill in the cockpit. This includes the control sticks, seat ejection handles, head rests, lower instrument panel (go between pedals), and the HUD.  I also built the cockpit tub and added the teeny weenie throttles.  The last bits that I have finished so far are the instrument panels (front panel w/ HUD installed), rudder pedals, and the two main wheels. I still need to sand and form the wheels into proper shape.  The only issue I am having so far is that a few of the pieces are no where to be found on the instruction diagrams. Specifically parts 125a, 134a, and 104. I know that they all go in the cockpit, and that 134 is likely part of the seat belts, but none of them are in the diagrams. I tried to find the parts in Agostini's build thread here, but the pictures are no longer visible. if any of you have built this kit and can help, I'd appreciate it. I sent a mesage to Agostini the other day and am waiting for a replay.   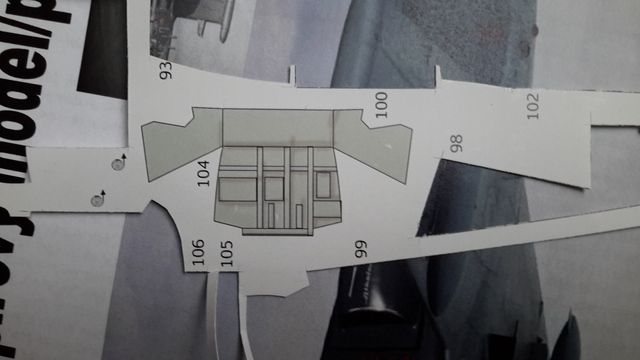 [/URL] [/URL]

|
| Google Adsense |
|
#2
07-21-2016, 05:53 PM
|
||||
|
||||
|
Great looking cockpit. Looks like a really nice kit.
Gary
__________________
"Fast is fine, but accuracy is everything" - Wyatt Earp Design Group Alpha https://ecardmodels.com/vendors/design-group-alpha
|
|
#5
08-02-2016, 06:19 AM
|
||||
|
||||
|
Work has continued. I think I have figured out where the mystery pieces go. I spent a lot of time staring at all of the pictures that Agostini posted that are stil visible. It may not be exactly correct, but so far they fit.
Part 104 was the part that formed the bulkhead between the front and rear cockpits. I got it shaped how I think is correct and mounted the rear instrument panel on top.   I also got the seat belts on. I still couldn't figure out what part 134a is, but the seats look good without.  The landing gear also have been finished. I used my pin vise to bore an opening through each wheel. I then put the wheels into my Dremel, and sanded them into shape.    The nose gear is a darker blue because I had to color the light blue area with a Sharpie. I had to brush the really thin parts of the gear leg with super glue to support the weight of the plane, and it discolored the paper, hence the marker.
|
| Google Adsense |
|
#6
08-02-2016, 12:27 PM
|
||||
|
||||
|
Very promising work so far, I'm excited to see the albatross complete

__________________
PAPERENGINEER Designs in progress: -C-2A Greyhound -Br.1050 Alize
|
|
#7
08-02-2016, 12:50 PM
|
||||
|
||||
|
good work, the cockpit is getting well, perhaps I will finish modern jet pilots to fit it,
regards
|
|
#9
08-03-2016, 11:59 AM
|
||||
|
||||
|
You do incredible good work Coach. Very nice cockpit with lots of eye candy to gaze at. Your idea of making the tires is one of my all time favorites of yours. I've used this method time and time again. Beautiful. I look forward to seeing the rest of your build. This is going to be a fantastic build. Thank you Brett for showing and sharing. wc
|
 |
|
|


 Linear Mode

