


|
|
|
#11
 12-29-2016, 02:50 PM
|
||||
|
||||
|
Quote:
__________________
A fine is a tax when you do wrong. A tax is a fine when you do well. 
|
|
#12
12-29-2016, 08:27 PM
|
||||
|
||||
|
Al, your first panel was amazing. I can only shake my head in wonderment that you are so quickly taking another such project. Hats off to you, sir!
__________________
Chris Coyle Greenville, SC "When you have to shoot, shoot! Don't talk."
|
|
#13
01-02-2017, 05:20 PM
|
||||
|
||||
|
Sonia Clock cont.....
PMs - Happy New year!!!
Thanks for the encouragement guys, I'm glad you like this style of paper modeling, I hope it catches on and other guys give it a go. I have had a number of Pers Messages asking for further details and other interesting ideas, I will assist where I can. As for the clock. I had a bash at her this evening. As you may remember, the centre section required painting and the bezel face required knurling around the edge. on my last clock I used plastic packaging. I had a thought and made my own knurling or corrugation as I think its called out of paper. I cut a piece of paper the required thickness: 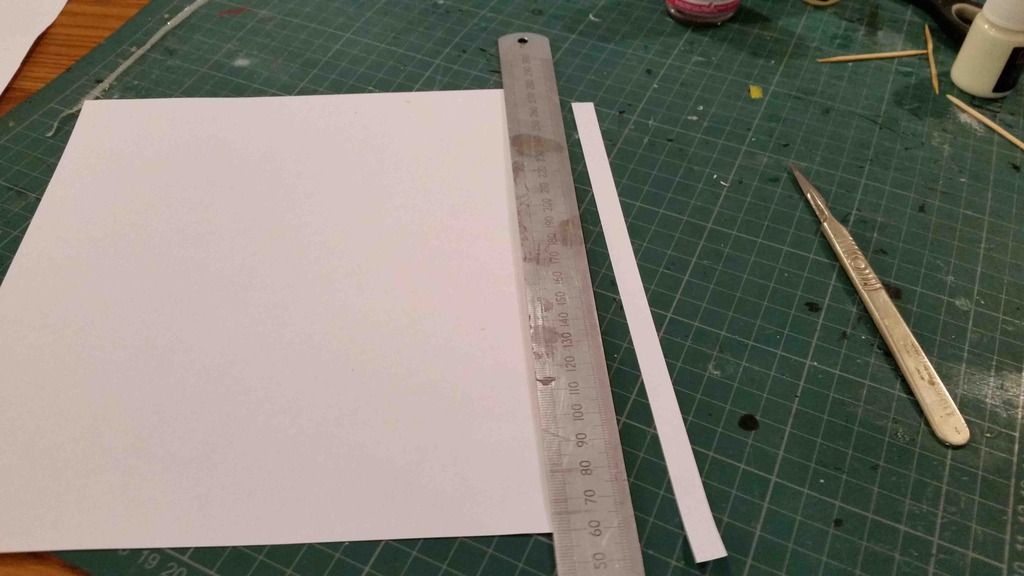 I next utilised the cap of my fluorescent paint as a press: 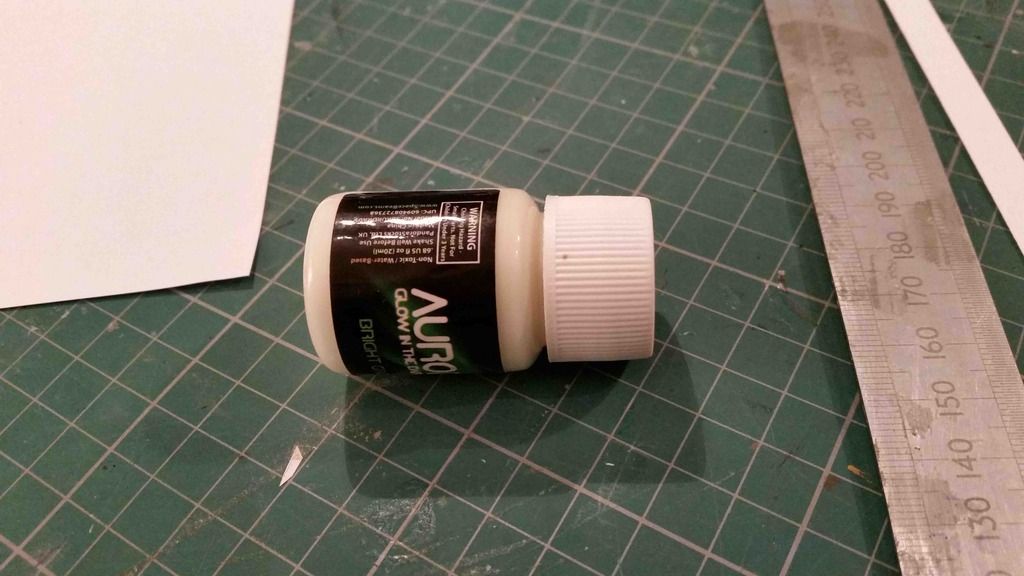 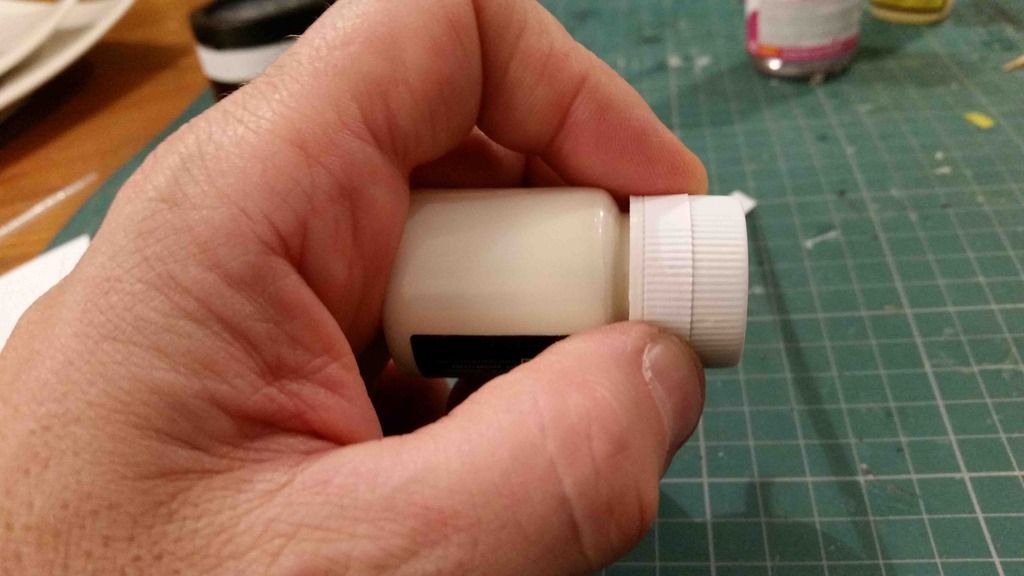 Once pressed to the cap with a tooth pick the paper looked like this: 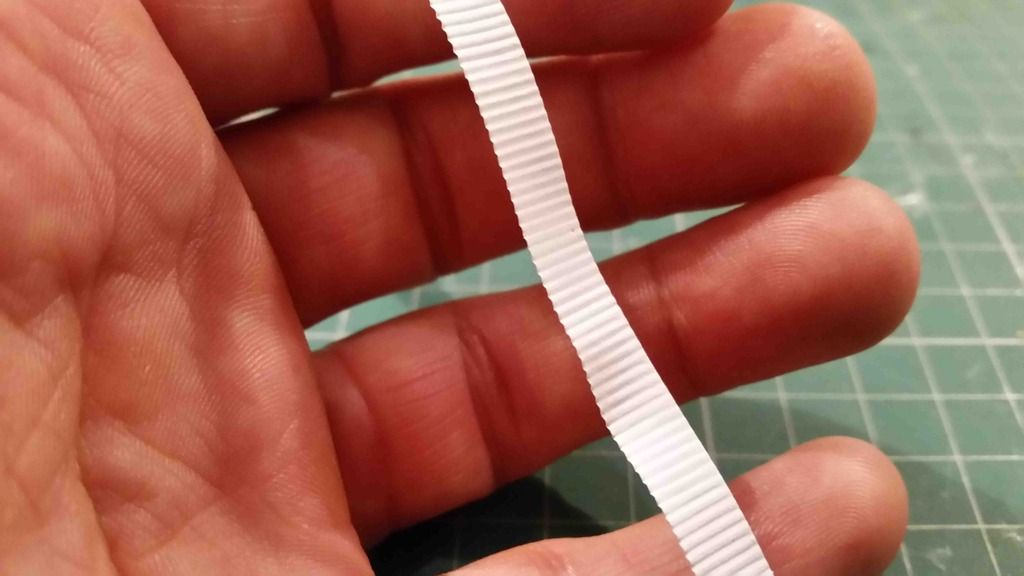 This I then stuck to the upper clock face bezel: 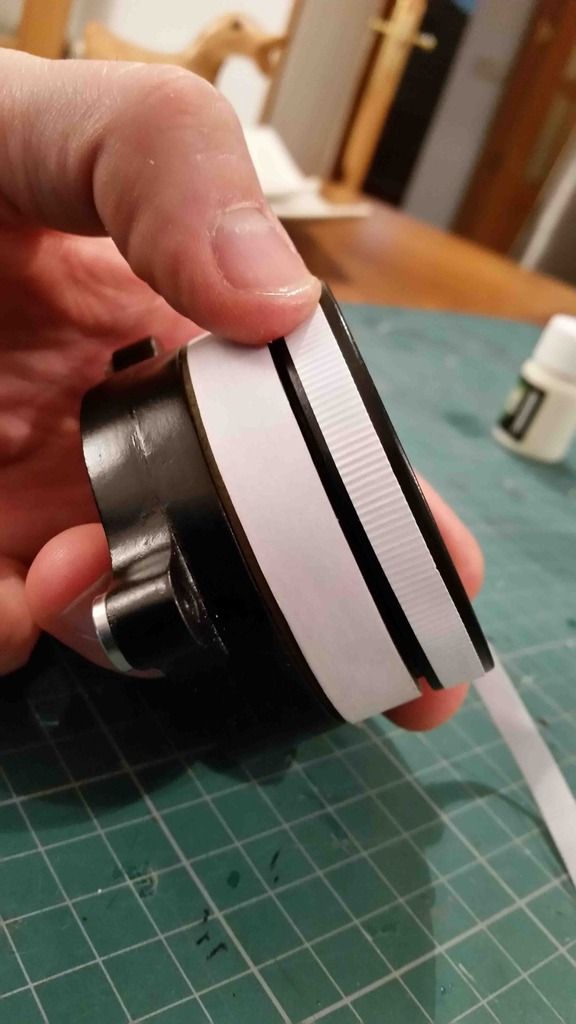 Looks quite effective: 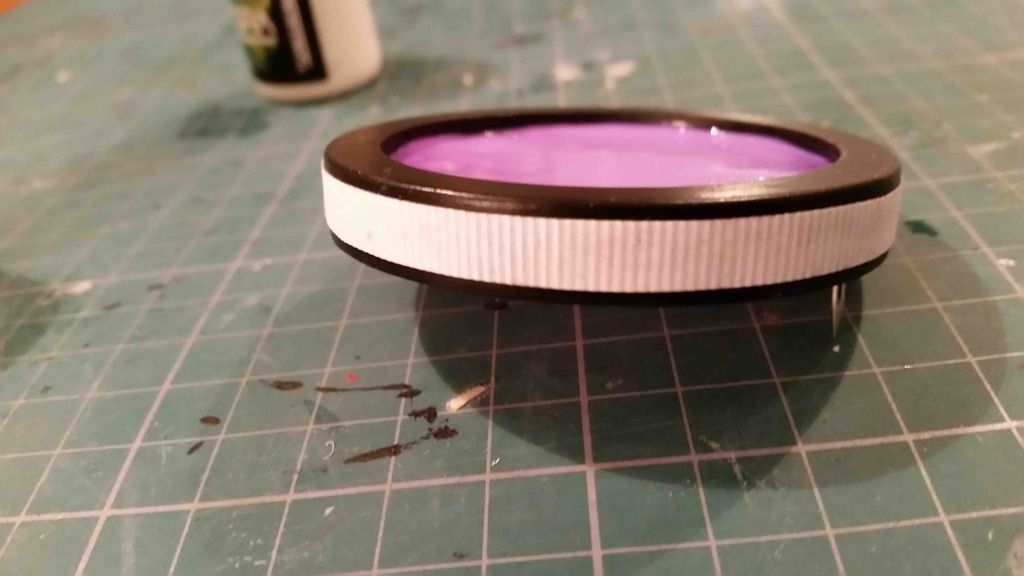 I next painted the bezel and the centre section black: 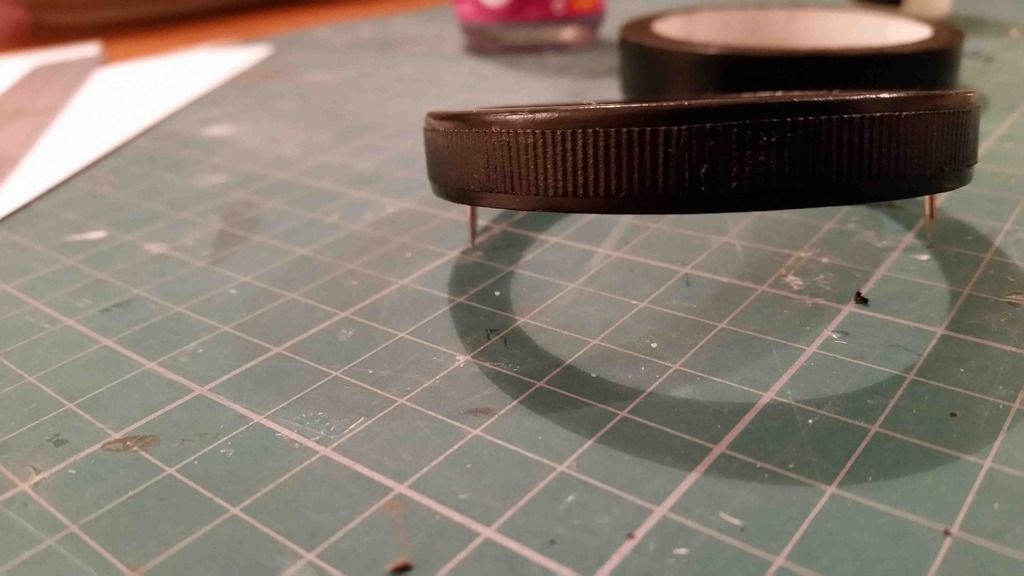 I placed the clock hands and second hand on the face then attached the bezel, 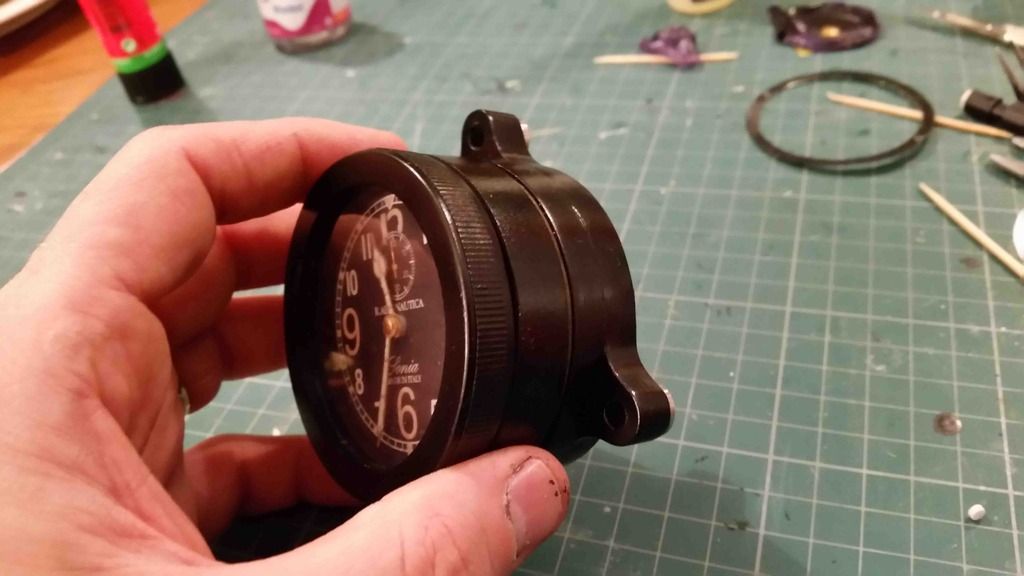 If all goes well, I should be able to construct the brass winder/adjuster tomorrow (finishing the clock before returning back to work). Enjoy
|
|
#14
01-07-2017, 06:03 PM
|
||||
|
||||
|
Clock Continue
PMs
OK, Ive just complete the Sonia, R Aeronautica Clock. The final piece of the clock is the brass adjuster/winder. This is found at the bottom of the clock and sticks out some! I first started with a paper lolly pop stick which the whole winder is built around. 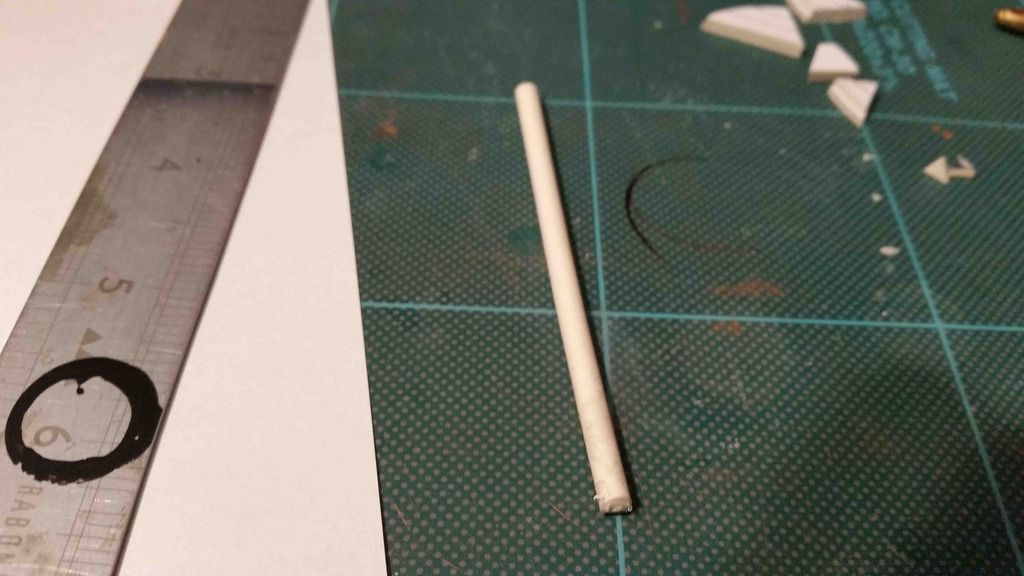 I simply wrapped paper around this stick to make the winder:  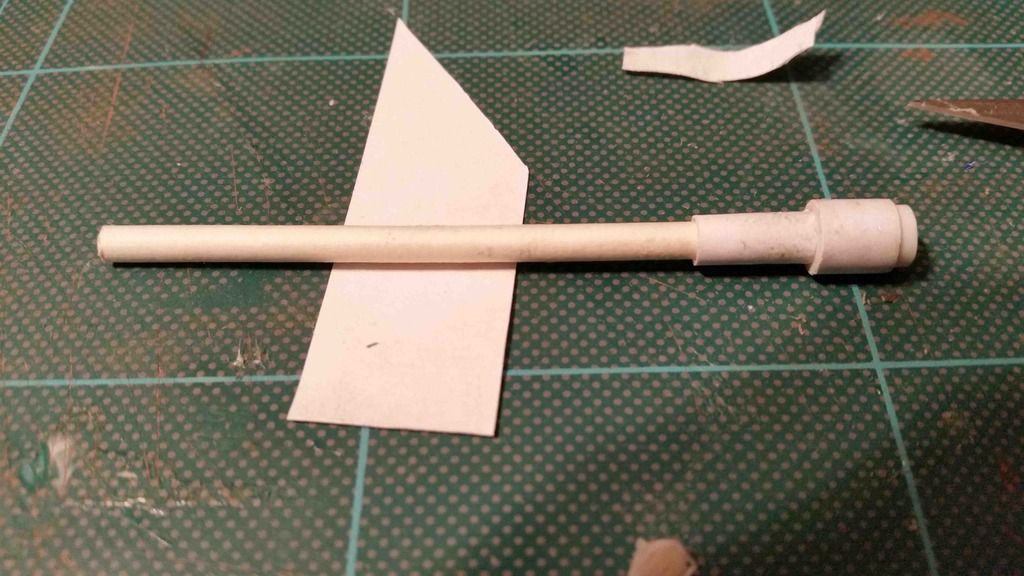 The winder has a locking nut which was simply card cut into shape an place on the stick:  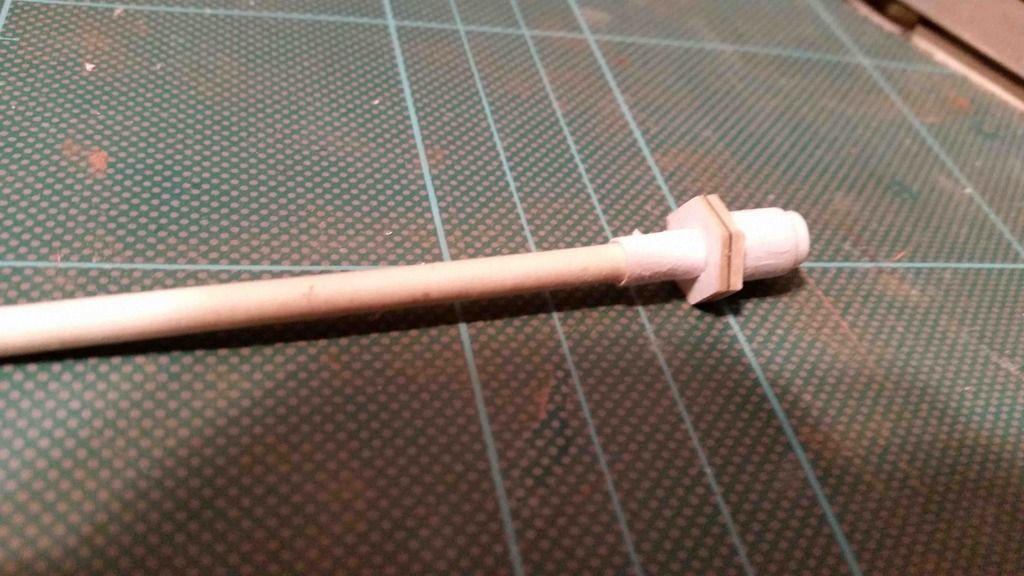  Next is the knurled grip which was made just like the watch face bezel: 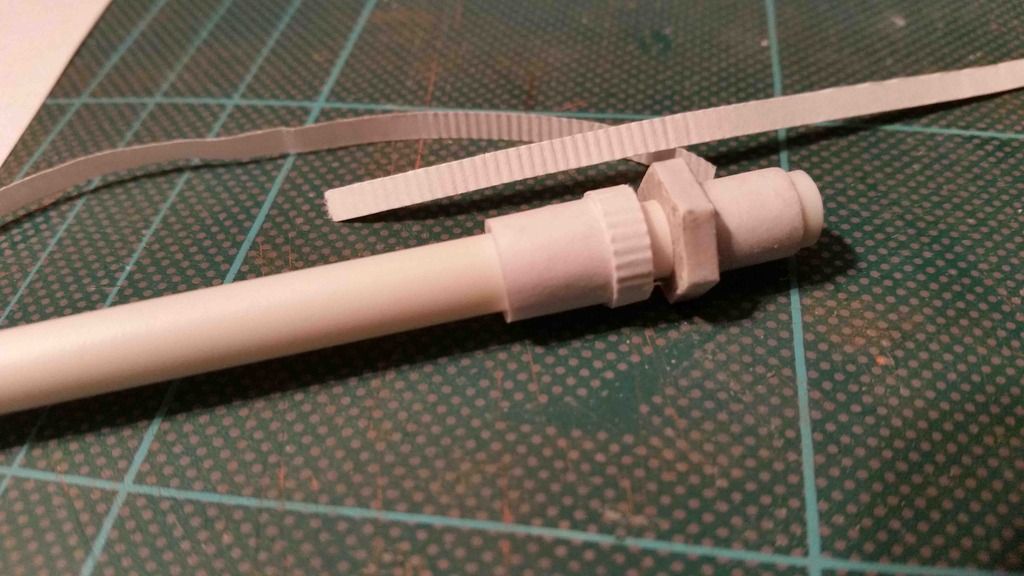 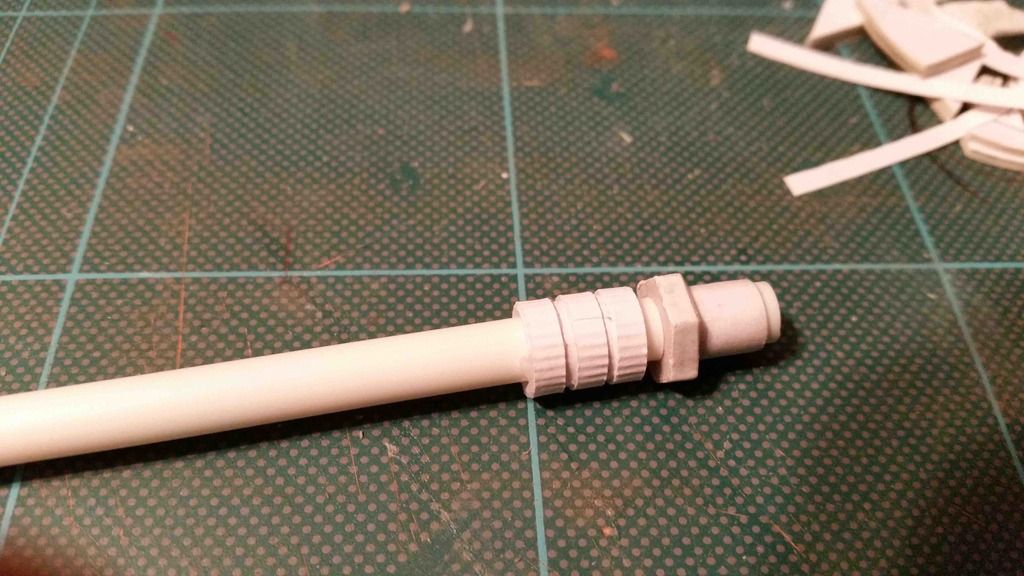 Next I cut the end off and capped it: 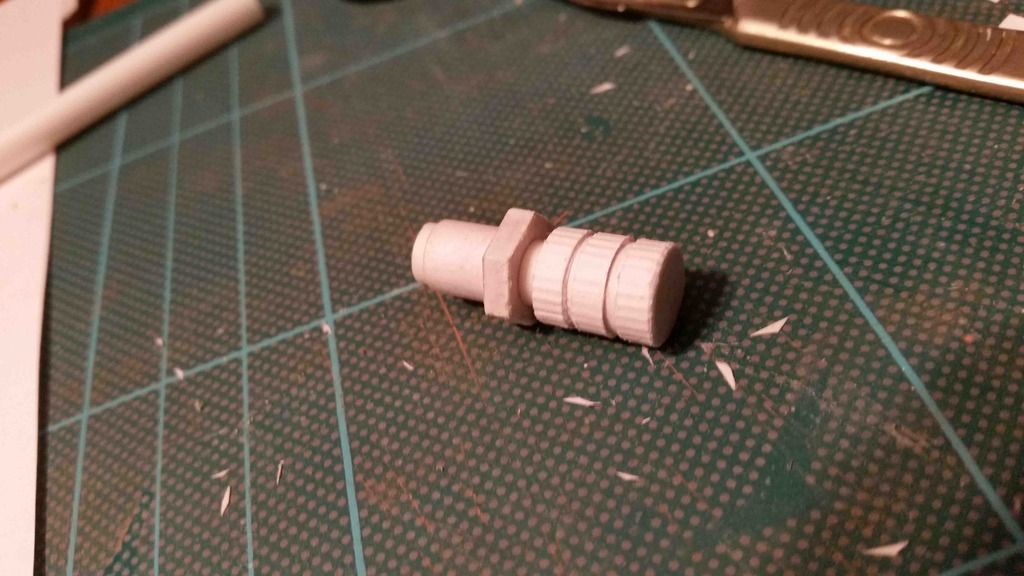 Test fit: 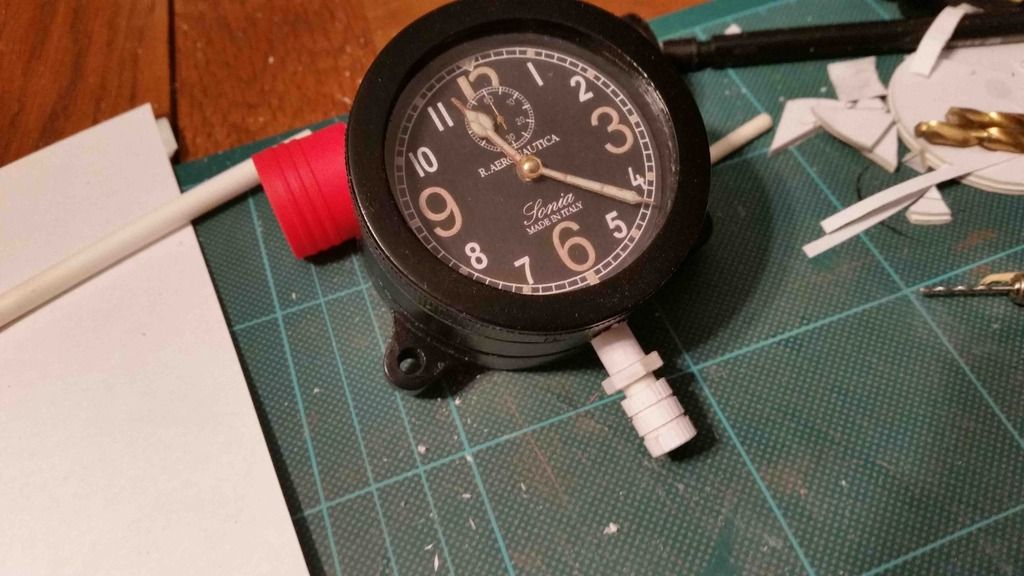 A little paint: 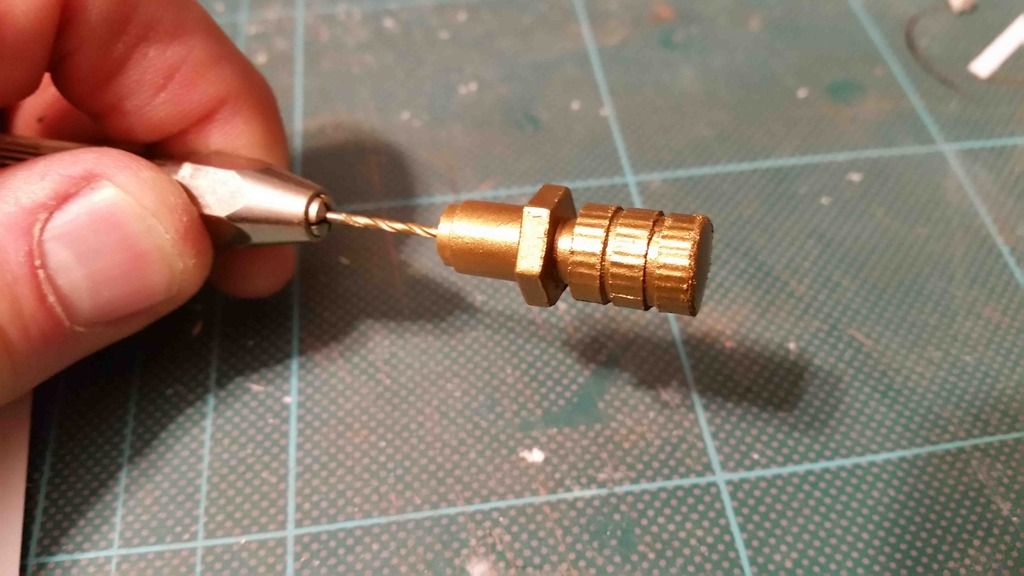 Final fitment on the clock: 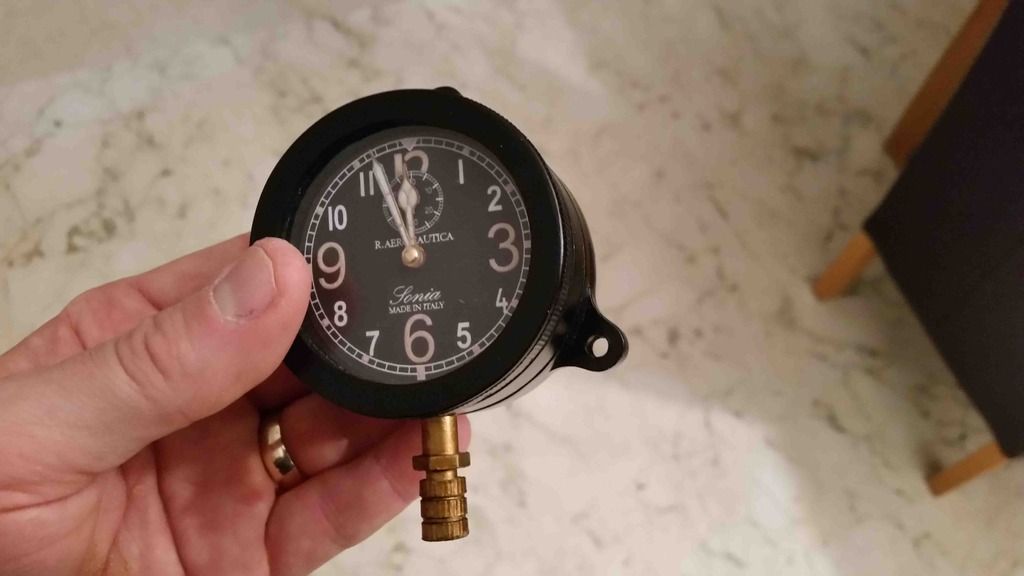 I placed some silver washers on the bottom a few weeks ago, they look as if they should be there so they are staying: 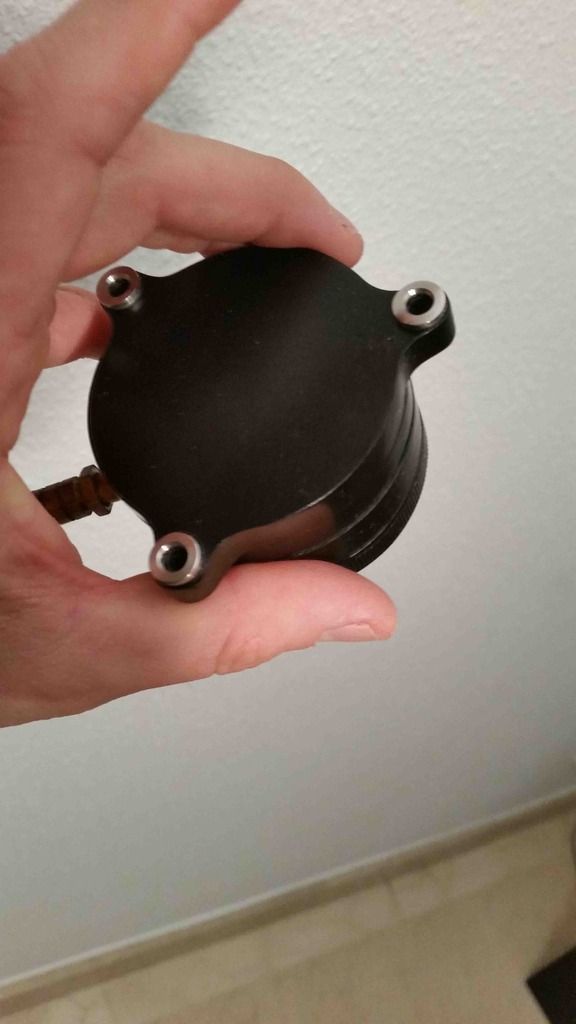 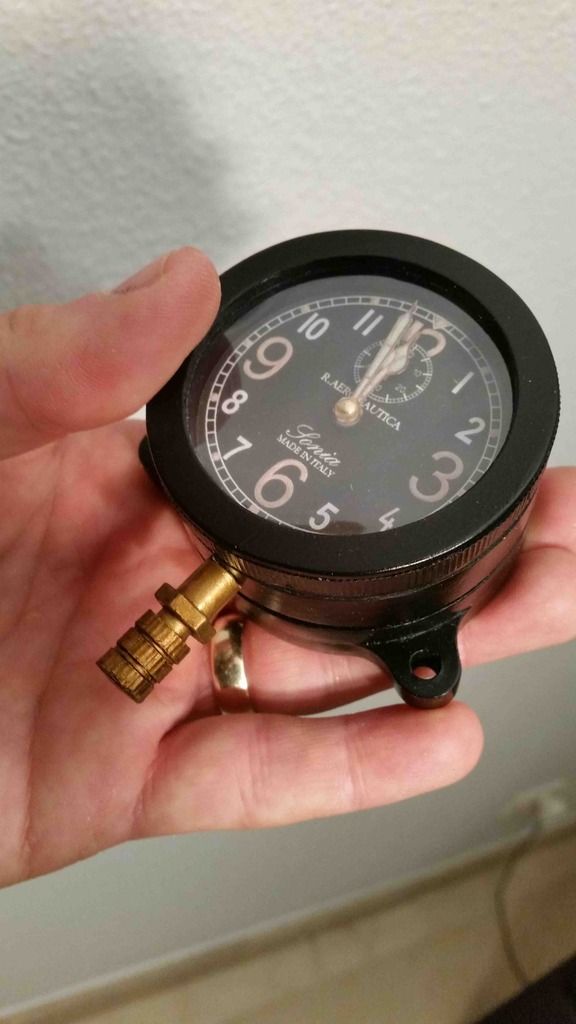 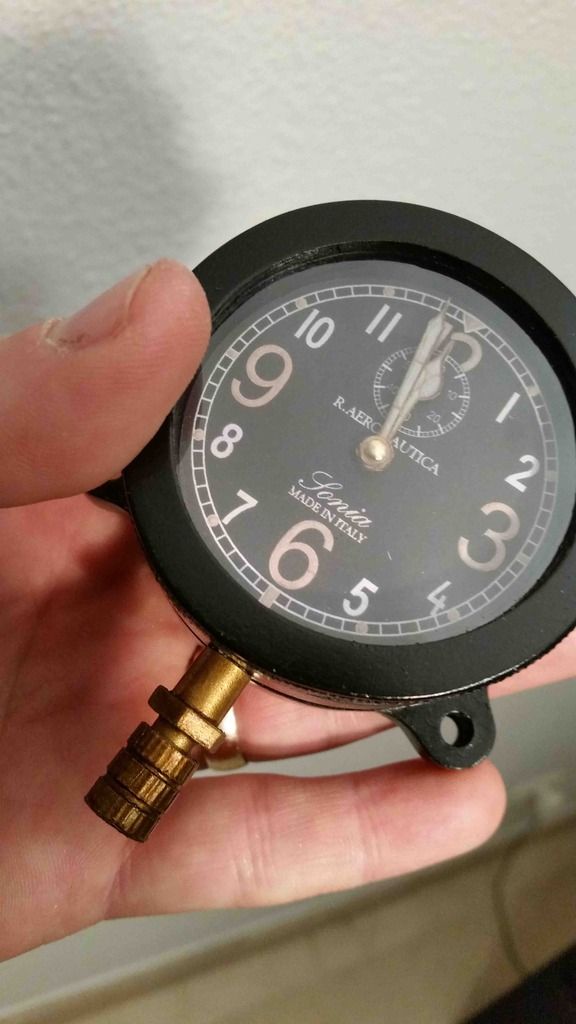 Side view: 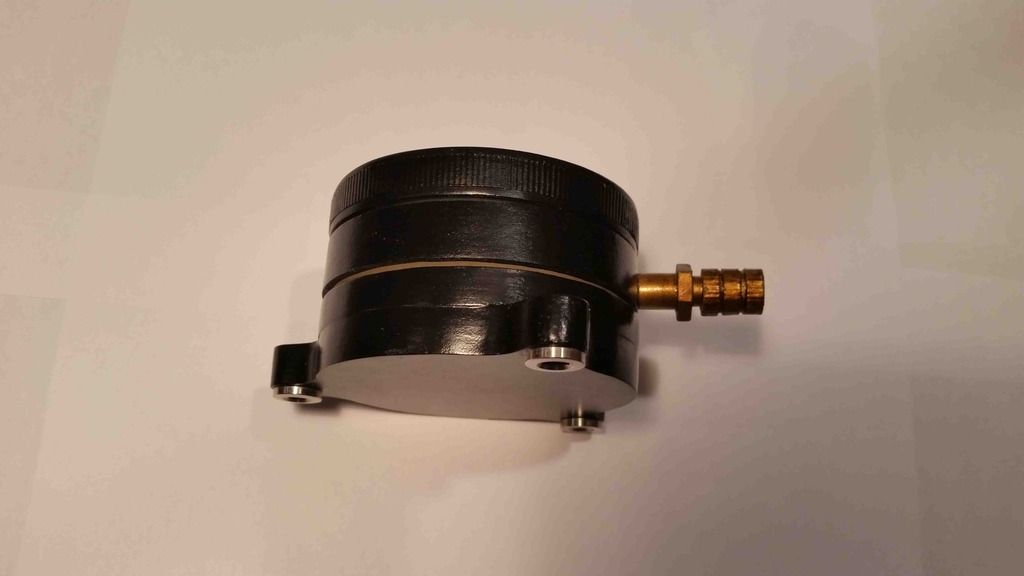 Front View: 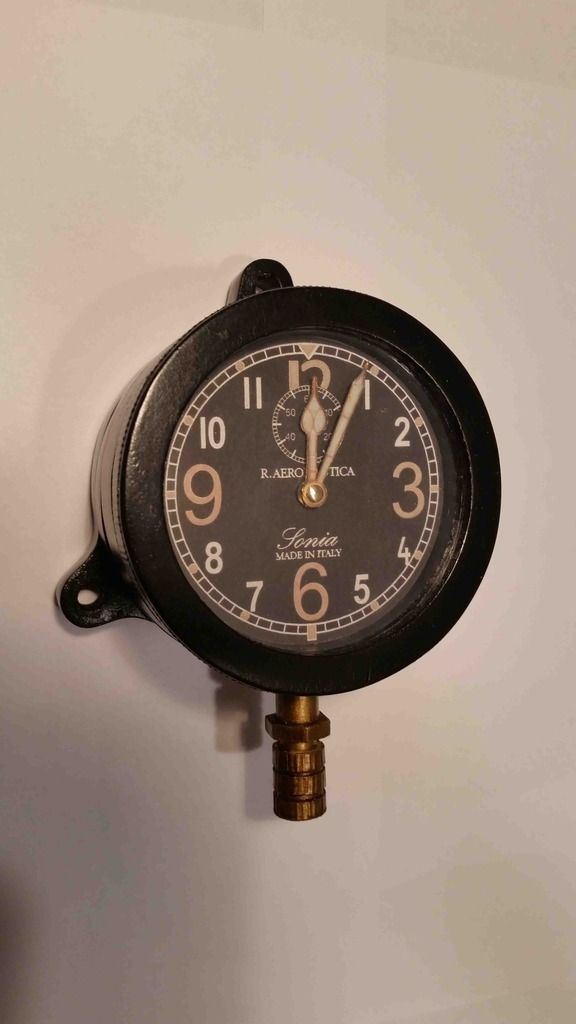 Hope you enjoyed this one? Regards
|
|
#15
01-07-2017, 06:08 PM
|
||||
|
||||
|
Pics
Just the final pics PMs
I almost forgot the glow in the dark thing: 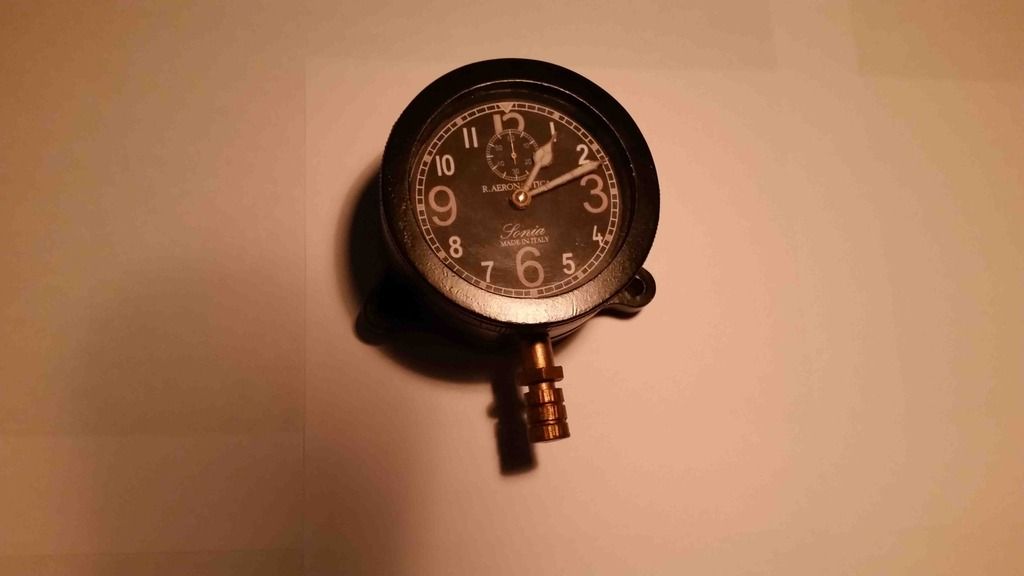 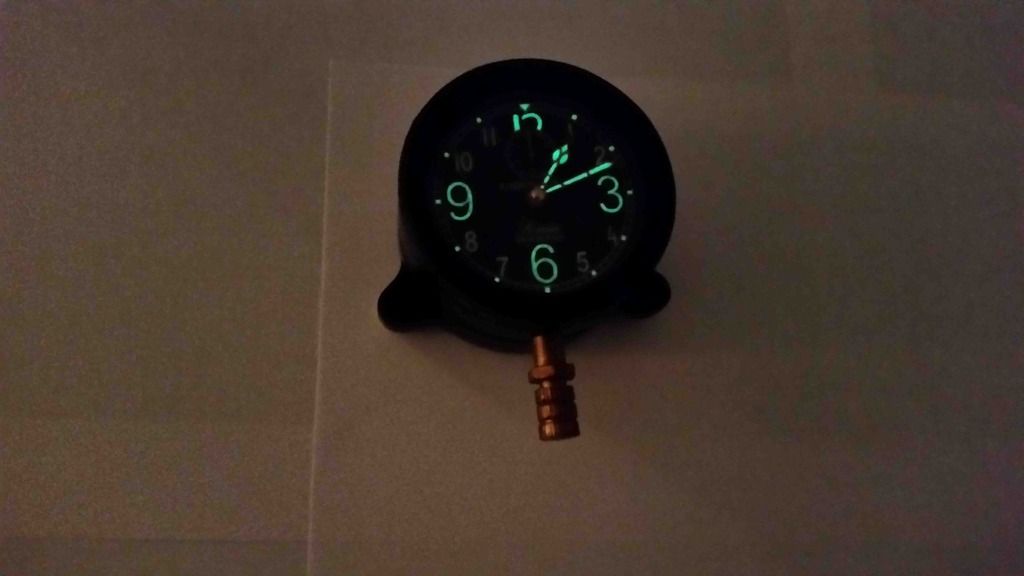 Enjoy Last edited by alzictorini; 01-07-2017 at 06:19 PM.
|
| Google Adsense |
|
#16
01-07-2017, 08:10 PM
|
||||
|
||||
|
To paraphrase Arthur C. Clarke: Any sufficiently advanced paper modeling technique is indistinguishable from magic.
Even watching you do this step-by-step, I can't believe the final results. Don
|
|
#17
01-07-2017, 08:37 PM
|
||||
|
||||
|
Somehow, I get this feeling that if you ever decided to do a model of the Prague Astronomical Clock, it would work.
Amazing work. Can I be the first to say 'I can't believe that is paper'
__________________
A fine is a tax when you do wrong. A tax is a fine when you do well.
|
|
#18
01-08-2017, 12:15 AM
|
||||
|
||||
|
UH BOY! Al's going to dazzle us with another 1:1 Scale interment panel.
Al please please make your parts templates available. if it's a question of getting them drawn into a graphics program I'll volunteer to do it. Are you back to England? Jim
__________________
There is a very fine line between paper modeling and mental illness.
|
|
#19
01-08-2017, 03:53 AM
|
|||
|
|||
|
So impressed with the quality of your work. Will be watching with extreme interest.
__________________
Helicopter's don't actually fly. They vibrate so badly that the ground rejects them.
|
 |
| Tags |
| folgore, instrument panel, macchi c.202, sonia clock |
|
|


 Linear Mode

