


|
|
|
#41
 01-07-2018, 01:49 PM
|
||||
|
||||
|
Variometro
Happy New Year PMs
Having completed the Variometro graphics, I decided to complete the glass face. This face will be the same for 2 other gauges on this panel and hence they will me made the same way with one difference. I am now using old CD cases for the glass. Simply put. I cut the glass from old cd cases using a drill and scalpel. 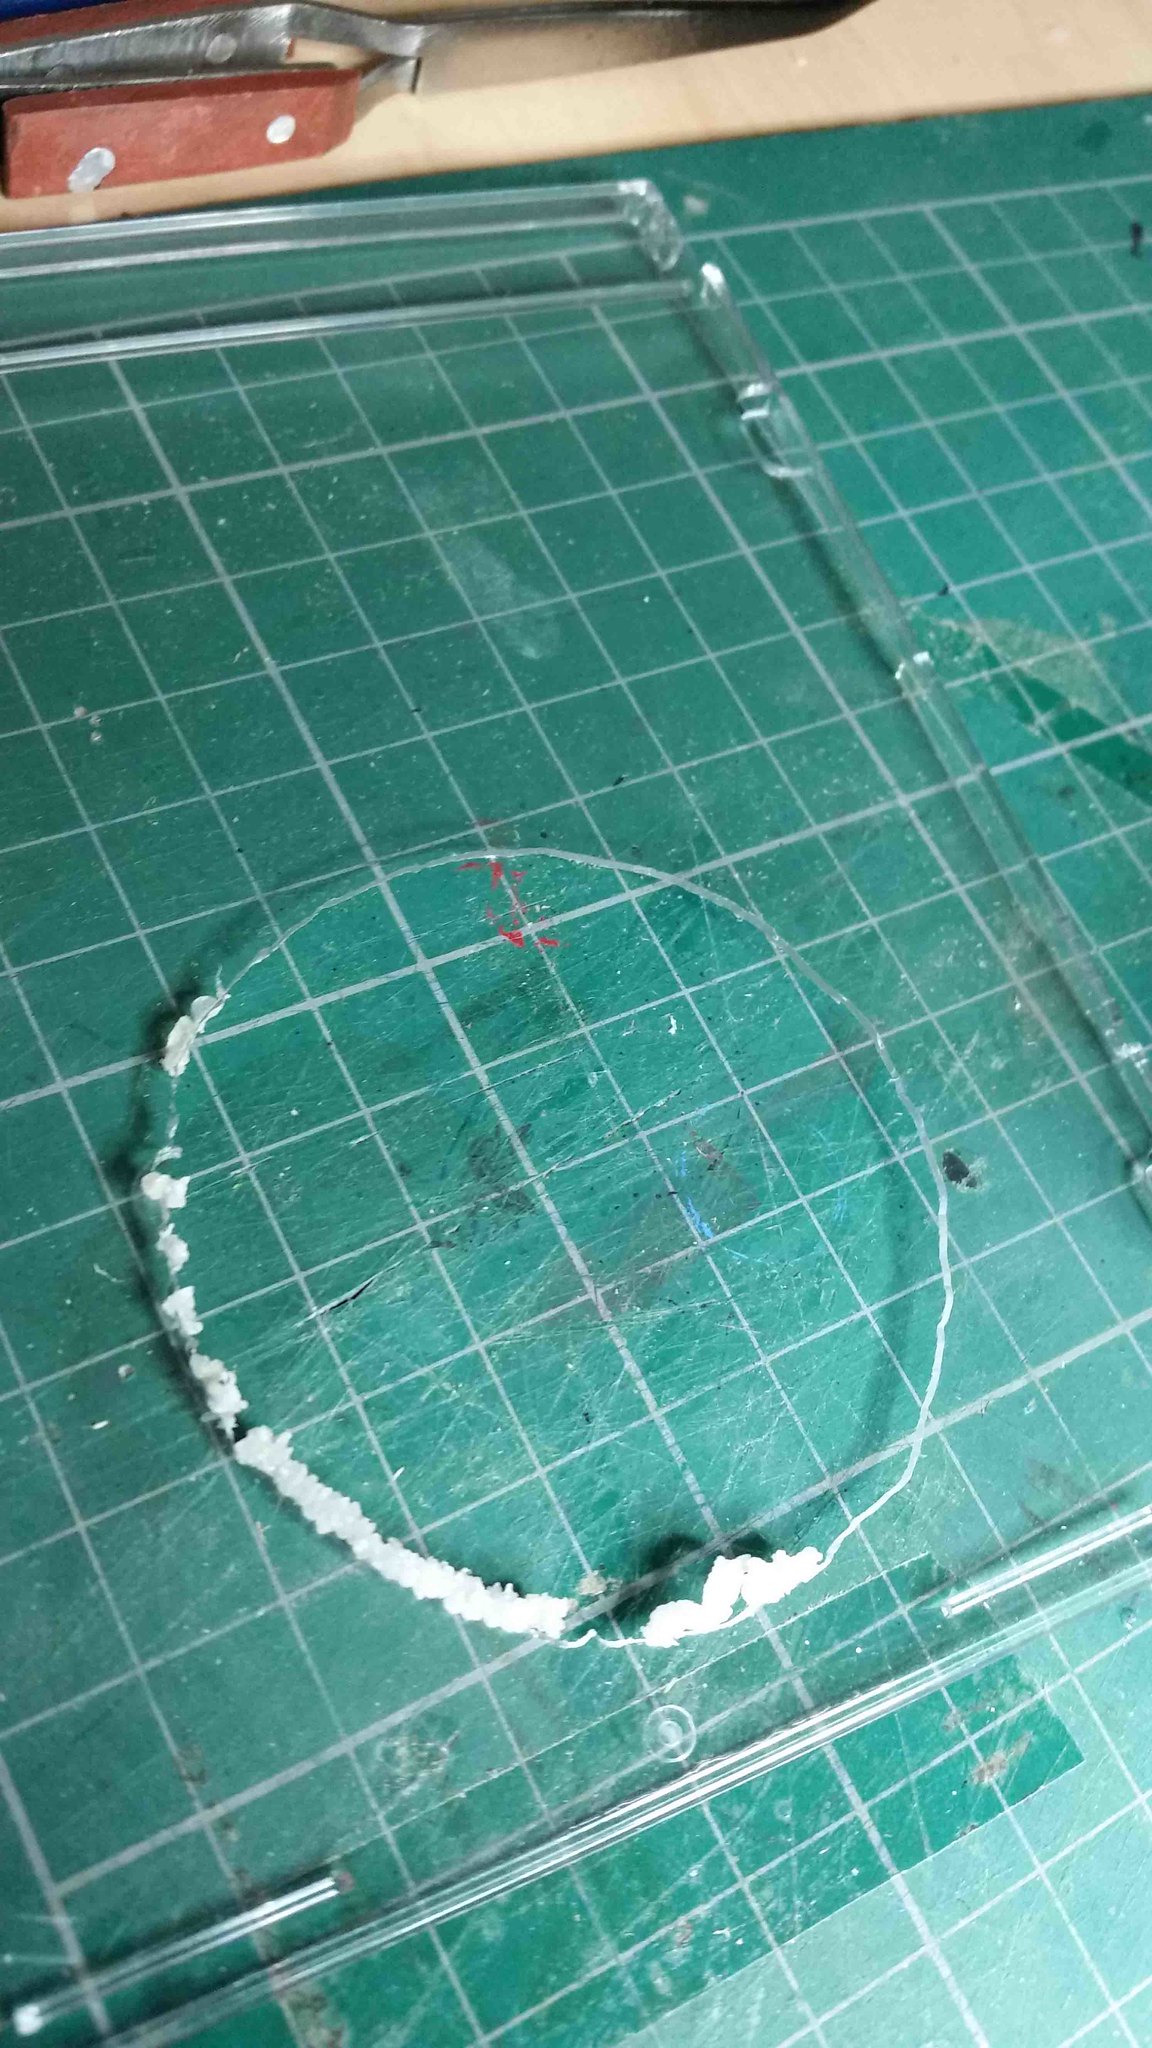 The glass or clear plastic as it is is sandwiched between the paper rings: 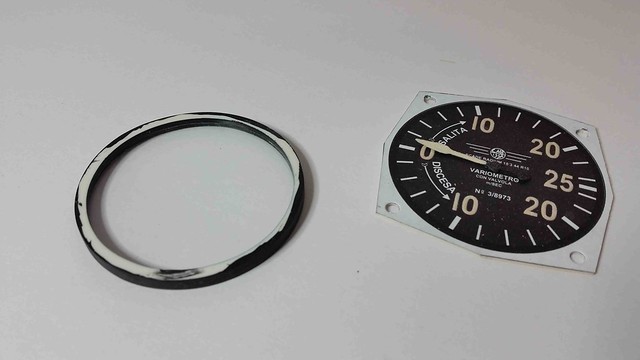 When painted and placed on the gauge face: 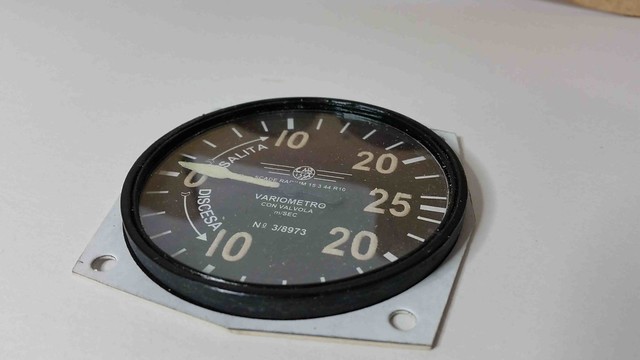 Ive done some work on the upper panel and drilled out the screw and rivet holes. The tiny rivets are for the chrome plates. The rivets are decorative split pins from Hobby Craft. 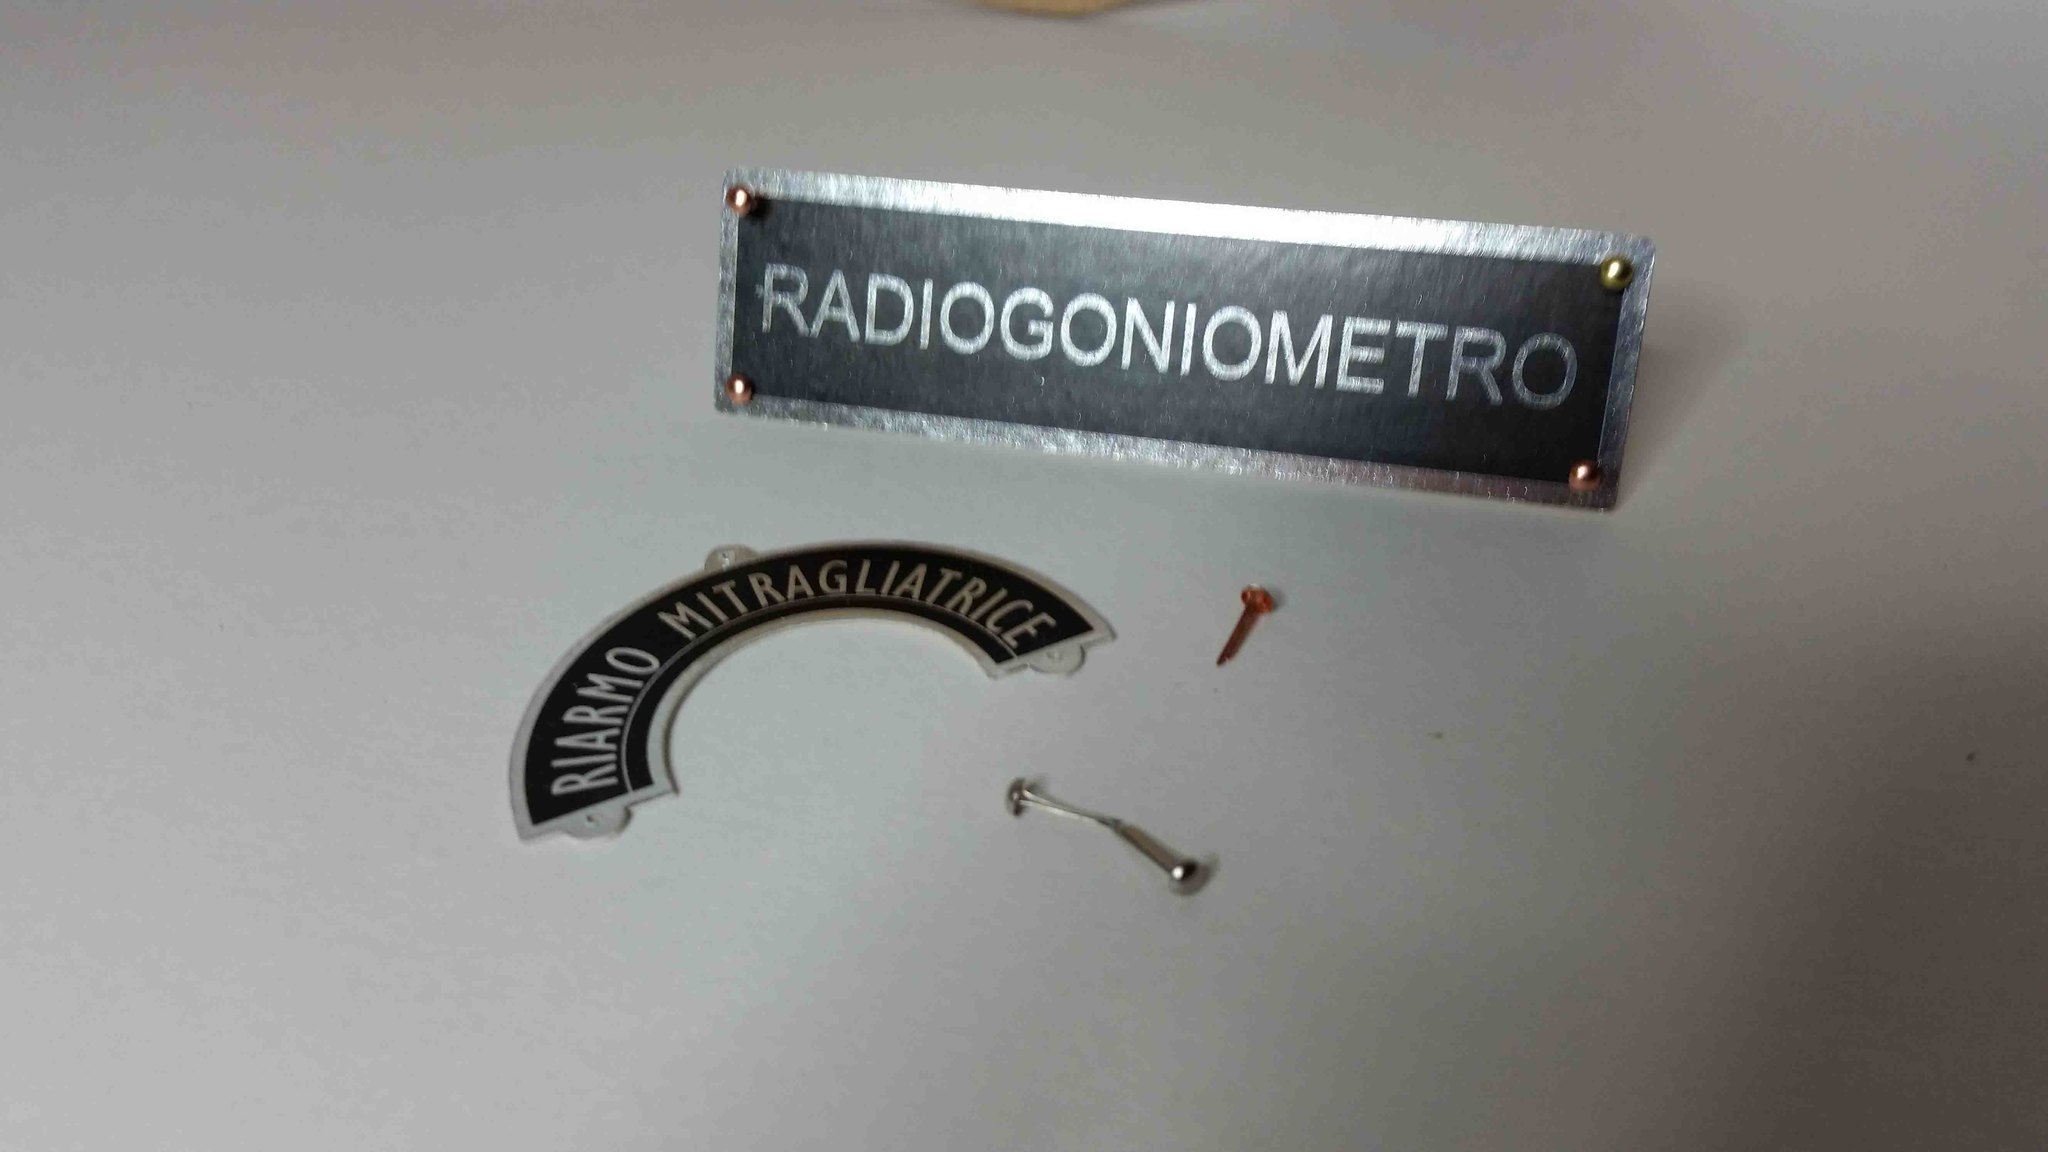 Panel assembled with the Sonia clock, chrome plates and a few gauges ( Currently, I've only made one glass face but as they are the same size it fits all 3 holes): 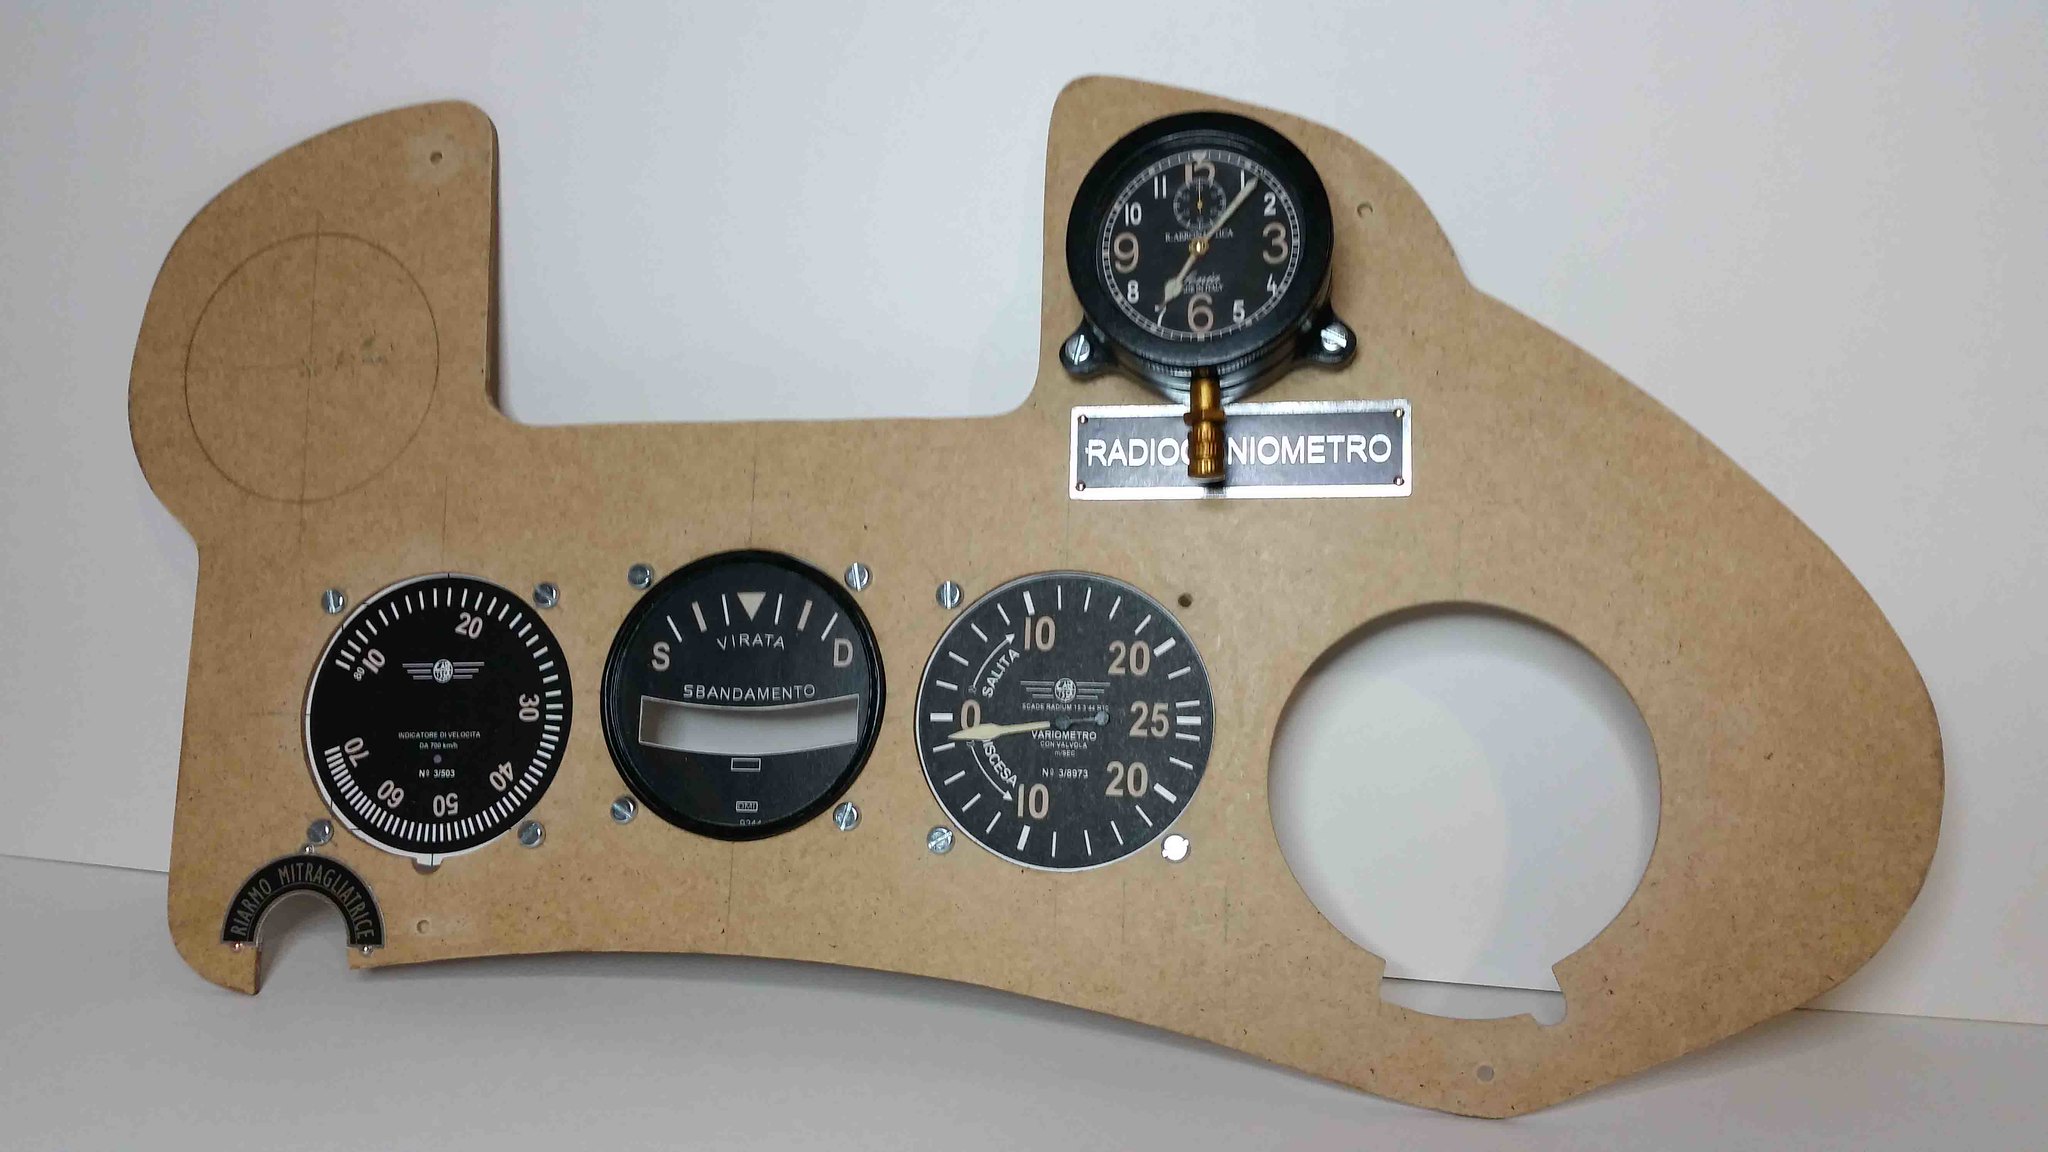 Im looking at painting the panel next (with wrinkle spray paint). Catch you soon, enjoy..... 
|
|
#43
01-27-2018, 10:23 AM
|
||||
|
||||
|
Wrinkle Paint
Thanks for the support PMs
OK, its been a long wait but Ive managed to get hold of some Wrinkle Spray Paint. I needed this for the Instrument Panel surface coat as it was used for anti-dazzle properties whilst in flight. Anyway after what seemed months, the paint arrived and i followed the instructions. At first you dont seem to notice any difference in the finish then, all of a sudden, it wrinkles:  I fitted some of the other components and it looks pretty cool: 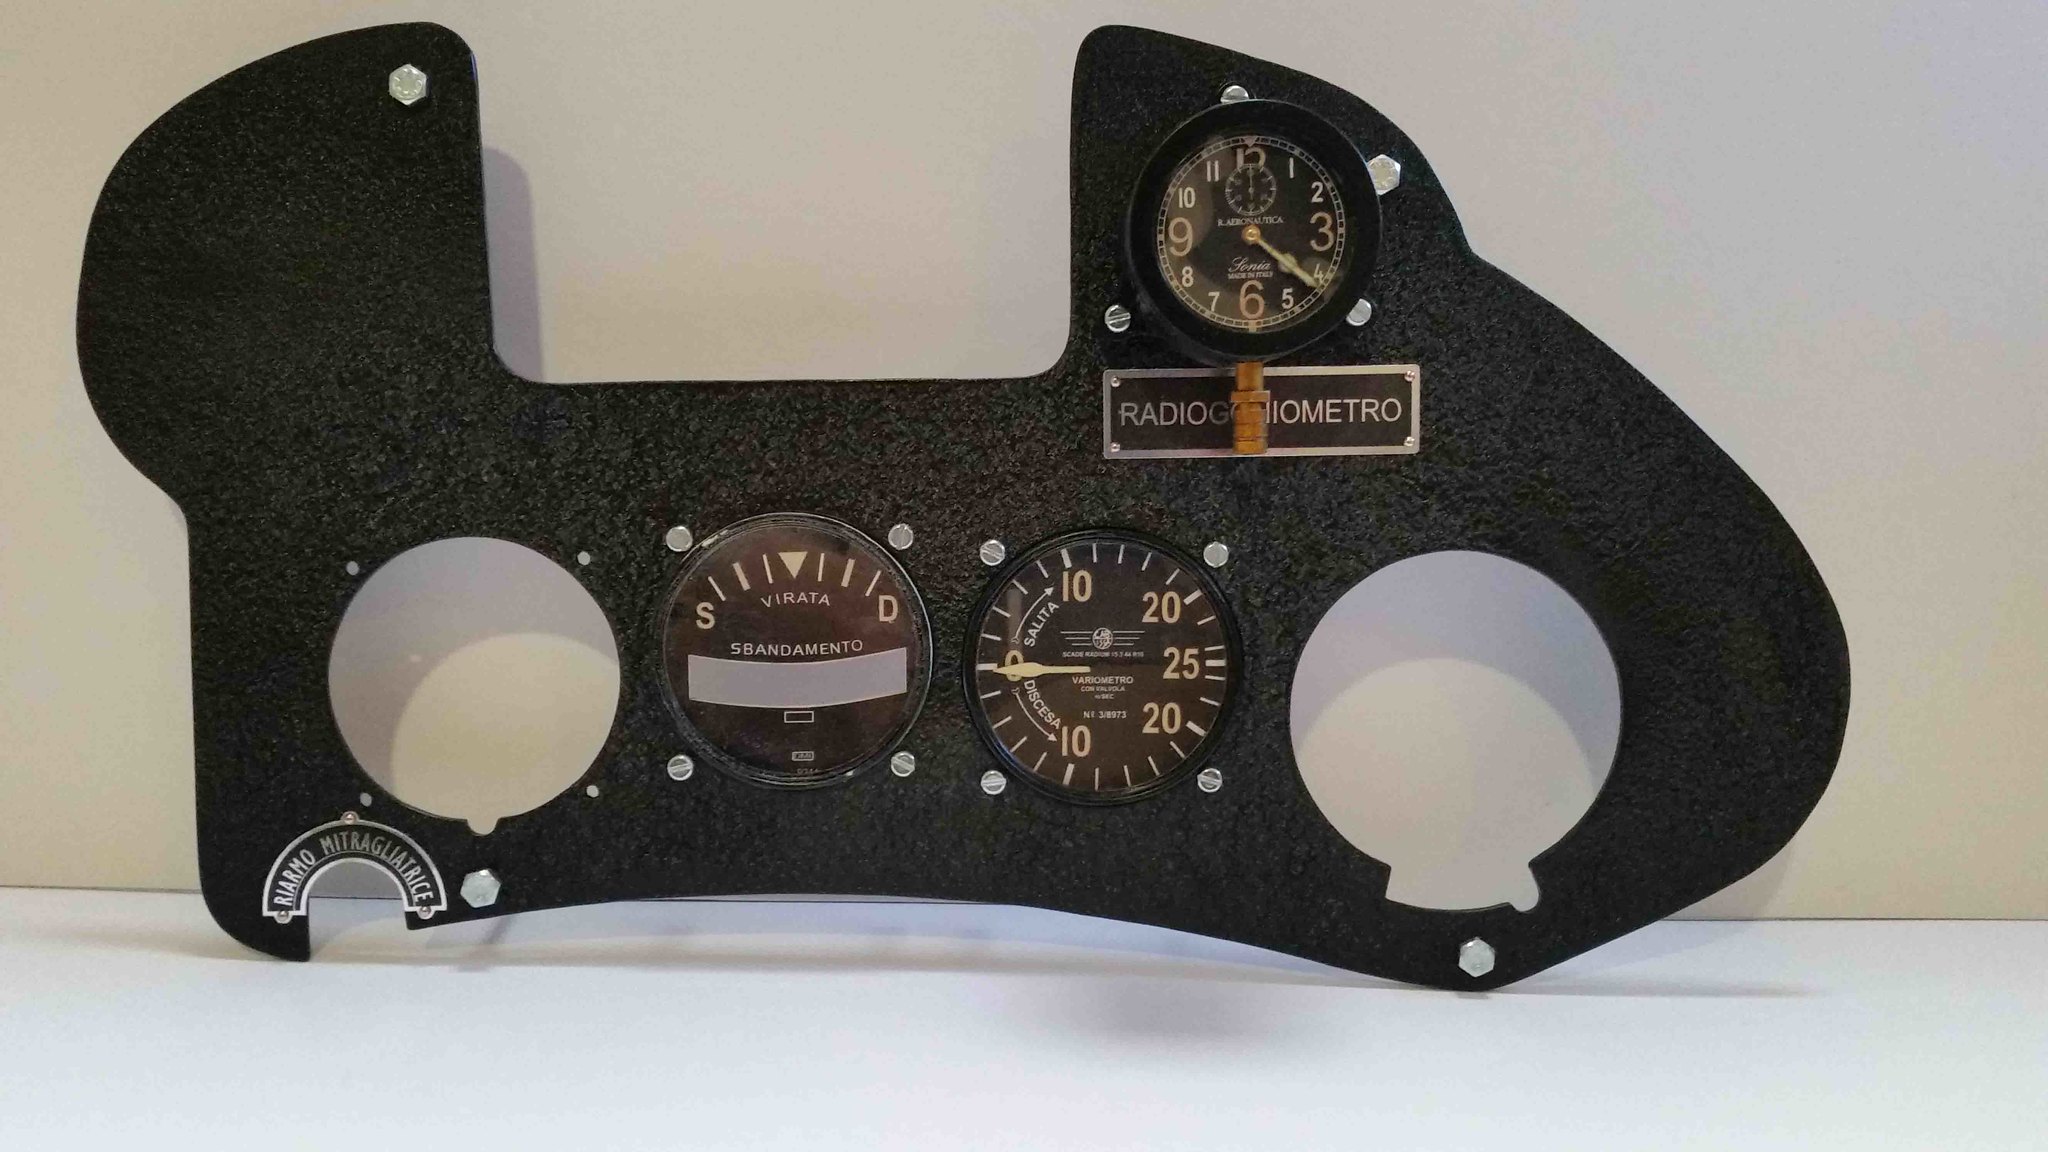 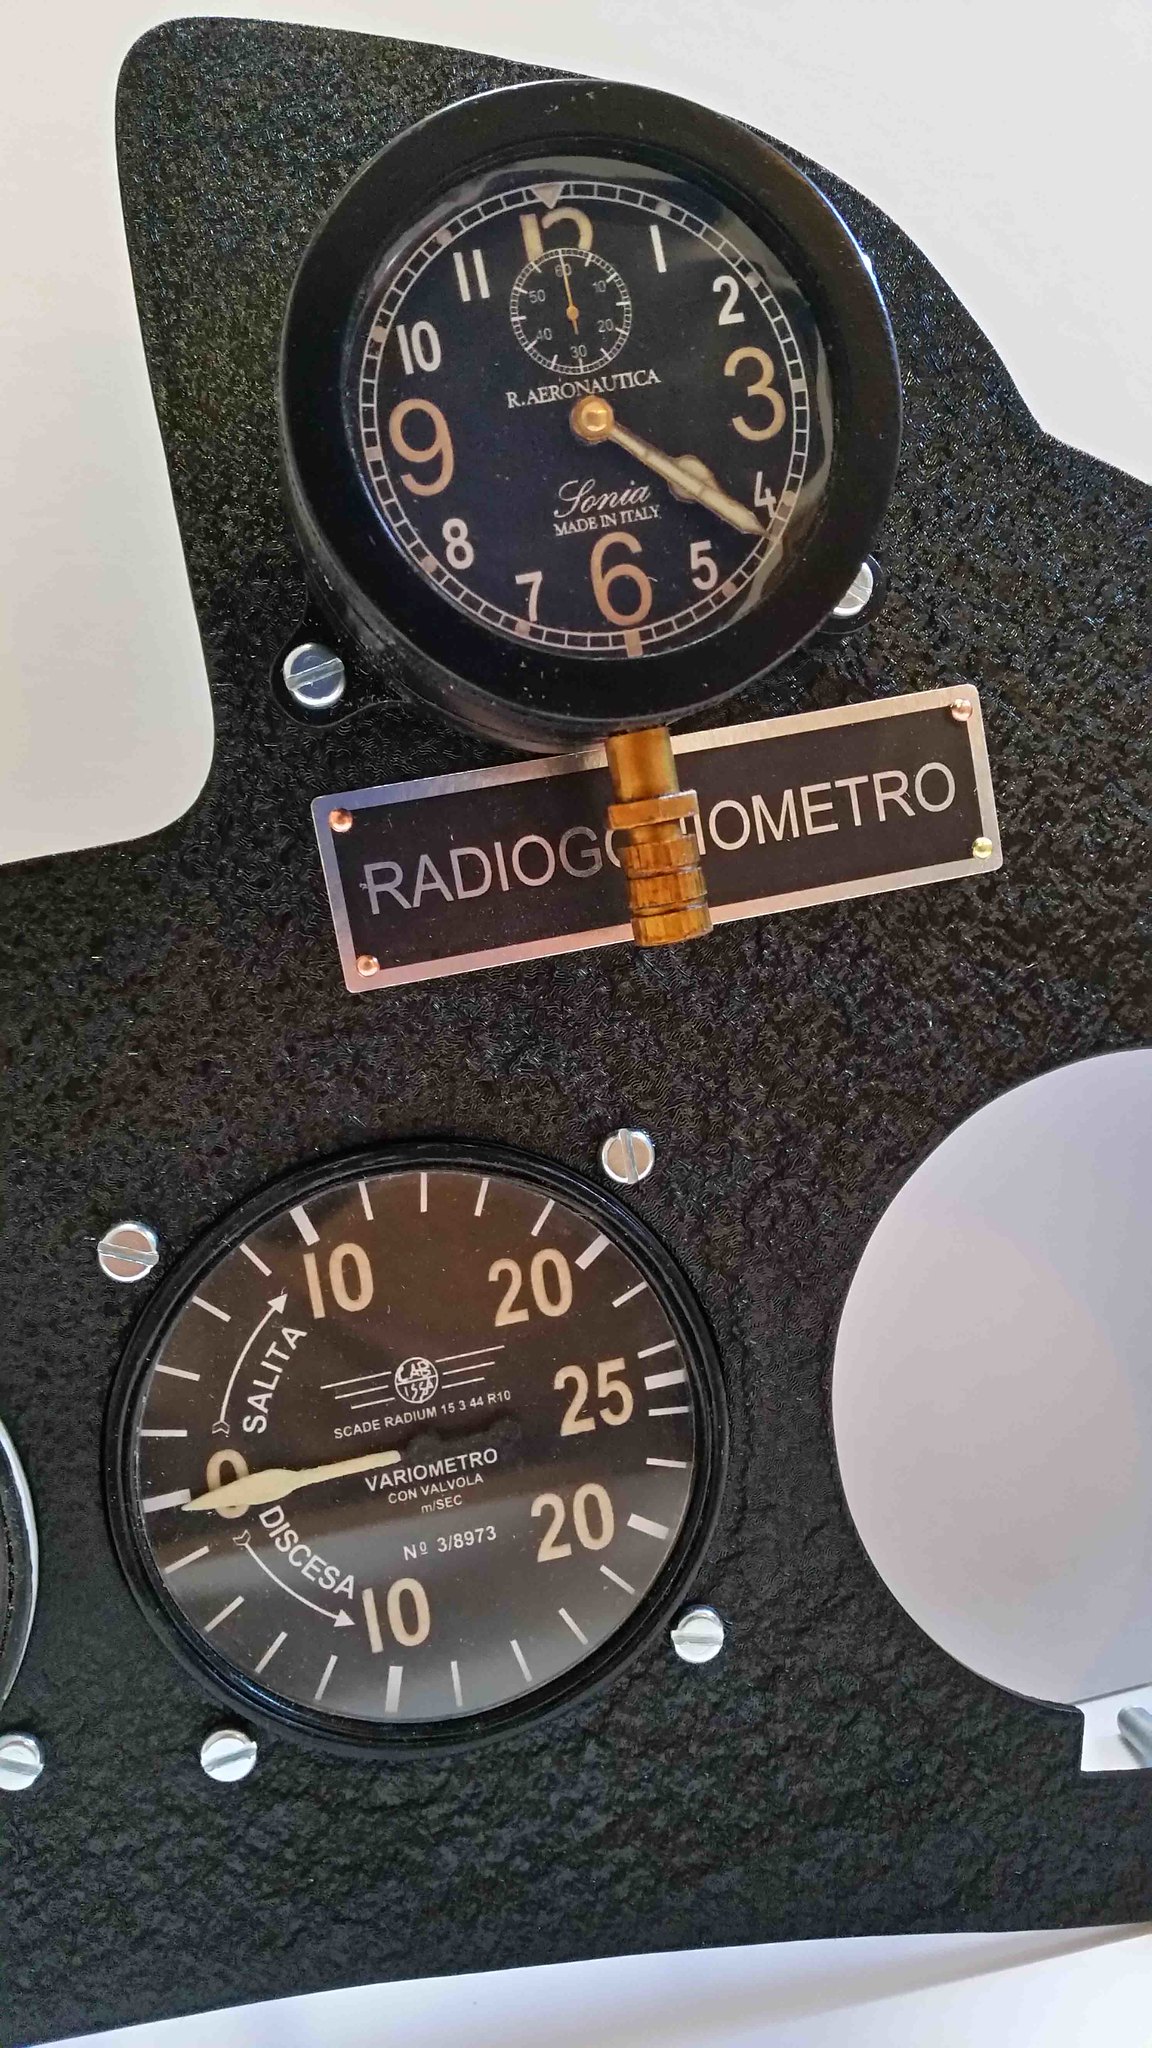 More instruments to come Enjoy
|
|
#44
01-29-2018, 02:12 PM
|
||||
|
||||
|
Hello PMs
Over the last few days Ive been completing the Sbandametro cockpit gauge for the Macchi. I would call it a role and bank rate indicator. The original looks like this: 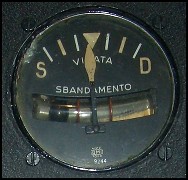 I made a desk design of the layout using serif free software and printed the gauge face on standard paper. This was glued using pritstick to cornflake card and then cut out into shape. 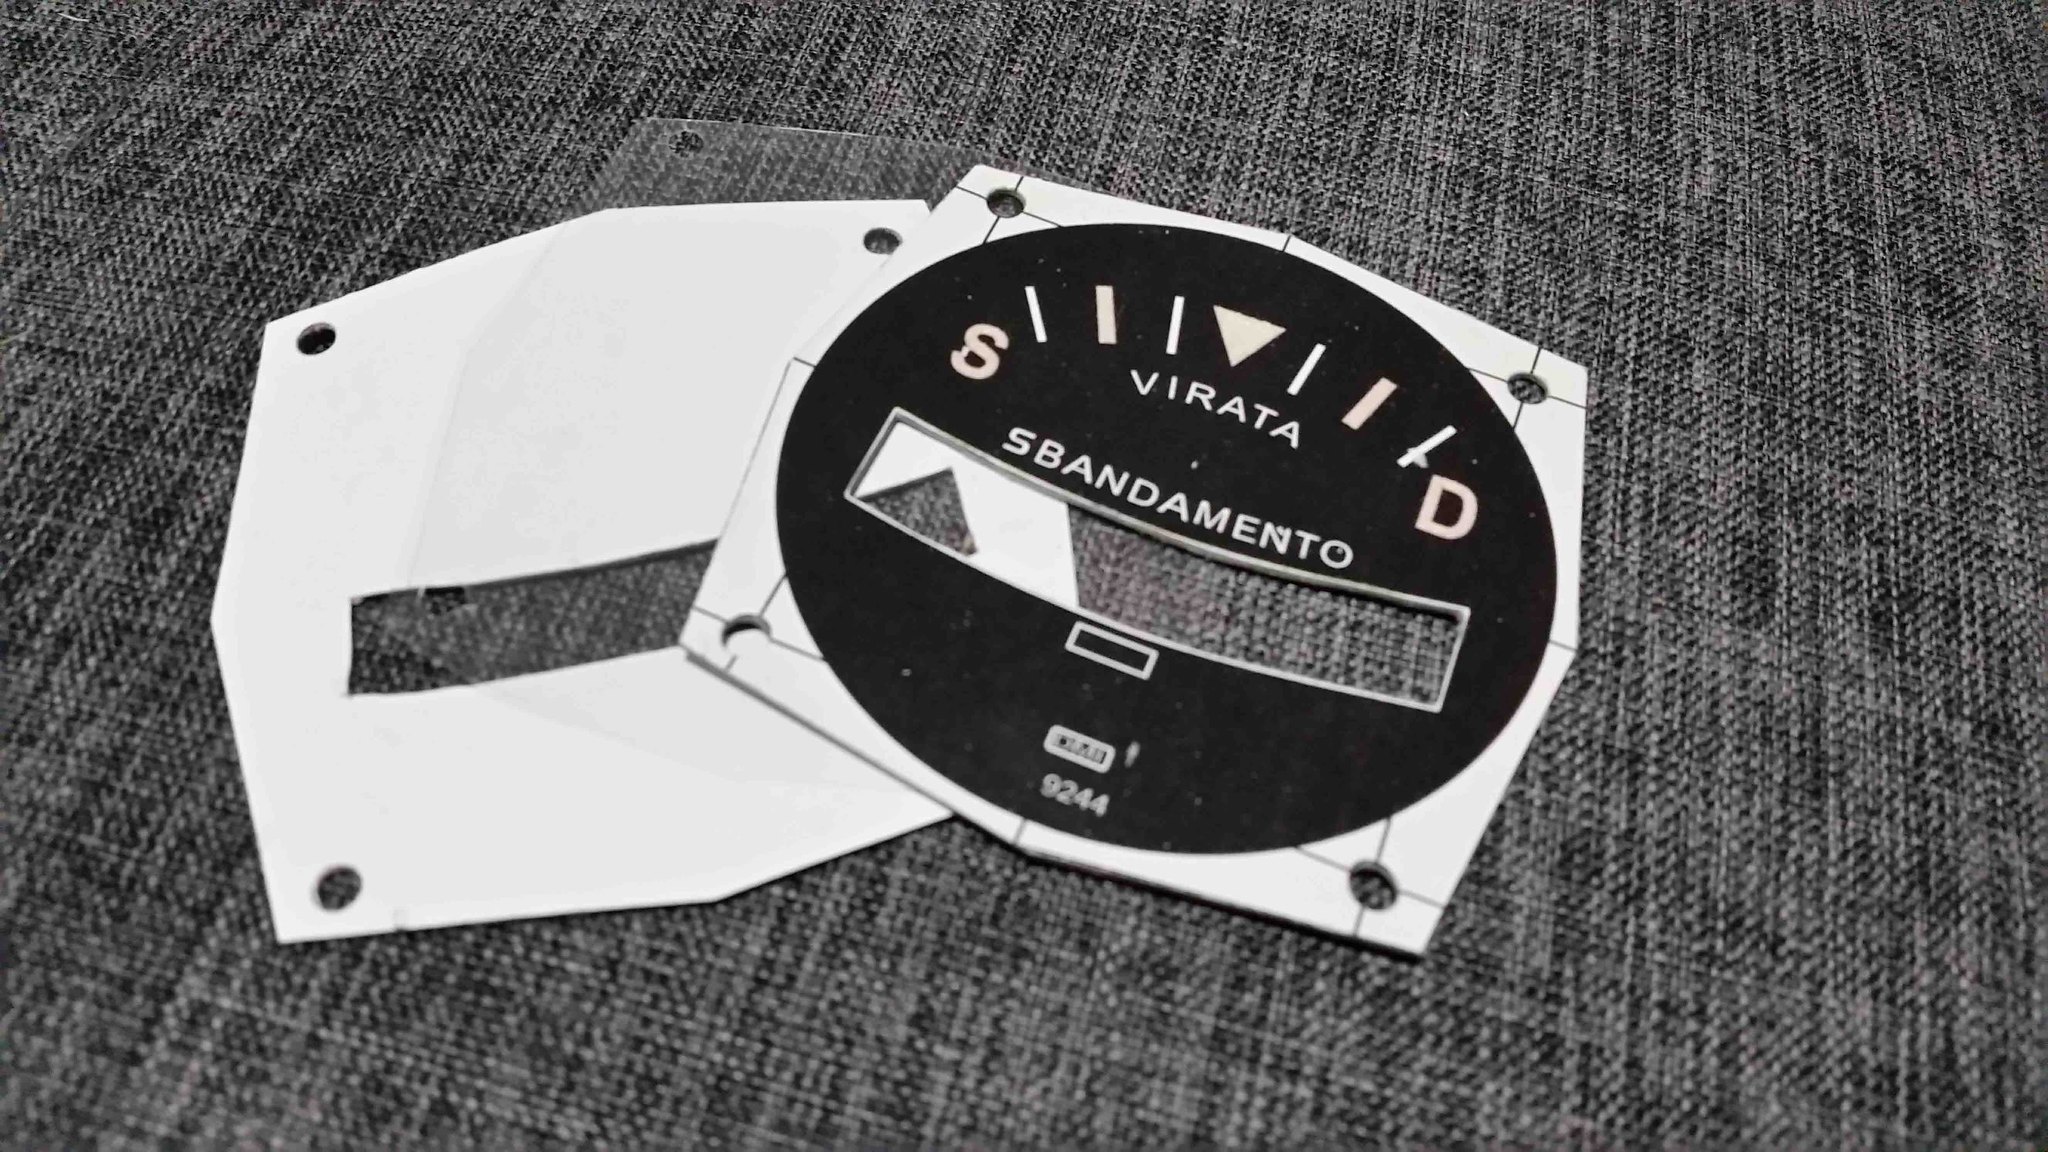 I used clear plastic from packaging, cutting it into the same shape and melting it into the cut out using my wifes hair dryer!!! 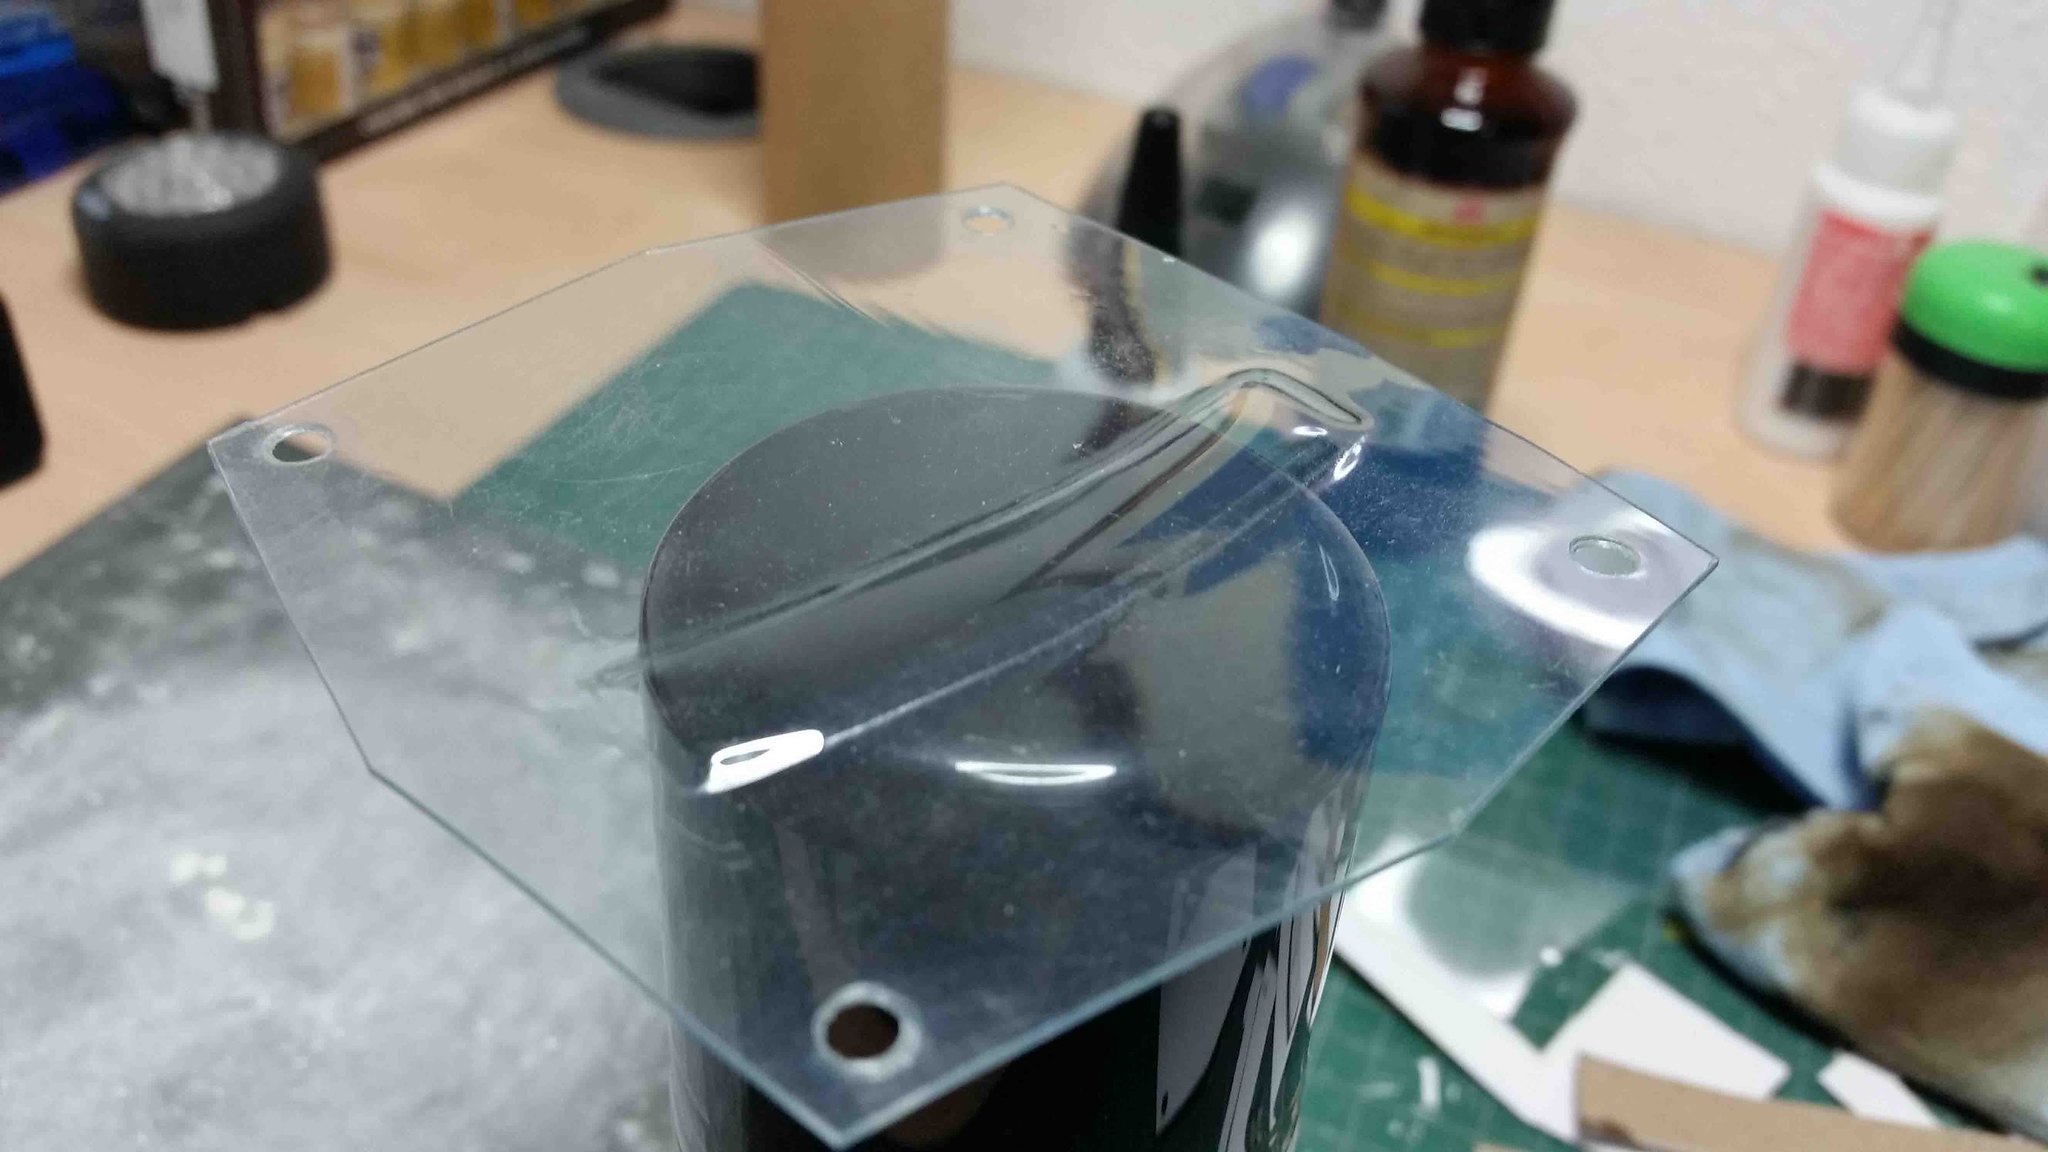 I made a needle from cornflake card (painting it with black and luminous paint) and I made the spirit ball out of a wooden ball I found in an old tin (painted black). The numbers are painted in luminous pint as is the back of the seen through the plastic. It looks impressive in the dark. 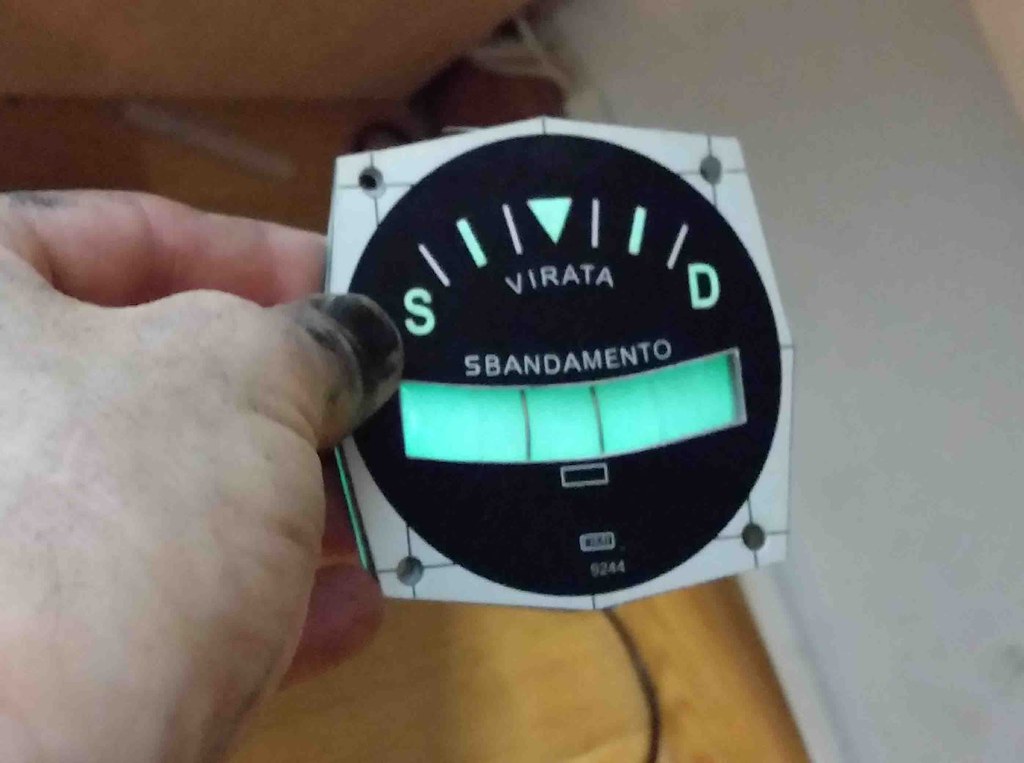 The completed gauge when fitted to the panel looks realistic enough: 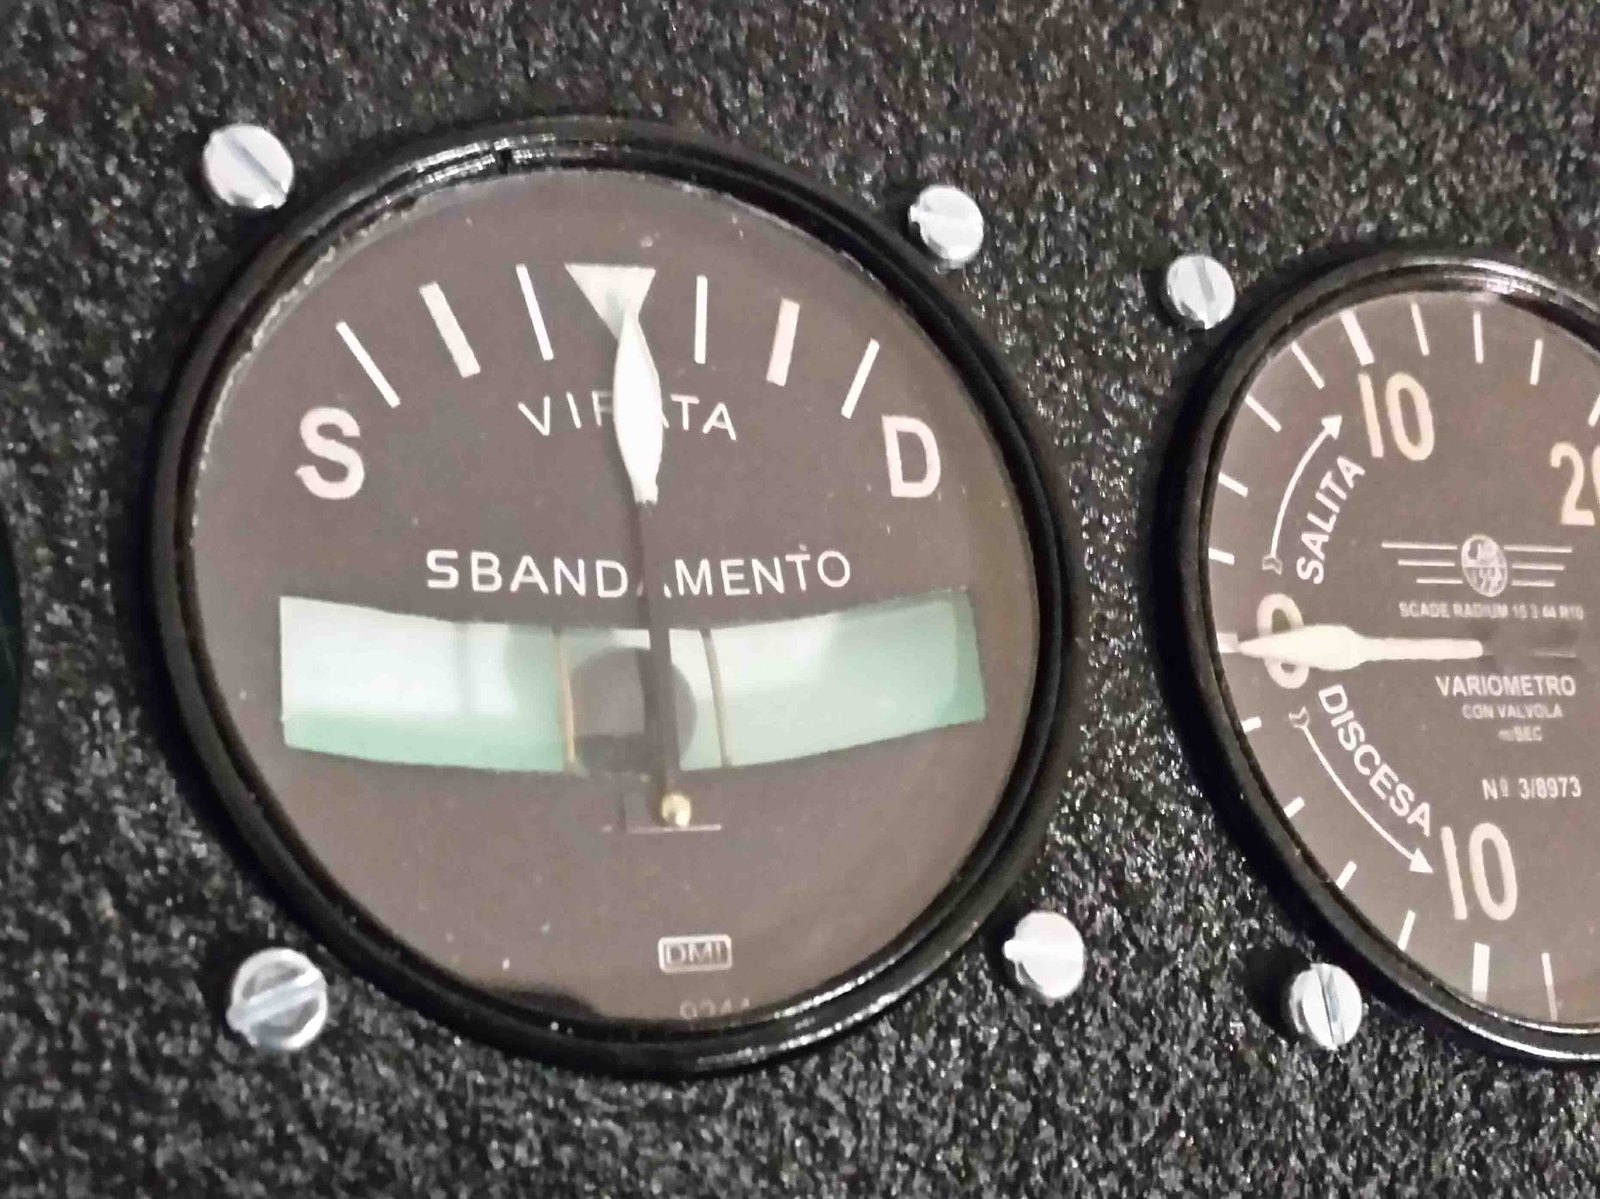 See the insert below for the full set of build pics. Enjoy
|
|
#45
02-03-2018, 08:35 AM
|
||||
|
||||
|
Indicatore Di Velocita
Hi PMs
Just putting the final touches to another gauge although to finish it I need to make an adjusting knob for the lower section which ill do later. The gauge n question is the Indicatore Di Velocita. It looks something like this: 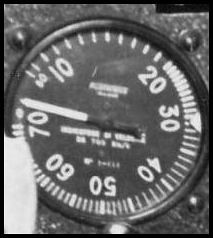 I designed it in Serif some time ago and it printed off beautifully on plain paper. I had a PM ref the gauge needles. What are they made of? They are also simply white card rescued from the bin. Im currently using a nice piece of card from Nespreso. White on one side with gloss black on the other:  Above: I just draw on the needle shape and cut it out and paint. Anyway, the rest of the gauge has been made the same was as the first gauge so I wont bore you with the details. Slotted in the growing panel, it looks quite realistic. Loving that wrinkle paint! 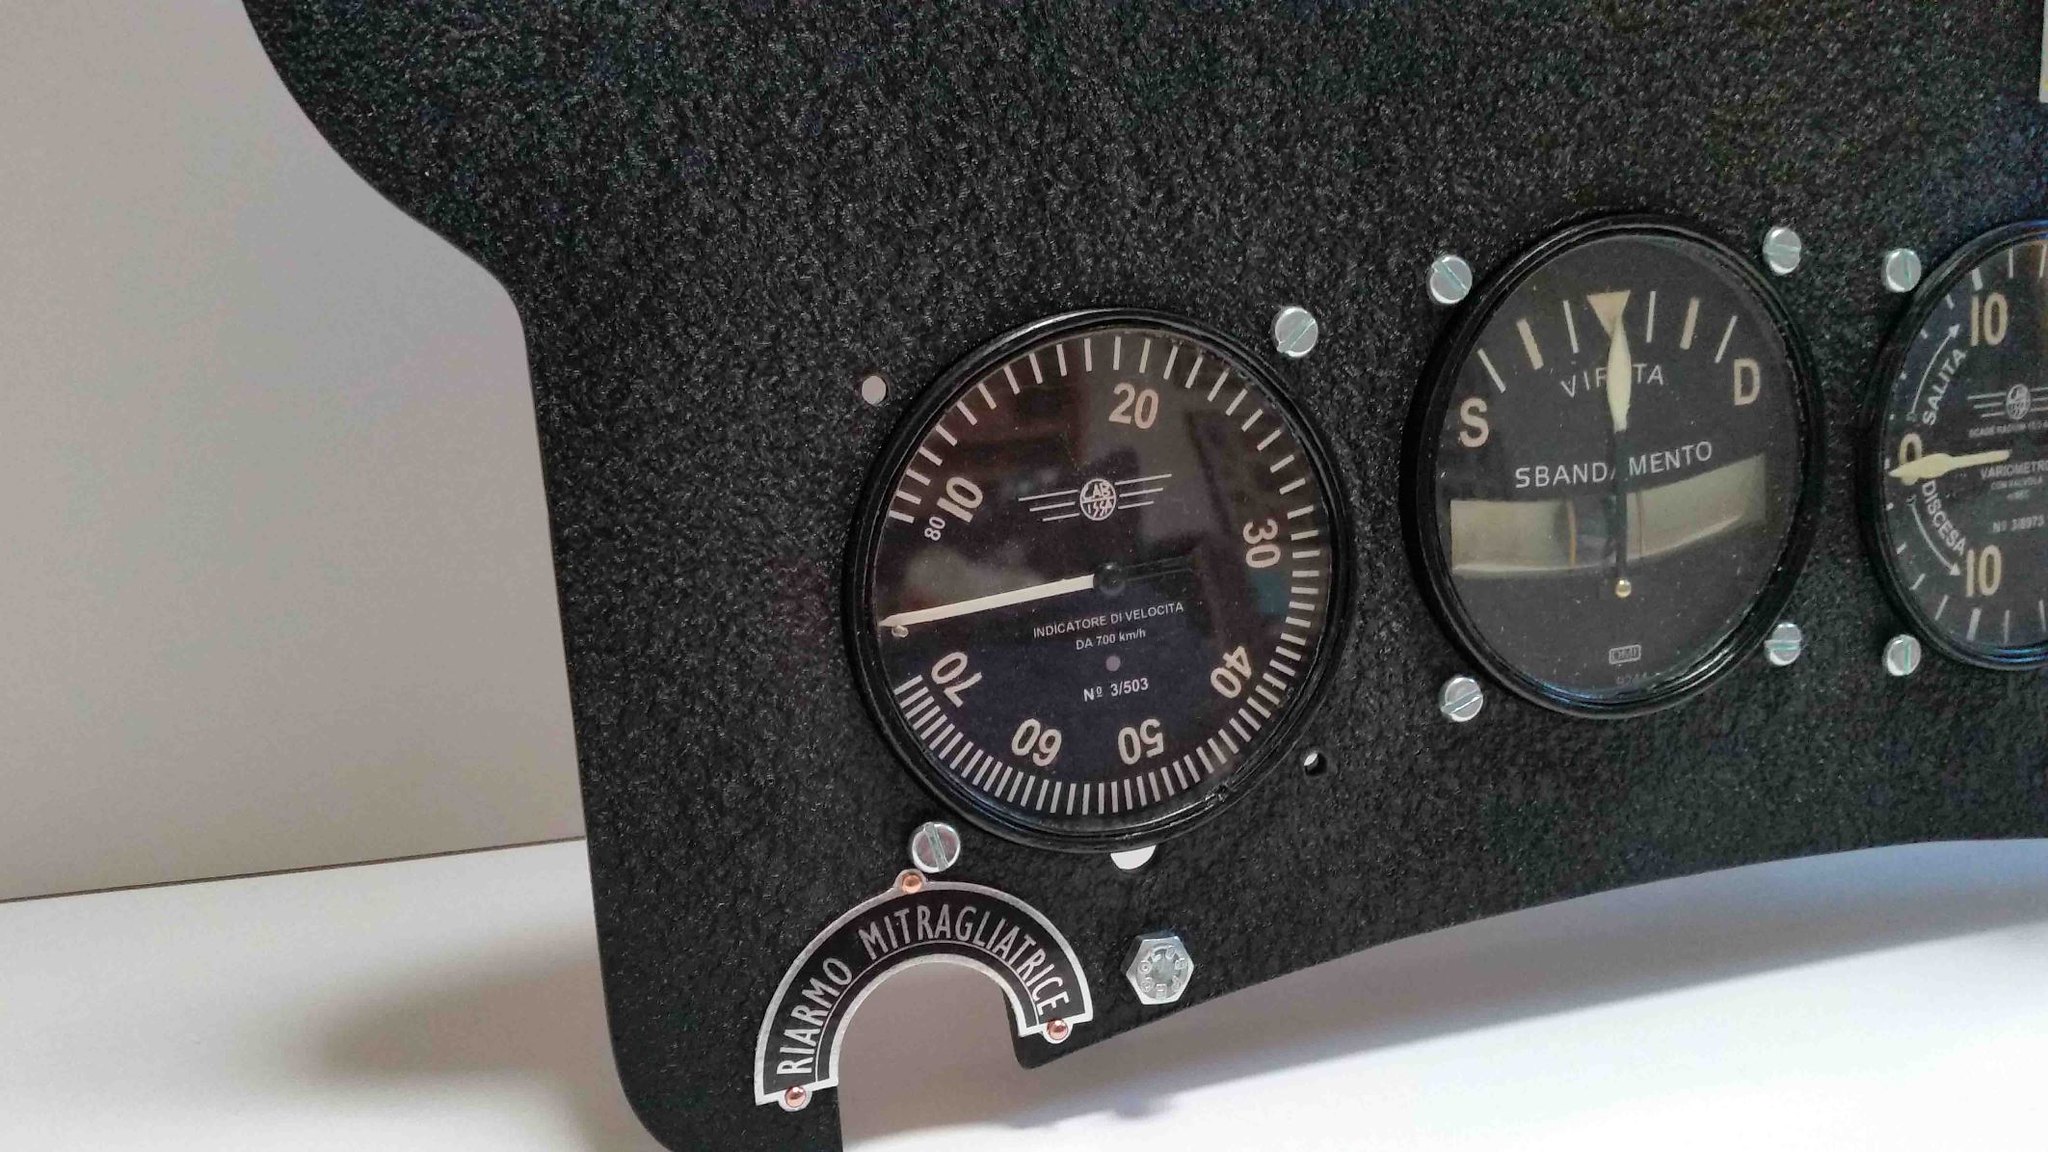 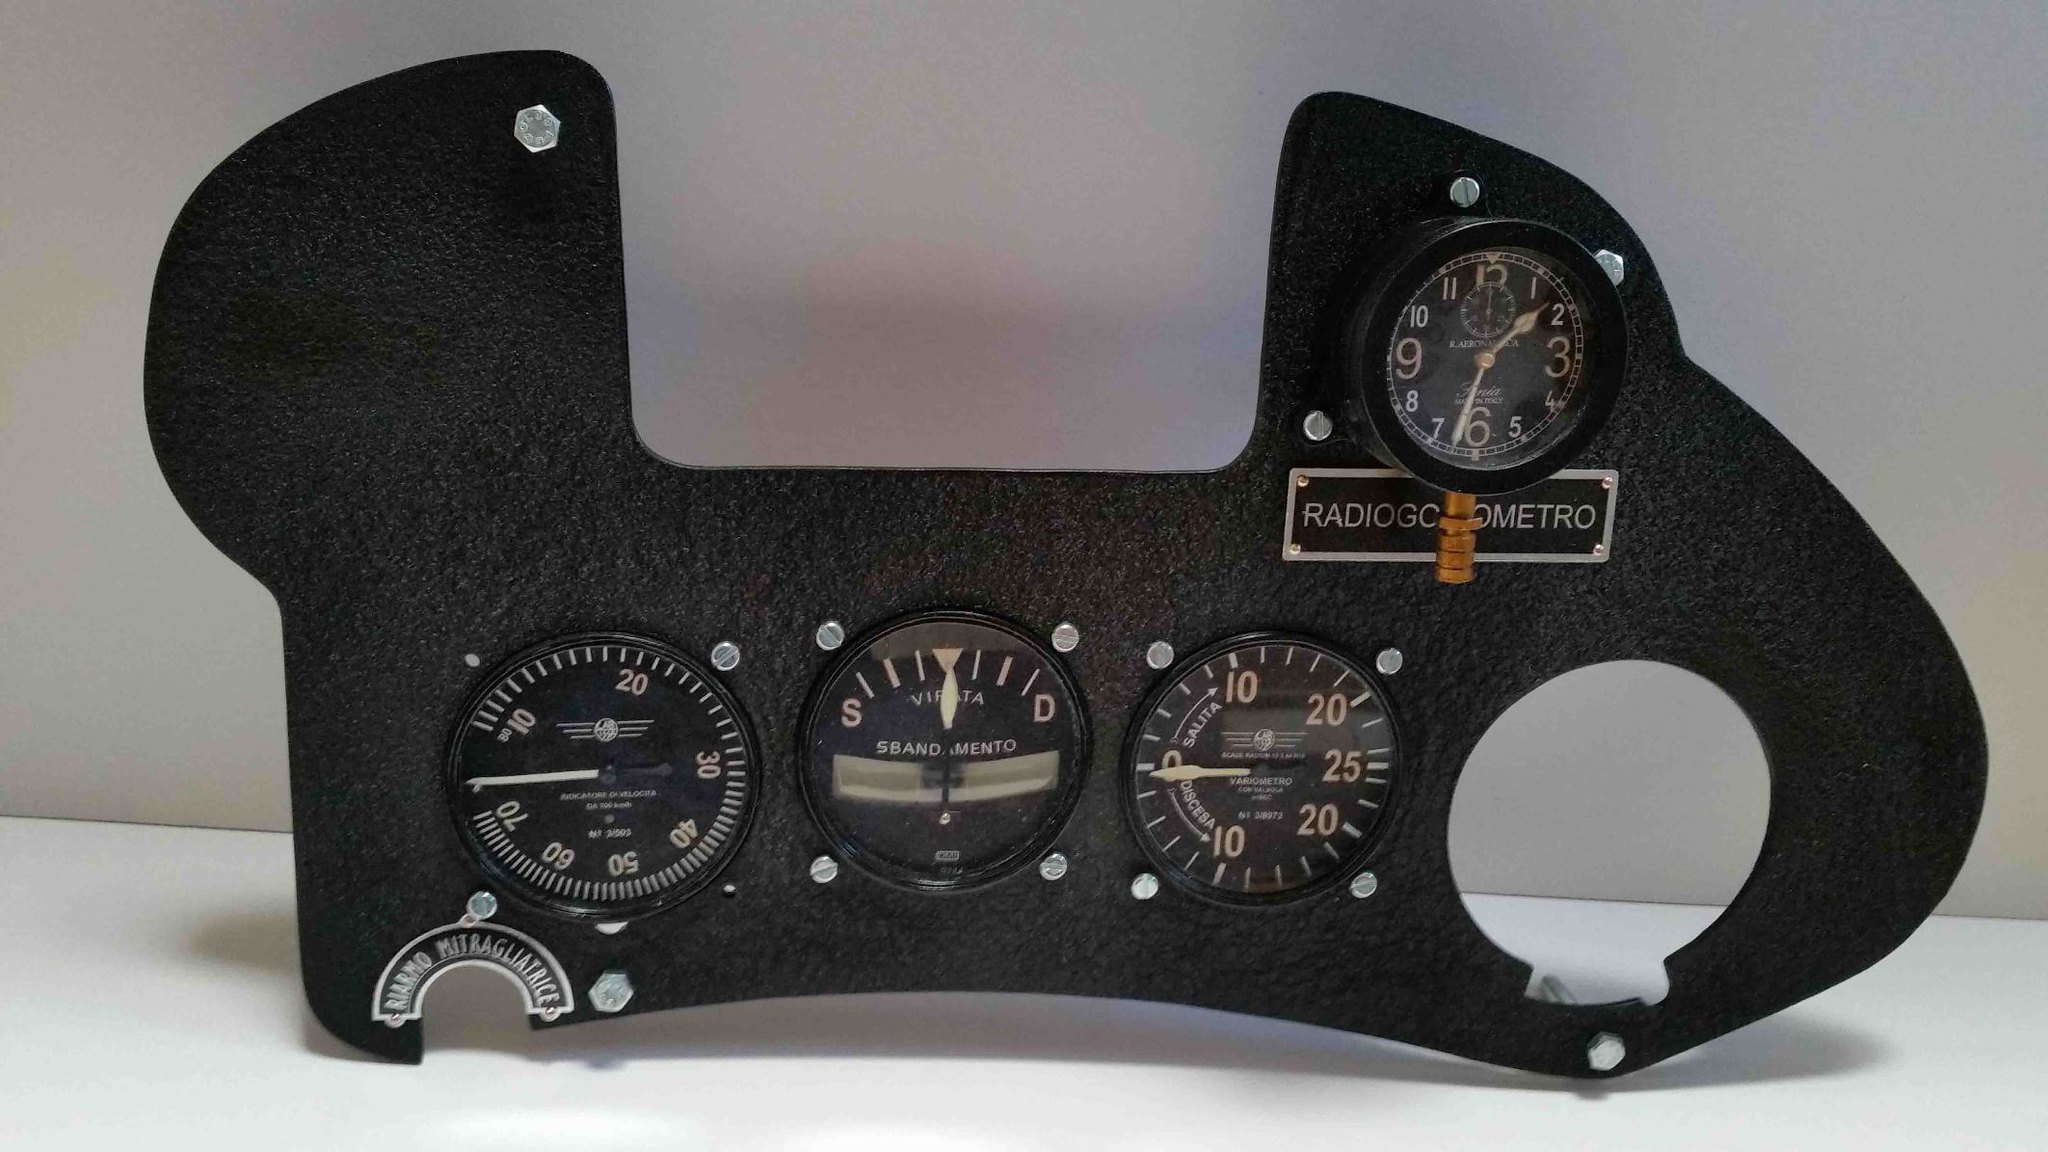 Have a nice weekend guys
|
| Google Adsense |
|
#48
02-05-2018, 03:23 PM
|
||||
|
||||
|
I was speechless.... 8-0
__________________
My personal site.
|
|
#49
02-07-2018, 02:35 AM
|
||||
|
||||
|
Al, The ME109 Instruments were outstanding. These instruments are on an even higher level of realism.
Or to put more precisely. . . .Dam your Good! Looking at the panels screws I have a suggestion to "blacken" them. Painting metal is always a problem without a lot of cleaning and using a paint primer. The results end up looking like painted screws. What I suggest start with brass screws and use "Casey Brass Black" metal finish. I have used this on Brass ship model parts and the result quite good and finish does not rub off. For best results etch the brass parts in white vinegar for 10 minutes or so. Then clean the parts with water and drop them in small container filled with the brass black. in just a few minutes you will have good looking black finished screws. Link to Amazon Jm
__________________
There is a very fine line between paper modeling and mental illness.
|
|
#50
02-07-2018, 08:34 AM
|
||||
|
||||
|
Thanks
Hello PMs
As always, thanks for the support on this build, its good to see people are interested in the subject. I am always trying to improve on previous techniques and as always new ideas are always welcome Jim, just checked out the link and the first thing it says is, does not ship to Spain. My wife is in the UK so Ill ask her to get it delivered there. I notice they do this product for aluminium as well, Im going to purchase both and try them on the current screws first as Ive got loads in a tin at size 4mm. If it doesnt look good ill get brass ones as recommended. Thanks for the support and help guys Enjoy
|
| Google Adsense |
 |
| Tags |
| folgore, instrument panel, macchi c.202, sonia clock |
| Thread Tools | |
| Display Modes | |
|
|


 Linear Mode

