


|
|
|
#71
 06-11-2018, 12:18 PM
|
||||
|
||||
|
Artificial Horizon part 2
PMs
Next, the glass support case: Again, simply sticking the graphics to MDF then cut it out to the correct shape and sand smooth: 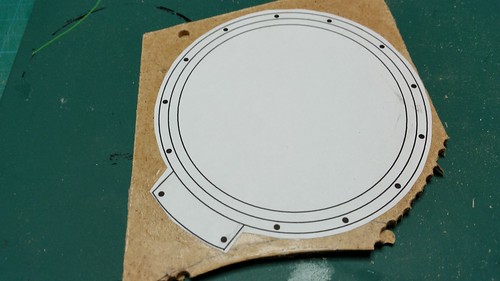 Cutting out  sanding 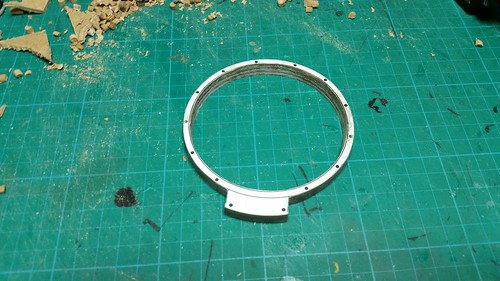 I next had to figure out how to make the plastic fit the support case. I used card as the mating face, marked the clear plastic and cut it out with a dremel. 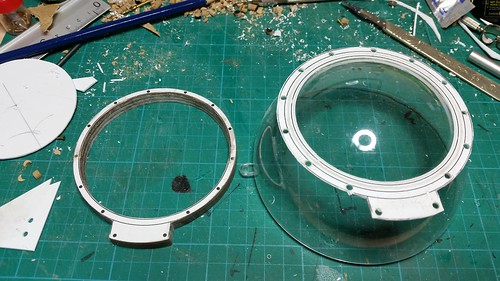 Before installing the plastic I attached the card face to the support body and used some small brass bolts for realism look.  Enjoy 
|
|
#72
06-11-2018, 12:23 PM
|
|||
|
|||
|
Despite reading every post since you began making these I'm still amazed by your techniques and their execution. You're doing great Al. Keep it up!
__________________
This is a great hobby for the retiree - interesting, time-consuming, rewarding - and about as inexpensive a hobby as you can find. Shamelessly stolen from a post by rockpaperscissor 
|
|
#73
06-11-2018, 12:35 PM
|
||||
|
||||
|
Artificial Horizon part 3
PMs
Completion Fitting the glass to the support came next: 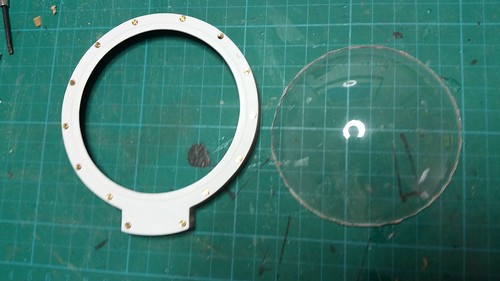 I made a card circlip which i placed on the inside pushing the plastic upwards tight against the card which worked a treat. 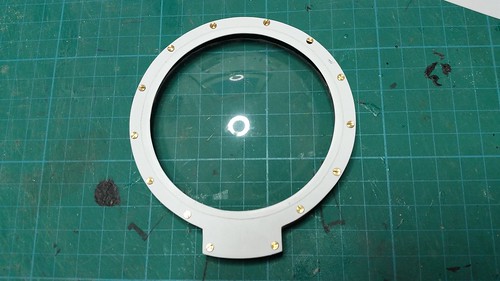 I next made the climb indicator out of card, painted it with glopaint and stuck in position. 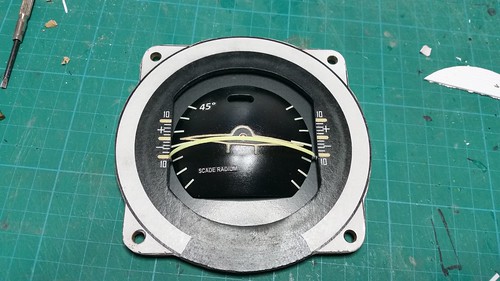 I next painted the support base black and tried everything for fitment. 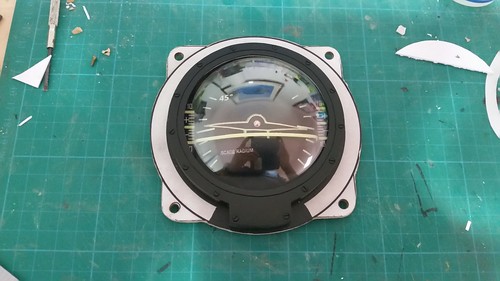 The adjusting knob was next. Again, MDF cut to shape and painted black. 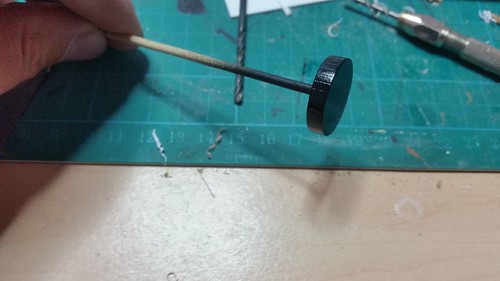 In place 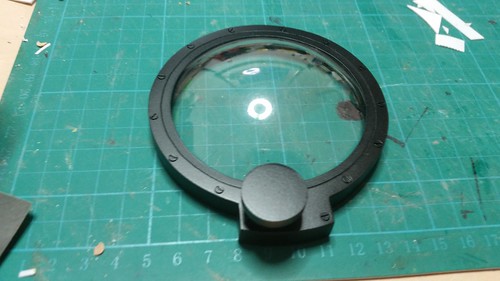 Now for final attachment and fitment to the panel. 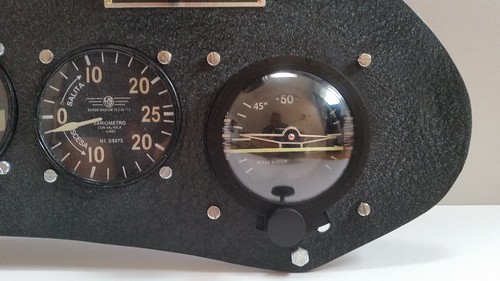 Complete The final item is fitted to the upper panel. 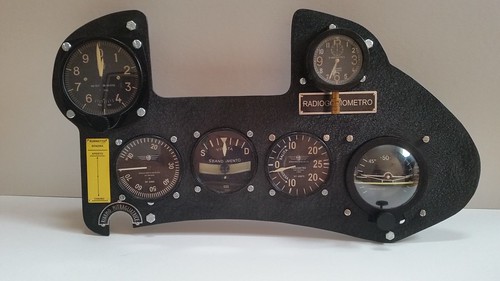 Next, work starts on the lower panel: Cheers Elliot Enjoy
|
|
#74
06-11-2018, 12:51 PM
|
||||
|
||||
|
Night Glo
PMs
Sorry, thought Id done for the night myself but its just getting dark in the workshop and i noticed this below. Look at this: 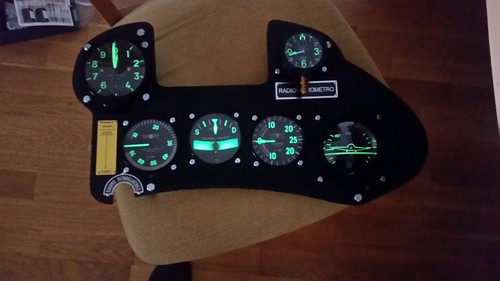 Have a good one
|
|
#75
06-11-2018, 01:00 PM
|
||||
|
||||
|
That is soooo cool!
__________________
"Rock is Dead, Long Live Paper and Scissors" International Paper Model Convention Blog http://paperdakar.blogspot.com/ "The weak point of the modern car is the squidgy organic bit behind the wheel." Jeremy Clarkson, Top Gear's Race to Oslo
|
| Google Adsense |
|
#76
08-01-2018, 02:40 PM
|
||||
|
||||
|
Temp Gauge
Hello PMs
Ive done some deep research into the next bunch of gauges. They all stem from the company Allemano in Italy (which still produce gauges today). Its been difficult to track down decent pictures of originals but heres one I found on the net: 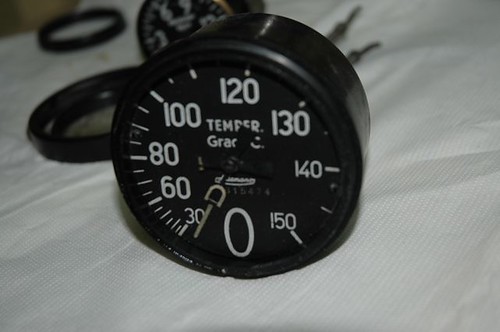 From the pic and the dia of the gauge I created the usual graphics: 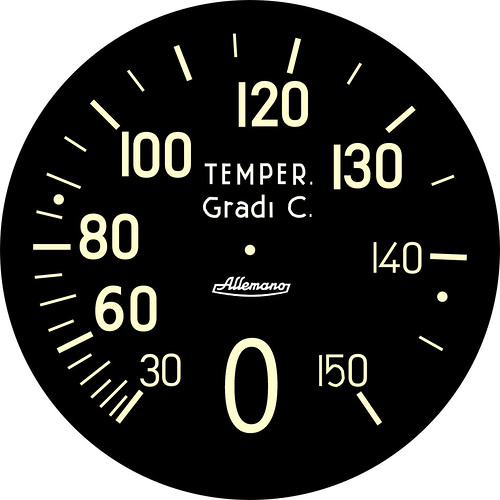 This graphic was glued to 12mm MDF (the base of the gauge), varnished and the numbers painted with fluorescent paint. From here I made the two rings from card in the usual way, covered them in superglue and sanded them until the reached the desired shape and size of the glass holder. I cut out the glass from an old CD case and sanded it until it fit inside the glass holder: 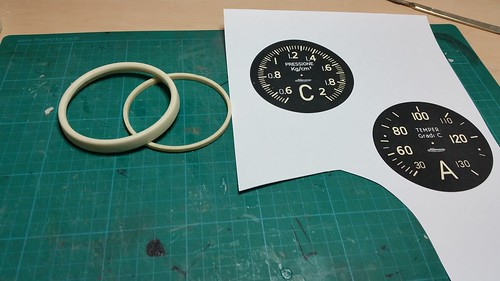 From here I made a mold from silicon of the two paper glass holders. With these I cam make the same rings exactly as many times as I need. 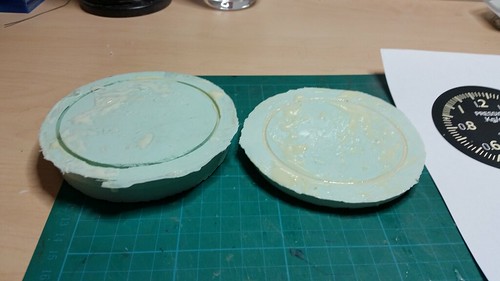 See the duplicate castings below: 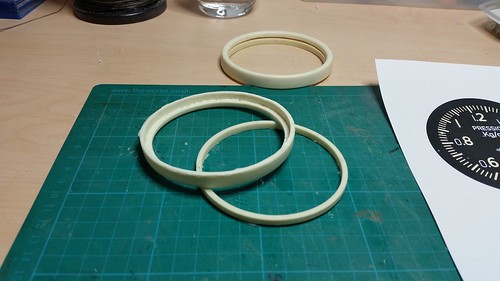 From here I simply painted the rings black, inserted the CD plastic to simulate the glass inside the outer ring and pushed the inner ring inside to secure it. I also made to needles and painted them then stuck the lot together: 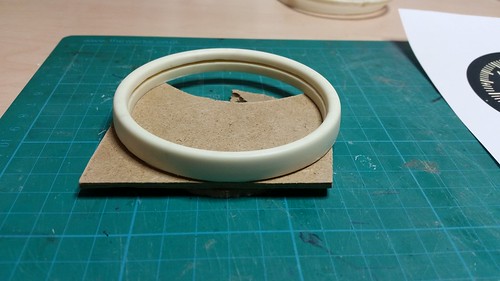 Painted and assembled: 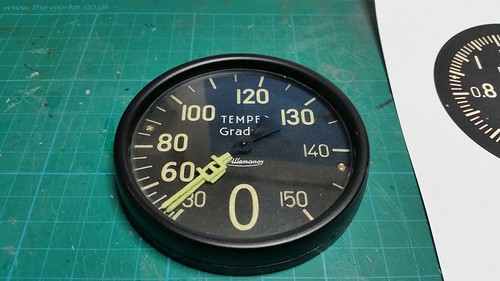 There are a number of other gauges of the same size which will get the same attention: 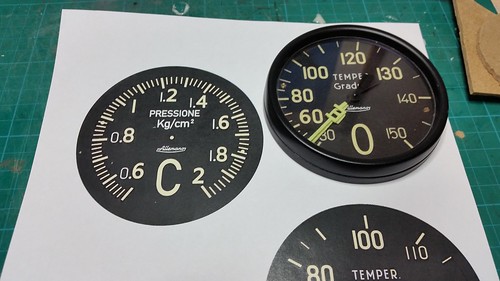 Hope this makes sense? Enjoy
|
|
#77
08-01-2018, 02:57 PM
|
||||
|
||||
|
Makes sense, but I'd forgotten 'the usual way', so had to go back and refresh this old memory bank
__________________
A fine is a tax when you do wrong. A tax is a fine when you do well.
|
|
#78
08-01-2018, 03:18 PM
|
||||
|
||||
|
layers
Hi Vermin King
Simply put, paper or card layer cut to shape and glued on top of each other until the correct height is made: 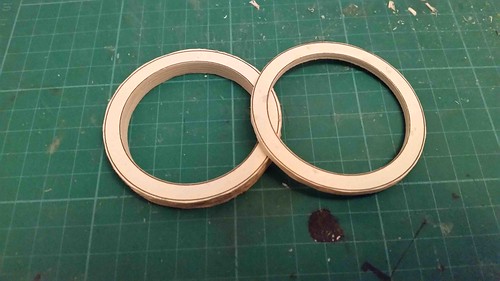 Once the correct size and shape is achieved, cover it in superglue. It turns the paper/card into concrete - simply sand to shape. Hope this helps
|
|
#79
08-01-2018, 04:00 PM
|
|||
|
|||
|
I like that you have turned to casting for repetitious parts. It's the only way to go, imho. As far as the temperature gauge goes you have done your usual professional job. Well done!!
__________________
This is a great hobby for the retiree - interesting, time-consuming, rewarding - and about as inexpensive a hobby as you can find. Shamelessly stolen from a post by rockpaperscissor
|
 |
| Tags |
| folgore, instrument panel, macchi c.202, sonia clock |
|
|


 Linear Mode

