


|
|
|
#111
 01-18-2019, 02:07 PM
|
||||
|
||||
|
Amazing stuff. Always have to check your thread first when I see an update
__________________
A fine is a tax when you do wrong. A tax is a fine when you do well. 
|
|
#112
01-18-2019, 02:10 PM
|
||||
|
||||
|
Assembly
Hello PMs
Well its dry so ive had a chance to install the gauges on the dry panel. This is the lower panel with all its bits:  And now with the upper panel attached: 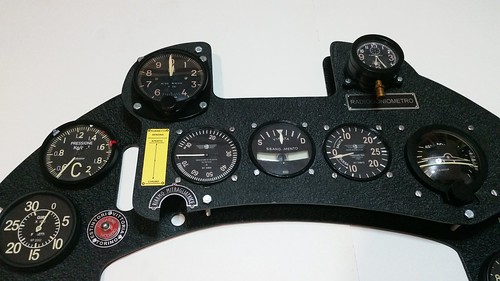 Right side 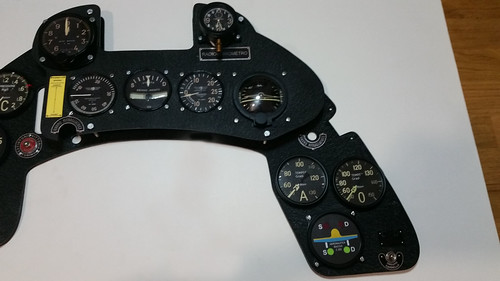 Left side  Top view 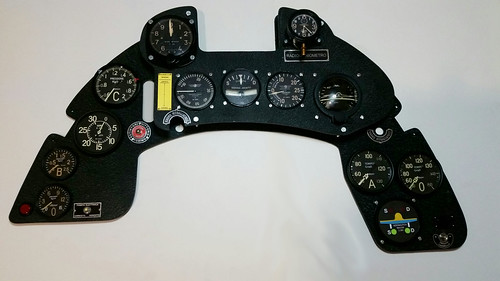 It only needs the arming handles, fuel shut off and another lever which im not sure what it does. Oh yes, the compass - its going to be in the way for the framing so Vermin King, ill make it as a seperate item. Enjoy
|
|
#114
01-25-2019, 09:31 AM
|
||||
|
||||
|
levers and handles
Thanks Mike - I will sir
OK, Ive been doing some work on the handles and levers. First of all was the Gun cocking levers x2. I made these from Wooden dowels. Cut to length, sanded and stuck together and simply painted black (weathered a little);  Painted and loose fitted on the panel: Left gun 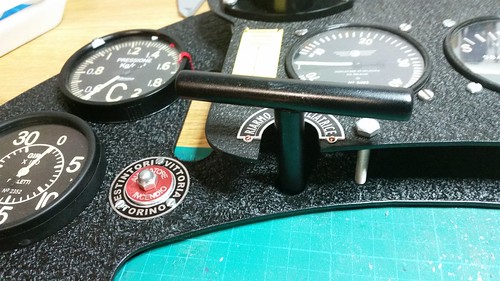 Right gun  This one was more difficult, the engine stop handle. I tried to make the handle from card and paper and failed to make something of a substancial realistic shape, so..... I used putty. Its a first time for this material but after a lot of sanding, see what you think?  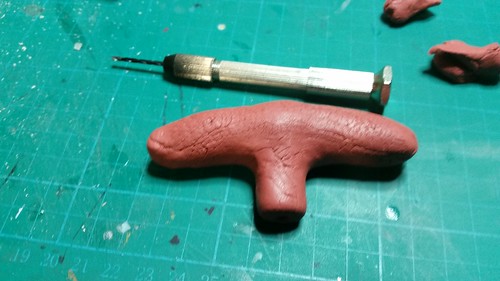 Lots of sanding 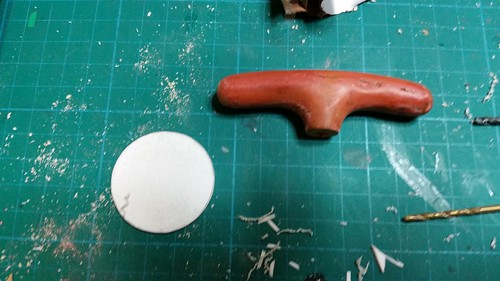 Bit of paint: 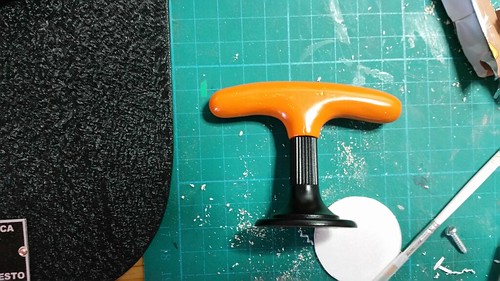 Now for the last of my letraset!! 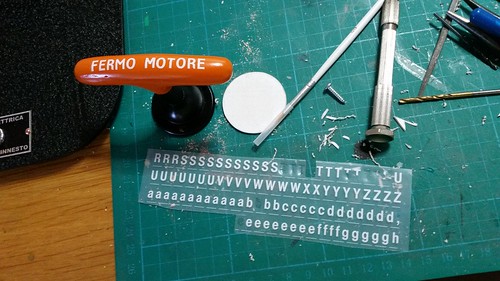 I stuck it on an old ink stamp and painted this black, handle in position: 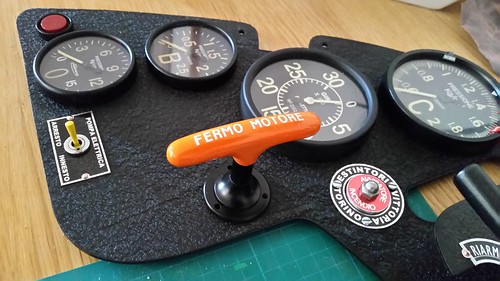 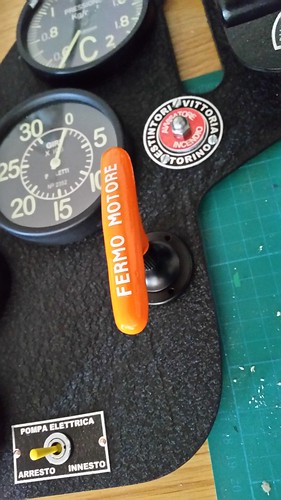 Hope you got some ideas from this set of pics. Just the fuel lever left to build!! Enjoy
|
|
#115
01-25-2019, 12:07 PM
|
||||
|
||||
|
Quality work, sir
__________________
A fine is a tax when you do wrong. A tax is a fine when you do well.
|
| Google Adsense |
|
#116
02-08-2019, 11:46 AM
|
||||
|
||||
|
Last Part??? I think....
Hello PM's
Just had a week or so to figure out and make the next item. This is the fuel tap or fuel shut off cock as I would call it. Here's one on a museum C205 (similar aircraft) - it has an orange handle with the Letter B for Benzine:  Nice and simple at first with just a card arch made from brown/white packing card: 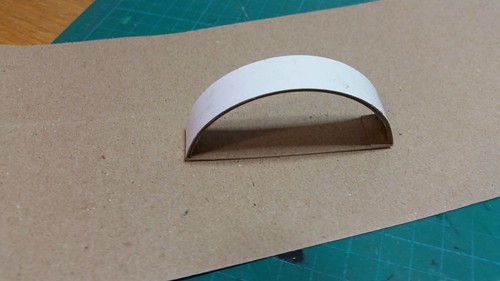 And sanded smooth: 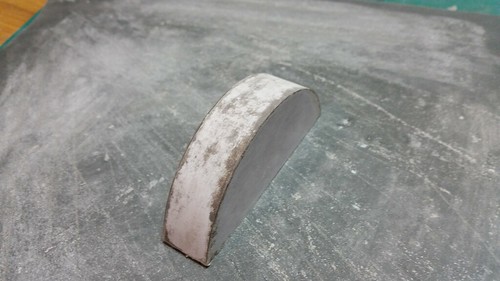 It was next sprayed black and varnished. The lever was 2mm MDF, cut out to shape and sprayed silver: 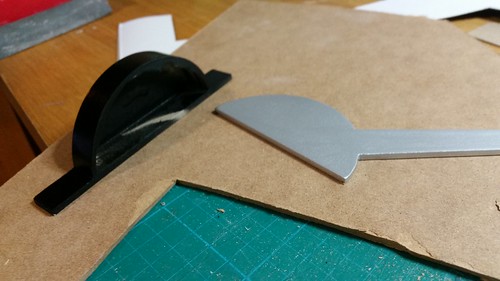 The end of the handle had me stumped for a few days but I reverted back to basics and glued a load of white card together to shape whilst attached to a drill:  The handle was too short at first but I simply added more card however, the superglue I used was strong! It took me ages to shape it!!  Eventually shaped: 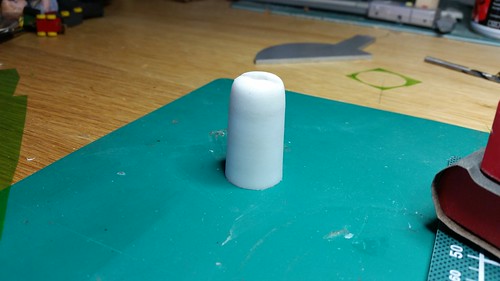 Very top of the handle: 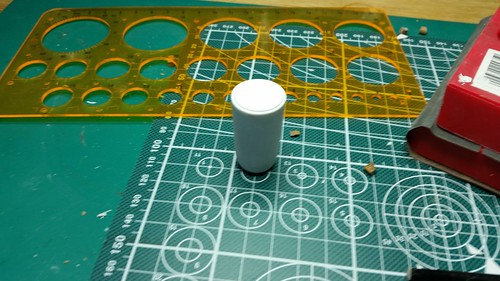 A little orange spray: 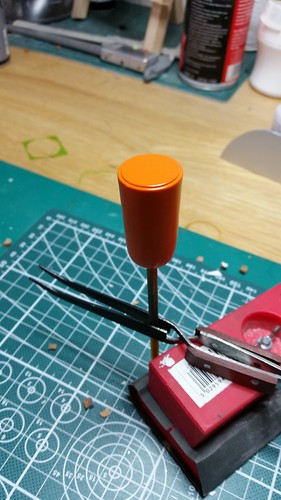 I had some MR DECAL left over from an Amazon buy some years ago and so designed a letter B to fit the end (oh and some other Macchi Graphics) of the handle like so:  This I then printed off on the special paper and cut out:  Simply placing it in water for 30 seconds allows you to tranfer it onto your object - really cool stuff: 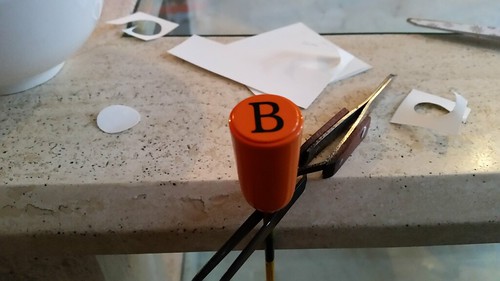 Here it is in place: 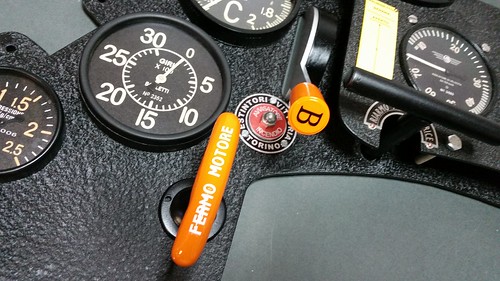  It really is starting to look good! A few more little items to go before she is mounted and completed. Enjoy
|
|
#118
02-08-2019, 02:21 PM
|
||||
|
||||
|
I am amazed at how you guys with skill can do tremendous work.
__________________
A fine is a tax when you do wrong. A tax is a fine when you do well.
|
|
#119
02-08-2019, 03:51 PM
|
||||
|
||||
|
Every time I tune in here I'm utterly amazed at the creative and and 'thinking outside the box' way that each part of these panels is dealt with. A true artist and modeller.
__________________
''Oh, stop whining! Can't you just print off another one?''- my wife ca 2018
|
|
#120
02-26-2019, 02:06 PM
|
|||
|
|||
|
Madre mía, this is amazing: words fails me, congrats for sharing!
|
| Google Adsense |
 |
| Tags |
| folgore, instrument panel, macchi c.202, sonia clock |
|
|


 Linear Mode

