


|
|
|
#12
 11-20-2017, 10:07 AM
|
|||
|
|||
|
Look great!
Well done.
Quote:

|
|
#13
11-20-2017, 01:42 PM
|
|||
|
|||
|
Exceptional job. Glad to have seen them.
__________________
This is a great hobby for the retiree - interesting, time-consuming, rewarding - and about as inexpensive a hobby as you can find. Shamelessly stolen from a post by rockpaperscissor 
|
|
#15
11-21-2017, 05:51 AM
|
|||
|
|||
|
A4-E Based on Emil Zarkov's model
Hi
Thank you for your kind words, especially from Yoav whose work i greatly appreciate. I will contact Zarkov's Cadbest regarding possibility of publishing the model. This will however require numbering the parts and making instructions. Here are some photos from building the model. Those who are familiar with the original model will see that I have made quite a lot of changes in construction. SEGMENT WITH COCKPIT TUB In the original model this consisted of 2 segments ansd associated bulkhead. Making it a single segment and eliminating associated bulkeads facilitated installation of cockpit tub and undercarriage well.         SEGMENT WITH WING ATTACHMENT In the original model finished assembly of both wings is attached to the fuselage. I had no confidence that the due to tolerances in assembling the fuselage width (which at this point has an omega shaped cross-section) will precisely match that of the wing assembly.     VERTICAL FIN I have developed my own way of making "imitation" of movable control surfaces. This results in a slot between fixed and movable part of the fin.      
|
| Google Adsense |
|
#16
11-21-2017, 06:15 AM
|
|||
|
|||
|
DORSAL FIN
This is somewhat modified from the original model       REAR FUSELAGE  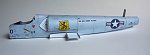 HORIZONTAL STABILIZERS Photos show more clearly how the imitation of movable surfaces is done. Score bend lines with blunt knife , cut out leaving some extra to facilitate bending, bent on a sharp edge ( this takes a bit of practice at first), Trailing edges are thinned by sanding on the inside, after gluing together i place it into a spine of the book to get straight trailing edge.           
|
|
#19
11-21-2017, 06:51 AM
|
|||
|
|||
   WING I changed the location of the join of the slat recess from the lealeading edge of the wing to the upper wing and added internal liners. Slat consists of 2 sides- inner and outer , printed on thin ( 80g) paper , separately bent over approx 2mm dia wire ( my wife kindly provided appropriate knitting needle) and glued together. Such laminated part is easy to bend and retains its shape after glue has dried.            NOSE In the original model the tip of the nose was in form of very small separate ring and cone parts - very difficult to make. I have changed to "petals" which form a part the nose.   AIR INLET I have modified the shape slightly from the original model to give it more rounded shape on top and eliminated long internal inlet duct - too difficult foe my abilities. 
|
|
#20
11-21-2017, 07:31 AM
|
|||
|
|||
|
FRONT AND MAIN UNDERCARRIAHE
  MAIN UNDERCARRIAGE Tight rounded bends are required for some of the parts. To make thigs easier some parts are printed on both sides, some are from thin paper laminated after bending.          SUB-ASSEMBLIES JOINED TOGETHER I left air inlets out before gluing the wing but it would have been better to join them to the fuselage earlier.   FUEL PROBE Such long small diameter parts can be difficult to make even when printed on thin paper. Tomorrow I will draw a diagram to show how it was made.  TAILHOOK AND VARIOUS SMALL PARTS ADDED   
|
| Google Adsense |
 |
|
|


 Linear Mode

