


|
|
|
#21
 03-23-2018, 10:33 AM
|
||||
|
||||
|
Good looking build !
Good luck with this really big bird ! Best regards, Ronan
__________________
-WIP : F4B GPM 1/33 // Recoloring S&P Mirage IIIC 1/72 -Previous build : S&P F-104J Starfighter 1/72 -Next build : Unknwon yet 
|
|
#23
03-24-2018, 12:22 AM
|
|||
|
|||
|
hi Chris
Hello Chris I do not know what happened in connecting parts 11 + 12 to part 10. This should be a smooth and easy connection. These are pictures of the central body of my model. All the connections between the parts were connected perfectly without any special problem.   On the other hand Chris, I think I know what happened there. I took each and every part and closed it completely and then I began to thread each part into the chassis and I got a full match. You worked a little differently. you took each part separately and wrap the chassis with it and then close the seam from above and thus you progressed in building the central body. After looking deeply at the pictures you put.... I see that when you get along with the parts, the upper stitches began to expand until the top seam of part 10 actually became wide, I estimate 2 millimeters. So I think that this is what caused the mismatch between Part 10 and Parts 11 + 12 Hope you can fix it YOAV
|
|
#25
03-24-2018, 12:43 AM
|
|||
|
|||
|
About super glue
If you look at the instructions page No. 104 .... Main body part II.... You can see that I use super glue only at breaking points and there is no glue on the entire perimeter of the part. The break points(Which need fast glue) of the part are marked with red arrows. I just take a toothpick and I put a drop of super glue on his edge, and then with the toothpick I stick the glue to the points I want and it sticks fast and I do not have to hold the part for a long time to dry. I highly recommend Super Glue-3 of LOCTITE Company.  It dries very quickly and leaves no marks, if the model's pages were sprayed with a protective spray after they were printed. Another advantage of this specific glue. Even after opening the tube for the first time, the contents of the tube can remain fresh even after two weeks or more. I hope my explanation is understandable ... as good as my English is.  good luck YOAV Last edited by YOAVHOZMI; 03-24-2018 at 01:00 AM.
|
| Google Adsense |
|
#26
03-24-2018, 01:14 AM
|
||||
|
||||
|
Toothpick and the super glue! That sounds very interesting. These are the crucial secret master lessons I am hoping for
 I was making a mess my way. I was making a mess my way. So only super glue on the red break lines but the hull rings are still glue together with regular glue, right? My problem was that when I glued the rings together I was not able to reach the break lines with the super glue, but with the toothpick method I can see that it will work. I also noticed that the closing of my rings lead to the gap you mentioned, Yoav, and hoped it was not too bad. But maybe it caused some of my problems. I don't think that it is the source of the huge gap between the front hull and the end rings. I was examining the model again today and I found this, which I think is the real culprit.  The last transversal rib is misaligned by at least 1mm! Looking back at the photos from the rib cage I can see that it was there but I haven't noticed it. I have to admit I was not thinking I had to be that precise and I might have rushed things a little in my youthful euphoria (I do feel 25 years younger when building this!)I will continue to build with this one and see how far I can go before nothing goes. It is after all my first try and there is so much I am learning. I will try a second attempt later where I hopefully reconcile all the lessons learnt. Happy building, Chris
__________________
website: http://www.papierschnitzel.com - patreon: https://www.patreon.com/papierschnitzel - facebook: https://www.facebook.com/papierschnitzel
|
|
#27
03-24-2018, 02:14 AM
|
|||
|
|||
|
Usually in complex bodies like this F-15 model, I use super glue only at breaking points and almost no glue on the perimeter of the part, because the glue at breaking points is strong enough.
I use this method regularly with super glue for models like the F-4E, F-15 and also these days with the F-16. In normal parts with a circular, oval or rectangular cut, I use the old and the common method of applying glue to the perimeter of the parts. YOAV
|
|
#28
03-24-2018, 12:08 PM
|
||||
|
||||
|
I have to say the super glue is growing on me. With the toothpick one is able to glue very precise!
So I was able to cover up the "step" in the lower back section somewhat by cutting through the middle, coloring the white in gray and bending it towards the engines. The long part covering up that area also improved it.  I then worked on the top engine covers, made some glue tabs and glued them in shape.  With a mix of regular and super glue I was able to get the covers in position (quite well for me at least ) Again the final middle cover part sealed the deal. Now the sections looks complete. 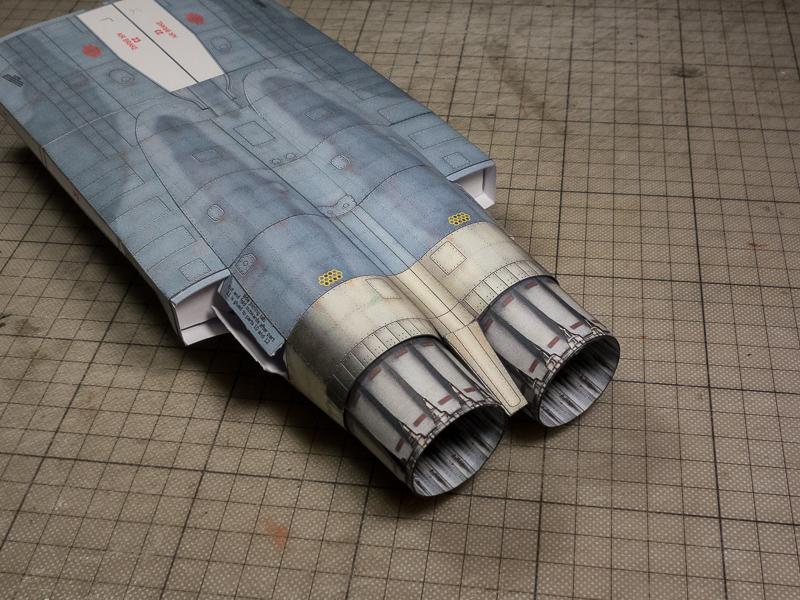 The triangle thing at the end left a gap but I was able to cover it up with the hook. 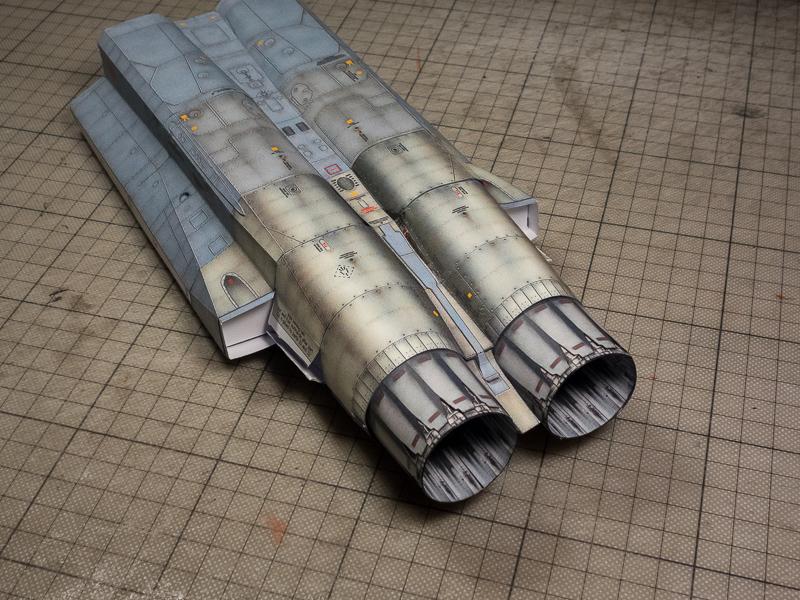 Only you guys will know what a mess this build is I think my nephew will be most impressed!I am very happy that I was able to cover up all the mistakes somewhat satisfactorily and made it to this stage. Though when I compare it to Yoav's build pics I realize I have a lot of training to do!!!
__________________
website: http://www.papierschnitzel.com - patreon: https://www.patreon.com/papierschnitzel - facebook: https://www.facebook.com/papierschnitzel
|
|
#30
03-25-2018, 01:47 PM
|
||||
|
||||
|
Thanks Russell, yes this model is challenging me to grow! :-)
Not much done today but the start on the seat was relaxing for a change. All very small parts but no new methods to learn! 
__________________
website: http://www.papierschnitzel.com - patreon: https://www.patreon.com/papierschnitzel - facebook: https://www.facebook.com/papierschnitzel
|
| Google Adsense |
 |
| Thread Tools | |
| Display Modes | |
|
|


 Linear Mode

