
 |
|
#11
|
|||
|
|||
|
I am extremely interested in those changes you made to suit your abilities... can you please list them and provide an explanation of how they helped you? Pretty please...

|
|
#12
|
||||
|
||||
|
Nice work! Well done.
Hayate is definitely one of the best-looking Japanese planes of WWII.
__________________
Kacper |
|
#13
|
|||
|
|||
|
Beautiful work, really well done.
|
|
#14
|
|||
|
|||
|
Hi
Thank you for kind comments Model is drawn entirely in Photoshop, which has facility for making various 3D effects for rivets lines holes etc. It is printed on nothing special injet printer, and not impregnated. After spending considerable time drawing the model it is my practice to make it in several versions. So now I started on 2 more versions , as below  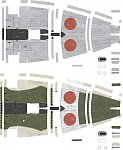 I have consolidated 2 segments of the centre fuselage from original model into one and revised sides of the cockpit to be printed on thin 80g paper and glued to the interior of the segment. I retouch the edges of the segments with crayons as I cut out the segments. Edges of the segments which will join to next segment are slightly "dished" by placing on compliant surface (soft cover book) and pressing with oblong handle of the knife. Then I round the segments and glue in joining strips. 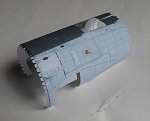 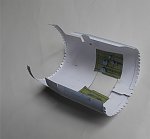 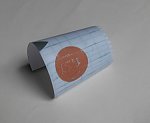 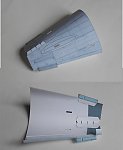 
|
|
#15
|
|||
|
|||
|
As always - excellent work.
Maybe you could make some arrangement with Nobi to offer your recolors to the public?
__________________
Constructive criticism of my builds is welcome - if I messed up and allowed others to see it, I certainly deserve it  Michael Krol |
| Google Adsense |
|
#16
|
||||
|
||||
|
Very interesting and very well done.
are you using the bevel & embose function on PS or the 3D effects ? can you elaborate on that process ?
__________________
Moshe O |
|
#17
|
||||
|
||||
|
Once again, beautiful work. Thank you for sharing.
Gary
__________________
"Fast is fine, but accuracy is everything" - Wyatt Earp Design Group Alpha https://ecardmodels.com/vendors/design-group-alpha |
|
#18
|
||||
|
||||
|
Great job on the artwork AND building

__________________
regards Glen |
|
#19
|
||||
|
||||
|
Your work and process are stunning!
__________________
MS “I love it when a plane comes together.” - Colonel John “Hannibal” Smith, A Team leader Long Live 1/100!! ; Live, Laff, Love... |
|
#20
|
|||
|
|||
|
Hi
Readers might have noticed that this model has "separated" control surfaces, not present in original Thaipapework model. 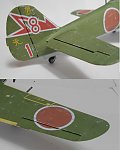 They are all made in essentially the same way, which I have "invented" some time ago and illustrate below for vertical fin. These control surfaces are in fact not separate to the fixed portion of wing or fin but are glued in with a slot between fixed an movable portions. Once glued in the wing or fin is a single piece, simple to "close" while the control surface and fixed portion are well aligned and with consistent gaps. 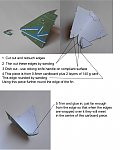 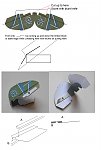 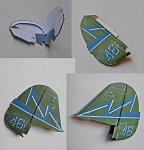 For those interested in how I make the various effects in Photoshop- I can send you a PSD file with all the layers and settings- then almost all the "secrets" will be revealed. |
| Google Adsense |
 |
|
|