


|
|
|
#101
 05-27-2010, 08:11 PM
|
||||
|
||||
|
Quote:
Thanks for your kind words too. I have said this a load of times but it is with help from people like you who made this a lot of fun. Had a busy week at work but still snapping the pics and building. Hope to get an update in the next day or two. Sadly I have not been following your threads but will get back to them soon as well. The paint tutorial is very good indeed. why not put it in your signature block like I did? Might bring some more traffic to it. Thanks again and catch you around I am sure. Cheers Jim 
|
|
#102
05-27-2010, 08:44 PM
|
||||
|
||||
|
Quote:
Onward, SFX
|
|
#103
05-28-2010, 05:56 AM
|
||||
|
||||
|
Quote:
First thing is to go to page one of your colouriing tutorial and copy the link to that page. Now, Click on: > UserCP - Top left of screen. > Settings & Options > Edit Signature Then type in what you want your signature to read. For example Colouring Tutorial. Highlight the text then click on the small icon that looks like the world with a piece of chain. If you hover over it then a pop up info box will read Insert Link. Paste in the box that pops up the link to your page. From here you can either preview signature or save signature. Those links are at the bottom of the page. Hope this helps and you can call me Master Po. :D Cheers mate. Jim
|
|
#104
05-28-2010, 10:05 AM
|
||||
|
||||
|
Quote:
 Thnx,
__________________
http://www.papermodelers.com/forum/a...-48-build.html http://www.papermodelers.com/forum/a...-his-tail.html
|
|
#105
05-28-2010, 10:09 PM
|
||||
|
||||
|
GeeBee R1 by Rafal Ciesielski - Part 7a
This next part took a lot of hours to do as there were many small bits and pieces to build. But, I start off by showing you that with a lot of care and patience, you can cut parts off that were glued out of order. Here you can see that it looks not too bad. I cut part 6 away and was able to leave the petals in place ready to put a new part 6 back later.
 I need to create the seat and this is all valley folds. i.e the fold is towards you creating a valley. Here is the scribing tool I made after a suggestion in this forum. I sanded down an old x-acto blade and it works very well.  This is the seat. K1 and all the parts marked with K are needed. They are on multiple sheets. If you look at the black lines as well as the shape of the seat you can get a good idea of where to place the folds.  Scribing tool in action. Use a nice even smooth cutting action. You will need to practice this to get a feel for how yours works for you.  Now! to make valley folds, my preference is to put the crease in the back of the part. This is a very narrow pin and I use this to mark points that I can join up on the other side so I can see where I need to scribe the paper.  In action.  How the back looks when done.    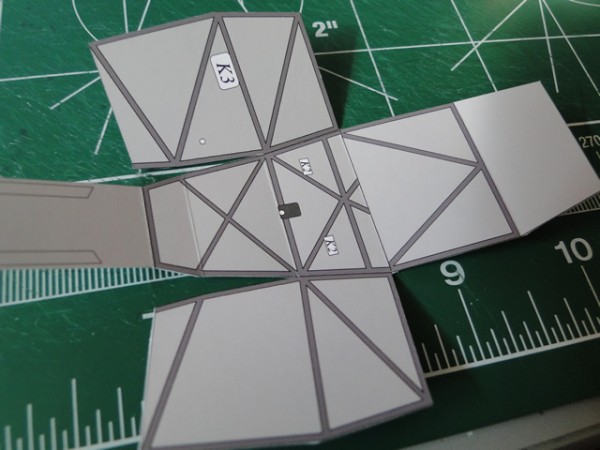 I am starting to get a feel for using the Faber-Castell Pitts artists pens. This is the two shades of grey I have been using. Make sure you use a light touch of the pen otherwise you will saturate the piece and the ink will flood the paper. 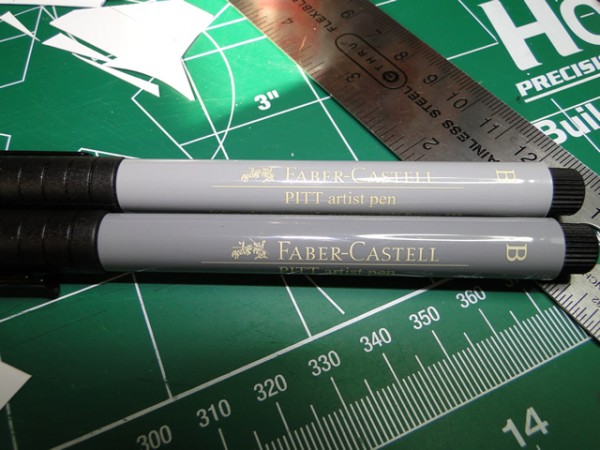 Foot pedals are next. Notice these are mountain folds. i.e The fold forms a mountain when you fold the paper. I do a top score on these - before cutting them out. Much easier to do.  For this model all the parts that need to be laminated have a * sysmbol. I use 2 sheets of 110lb paper for that. It creates 3 layers of paper with two layers of glue and forms a very strong laminate. This is the glue I use for that. It works well enough for this purpose.  Laminated pieces cut out. As stated before, either use scissors or stabbing cuts to get these done.  Remember! A small amount of glue.  Controls laminated and being held with a pair of tweezers. Notice I have coloured all the edges with either red or grey ink. It really finishes the piece off, even if it will hardly be seen.  Holding the pedals prior to folding and gluing. This will give a crisp edge to the fold.   I just love my blade boxes to use as weights to hold things in place. here you can see the pedals being held. I put a big gloop of glue at the back of the pedals so they keep their position.  Finished with the pedals, also edge coloured.  ... part 7b follows.
|
| Google Adsense |
|
#106
05-28-2010, 10:10 PM
|
||||
|
||||
|
GeeBee R1 by Rafal Ciesielski - Part 7b
More bits added to the cockpit.
  Time to check in on Gizzy, my modeling buddie. Oh! Thunder is outside and he's trying to hide under the green paper. lol  OK! Time for a nap.  Next in line is the seat. Told you this was a lot of work. I am using the bottom of my mouse mat and the handle of my knife. Press down hard and it forms a smooth curved fold.  Before you ask, I was doing a dry fit and saw that this needed to be rounded by looking at the other parts. One side attached.  And the other..Notice again how good the pitts pens can blend the edges.  Backs attached. Don't worry about what looks like too much colouring, this will be hidden and I wanted to get rid of all the white.  Done. You cannot see it but I coloured the underside of the seat where it curves up. A bit of overkill as it is not seen but hey..  Seat belts are next. Notice the L and P? I matched it up with the parts marked L and P on the seat. Does not make much difference if you get this wrong. Just remember K6a is the top straps and P and L are the cross straps.  This is the stick grip.  When you cut this out use shallow cuts. Even with a sharp blade, the paper is going to get very narrow and you can pull the paper. Don't try and cut this in one go. Several shallow cuts. Notice also that I have cut the inside first. This leaves a lot of support on the outside for this part.  Done..  Gluing the part to the rod is actually quiet easy. I use lots of glue here. Then wrap the part around the brass rod. Just remember to look at all your sheets for any parts marked with K as this will be part of the cockpit. Keep the two narrow pieces of paper in line when you wrap them.  Keeping in place while glue is drying.  This is the tip. I show this so you can see how the narrow bits need to be rolled up.  Finished and coloured with a black pitts pen.  And glued in place with a gloop of CA glue. I put a small hole in the base and put more CA glue through the hole from the back. That is all that is keeping this in place. And it does very well. I realize that I did not show you how to mount the seat but it is one of the easier tasks.  Oh look! A former. And it has K1. K1 is the cockpit and needs to be glued to this piece.  Here we have the seat belts and the head rest in place. I coloured the headrest then sanded it then coloured it again. This gives the effect of worn leather. Notice that the long seat belt straps are up and down and the short ones are across the seat? I tried to glue the straps in a natural position by bending them a bit but like the rest of this, it will be hidden away. But I feel it is worth the extra effort. There were markings on the side of the seat for the cross belt but there were none for the other straps - so I guessed where they should go.  ... part 7c follows. Last edited by bagpiper; 05-28-2010 at 10:24 PM.
|
|
#107
05-28-2010, 10:10 PM
|
||||
|
||||
|
GeeBee R1 by Rafal Ciesielski - Part 7c
This has taken a lot of time to get to this stage. There are a lot of small parts that need a lot of care to cut out and glue. Also in this part I needed to bend the brass rod for the control stick. The template is on on the sheets too. I think you will agree, that this last image shows that all the effort was worth it. The red knobs where rounded off with a light sanding before colouring them in. Here you can see the bottom of the seat coloured but it will not be seen. But it's attention to detail at all stages that will make for a great model. I am learning this myself. So until next time, happy reading.
Cheers and here is the last picture for part 7 of the build Jim  ... to be continued Last edited by bagpiper; 05-28-2010 at 10:26 PM.
|
|
#108
05-30-2010, 02:14 PM
|
||||
|
||||
|
Astounding work! Obviously your skills transferred well to paper (or you is a ringer, tyro my eye!).
Looking forward to more. Yogi (not nearly so patient ...)
|
|
#109
05-30-2010, 03:31 PM
|
||||
|
||||
|
Retired for now,
I agree with your reservation on this thread. I believe this is a ringer. I base this on the fact that he discussed with another member on how to generate more views and comments to this thread. Secondly the gentleman has stated he is an Engineer by profession. I find it hard to believe that and Engineer finds it so difficult to read diagrams and follow instructions with the excuse of being a slow learner. Thirdly; Like you say he has had a miracle happen and is now showing talents that he professed he never had. I originally bought into this thread in the hope of helping someone to learn the basics of paper modeling. I will no longer take any interest in this build thread. rON
|
|
#110
05-30-2010, 04:10 PM
|
||||
|
||||
|
Quote:
Quote:
:D :D :D Kindest regards. Two Cuts Terry (Err.. Jim) :D :D
|
| Google Adsense |
 |
|
|


 Linear Mode

