


|
|
|
#11
 06-13-2008, 05:41 PM
|
|||
|
|||
|
Looks good so far. I remember when the KA 50 first came out. It really is one heck of a helicopter. Kamov makes a nice line of helicopters. The KA 50 has is really scarey looking especially with the counter rotating blades and without a tail rotor there is less to go wrong.

|
|
#12
06-14-2008, 03:35 PM
|
||||
|
||||
|
Thanks guys!
Yeah I really like this one too. It was the motivator for me to place an order to Halinski. So I skinned the tail, and made the little... horizontal... thing. What are they called in a helicopter? The tail: 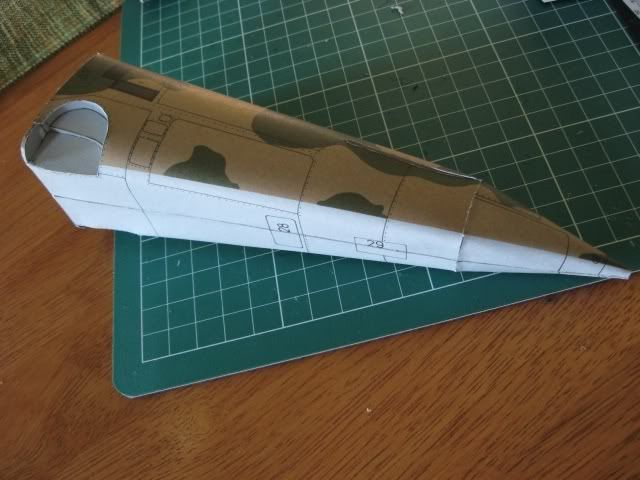 The horizontal thingy: 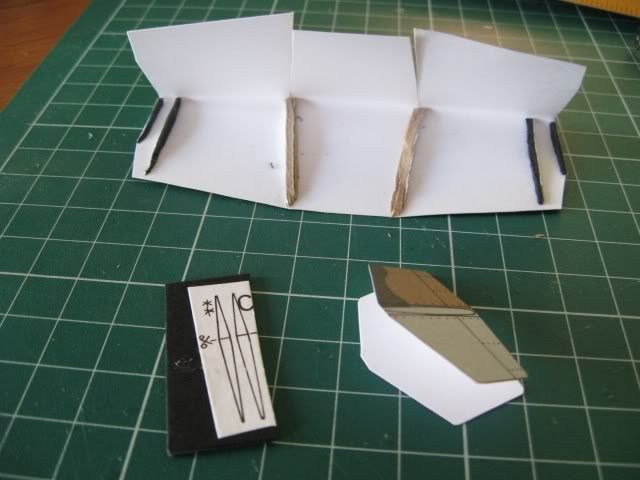 Those supports in there are a total guess. They were simply labeled #13 A, B, C, D and with no instructions or diagram. I guessed that the C part goes into the vertical edge parts (#13, but left/right), and you can see both beside each other. The main section came out alright, so hopefully I guessed right: 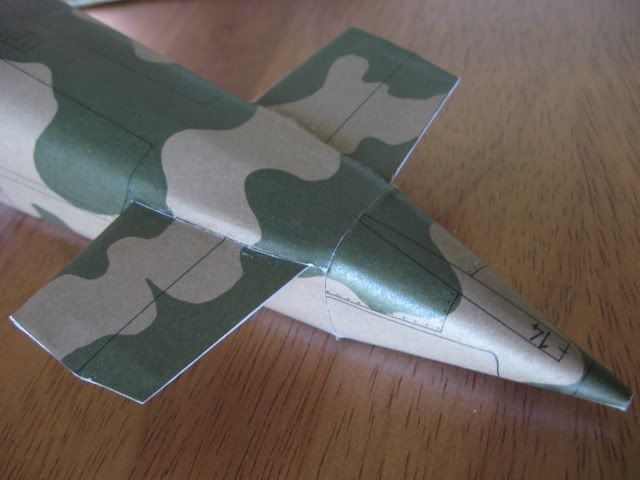
__________________
- Kuba
|
|
#14
06-19-2008, 03:31 PM
|
||||
|
||||
|
Thanks Don, though I don't think I can agree with you in some spots :o
Right now I'm not that happy with this model... I'm getting a lot of issues, and most are my fault, but that doesn't change the frustration! Here's one: 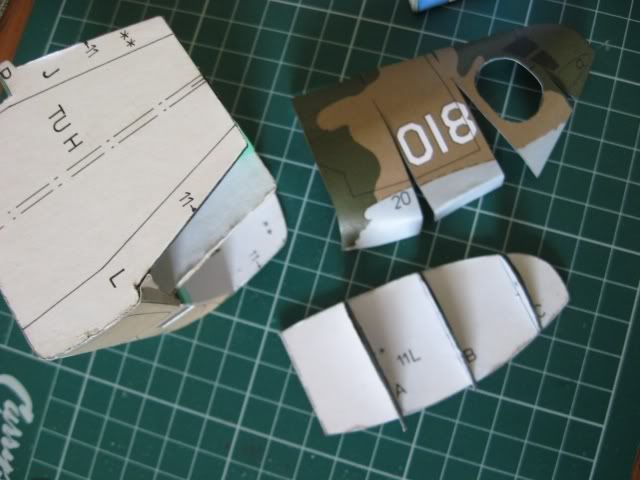 I'm supposed to stick the engine skeleton along that line (note the #11 arrow), which you can see isn't even close to straight. Am I suppose to curl the 1mm frame?  I'd decide based on the skin, but the skin starts from the main body. Avoiding that mess, I did some other stuff. Like the tail:  Sadly it got sort of crooked as I glued it shut, leaving that small gap, but I plan on touching everything up with paint for once. These are the supports for the main landing gear. It said to use a roll of paper, but I thought the dowel would be easier. 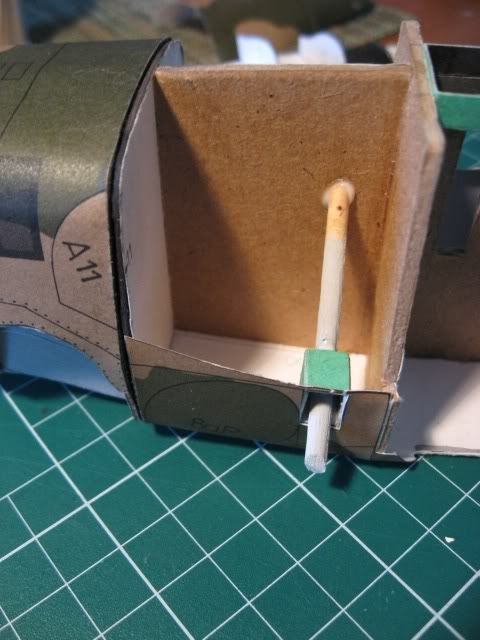 In case you're wondering, I'm using a green bristol board as the 0.5mm backing. Also notice the revealed cardboard in the join there... For some reason I always manage to bend the frame as I skin it, and even after a crazy amount of sanding it doesnt fit perfectly. Like I said I'll touch it up at the end  This here is the underside of the front section, which holds the front landing gear, as well as the sensors or whatever. 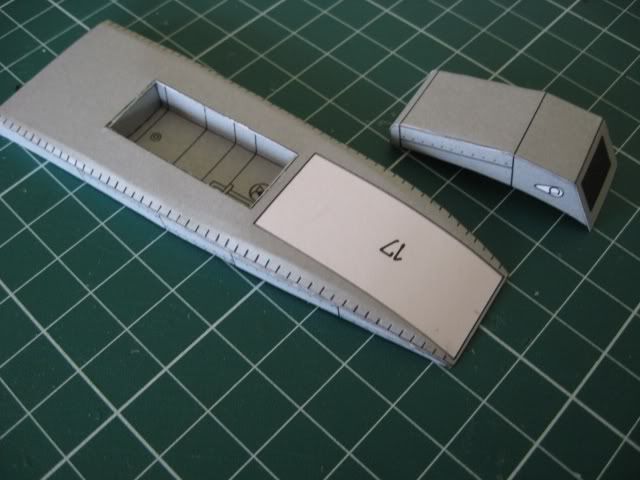 That's going to give trouble too, since the underside of the front isn't exactly even. Sorry for the mess! :o Edit: Ooops! Forgot about this one. 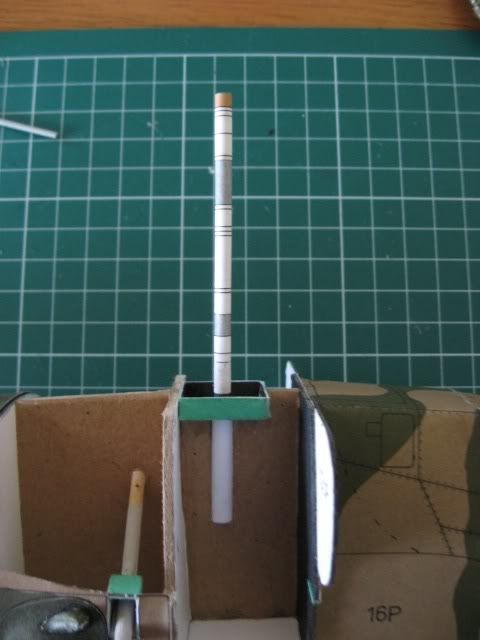 That's the main rotor shaft. It slips into a hollow tube of rolled paper so it can turn, and it's stiffened with a 2mm diameter wire.
__________________
- Kuba Last edited by Gharbad; 06-19-2008 at 03:44 PM.
|
|
#15
06-19-2008, 04:43 PM
|
|||
|
|||
|
I wouldn't be too hard on yourself. Have you ever seen real Russian Helicopters? You'd be surprised. I believe the tailplane is called a stabilator. I could be wrong, that is what we called them when i worked at Sikorsky. Helicopter blades are not flat on the trailing edge they have different contours which allow the blades to auto rotate in the event of a power failure. If you ever get to see a Sikorsky Blackhawk blade it is a great example of this. The trailing edge is very different of the inboard end as opposed to the outboard section and there is a transition between the two which makes it noticeable. The outboard angle of incidence allow for lift while powered and the inside allows for airflor and the negative pressure of the leading edge to keep the blades going the same direction. Which is why they do not act like the toy paper helicopters which stop then speed in the other direction upon descent.
|
| Google Adsense |
|
#16
06-20-2008, 12:45 AM
|
||||
|
||||
|
Nice to see a heli coming along
And you are doing a great job on it!!
|
|
#17
06-20-2008, 04:13 PM
|
||||
|
||||
|
Interesting stuff Zathros. My dad is studying CFD right now, so I'll let him know about that.
Thanks for the kind words as well, both of you. I did a bit of a risky move and just started skinning the engines. It was going fine, then went ugly. It's a very, very strange shape, requiring some complex curves and then a sudden sharp crease. Here you can see it just fitted on, being held by the leading edge of the skin. 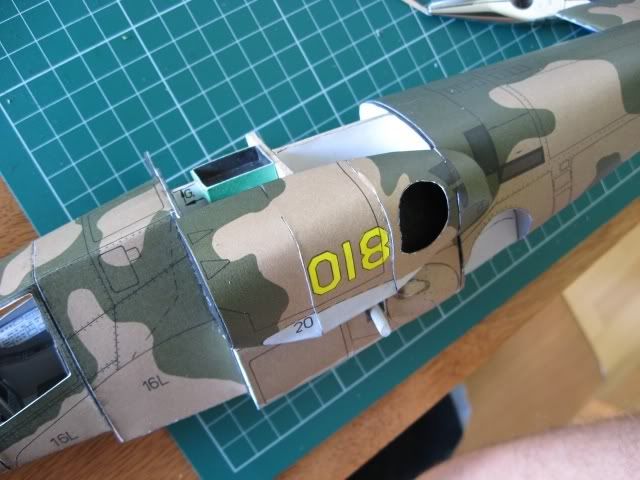 I also had to paint the number 018 in yellow. It didn't turn out amazing with some paint clearly beyond the lines, since I didn't notice my brush was so bad. Oh well, it looks good when you're not looking super close. 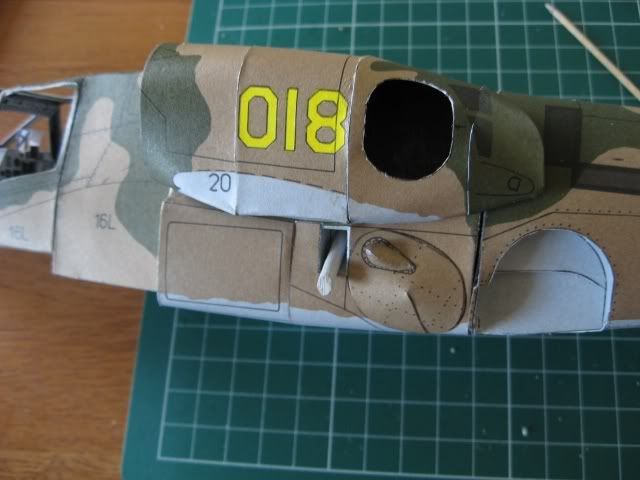 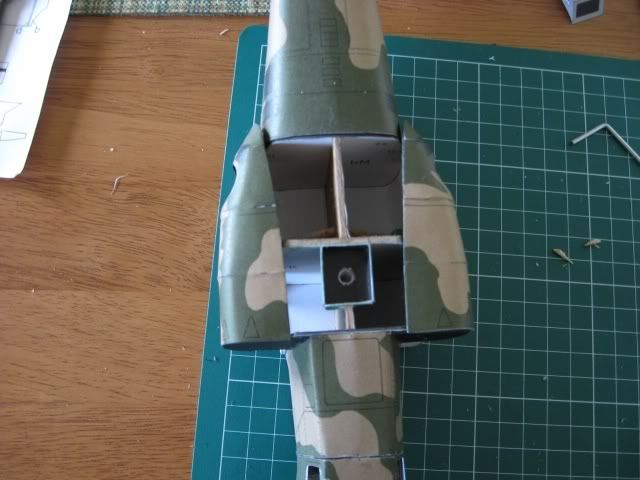 I think it went ok, but it's not great. Some of it will be hidden by more details. If you look at the rear end of the engines, they stick out from the main fuselage - I think I'm going to have to do some creative sanding or patch work. I have no idea how that was supposed to fit at all, so I'm glad to get a reasonable result. Edit: Oh and I almost forgot... as I was glueing we got this view through the window: http://i211.photobucket.com/albums/b...imals/deer.jpg
__________________
- Kuba Last edited by Gharbad; 06-20-2008 at 04:17 PM.
|
|
#18
06-21-2008, 08:19 AM
|
||||
|
||||
|
Thats a really nice view!!
|
|
#19
06-21-2008, 03:47 PM
|
||||
|
||||
|
Today I tried making these front, side panel thingies. I really don't know many names
Trying to fit one side, it leaves a pretty big gap: 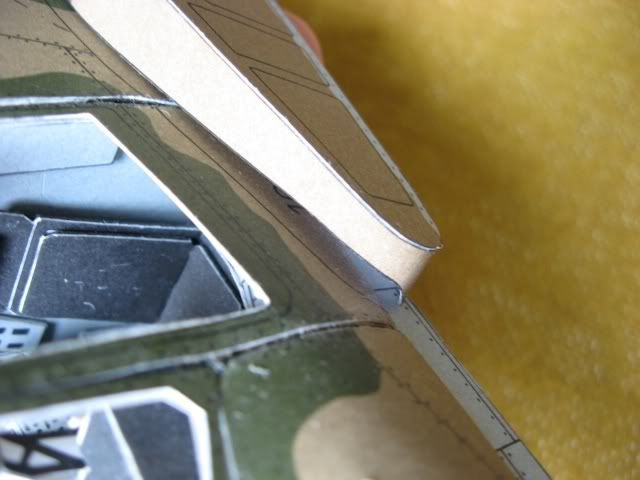 Though, you can see in this that it is where it's supposed to go, as it needs to be level with the bottom; just a design flaw I guess. You can also see how it's not even close to the black line showing where to glue it. 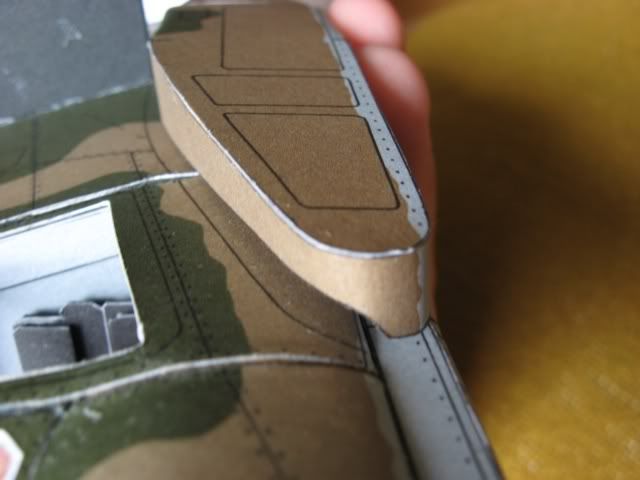 I think I'll just try to patch it, then paint it later. The other side worked out much better, though you can see the engine slightly mutilated: 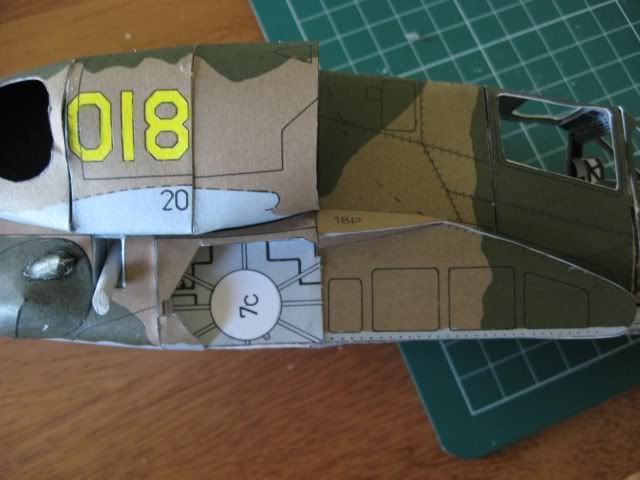 It's asymmetrical, since this side has the cannon. I was worried it would all screw up, but after a few modifications to the grey part, I managed to make it work. It was one of the pieces that was too long, as if it wanted me to thicken the former which I didn't. I still haven't glued the engine, it's just attached loosely.
__________________
- Kuba
|
|
#20
10-13-2008, 10:08 AM
|
||||
|
||||
|
So, uhhh, it's apparently been almost 500 photos since my last update. Sorry about that :o
You can see I closed up the top, added the engine fronts, and some filler parts between. The part between the engine and the fuselage expected magic - curving in like 5 directions. I got a decent result I think. 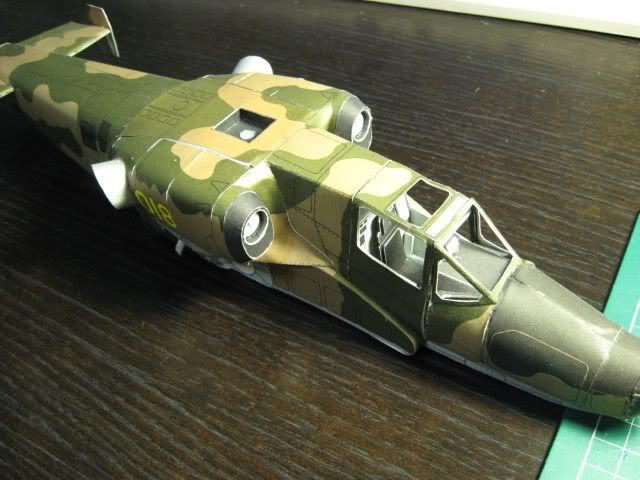 The tail is pretty much done 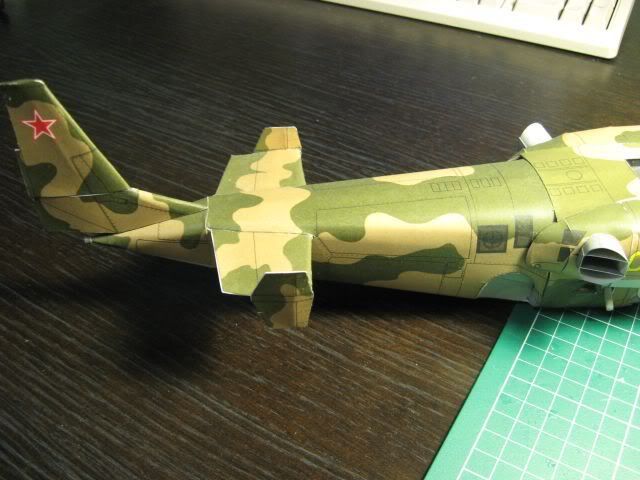 Another shot from the top, and you can see the engine exhaust. It's not glued in it, and I haven't put the fins on them yet.  The first of the weapons, and I'm making the barrels (40...) at the moment. 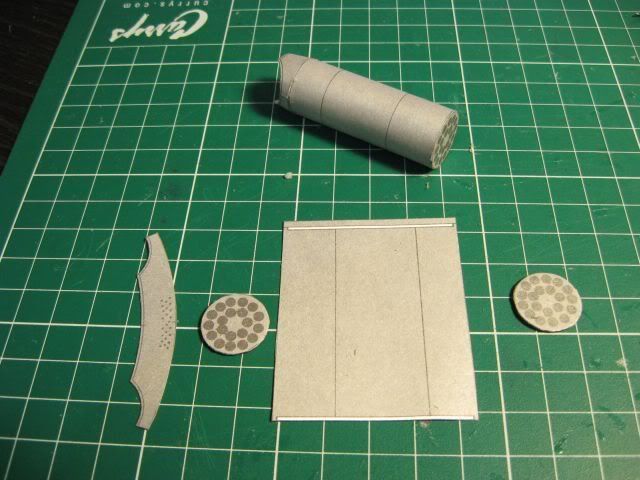 Sorry about the colours, this is under my desk lamp last night.
__________________
- Kuba
|
| Google Adsense |
 |
|
|


 Linear Mode

