


|
|
|
#31
 04-28-2011, 06:00 PM
|
||||
|
||||
|
Hello again!
This build is slow but it is taking shape as time passes. I finally finished the front fork, those little parts are hard to make, hard to glue, and hard to see HEHEHEHE! When I finished, it was hard to resist NOT putting together all the subassemblies and take pictures of it. Through the years, I have read several articles about how to take pictures with a digital camera, and I finally decided to apply what I learned. I'm really happy with the results!!! So here are the pictures of the bike as it is today. 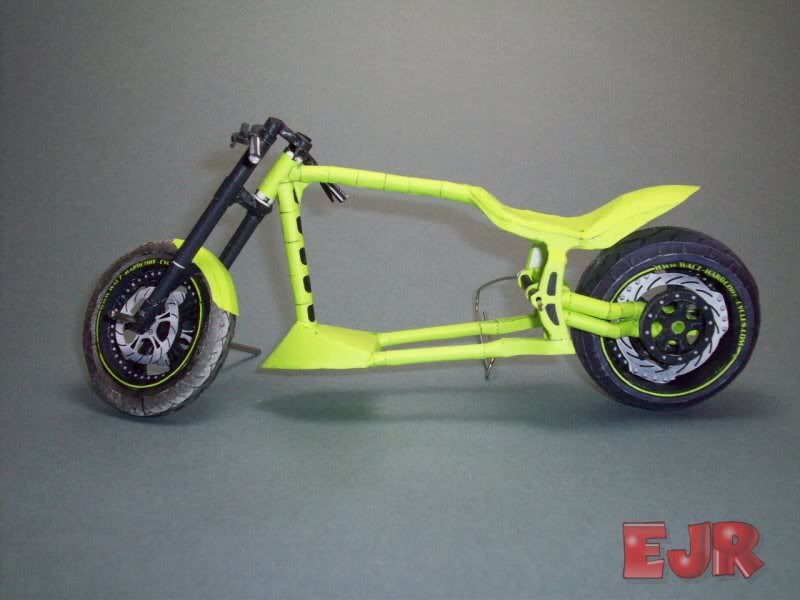 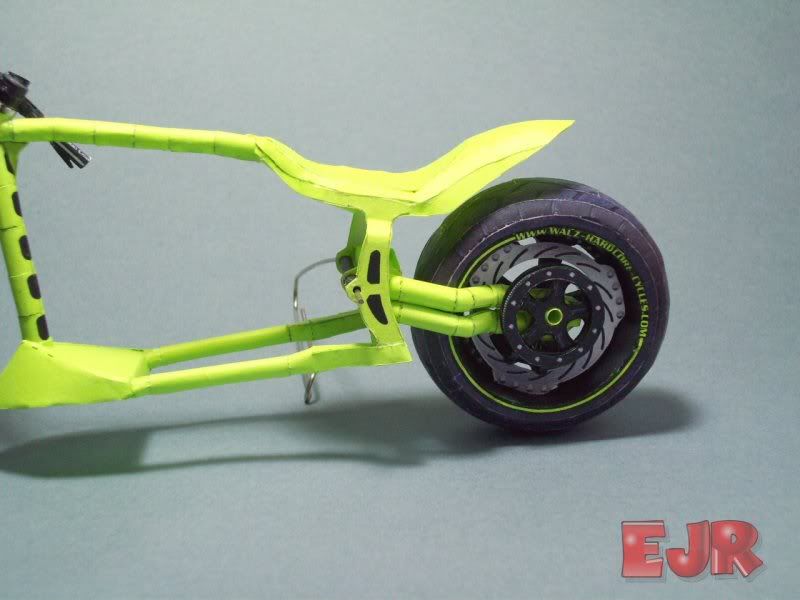 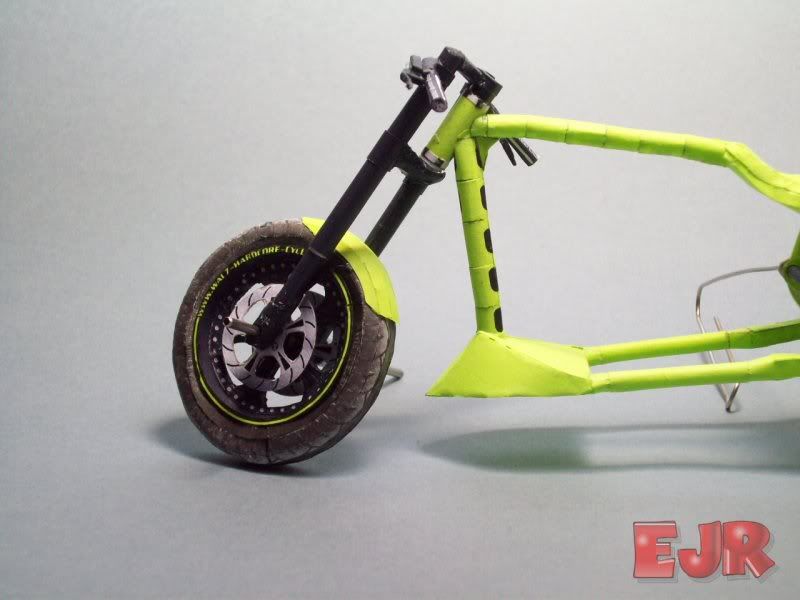 I modified the frontguard making it smaller/shorter. All I did was cut the original part to shape. What should I do next???? the engine? The front light? Until next time!! 
|
|
#33
05-05-2011, 04:57 AM
|
||||
|
||||
|
very nice work
|
|
#34
10-14-2011, 09:06 PM
|
||||
|
||||
|
Ok, after a long time not posting my advances, here they are.
") I finally started the engine! And man.. What a hard task it is!  Not only it has many many parts, but it has several sub-assemblies and since I have reduced it to be 1/12th-ish, I have ended up with very tiny parts. This has caused me to have problems aligning parts, specially the tiniest fins. Add to that that I intelligently decided to change white glue brand It caused gluing the little parts a nightmare. Not only they took years to stick, but as soon as the next fin was glued, the previous one got detached at the slightest touch. Everything was fixed when I got white glue used in some handicraft stuff that mimics oil texture on print matter. Now I apply glue in both surfaces, wait a couple of seconds and then attach the parts, they stay soft just enough time to align them and once dry they hold their position very firmly allowing me to touch them without dis-assembling them again Here are the parts I have managed to make. These are the transmission assembly, an electric part of the engine (I think) and the bases of the rod valves. Oh and a round cover that Im not sure where it goes or if it is even an engine part. 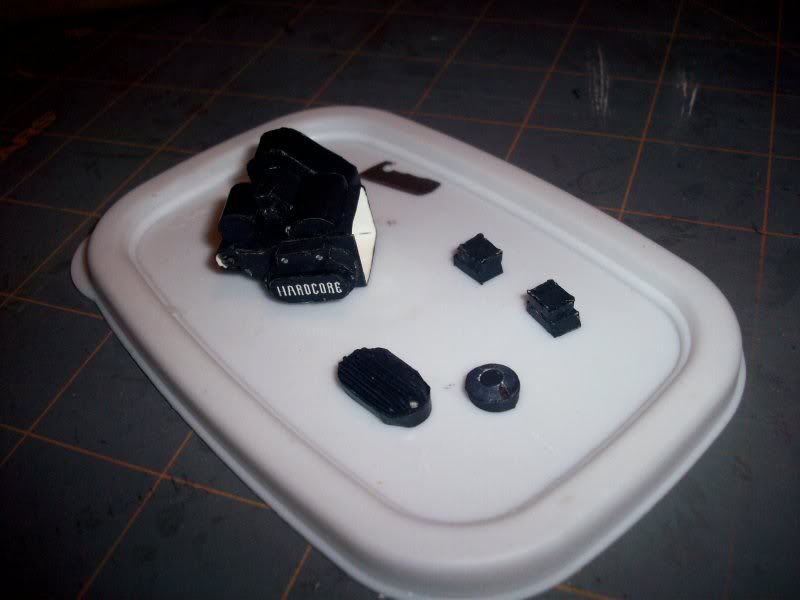 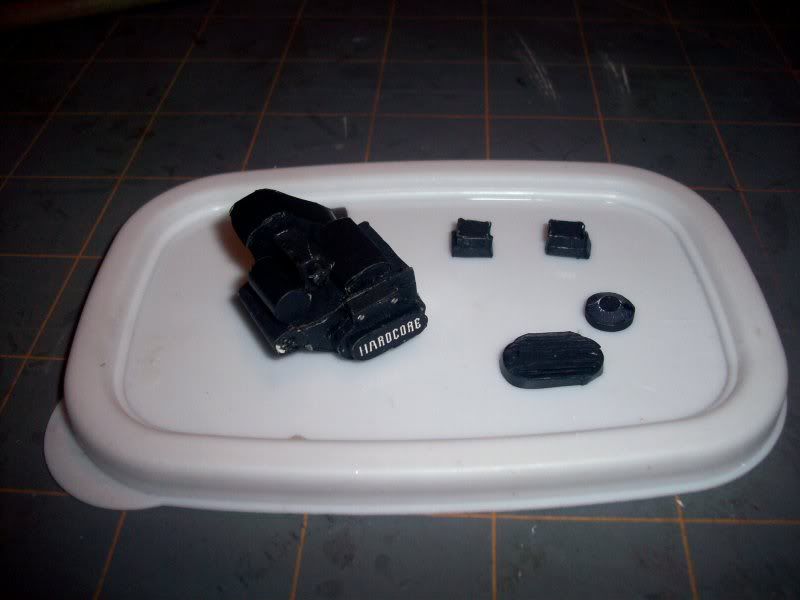 These are the base of the air filter, the tube of the filter and the initial part for the left-upper cylinder fins. 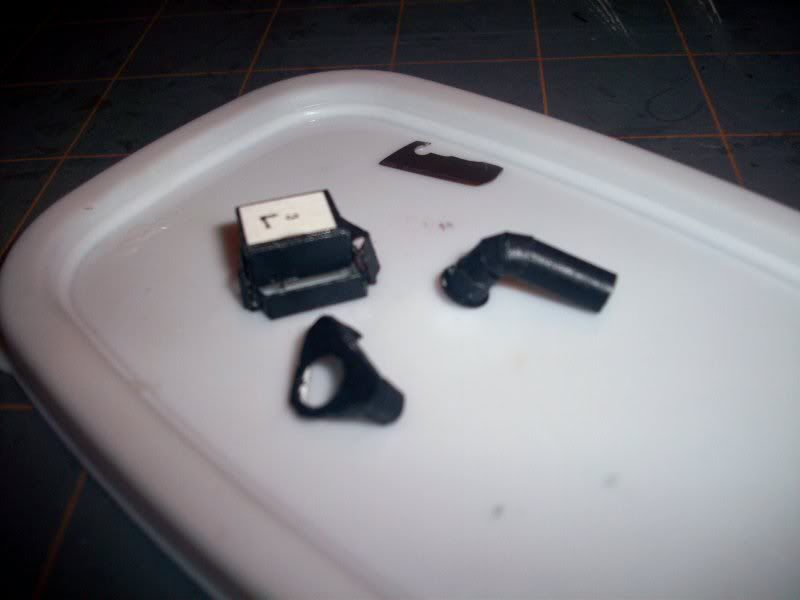 And for the Pièce de résistance: the right upper cylinder fins, and yes I know the fins are not aligned and yes they are white, but all Im thinking in doing to improve things is to use a silver pen to cover the white edges. They will stay as crooked as a politicians way during election time. 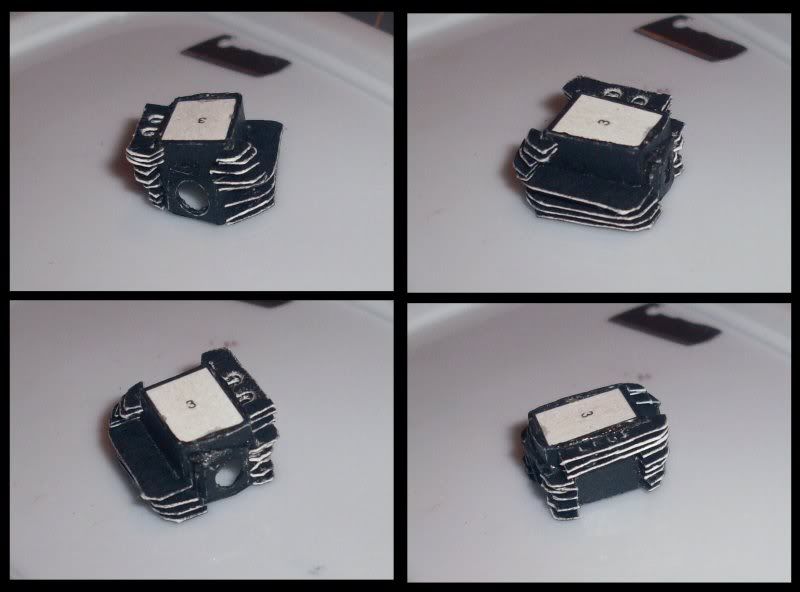 I just hope they look better once the whole assembly is finished.<BR> Thats all for today, next time I will show you the problems I got with the air filter and how I (hopefully) will fix it. 
|
|
#35
12-09-2011, 11:27 AM
|
||||
|
||||
|
Hello everyone.
Im back at building, and posting here. I mentioned some months ago, that I had a problem with the air filter.  Problem was that I had a hard time folding all the sections of the air filter, and it was caused by two reasons. Problem was that I had a hard time folding all the sections of the air filter, and it was caused by two reasons.First was the thickness of the material used, which was a regular 75lbs paper. Second reason was the folding marks on the paper were too thin, so I couldnt make out which one was valley-fold(V) and which one mountain-fold (ʌ). I decided to use the thinnest paper I can get and use some help for folding it. I created a diagram that showed each type of fold with a different line: 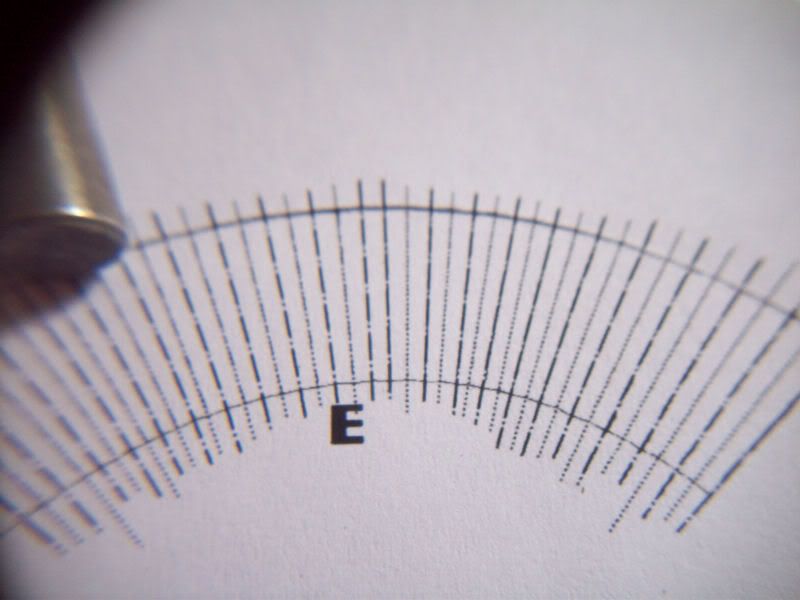 The idea is to cut the piece and then using this as a template, score one type of line on one side, then invert and score the other type of line on the other side. 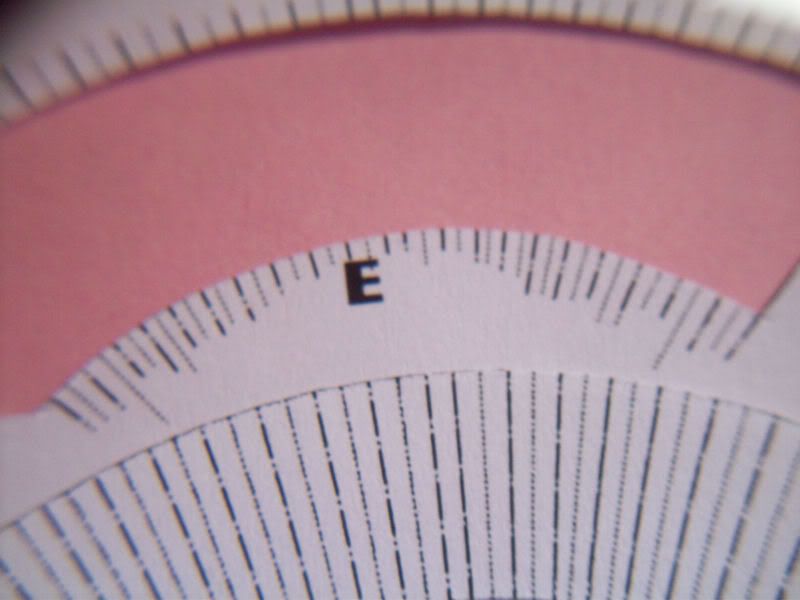 After folding all lines, and gluing the borders I had a hard time getting the proper shape, until I made a guide to help the piece to keep the shape. 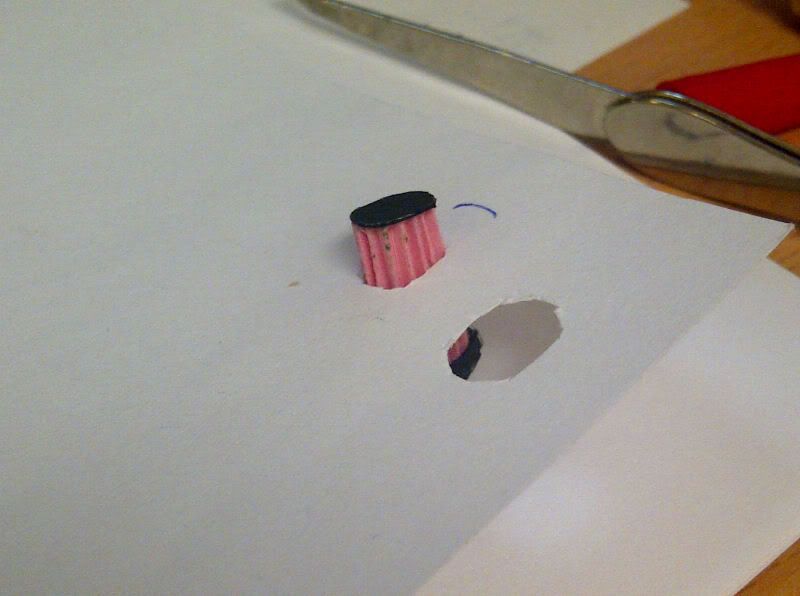 I intend to leave the air filter without any cover, so everyone will be able to look at all those pain-made details. I have not had time to take pictures of the final piece, since I wanted to keep building and try to finish the left side cylinder to assemble the engine. Im almost there, so I will show pictures of the filter on the final assembled engine. Until next time
|
| Google Adsense |
|
#37
12-15-2011, 10:00 PM
|
||||
|
||||
|
Hello everyone.
As I mentioned on Alan's thread, seeing what he has done with his bike, has motivated me to keep building the Viva las Vegas bike, I really made an effort to finish the engine. You can see some pictures I took with my cell phone of the final engine assembly. 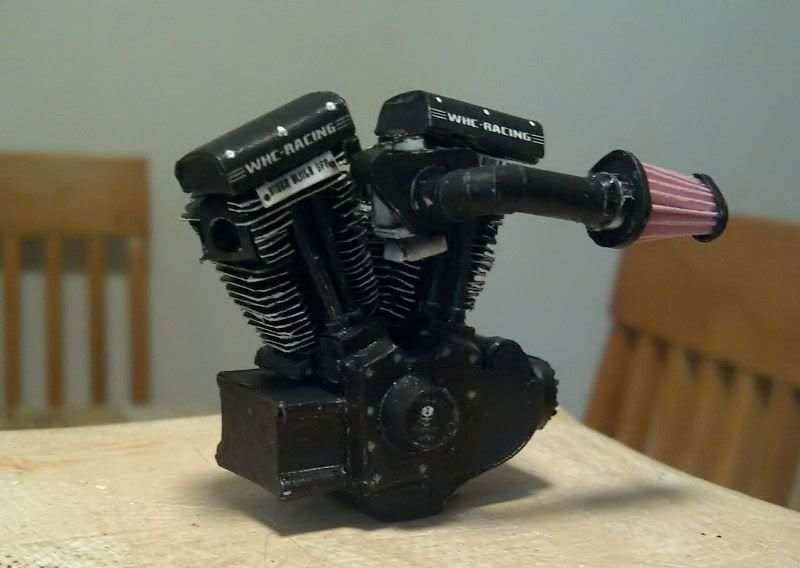 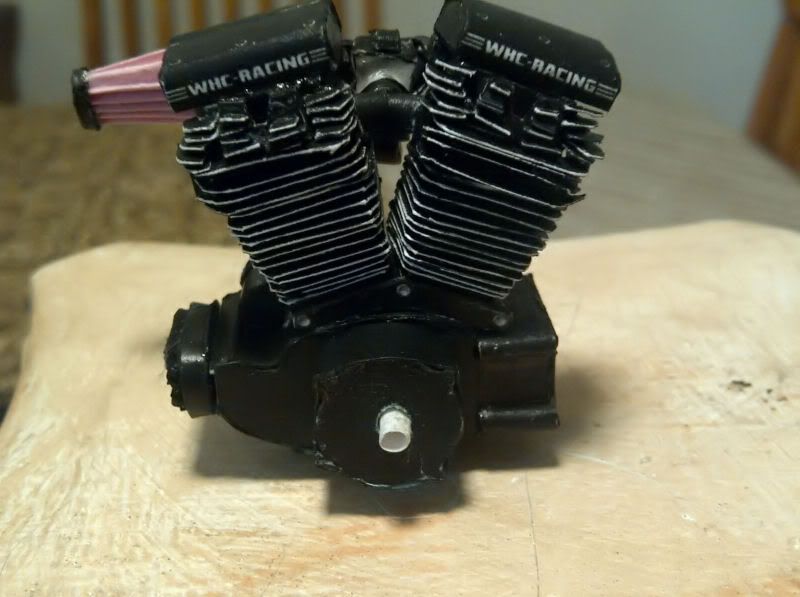 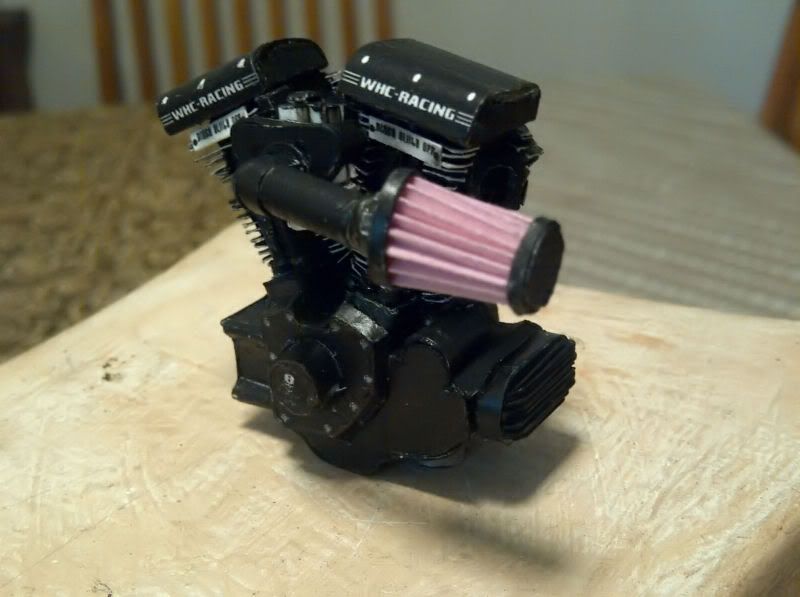 And here are a couple of pictures with the engine and tranny on the frame (nothing glued yet). 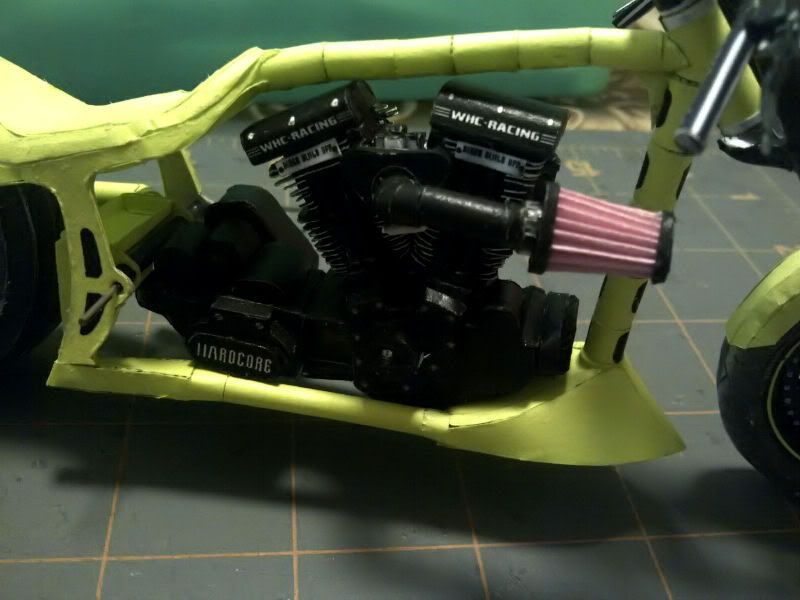 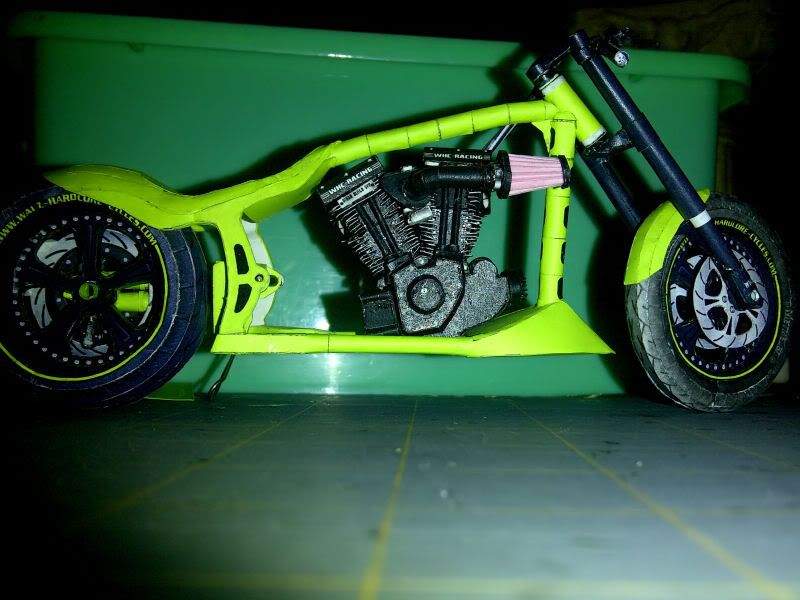 I promise to take better pictures with a proper camera for next time. Best regards.
|
|
#38
12-15-2011, 11:50 PM
|
||||
|
||||
|
I knew I'd seen a green one of these somewhere, it's a shame threads get pushed down the list of recent posts so quickly here sometimes...
Like I've said on other builds of this bike.. you guys continue to amaze me with the work you do, I've never attempted a motorbike model and probably never will but I love looking at the builds that pop up on here and other forums. My hat is off to all of you, I love your work, keep it coming!
|
|
#39
03-10-2013, 05:24 PM
|
||||
|
||||
|
I'm officially re-starting this proyect.
It took me this long to realize I was not going to be able to make a gas tank like the Viva Las Vegas chopper, and believe I tried hard, at least thrice, but I could get a decent tank, so I had to settle with the normal design of the gas tank I put everything together without gluing anything to see where am I from the final bike. Here are a couple of pictures. Without the tank 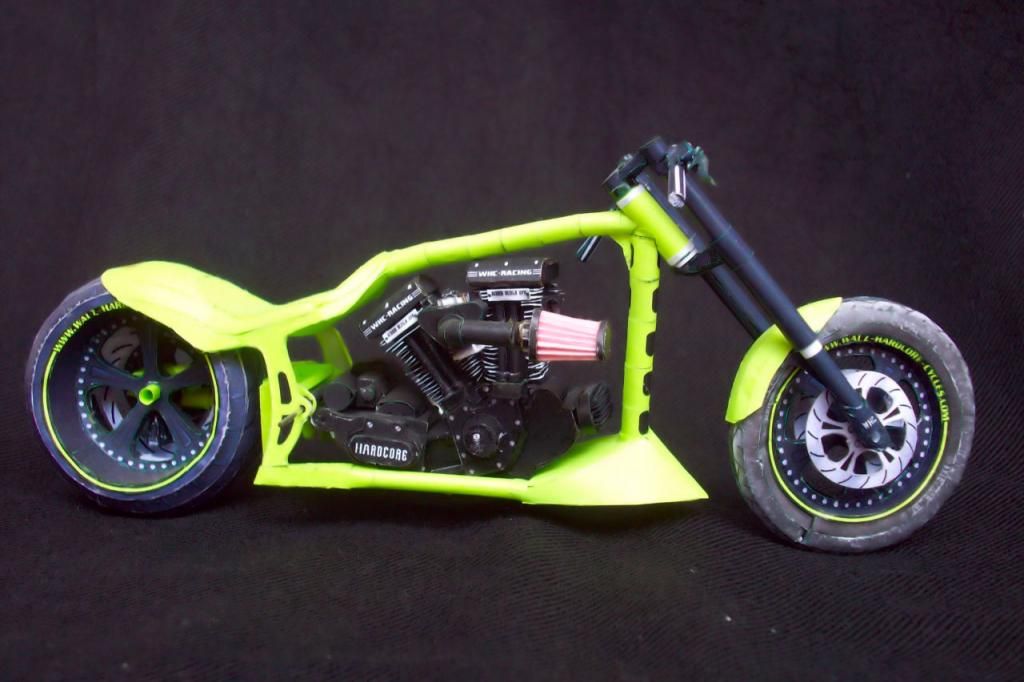 Now with the tank. 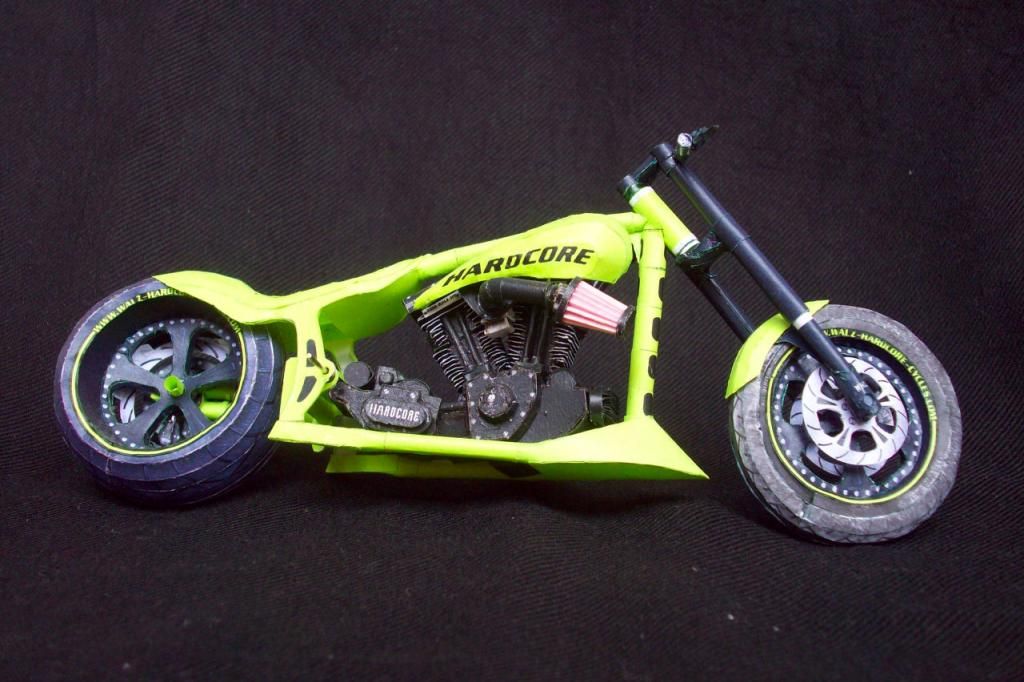 I will take it from here, I think the next is the light on front. Best regards
|
 |
|
|


 Linear Mode

