


|
|
|
#41
 10-16-2011, 06:35 PM
|
||||
|
||||
|
Can it be the little chip in the Karma sees things differently when most of the area photographed is white in the first pic versus primarily yellow in the other photos? So it turns the yellow mat tan and the green frame grey?
I think it is a predominant background color issue. Looking at the PT Boat thread, when a lot of your mat is showing, the boat was more grey and the mat is tan. When the boat has more table in the background it is less grey and the mat is more yellow. Last edited by Vermin_King; 10-16-2011 at 06:40 PM. Reason: back from the PT Boat posts 
|
|
#43
10-17-2011, 04:44 PM
|
|||
|
|||
|
Airdave, you're doing a lot better at designing this than i could! That WWI tank i tried to design years ago was horrible!
|
|
#44
10-17-2011, 10:08 PM
|
||||
|
||||
|
Don't sell me to the crowd just yet...
this thing is still only in the planning stages. I have joined the Landships Forum and put in a request to some members over there for some reference photos of the old Autocars. Hopefully that will get me started on the design properly. One member has already sent me some pics of the Armoured car as it sits in the War Museum in Ottawa. Big thanks to Phil R (and Charlie C)!
__________________
SUPPORT ME PLEASE: PaperModelShop Or, my models at ecardmodels: Dave'sCardCreations
|
|
#46
10-19-2011, 10:52 AM
|
||||
|
||||
|
Thats cool..if you find anything, it will help.
I agree, the material I need is hard to find. It should be a law that if you restore a vehicle for Show or Museum display, you MUST create a detailed blueprint of the entire vehicle and make it availbale to all scale modellers looking for reference material. Hopefully the pics of the Autocar (truck) restoration will be just what I need. (coming from Tim over at the Landships Forum)
__________________
SUPPORT ME PLEASE: PaperModelShop Or, my models at ecardmodels: Dave'sCardCreations
|
|
#48
10-19-2011, 11:57 AM
|
||||
|
||||
|
2 ton truck
(I Autocar had completely stopped producing any cars by that time and became stricly a truck manufacturer) but there were earlier and later versions. the first ones would have been based on a 1914 model ...whereas later ones may have used up to 1917 models. not sure that there would be much difference anyway at that time. Can't see Autocar producing new designs every year, especially during the war.
__________________
SUPPORT ME PLEASE: PaperModelShop Or, my models at ecardmodels: Dave'sCardCreations
|
|
#49
11-06-2011, 10:39 AM
|
||||
|
||||
|
Test Build Part deux!
To be honest, I think I am still in experiment and "see what happens" mode but I have collected a few photos of an Autocar Truck Chassis restoration (thanks to Tim at Landships Forum) and I have been able to correct a few things on my existing Frame parts and start adding more details. Rather than add to the earlier test build, I have changed enough things to warrant a fresh test build. New Chassis parts (first test build frame in the background) 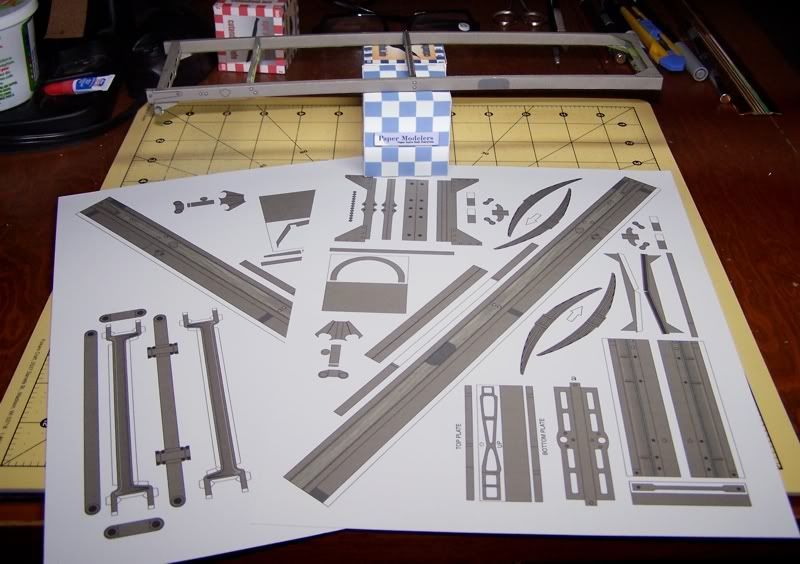 Everything went together okay...I cheated and pulled two crossmembers from the earlier test build. Just didn't want to cut out all those internal holes again! Also got the "sub frame" parts ready (this is the Engine support). 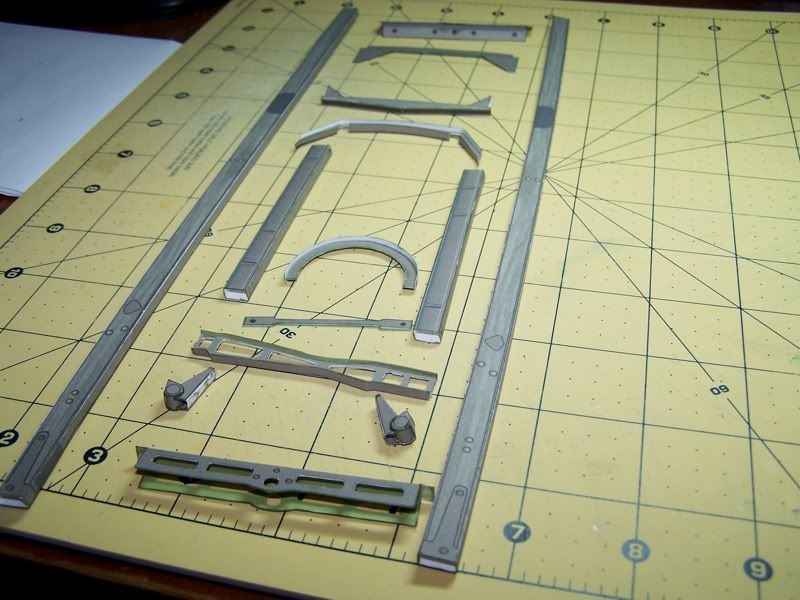 yes...the frame rails curve. I have assembled them twice and made sure they are glued as square as possible. *the first test build also had curved rails. The curve keeps reappearing but doesn't seem to be a big issue. The assembled rails seem to straighten out very easily and I'm sure as more parts are attached, they will take a proper shape. I also have not gone overboard with edge or reverse side colouring. Some parts will require the builder to do this colouring and a few parts will have two layer, coloured reverse parts. I have already started adding that. But for now, I am more concerned with test assembly and making sure parts fit properly in their respective places. Wasn't paying full attention during my rushed build and I glued the front Leaf Spring brackets and front cross member in the wrong position...had to pull them off...and did some damage to the top of the frame rails. sorry  next I will assemble the front Axle and leaf Springs....
__________________
SUPPORT ME PLEASE: PaperModelShop Or, my models at ecardmodels: Dave'sCardCreations
|
|
#50
11-06-2011, 11:26 AM
|
||||
|
||||
|
That chassis looks great, both in appearance and size. If that scale on the cutting mat is in inches, this is going to be a big model. Terrific effort. Many thanks
__________________
Regards, Don I don't always build models, but when I do... I prefer paper. Keep your scissors sharp, my friends.
|
| Google Adsense |
 |
|
|


 Linear Mode

