


|
|
|
#41
 02-13-2013, 11:20 PM
|
||||
|
||||
|
Still struggling to find time to work on this
and struggling a little bit with the basic design. Its all about getting a substantial inner supporting structure in as few parts as possible, that goes together without confusion and properly fits the outer skins. This is the latest incarnation...and it looks promising. For one thing...I am liking the scale! Keep in mind this is just the central Main Hull. 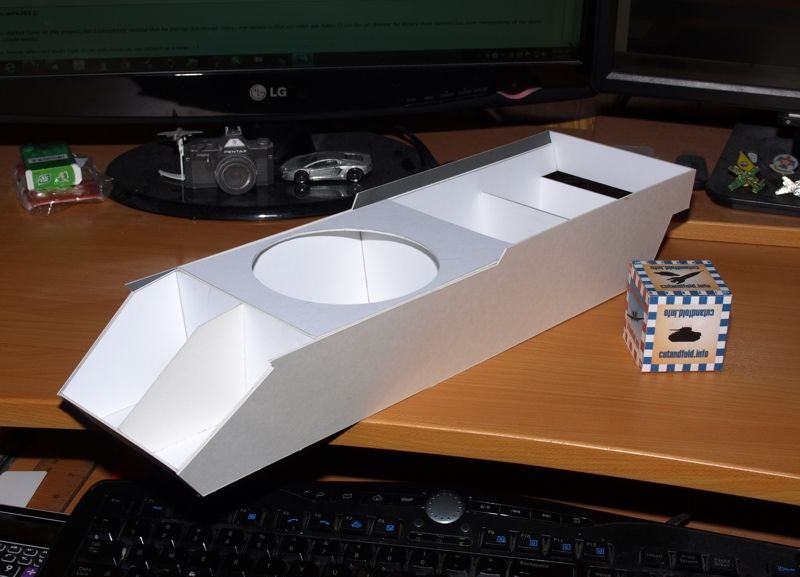
__________________
SUPPORT ME PLEASE: PaperModelShop Or, my models at ecardmodels: Dave'sCardCreations 
|
|
#42
02-14-2013, 08:34 AM
|
||||
|
||||
|
Dear AirDave:
Is that foam core or is it 1mm card stock in the frame? I have noticed in the Eastern European Models that they use Big slot and Tab to lock the pieces together look at the BD-41 that has been in the threads. Then on to Color and markings I think that you should call the closest Canada Armory and find out which one had these tanks to your Home town and then mark it with that Regt. I love seeing the design process, go Dave, MILES
|
|
#43
02-14-2013, 11:01 AM
|
||||
|
||||
|
I considered using Foam core but:
it tends to squish and is weak at the cut edges and it might be too thick for some of the Hull panels. Anyone got any other suggestions for construction material. keep in mind this is a retail kit...so the materials have to be available to anyone and the method has to be something that people understand. Scratchbuilding is not easily translated into a model with instructions! I can only supply a part template. The builder will need to transfer the part to the required material and create a part to a defined thickness. ... For this latest design I used three layers of Bristol Board (Card) glued together for all the former parts. Thickness is a little over 1mm. The Hull sides actually have second layer parts inside, which create slots for the cross dividers. The existing Tank models I have seen use a ribbed style inner form with slotted, cross connected formers. I wanted to have solid sides so there was no skeleton ribbing and no flexing to the large side panels. The biggest problem I am dealing with is scale thickness of the armour. The Centurion has quite a few extended and exposed plate edges, as well as the angled sides to the Hull. So, I couldn't just design a box for the skin to fit over. The deck for example is not part of the Hull. Its a single plate, with angled sides that fits inside the main Hull box. This is all creating a problem of producing an accurate shape, producing an internal structure that the outer "skins" will fit precisely, and dealing with some of these extended visible edges of armour plate. (I have to avoid any visible card edges, especially with the internal parts.) For the main Hull, the scale armour plate is about 3.2mm(1/8") thick, and 6.5mm(1/4) thickness for the glacis (forward plates). Some of the upper exposed edges of the Hull sides will require some extra layers of card (maybe strips to build up the thickness beyond the 1mm card). And some areas, like the front plates will be assembled separately with thicker internal structure and then attached to the Main Hull. As I said...this is the trickiest part of the design...getting started and sorting this Main Hull out. Once that is done, its just a case of designing smaller parts that will attach to the Hull. That should all go a lot easier.
__________________
SUPPORT ME PLEASE: PaperModelShop Or, my models at ecardmodels: Dave'sCardCreations
|
|
#44
02-14-2013, 11:24 AM
|
||||
|
||||
|
Wow!
I missed the crossing of the line of departure on this very impressive and challenging project. Best wishes. I will definitely mention this project in my presentation on paper modeling and military history next month. Don
|
|
#45
02-14-2013, 11:41 AM
|
||||
|
||||
|
haha I love the comparison between 1/25 scale and 1/16!!!!
__________________
SUPPORT ME PLEASE: PaperModelShop Or, my models at ecardmodels: Dave'sCardCreations
|
| Google Adsense |
|
#47
02-14-2013, 12:52 PM
|
||||
|
||||
|
Quote:
__________________
Currently building Heinkel Models/Ron Miller Authentic Nautilus.
|
|
#48
02-14-2013, 01:52 PM
|
||||
|
||||
|
I would go with multiples of 1mm card. Easier for poeple source.
That said some of my build have used self-adhesive mount-board. It's 1.8mm thick and has a self-adhesive side. Great for former pages, but a bit expensive Tim
|
|
#49
02-14-2013, 11:05 PM
|
||||
|
||||
|
Dave
As others have pointed out I would use 1mm card stock as this is the most common thickness used for the skeleton of armor models. Its easy to make by laminating 67 lb card stock and fairly easy to work with. For the "plate armor" I would suggest that thin boxes could be made with 0.5 mm card and a printed outer skin. A 50mm plate in 1/16 scale would be 3.125 mm thick and would be relatively easy to make even with beveled edges. Jim Nunn
__________________
There is a very fine line between paper modeling and mental illness.
|
|
#50
03-30-2013, 09:13 AM
|
||||
|
||||
|
End of March Centurion Update
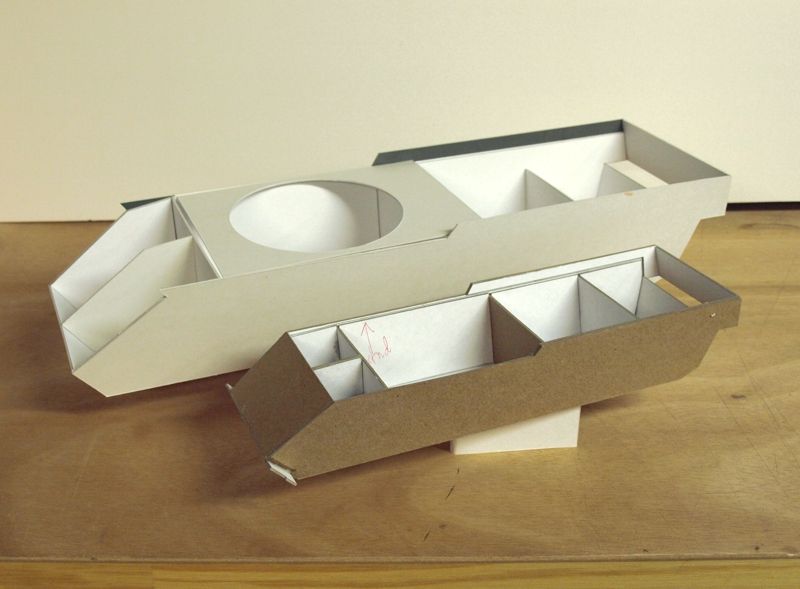
Well, its been a while (with this project), but just to prove it has not fallen by the wayside... I ran up against a few issues with my first Hull form. The central Hull being the the main part from which everything is attached, turned out to be a bigger obstacle than I had envisioned Buried under a lot of tank "bits" it is deceptively complicated and has a very particular shape with many compound angles which proved to be a challenge to design as a paper model. While it would have been possible to cheat with a smaller scale model and make the Hull more boxed shape, at this scale I have to be faithful to the actual shapes and angles involved. For example, the main chassis/hull has angled sides making the belly plate only about 70% as wide as the top plates. (This is of course to deflect incoming fire down toward the ground) The nose and Tail have multiple angles as well...setting up some interesting compund angles with the side plates. None of this is too difficult, until you try to design an inner form using thicker card, in as few pieces as possible, that can be easily understood ny the builder... and an outer "skin" that matches the contours and angles PLUS fits over the formers with just the right amount of tolerance. And of course, there has to be a workable assembly method for all this. Complicate all this with my flip-flopping on the final scale size. Anyway, the point is...I went through a number of Hull designs...printed parts...and wasted cardstock... 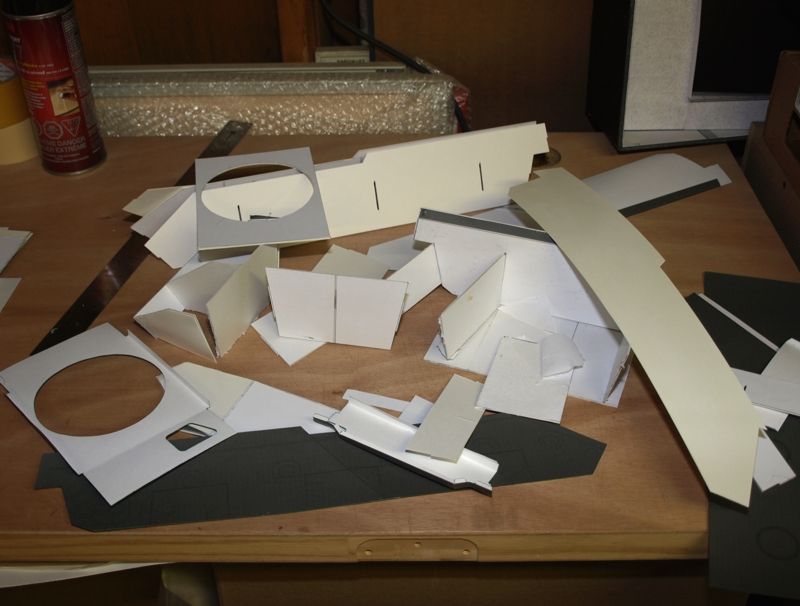 before finally arriving at what looks like a workable Hull! This design has the fewest parts so far, and I took the suggestion of using a tab-slot assembly method for the Former parts. (sorry, I forget who actually made the suggestion, but thanks) The "tabs" are small...even at this scale...but not difficult to deal with. However, the final assembly requires a little sanding of the tabs as they stick through the side plates.  So, with a new Hull former design, I was able to modify all the "skin" parts to fit and add the remaining design elements (tabs, slots, cuts, folds, etc). And I ran through a quick test of all the "skin parts, making sure everything fits the Hull. (and figuring out all the adjustments and necessary fixes)       And...everything went together properly so I finished up the textures and colouring on the actual parts Next step is to build what hopefully will be a final Hull assembly. (I've already started work on Suspension parts, so it better be!) 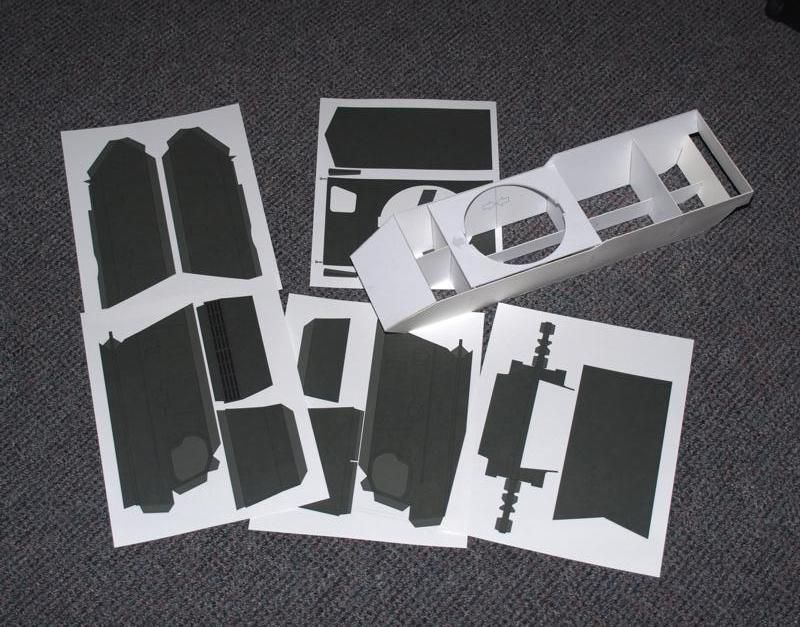 But, before I do that, I need to sort out the Driver's compartment and Engine compartments. These will be tubs that are inserted into the Former assembly. They can be assembled separately and don't rely on any other assembly. But, they will need to be fitted into the Hull former before the outer skins go on. I have the Driver's "insert" almost done...just got to add the foot pedals and hand controls, and a few more small detail elements. But it will be an awkward squeeze to get in in, since I already sealed up the top of the Former assembly! (yes it really needs to drop in from the top!) The Driver's compartment might seem a little pointless (and it is completely optional for the builder) since the only viewing of this area will be from a very small access port above the cockpit. But its there in case you want to install it. 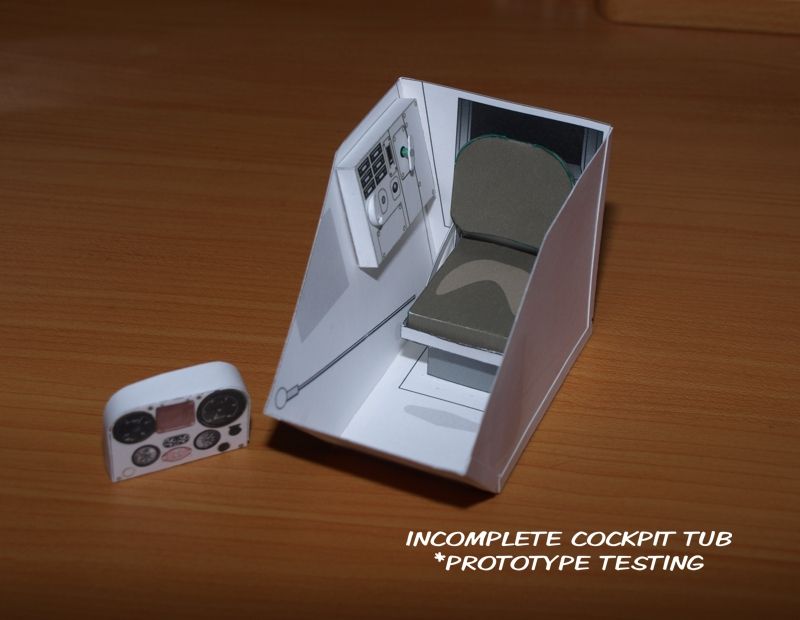
__________________
SUPPORT ME PLEASE: PaperModelShop Or, my models at ecardmodels: Dave'sCardCreations
|
| Google Adsense |
 |
| Thread Tools | |
| Display Modes | |
|
|


 Linear Mode

