


|
|
|
#1
 09-10-2013, 10:22 AM
|
||||
|
||||
|
P-51D Air Racer Miss America
Check out the newest Mustang project!:
I thought you might like to follow along with the design and test build of my first Mustang Racer. This is a Racer I had looked at a while ago...and considered...because of the fact that it had minimal modifications. Most P-51 Racers have clipped wings and are more streamlines for speed, and some appear to have slightly extended fuselages, cropped canopies, and even cockpit extensions (razorback spines along the fuselage). Miss America appeared to be almost stock looking except for the clipped wings...and she's got a great looking paint scheme! So, if I can sort out the wing modifications... so, starting with my D model Mustang, I shortened (clipped) each wing the required 2.5 feet (scale). The tail wings are also shortened, but only enough to lose the curved end and allow for flat end plates. Sorting out slightly upward curved end caps and little fins on the main wings is the challenge. 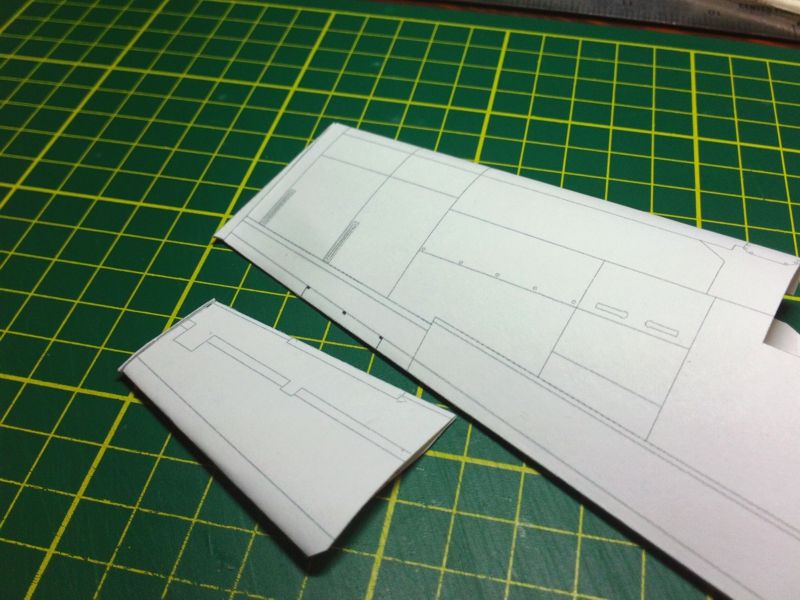 Right off the bat I had a length and fit issue (can only be seen from below) as well as the fin being too long along the length of the wing tip. But, I can see I am going in the right direction, just a couple more tweaks should do it! 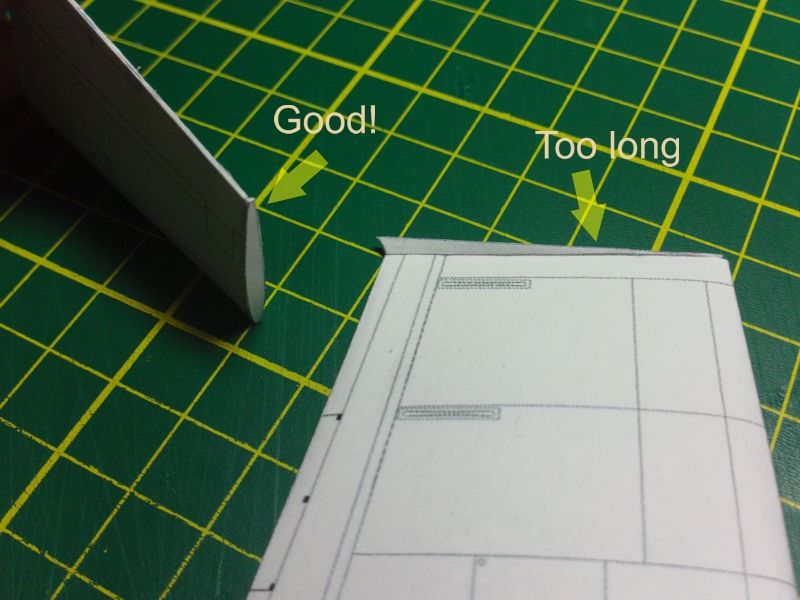 After that, I would need to test build the wing again...but I was pretty confident about the alterations and so I went ahead and sorted out the paint scheme. This way I can test the wing modifications and the paint scheme all at the same time. It looked challenging at first, but everything fell into place fairly quickly. (I think I am getting good at this) So, here we go...sheets printed...start cutting! 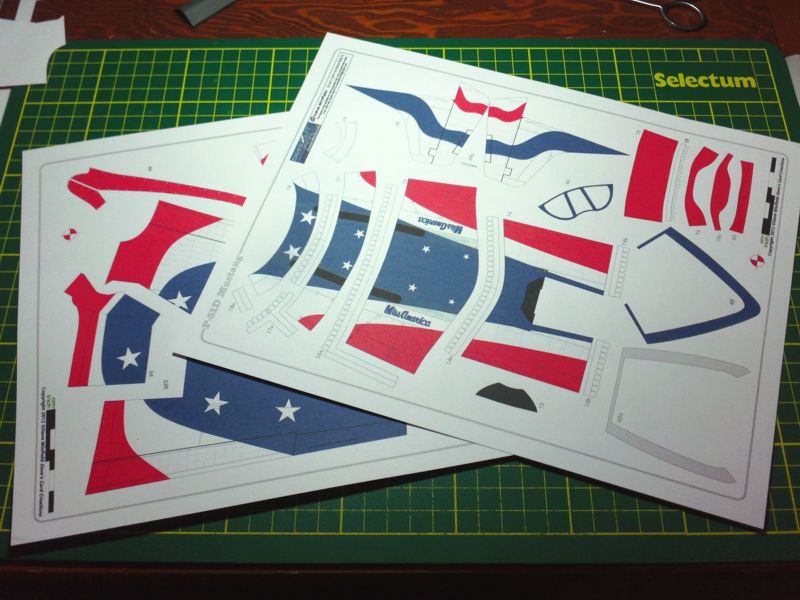
__________________
SUPPORT ME PLEASE: PaperModelShop Or, my models at ecardmodels: Dave'sCardCreations 
|
| Google Adsense |
|
#2
09-10-2013, 10:23 AM
|
||||
|
||||
|
Contrary to my usual method of assembly, I am starting with the wings, since that is where I have
made the most modifications. I decided to build a wheels up version, to speed things along, and I like the idea of displaying the Racer on a pedestal. That sparked an idea to modify a new part for the P51D. A part I have been thinking about for some time. Fitting all the broken parts back together for a wheels up version is a little awkward and I thought about adding a preassembled part (wing crook + landing gear doors) to make a quicker and smoother assembly with fewer parts. So, thats what I have done and a test fit is in order... 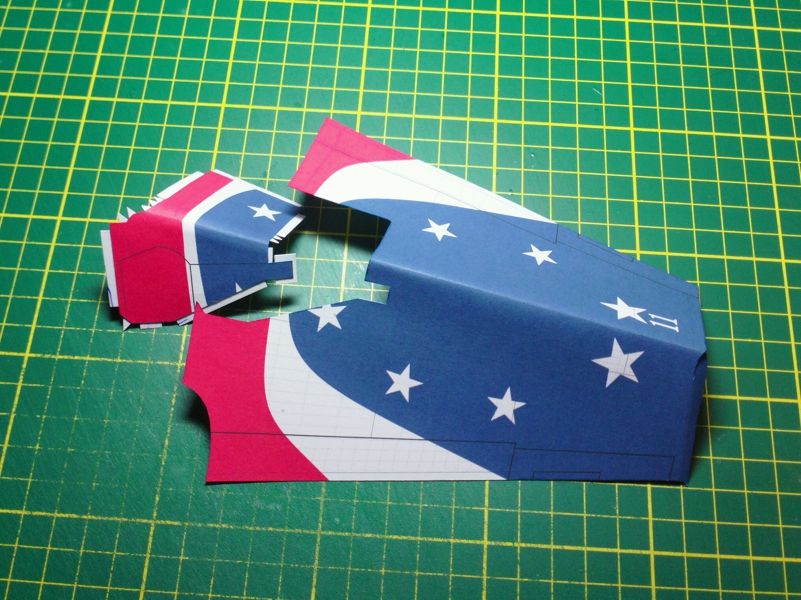 And...everything seems to go together quite nicely. Saves trying to trim, reassemble and fit the Gear doors into place after the wing has been assembled! I will be including this part in all new Mustang kits from now on. 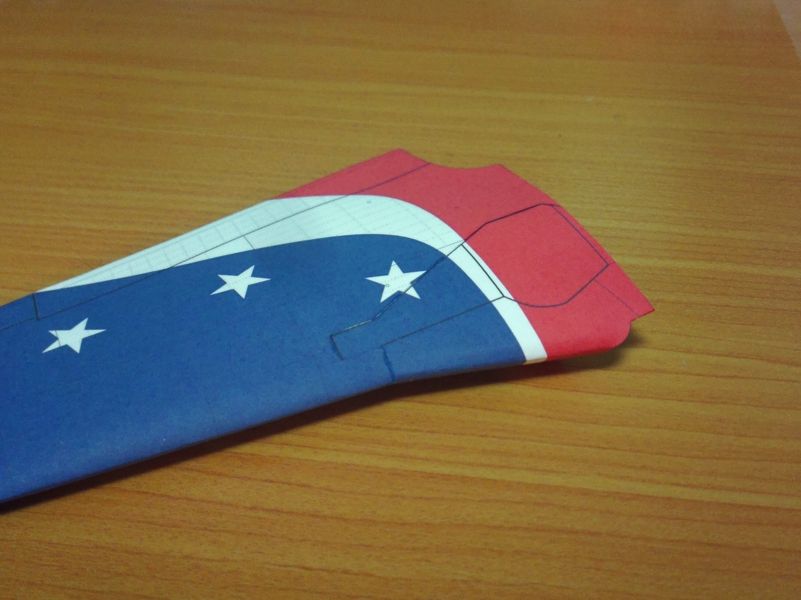 Finishing up the wing (minus the internal structure) means closing up the newly redesigned wing tips... and all is going together nicely there aswell! The "fins" are the right length and height now, and the closed ends are pretty straightforward. They require a little bit of patience. I glued the front curved part, waited for it to dry, then worked my way along the wing tip gluing small sections at a time until the entire wing tip was closed. Then I used the round end of a paint brush to smooth out the end cap (from the inside of the wing). A little forming after the glue has dried and I have a nice smooth clipped wing. 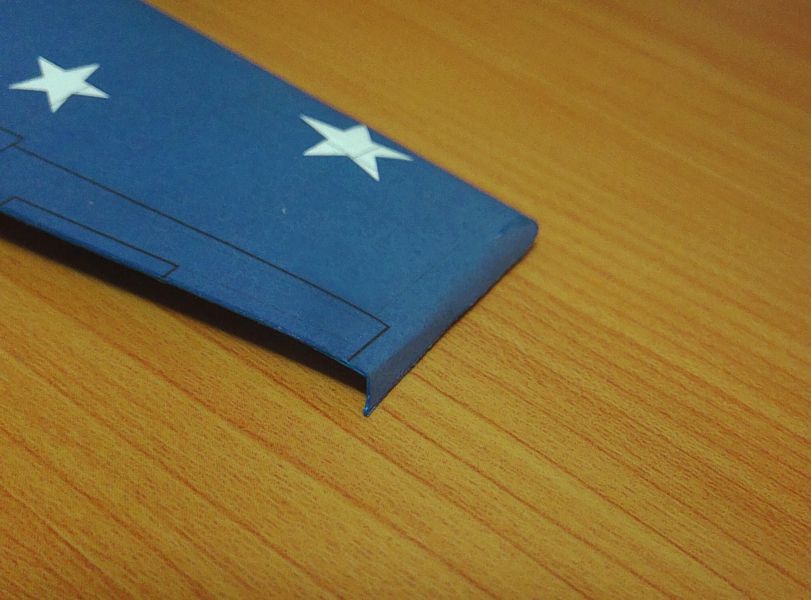 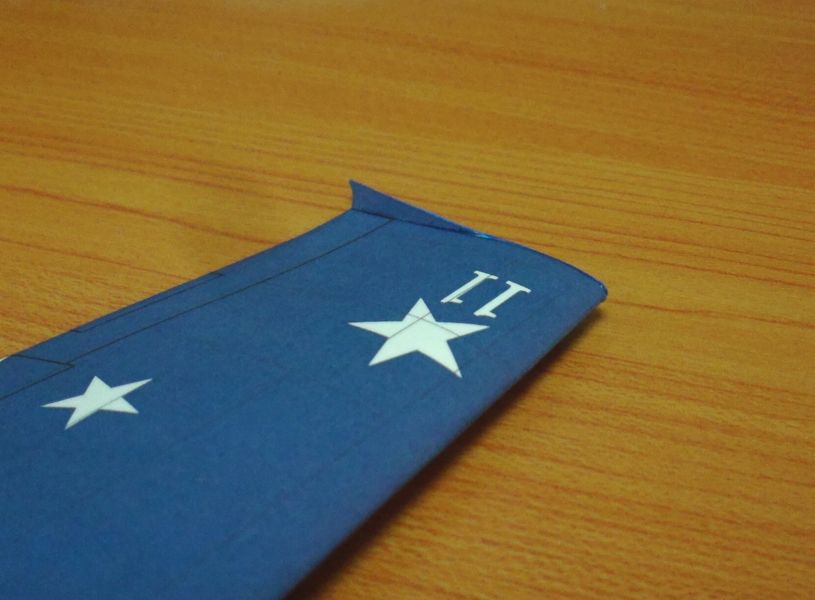
__________________
SUPPORT ME PLEASE: PaperModelShop Or, my models at ecardmodels: Dave'sCardCreations
|
|
#3
09-10-2013, 10:47 AM
|
||||
|
||||
|
Looking good, Is it going to have a cockpit interior?
__________________
Joshua
|
|
#4
09-10-2013, 10:52 AM
|
||||
|
||||
|
My D model has a cockpit yes.
__________________
SUPPORT ME PLEASE: PaperModelShop Or, my models at ecardmodels: Dave'sCardCreations
|
|
#6
09-10-2013, 03:26 PM
|
||||
|
||||
|
...we'll see
__________________
SUPPORT ME PLEASE: PaperModelShop Or, my models at ecardmodels: Dave'sCardCreations
|
|
#7
09-11-2013, 06:54 AM
|
||||
|
||||
|
continuing...
with the wings. And I have almost got both wings together. The parts are fitting nicely, so this will be a good optional part to include in the kit. Really saves a lot of work having only one part to fit into the Wing, instead of three (that were tricky get all lined up). 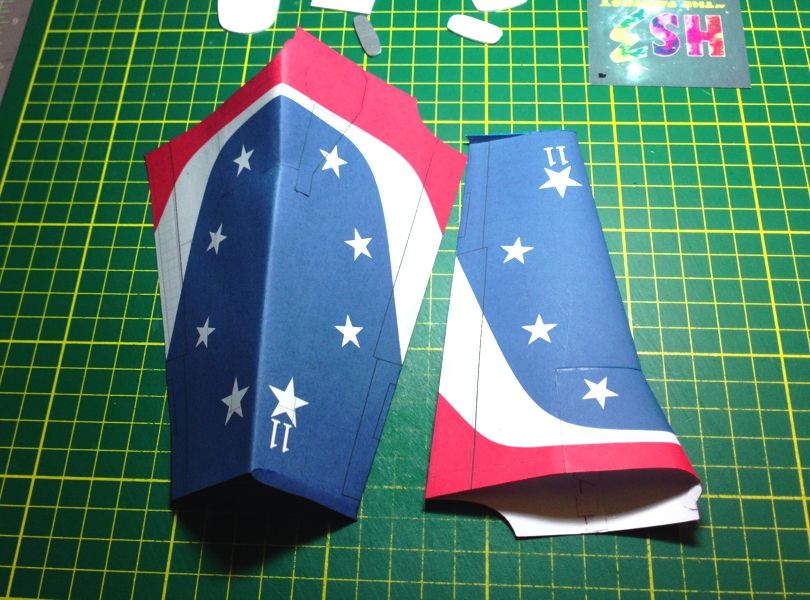 and while waiting for glue to dry on the wings, I am assembling the fuselage. My usual method...I start at the front, form a few sections into the rough shape they should be, join each with their respective center seam joiners...add the tabbed glue strips...and then attach each section one at a time. I glue around the section, usually gluing one side first, getting everything lined up, and then when it is secure I move to the other side. Lining it all up and gluing in place. (I have already dry fitted to completely understand the fit and make any last adjustments). After I get two sections together, I slip in a precut former. I test fit the former and sand/cut it down until it goes in easily. Not tight and not loose. If its too tight, it causes "ribbing". It only needs to shape the fuselage part into the correct shape, it really doesn't need to do much more than that. 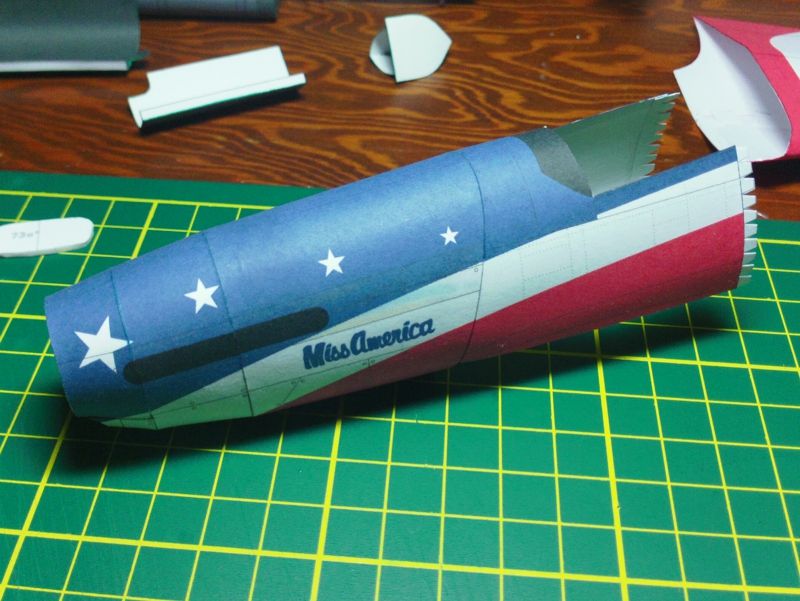 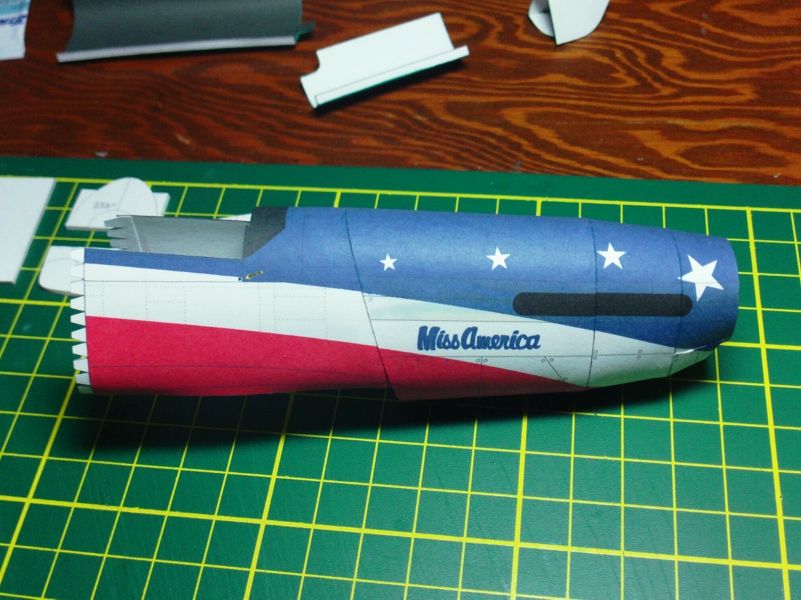
__________________
SUPPORT ME PLEASE: PaperModelShop Or, my models at ecardmodels: Dave'sCardCreations
|
|
#9
09-12-2013, 08:14 AM
|
||||
|
||||
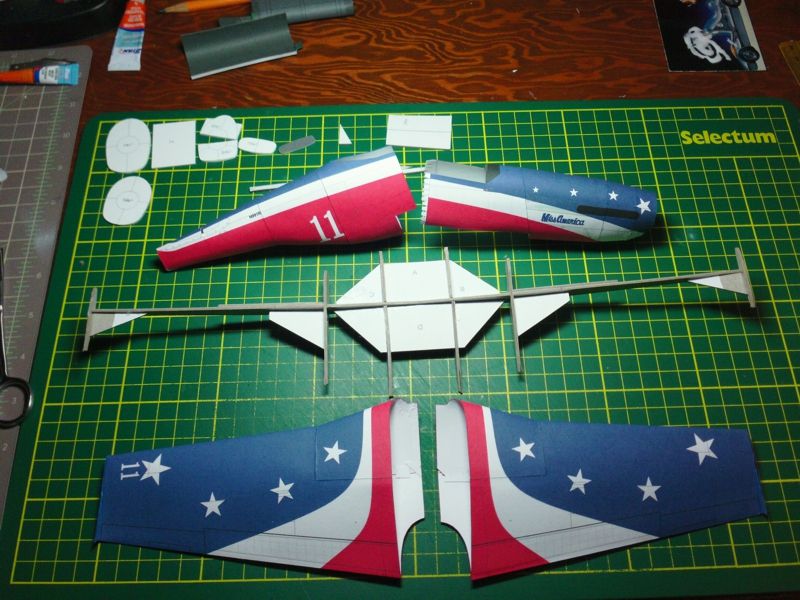 Wings assembled, and as you can see, the internals are ready too. However...you might also that the spars are way too long to fit inside the wings! When printing the parts pages, I knew I already had a sheet of Mustang formers printed (from an earlier build) so I decided to use them...not thinking about the newly designed spars and ribs for this model. So, I will be cutting down these internals to the correct length before installing them. 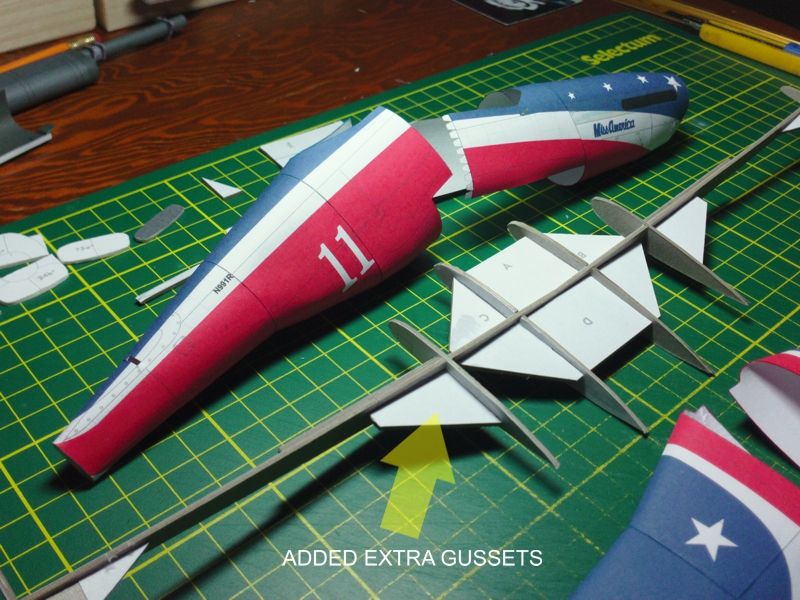 As usual, I am always adding little extra gussets here and there...I do this on all my wing spar assemblies. Mainly just to keep parts perpendicular, and stop those ribs from twisting and bending when I slide the assembly inside the preformed wing skin. If I were assembling this wing with wheel wells, I would be attaching the spar assembly to one side of the wing skins and then wrapping the skins around to enclose the spar and ribs...and dislocating ribs would be less of an issue. ... Eventually I get the wing skins on the trimmed down spar assembly and join the centers with a thin strip of card. [below] I've also got the two halves of the fuselage finished and joined up at the middle connection. Doing it this way, without a cockpit in place yet, allows for the cleanest and tightest connection at that center seam. The cockpit on this model easily slides in from the bottom later on. 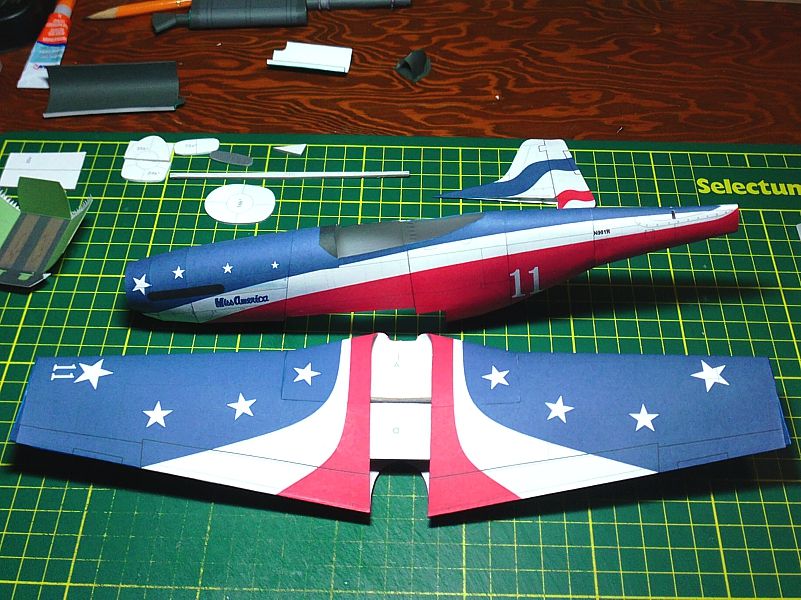
__________________
SUPPORT ME PLEASE: PaperModelShop Or, my models at ecardmodels: Dave'sCardCreations
|
 |
|
|


 Linear Mode

