


|
|
|
#94
 03-09-2015, 07:38 PM
|
|||
|
|||
|
Wow, amazing!

|
|
#95
03-27-2015, 11:05 AM
|
||||
|
||||
|
I did a quick build of the optional Fuel Tanks for the P47.
These can be used on any Jug, as long as it is equipped with wing pylons. The free accessory download includes two of these Tanks and two Bombs. Small parts...not complicated...but small to build.  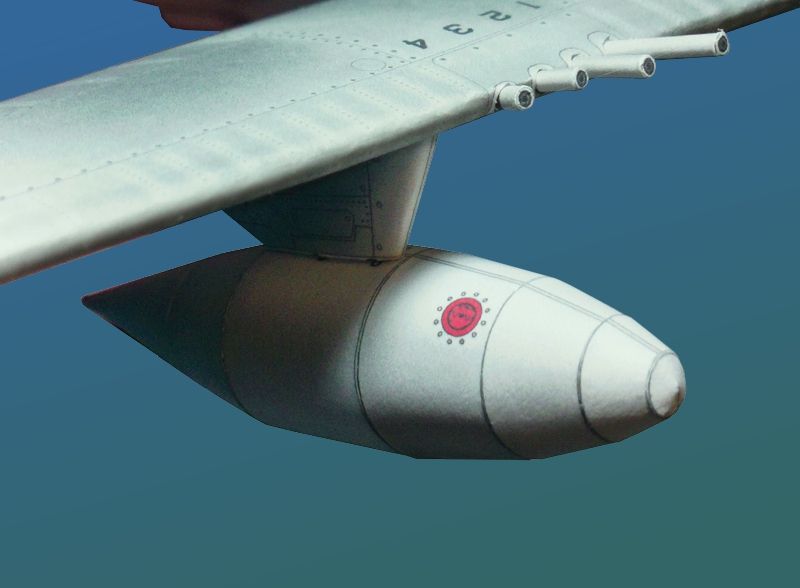 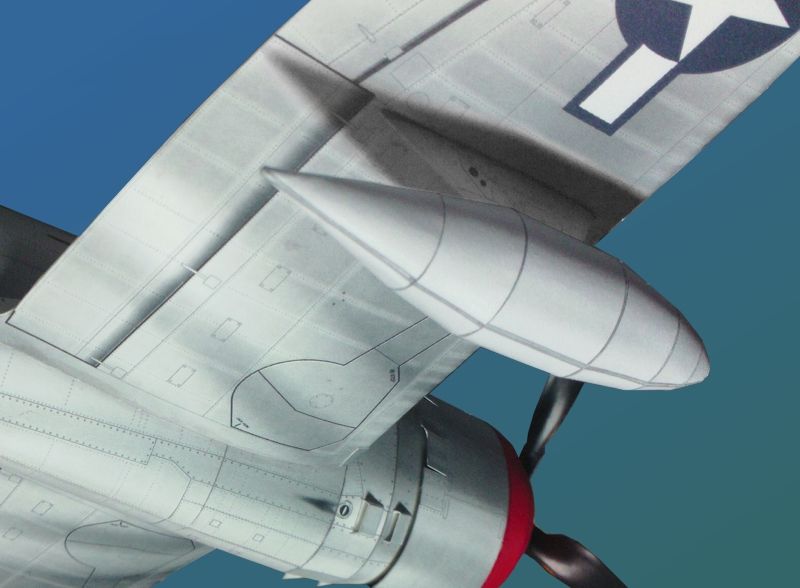
__________________
SUPPORT ME PLEASE: PaperModelShop Or, my models at ecardmodels: Dave'sCardCreations
|
| Google Adsense |
|
#96
03-27-2015, 05:57 PM
|
||||
|
||||
|
They look great Dave!
Gary
__________________
"Fast is fine, but accuracy is everything" - Wyatt Earp Design Group Alpha https://ecardmodels.com/vendors/design-group-alpha
|
|
#98
03-27-2015, 09:19 PM
|
||||
|
||||
|
Quote:
I did a print on regular cardstock at normal settings and it still looks good but I have to admit, nowhere near as good as the matte photo paper. It really looks like real metal in some spots. And theres so much more fine detail. Only issue is, the photo paper MUST be fixed (clearcoated) and is still not as durable as regular cardstocks. So, you really need to be a careful and clean builder to make the photopaper work for you.
__________________
SUPPORT ME PLEASE: PaperModelShop Or, my models at ecardmodels: Dave'sCardCreations
|
|
#99
04-12-2015, 09:43 PM
|
||||
|
||||
|
Question About Part 27/28
Hi Dave,
Not sure how to fold part 27. Notice the last photo in post 84 above shows the finished part, but not very clear on how to fold it. Do I create fold lines on the vertical axis as the part is drawn? (along the tabs that go past the main body) Are there horizontal folds needing done as well? So far the build is going well, working on the cockpit. Pieces fit nice together! Mike
__________________
Cardstock Property Tables and Terms Flying Cardstock Models http://www.papermodelers.com/forum/m...uers-projects/
|
|
#100
04-18-2015, 06:42 PM
|
||||
|
||||
|
Sorry Mike...only just getting back on the computer (from my trip).
Part 27 is the base unit for the target sight. Looks like Part 27 has some edge lines missing. I think it is only in this kit. I will have to fix it. ...and add some fold lines. The image below shows the basic folds for the part. Its just a boxy shape. You can edge glue or add some tabs yourself.
__________________
SUPPORT ME PLEASE: PaperModelShop Or, my models at ecardmodels: Dave'sCardCreations
|
| Google Adsense |
 |
|
|


 Linear Mode

