


|
|
|
#31
 02-19-2015, 12:54 PM
|
||||
|
||||
|
Beautiful model Dave! Your photo build is incredibly detailed and of course very well photographed. That Smithsonian T-Bolt is way past shiny. I kinda doubt that any operational aircraft were that conspicuous. Maybe only if they wanted to dazzle-blind the enemy pilots.
Curt 
|
|
#32
02-19-2015, 01:03 PM
|
||||
|
||||
|
Great, thanks for the tip Dave. I'll try it out.
Gary
__________________
"Fast is fine, but accuracy is everything" - Wyatt Earp Design Group Alpha https://ecardmodels.com/vendors/design-group-alpha
|
|
#33
02-19-2015, 01:04 PM
|
|||
|
|||
|
yes, yes...
...yes!
") maybe... P-47D-25-RE (s/n 42-26628) coded "LM-C" and named Miss Fire/ Rosie Geth II, flown by Capt. Frederick J. Christensen Jr. of 62nd FS/ 56th FG or P-47D-28-RE (s/n 44-20209) coded "7U-W" and named Jeanie of 23rd FS/ 36th FG.... 
|
|
#34
02-19-2015, 01:15 PM
|
||||
|
||||
|
I didn't think these planes were that shiny, in wartime,
but it looks like (from some old photos) that some planes did get polished up. I guess it depends on how much time you had on your hands? lol I wish I could represent it better in the paper model, but I tried making the colouring more like real shiny metal...and I couldn't control how well it comes out of the printer. Some parts came out real dirty and dark. So I decided to go with a metal look...just not so polished and with those heavy contrasts. I also have to think about creating something that is going to work on different printers and not produce weird things for some people. Osborne...I have about 5 Jugs already in line for models. Let me get those done first, and then remind me again of these aircraft. okay?
__________________
SUPPORT ME PLEASE: PaperModelShop Or, my models at ecardmodels: Dave'sCardCreations
|
|
#36
02-20-2015, 01:25 PM
|
||||
|
||||
|
Call me Bruce Jenner?
__________________
SUPPORT ME PLEASE: PaperModelShop Or, my models at ecardmodels: Dave'sCardCreations
|
|
#37
02-20-2015, 04:19 PM
|
||||
|
||||
|
With the main fuselage done, its time to fit the Wings.
First thing is to print and laminate the Wing Spars and Ribs to heavier card. I print on regular weight paper and glue with 3M Spray 77, to two layers of Cereal Box card. Roll it with a brayer roller and give it a day to dry. This gives me parts at about 1mm thickness. Cut out all the Ribs and Spars, and then apply some CA to any tips and edges that show delamination. There will always be some...most of it isn't a big issue. I designed a new set of Ribs and Spars for this Jug...incorporating Landing Gear wells. It doesn't matter if you are planning wheels up or down, you must assemble the wheel wells and fit them into the spars and ribs, to complete the structure. The Wells are a simple box construction, with steps on one side. Nothing too difficult. There are also some small "ribs" that fit within the wells. These are optional details...and are quite small. But the visual effect is better I think, with them installed. 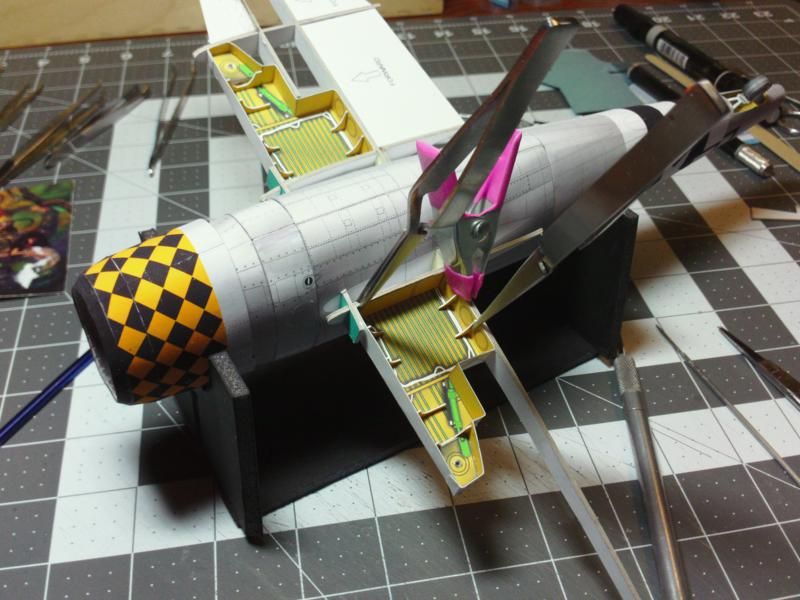 First pic (above) shows me fitting the wheel well into the partially constructed spar and ribs. The box is glued in a few spots to the ribs and spars...clamped in place until the glue sets. Next shot (below) shows the top side of the wing...complete...and you can clearly see the spar/rib/well structure. Its important that the wheel box is flush with the bottom of the spars and ribs. No, the "R" did not mean left/right...was just something i forgot to erase from the back side of a piece of cardstock. 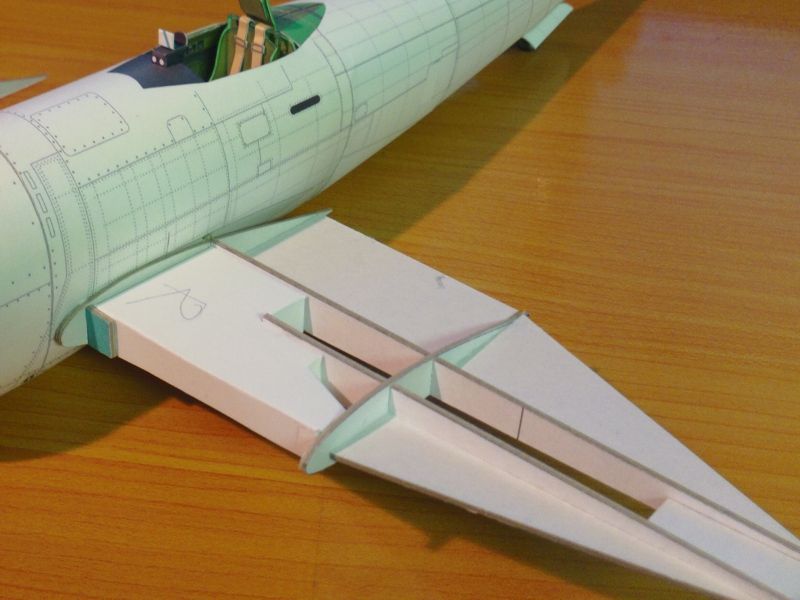 ... Just another detail shot showing the fully assembled inner wing. Spreaders are installed to stiffen everything up and keep things square. I have changed the design of these spreaders since these photos, but the procedure is still the same. In this photo, you can also see where the main Spars travel through the fuselage. The Spars are not glued to the fuselage in any way, just centered. Its important that the holes in the fuselage are not cut oversize. The Spars must fit tightly through the openings to keep the wings in place until the skins and fairings are installed. 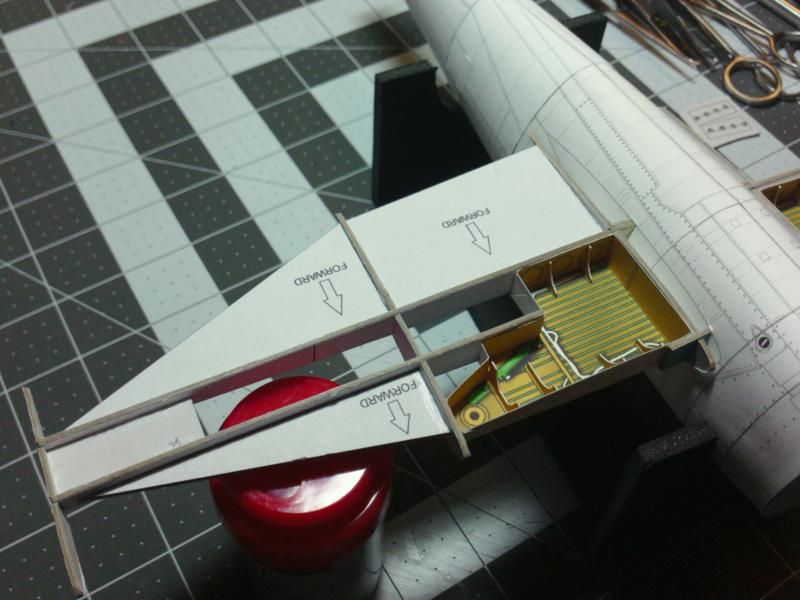 ... Next photo shows me piercing the wheel well box to create a hole which will receive a supporting pin inside the Landing Gear strut. This is an optional method of building the Gear...the inside support rod just adds strength. Before making the holes for the Landing Gear blocks must be installed to thicken this area of the wheel wells. Its hard to see in the photo, but the floor has been raised 1-2mm. An extra part with artwork is provided in the kit to install in that area. If a support rod is used in the Landing Gear, holes must be drilled the same size as the support rods. 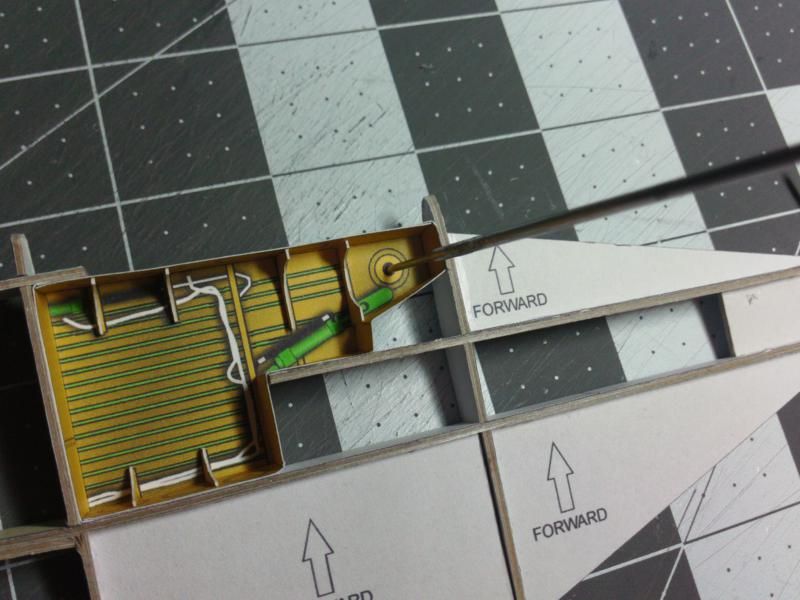 ... and, we are ready for Skins! 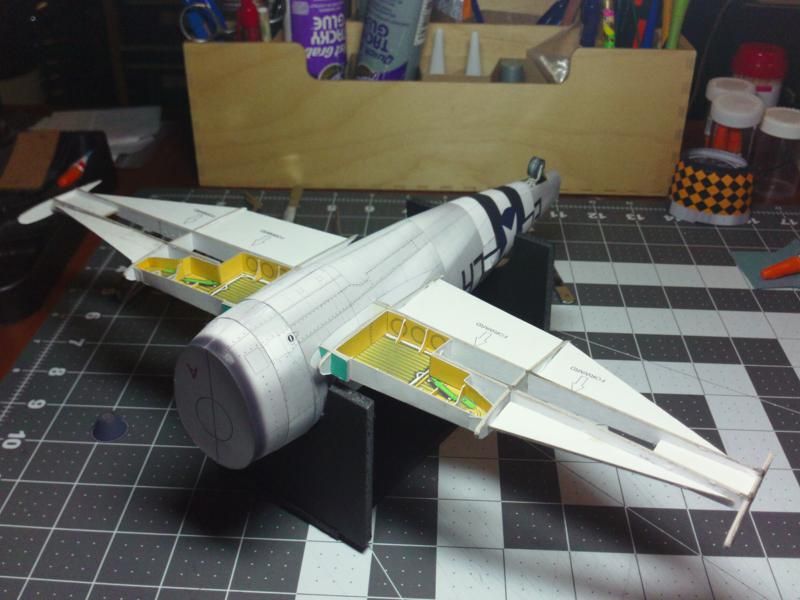
__________________
SUPPORT ME PLEASE: PaperModelShop Or, my models at ecardmodels: Dave'sCardCreations
|
|
#38
02-20-2015, 05:16 PM
|
||||
|
||||
|
Wing skins...
You can see I have added a few surface details, like the Landing Lights on each wing. These lights are artwork... already in place... but I have provided additional artwork parts for a second layer. Completely optional of course, but it adds some visual effect to the 2D parts. Best (if you choose to use them) to cut them out and glue them in place before cutting out the wings . 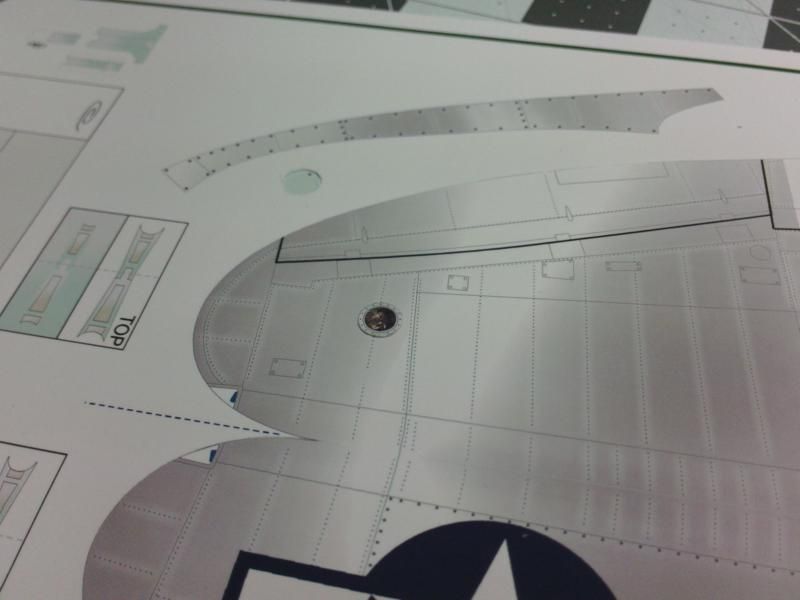 ... A complete wing cut out and ready to use...almost... first...edge colour. 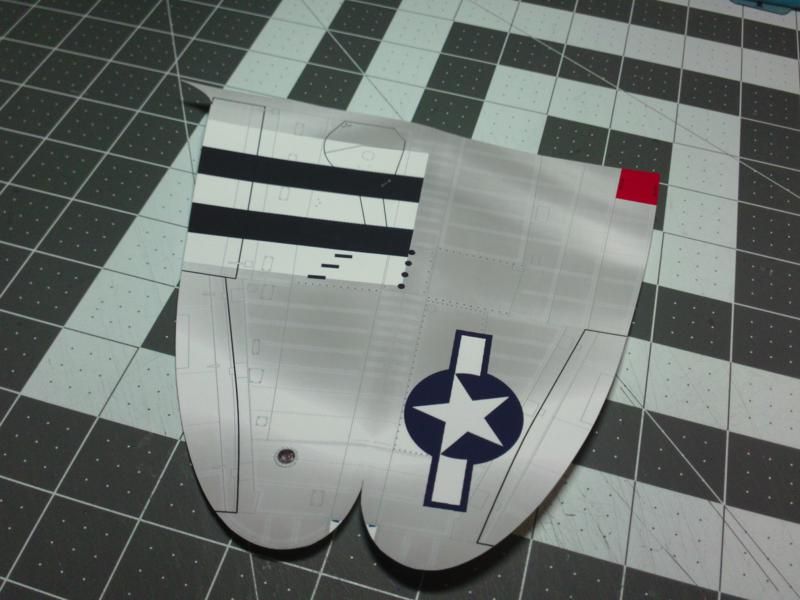 ... If "gear down" is planned, you will need to cut out the Landing Gear doors. You can save these doors (if you cut them out cleanly) OR use the second set of doors provided in the kit. Either work just fine. You should also cut out the Machine Gun ports to fit the Machine Gun tubes. It is possible to glue the tubes to the front edge of the wing (if you prefer). 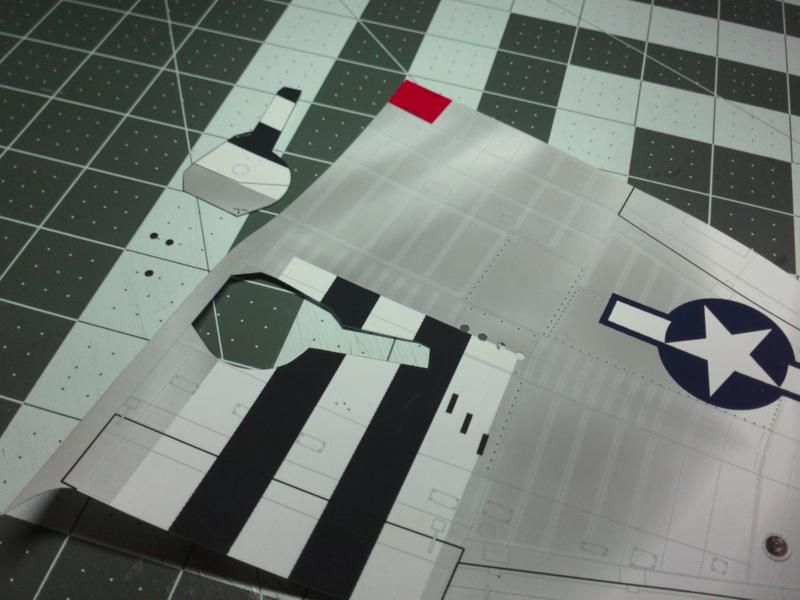 ... To fold the skin, creating top and bottom sides, you need to shape the leading edge of the wing. If you look at the wing ribs, you'll see this is a curved/rounded edge...so you don't want a creased fold. I prefer to use a long dowel and roll the front edge of the wing. I start with a thicker dowel and then get tighter with narrower dowels, until I get the same shape to match the front ends of the ribs. However the wing edge will need to get flatter and sharper as you get further out toward the tips. So, you'll have to flatten it out a bit more with your fingers, almost to a crease. 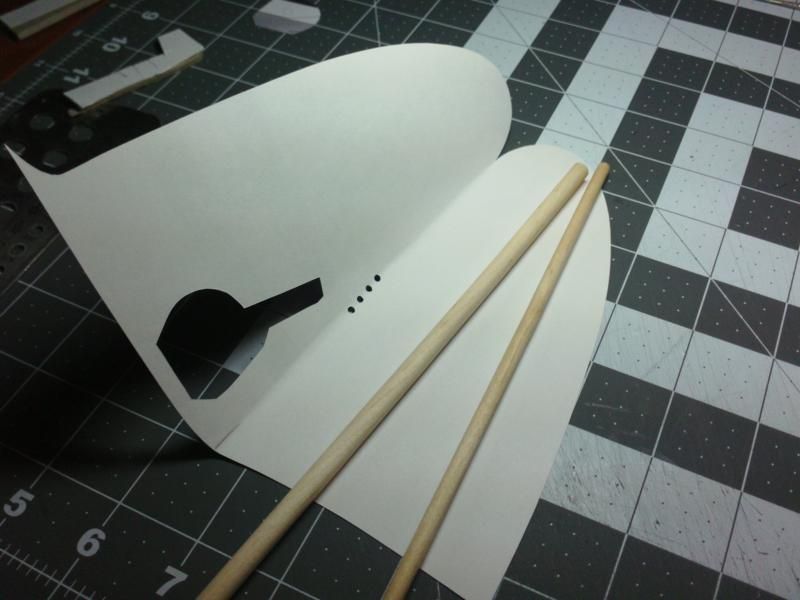 ... When gluing the trailing edge of the Wings, you only want to glue the very edge, so the wing retains some tapering thickness. So I added this tabbed joiner strip. Attach it to the bottom side of the wing, about 2mm from the edge. Then apply a bead of glue along the edge of the wing skin before folding over the skin and sandwiching the tabbed strip. 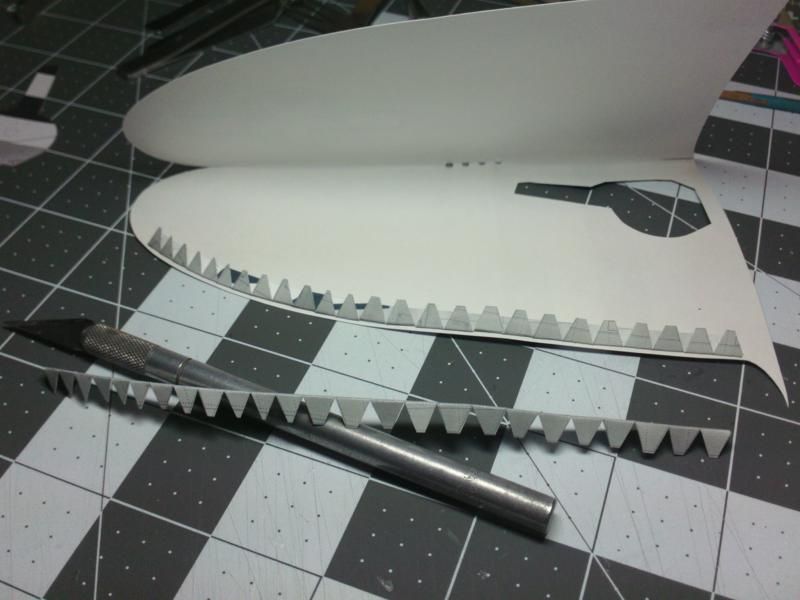 ... The wing tips join together quite well without any slits or cuts in them but you don't want to glue the entire wing tip flat together. So, I added a bevel to the edges of the curved wing tips using the rounded end of a paint brush. Place the wing tip, at an angle, against a hard surface like your cutting mat, and push and drag the tool around the shape of the tip, creating an indent. I think it just stretches the paper a bit creating this bevel on the edge. You can see I applied a fair amount of pressure, leaving a trail of colour rubbed off from the paintbrush. 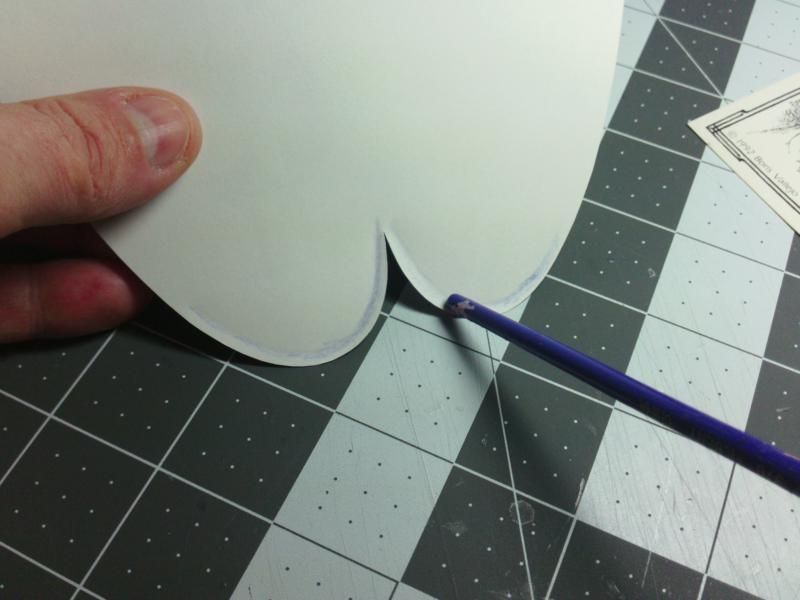 ... I was able to achieve 1-2mm of beveled edge on each side of the wing! Apply glue just to the edges of the card and carefully line up the wing tips. The bevel helps keep some thickness in the wing ends. 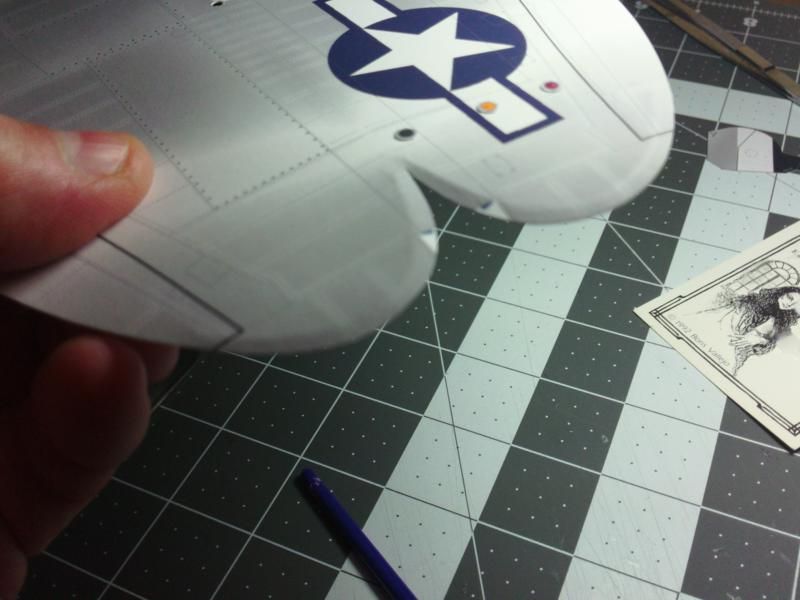 ... Now the wings are ready... and its time to fold over the skins and glue the edges. Test fold, and test fit, before gluing ...make sure everything lines up and give yourself a visual reference for that final glue and fit. Try to avoid any twist in the wing. I can verify that these wing skins line up really well. But, if you end up with a tiny overhang top or bottom, it can be trimmed...its better than a twist in the wing. Anything more than .5mm is too much though. Try again. I just lined up the tips and made sure the aileron/flap lines lined up. You cannot use the inside (fuselage) edge for alignment because the underside of the wing is longer. 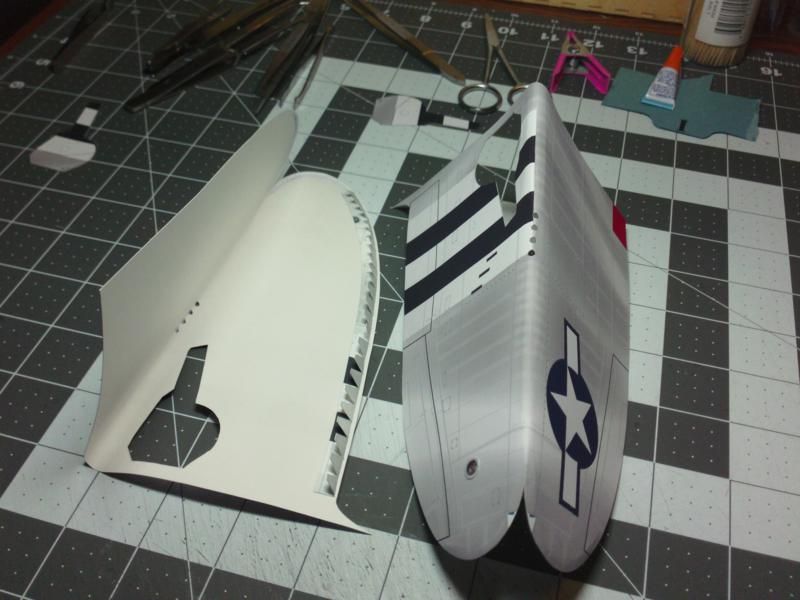
__________________
SUPPORT ME PLEASE: PaperModelShop Or, my models at ecardmodels: Dave'sCardCreations
|
|
#39
02-20-2015, 05:22 PM
|
||||
|
||||
|
Spectacular tutorial, Dave. I might take a run at a Jug after seeing this.
Also, your rendering interpretation of silver is probably the best I've ever seen. JoeG
__________________
Currently building Heinkel Models/Ron Miller Authentic Nautilus.
|
|
#40
02-20-2015, 06:17 PM
|
||||
|
||||
|
Thanks Joe.
The metal is my 16th experiment at it! lol Its so hard to find something that prints well for everyone. John Dell's Stratoliner is pretty freakin' awesome (when it comes to the metal finish). Nice artwork in that model.
__________________
SUPPORT ME PLEASE: PaperModelShop Or, my models at ecardmodels: Dave'sCardCreations
|
| Google Adsense |
 |
|
|


 Linear Mode

