


|
|
|
#21
 11-17-2015, 02:47 PM
|
||||
|
||||
|
The Cockpit assembly is complete except for the Seat Belts and Control Sticks
which are fairly straightforward, but tedious to prepare. Small parts, delicate cutting...carefully folded and glued into place. Theres room for builder options...use the parts as supplied or design your own. (Heres the first white build...the part installations are a little easier to see) 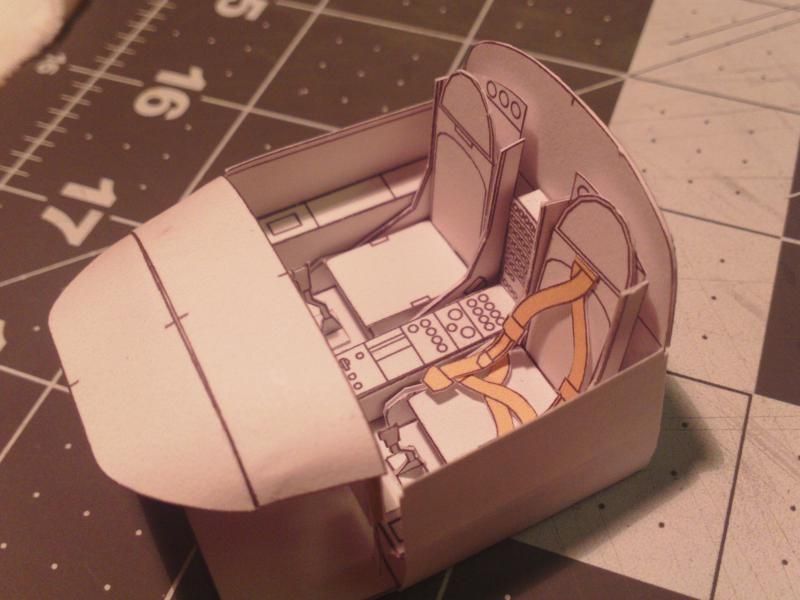 ... Moving on, its time to add some wings... starting with the internal spars and wing ribs. At the beginning of the build, the Formers page was printed on regular weight paper and then glued to thicker cardboard...about 1mm total thickness. All slots and openings in the formers and other parts are intended for 1mm thicknesses. Cutting out all the Wing Spars and Ribs, you'll need to use a straight edge to ensure straight precise cuts and to keep all the parts as closely matched as possible. The main Spar is made of three parts (Right and Left Spars and a center joiner. A secondary (rear) Spar is one piece and smaller. Everything locks together with the Wing Ribs (four on either side of the aircraft). The Wheel Well boxes will fill up one of the openings, but most will be filled with flat spacers and gussets. When assembling Ribs to Spar, top and bottom surfaces must be flush with each other. So trim out mating slots until you can easily, but tightly fit things together and adjust slot depths as needed to keep things flush. Don't accpet "close enough" here...do it right. 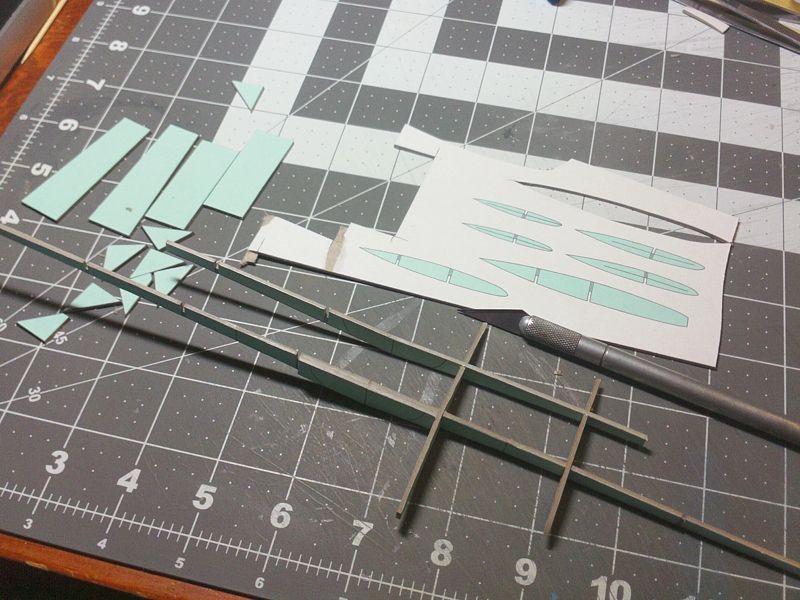 ... You can (if you choose to) go ahead and glue all the Wing to Rib connections BUT...only assemble one side. The Spars still have to slide through the fuselage ...and be centered. Once the Ribs are all in place, the assembly will be locked into the fuselage. I think it makes sense to assemble one side including gussets and spacers and glue all the components together. This will lock everything in place and keep it all square while you fit it into the fuselage. But you can also square everything up after installing in the fuselage, and then install the spacers and gussets (as I have done). The front Spar center Joiner is marked to help you align it in the fuselage. Its a good idea to locate and glue it in place, as well as securing the rear Spar (once you are sure of its position). 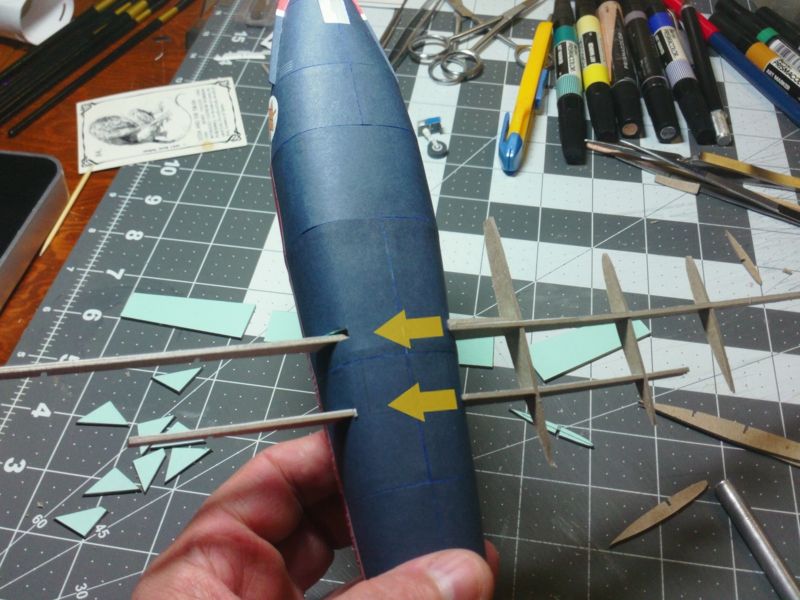 ... Wheel Wells are easy to assemble if you cut them out carefully and prescore all the necessary fold points. Prefold everything and then start gluing tabs around the wheel wells until it is enclosed. Fold the outer tabs away from the box to create mating surfaces for the Wing skins. The Well boxes fit snugly into the Rib and Spar assembly. You can glue in place if you choose to. 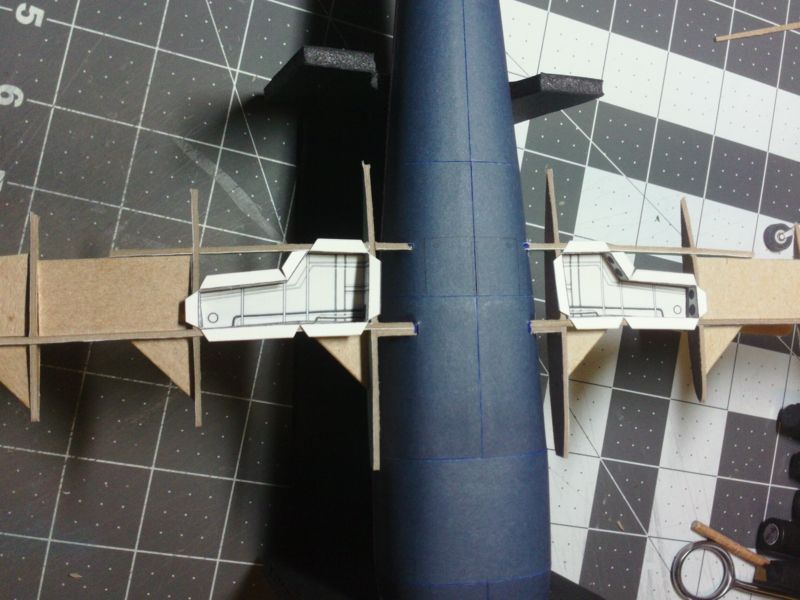 ... Making sure to cut all Gussets and Spacers perfectly square is very important. They need to be installed snugly into corners and have to square everything up. Make sure to use all of the parts, and add more if you like. 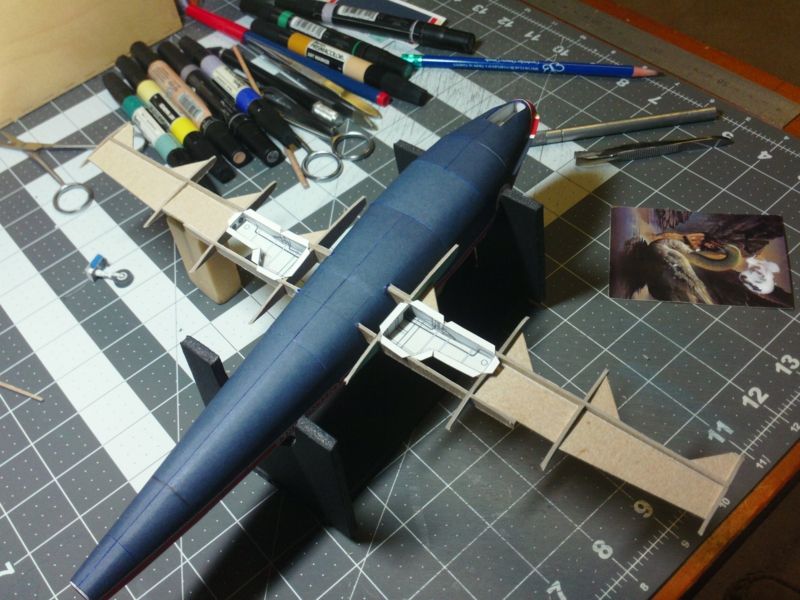 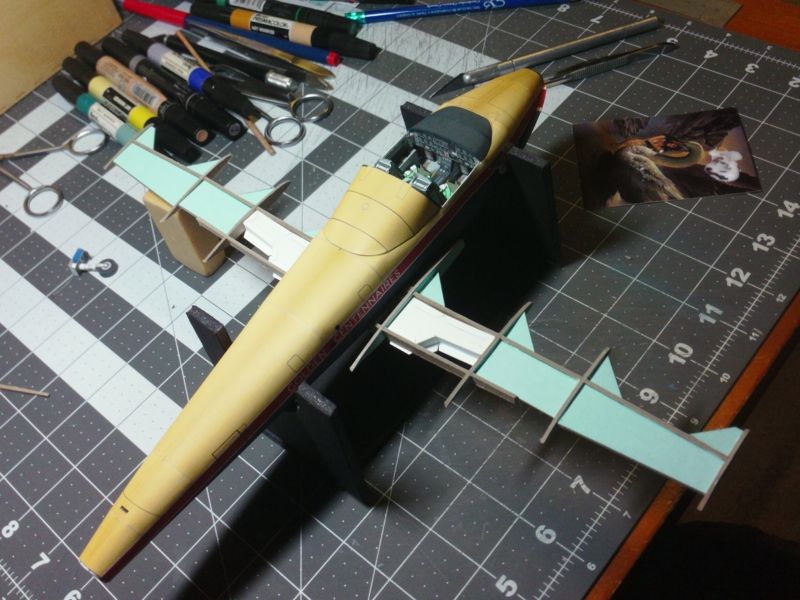
__________________
SUPPORT ME PLEASE: PaperModelShop Or, my models at ecardmodels: Dave'sCardCreations 
|
|
#22
11-18-2015, 01:21 PM
|
||||
|
||||
|
Once the wing Spars and Ribs are solid...glue is dry...at least a day later...
you can install the wing "skins". Each main wing...there are two in total, in case you didn't know...is made up of two parts and a joiner strip. I eliminated a larger, uglier seam for a smaller and slightly trickier part to install. Patience is again your friend. Score the trailing edge glue tabs...Cut out the wing parts... 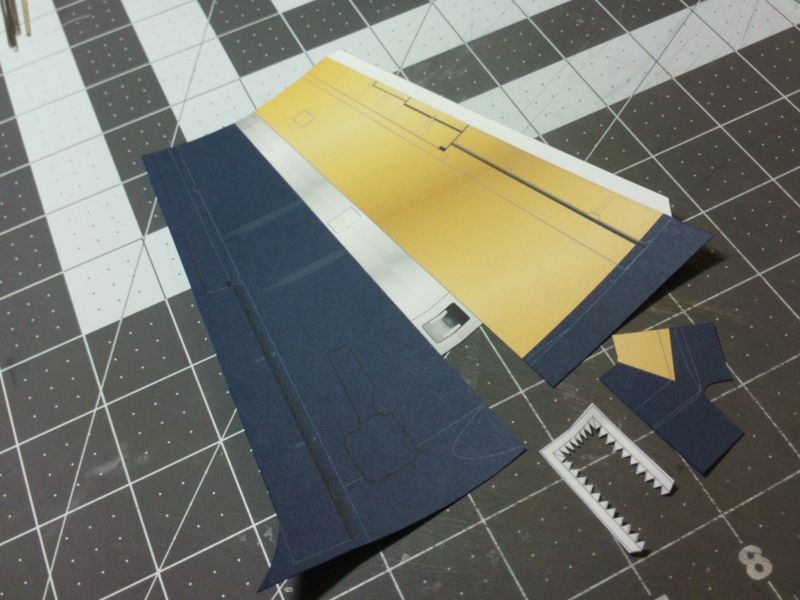 .. In this case, I am building "wheels down" so I will need to carefully cut out the wheel well doors. You can save and reuse the door parts...or use the extra door parts provided. Either way, there are inner parts to be attached. 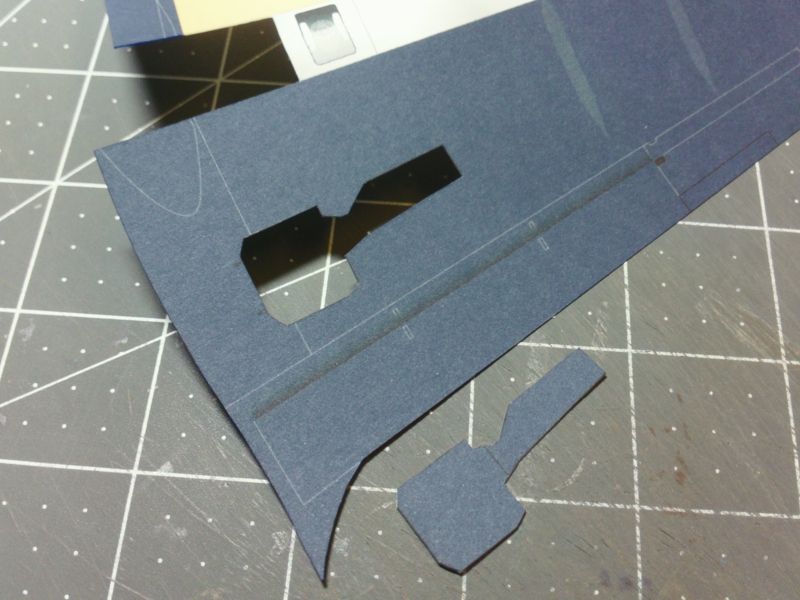 ... First step is rolling the front edges of the wing parts. I start with a long wooden dowel, at least 1/2" in diameter. Don't rush the rolling, or you will cause creasing. Slowly, the paper stretches, so you can roll a lot more cleanly if you take your time. Try to roll both parts of each wing the same amounts as you go. 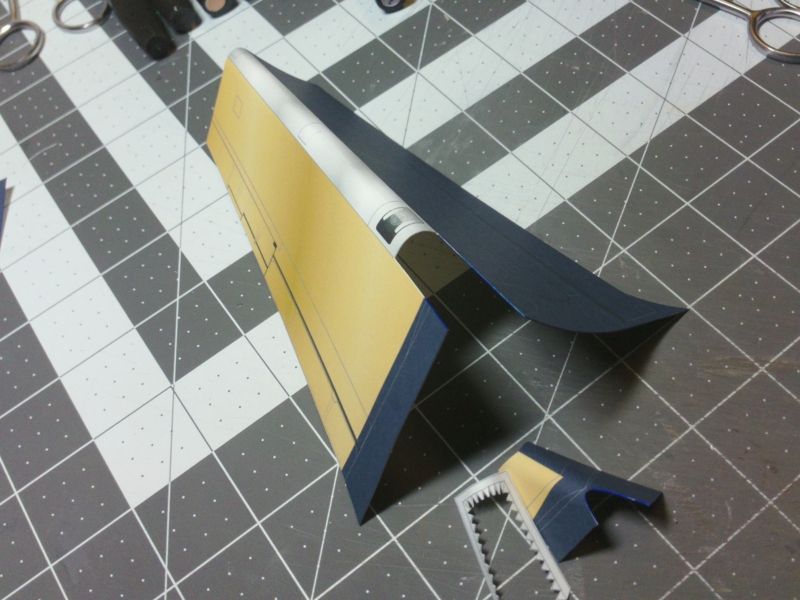 ... I use smaller and smaller dowels (and other cylindrical tools) to roll the wing edge tighter and tighter until I get to the same size as Wing Ribs. Use the rib shape as your reference. Some wings, like these, are almost pointed in the front, so I need to roll them pretty tight. I will also use thin dowels on the inside of the wing part to score the leading edge a bit more. With the wing approaching its required shape, you can install the tabbed strips for the wing insert pieces. Don't attach these strips any earlier than this point...it will interfere with shaping the wing. 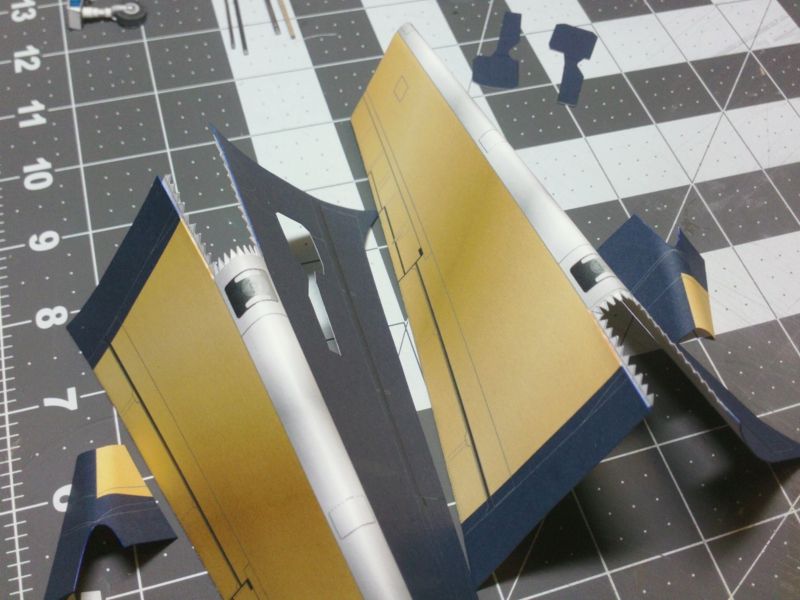 ... Now you can fit the insert pieces... if you have rolled both wing parts the same shape, they should fit together quite easily. if not, you must shape the insert part as best as possible. Line up only one long side (top or bottom) and glue it in place over the joiner tabs. Once it has fully dried, glue the opposite side. Then glue the curved section of the insert part...from the inside of the wing...pushing the joiner tabs up into place and stretching the wing part out to meet the insert part. Any gaps should disappear at this point. Keep smoothing out the tabs until the glue takes hold. 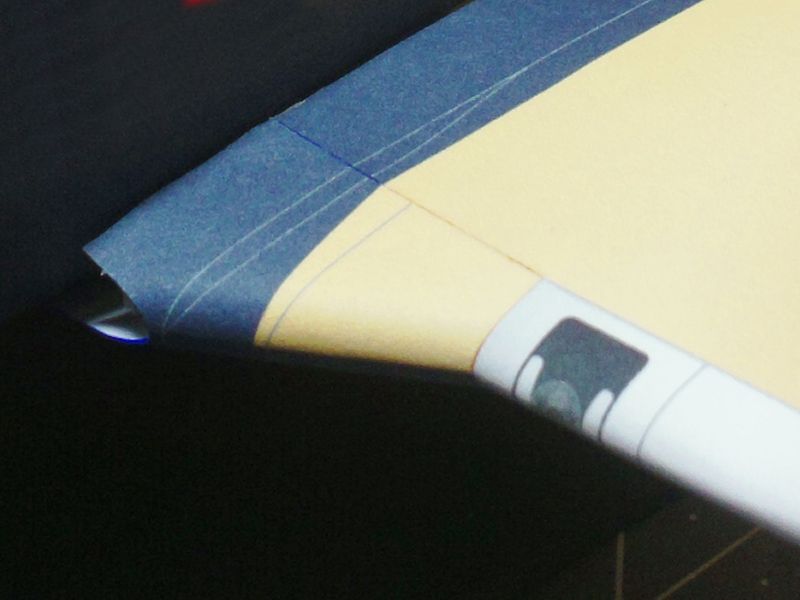 ... Don't allow the wing to unfold at this point. The insert part will become dislodged if the wing is allowed to open up. I use a gentle clamp to hold the wing edges together, so the wing will retain its shape. I'm waiting until the front edge is fully formed and all the gluing has dried, before I glue the trailing edges of the wings. 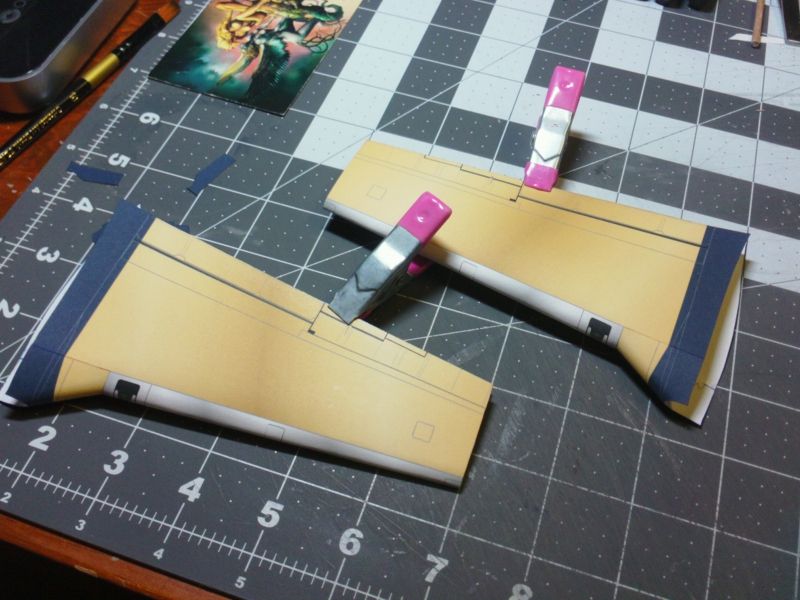
__________________
SUPPORT ME PLEASE: PaperModelShop Or, my models at ecardmodels: Dave'sCardCreations
|
|
#23
11-21-2015, 09:37 AM
|
||||
|
||||
|
Continuing with the Wings...
still haven't glued the trailing edge of the Wings yet. Looking at the front edge, it needs a bit more creasing. Some wings have a very rounded leading edge, others are more sharp and pointed. Using the internal Ribs as reference, I gently add more of a point to the wing fronts. But be careful, this is where the paper stresses and you create little creases. 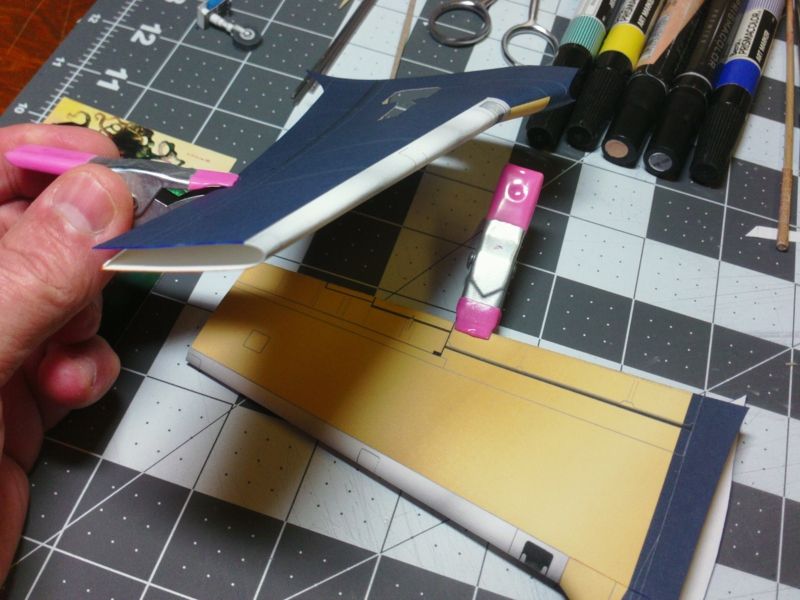 ... Now I am ready to seal up the trailing edges. The glue tab has been scored and folded already...but I want to flatten out the fold a lot more. I want the two wing sides to meet as flat and tight as possible. You could cut off the glue tab and glue just the edges of the wing sides together, but you must be careful not to glue too much and flatten out the flaps and ailerons. The folded tab strip helps give the wings some tapered shape. Make sure to test fit everything and adjust your leading edge fold if necessary to help the trailing edges line up. This is another reason to keep the wing folded during all this assembly. 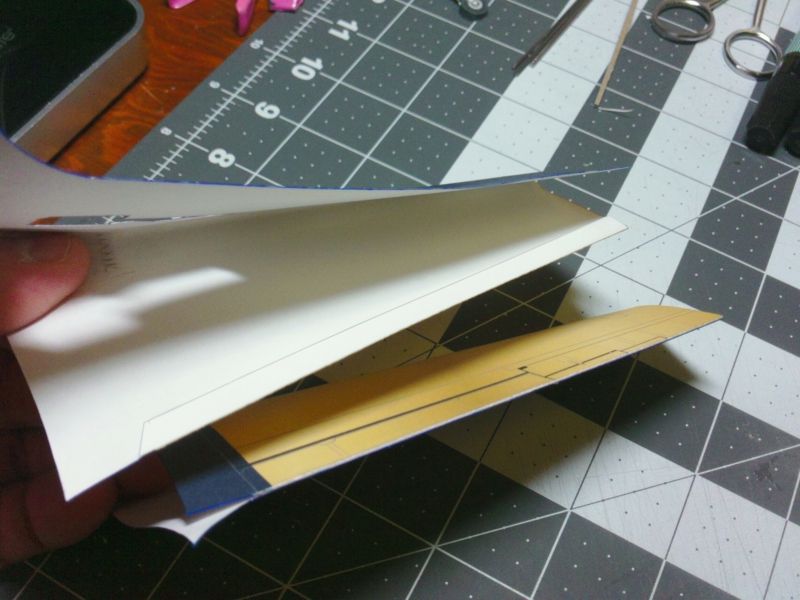 ... Wing tips can finished at any time, but its best to install the tabbed joiners after the wing has been glued into shape. You may need to trim the length of the joiner strip, as long as you have a good set of tabs to work with. You can also trim the shape of the tabs to fit the Wing Tips if needed. To install the wing tips, preshape the parts to match the wing shape. The more curved to match, the easier they fall into place. Glue one side, starting at the front or rear. I glued in three steps, about a third of the way each step. Allow thr glue to fully dry before continuing with each step. Then repeat it all for the opposite wingtip part. Allow them at least a day to completely set up, before attempting to edge glue the upper and lower parts together. 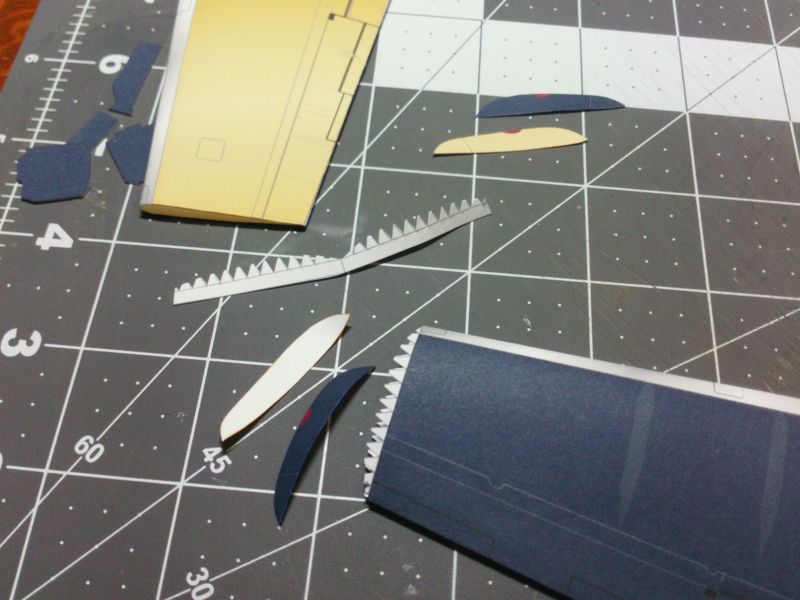 ... Another look at the wheel well cutout in the assembled wing...inside edges coloured. Note also, the connection of the insert part at the wing front. I have trimmed across the edges of the two parts to make sure it is even where it contacts the fuselage. And now the skins are ready to fit to the aircraft. 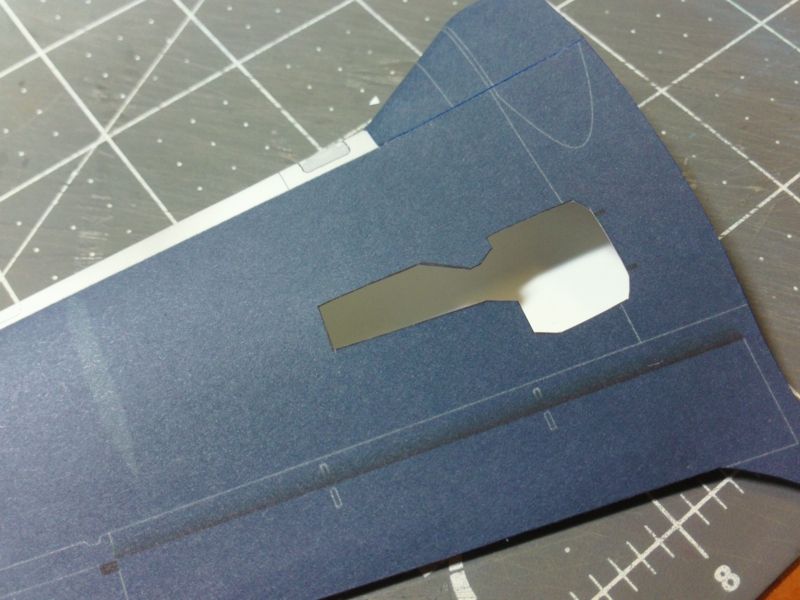
__________________
SUPPORT ME PLEASE: PaperModelShop Or, my models at ecardmodels: Dave'sCardCreations
|
|
#24
11-22-2015, 10:50 AM
|
||||
|
||||
|
Where the heck did everyone go? or have you all just lost interest in this project? LOL
Another one of those projects that just takes way too long, I know. Installing the Wings!... the assembled skins literally slip over the ends of the Wing Spar assembly and up to the fuselage. I found I had to flex and wiggle, to get the skins over the snug fitting Ribs. -I also trimmed off the rough ends of each Rib so they wouldn't get hung up on anything inside the Wing skin. -and I used CA Glue on all the ends of the Ribs to stop any paper fraying and delamination. Once the wing skin is all the way on, you can check the alignment of the underside with the fuselage and the alignment of the wheel well openings (to the wheel well boxes). The wheel wells are the only thing I glued at this stage ...putting glue on the tabs of the wheel well boxes and pressing down the wing skin once it was in the proper place and position. I would recommend a dry fitting first, and then, once you are confident, apply some glue. 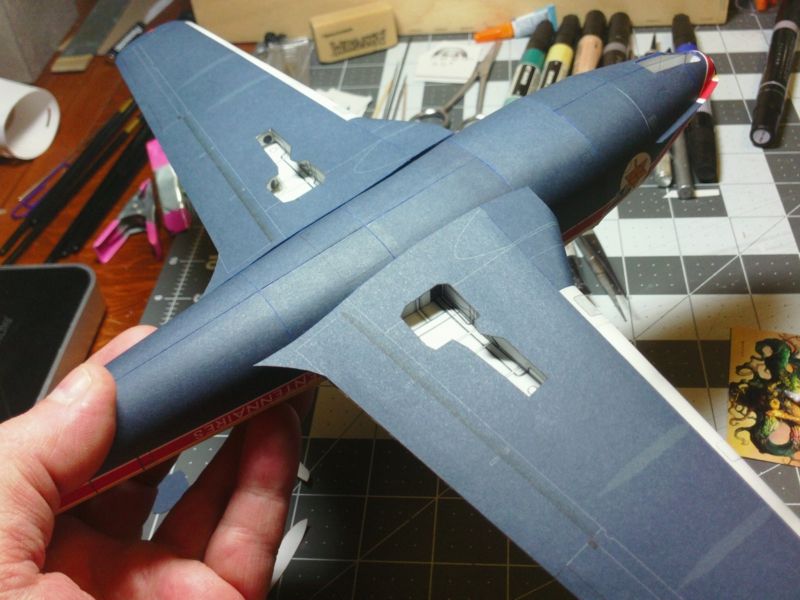 ... While the undersides of the wings must meet up and be glued to the fuselage, the top sides are not quite touching. The gap will be covered by the wing root parts and the Engine Intake nacelles. If any part of the wing touches the fuselage it can be trimmed, but this most likely means the wing skin is on too far. Check the alignment of the Wheel well boxes first. Once the wing is in place, you can glue donw the upper surface to the inner most Wing Rib. Its a bit tricky getting glue in there...or, you can put glue on that rib before you install the wing skins. 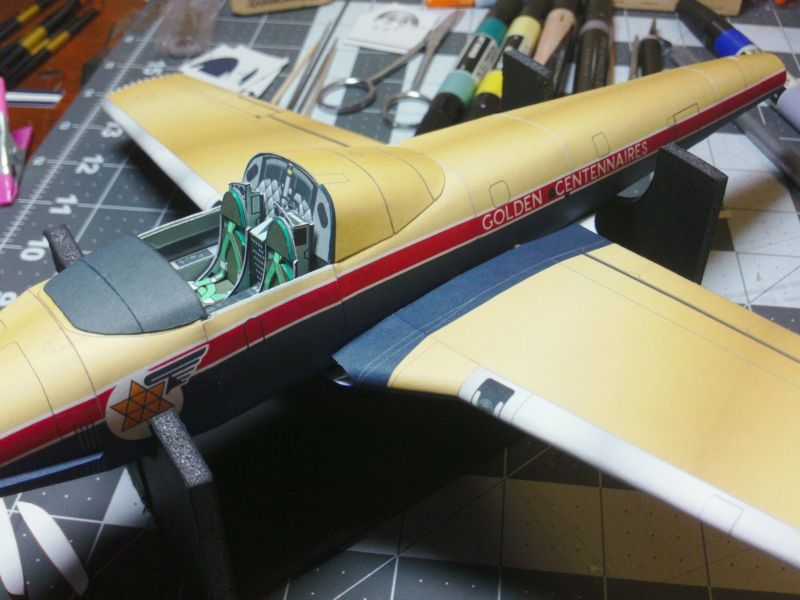 ... The underside of the wing skins must be glued directly to the fuselage. Hopefully your skins line up with the reference marks on the fuselage, but its most important that your wheel well boxes line up first. Glue the wing skins wherever they end up. This is a tricky spot to glue, because you need to edge glue and try to avoid gluing down too much of the wing skin. I used a spacing tool (tweezers to be exact) and slid them under the skin raising the wing skin away from the fuselage. Then I used toothpicks and a fine paint brush to apply a thin bead of glue along the very edge of the wing skin. Run your finger along the outside of the edge to remove excess glue...remove the spacer tool...and press the wing gently against the fuselage. I use a dry brush to clean away excess glue that squeezes out and try to create a clean weld along the wing skin edge. You could try to glue half the wing skin edge (front or rear) and then the rest, but that wouldn't be any less awkward. Gluing the entire length of one wig skin edge is probably the simplest approach. I sometimes do dry runs of things like this, to get a feel for the whole procedure and fish out any problem areas. 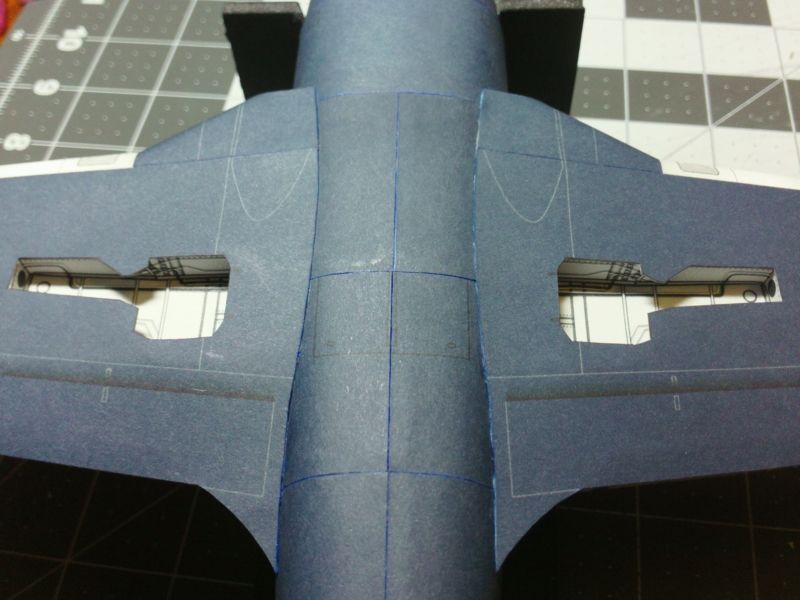 ... This is a spot where edge colouring is important. Even after gluing them down, those edges of the wings are visible against the fuselage. Edge colouring helps hide the overlapping connection. For my edge colouring, I don't have the exact shade of blue (marker). So, I just used a royal blue colour, and then I recoloured over with a 50% Gray art marker to tone down the blue. Its not perfect, but its blending in fairly well.
__________________
SUPPORT ME PLEASE: PaperModelShop Or, my models at ecardmodels: Dave'sCardCreations
|
|
#25
11-22-2015, 01:19 PM
|
||||
|
||||
|
Still here, still watching. Mostly waiting for availability on your website - LOL. Looking mighty fine and a great addition to the world of training aircraft models - not enough of those available.
__________________
2.6% Neanderthal DNA YB (Currently pondering the next build)
|
| Google Adsense |
|
#26
11-22-2015, 04:26 PM
|
|||
|
|||
|
AirDave
I am gobsmacked by the workmanship, the skill. Reading the thread is like reading a good novel, I want the end but I am enjoying the story. Thank you for posting your build, it will help us all! 
|
|
#27
11-22-2015, 04:57 PM
|
||||
|
||||
|
Great, glad to see people are still watching!
okay...continuing... this is the part I made a big change to. The wing root fairings...an awkward spot on most aircraft models. On the Tutor, this curved wing root is also the blended area for the engine nacelles. And it finishes off that little taper tail at the base of the wings. I found the two part fairing very tricky to shape ...and edge joining the curved area to the little tapered section of the wings was very difficult. So, I redesigned iit to a single part, since half of it is hidden underneath the engine nacelles. And I eliminated the curve in that little tail section. Because its so short, I don't think its too noticeable. (*you could still cut the tab off the fairing and cut a curve into it, and edge glue it.) Anyway, the new part requires a simple crease and fold...and then a curve along the lengthwise indicated line. 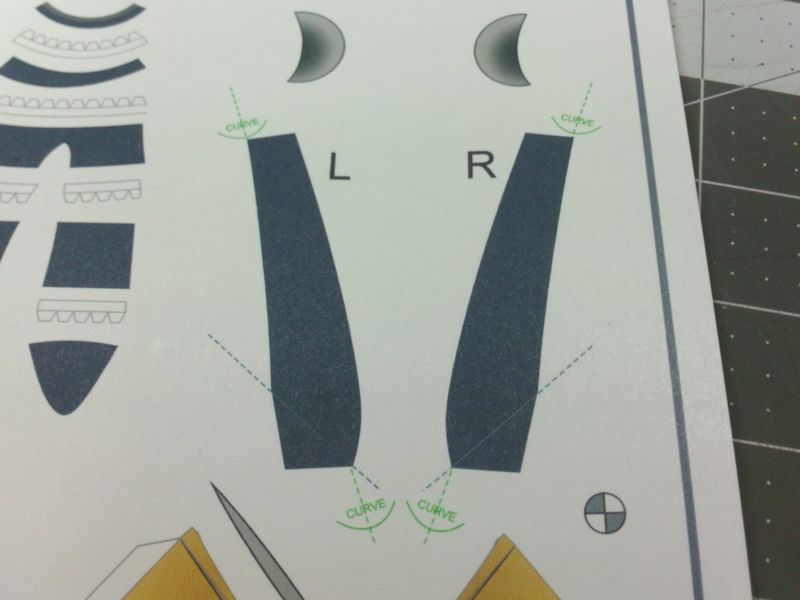 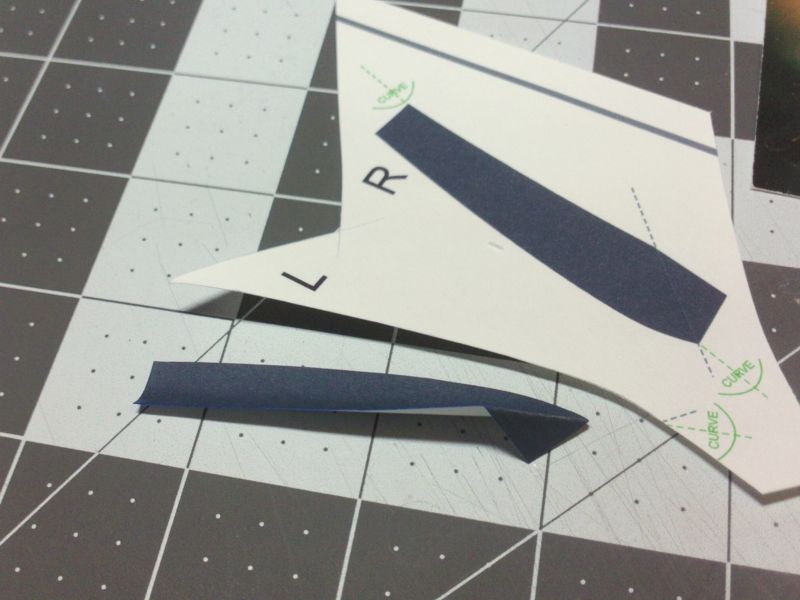 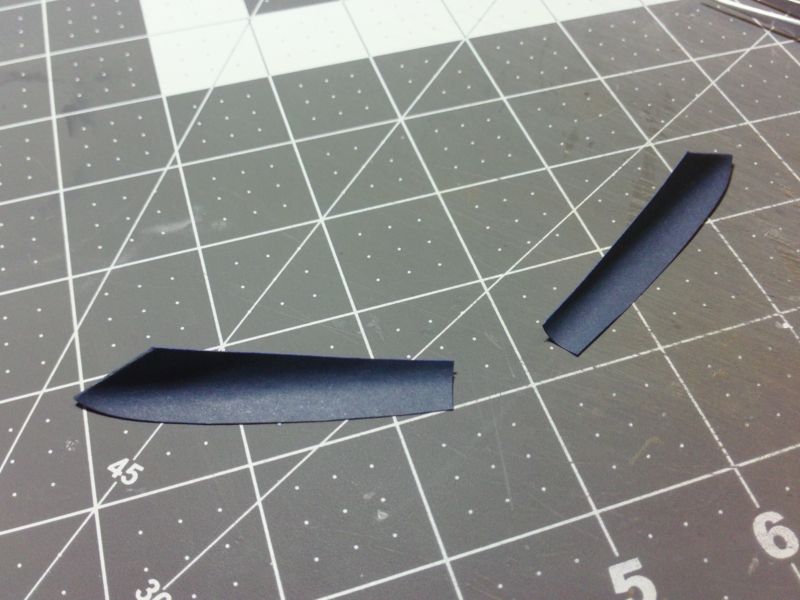 ... To install the part, attach the folded section to the underside of the wing. It lines up with the bottom edge of the flaps (on the bottom side of the Wing), so it doesn't look too much out of place. Allow the glue to dry... 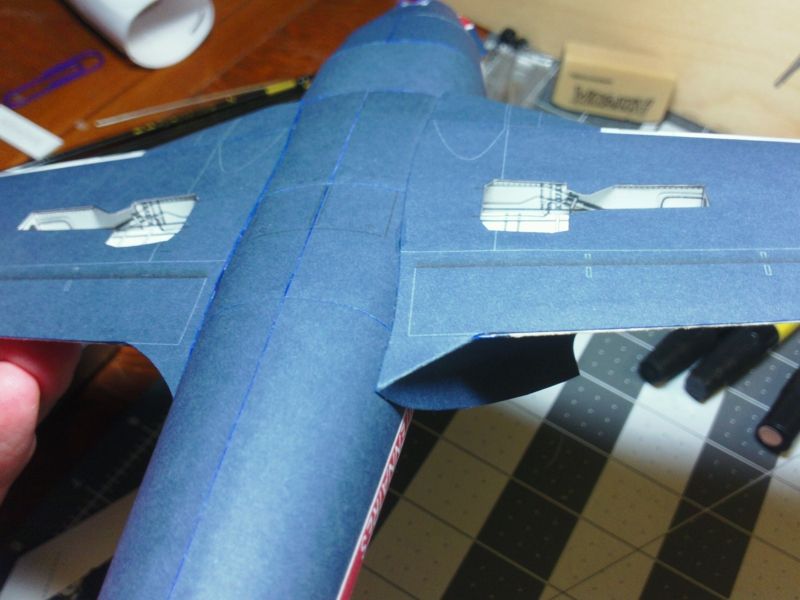 ... And, heres what it looks like from the top...with the fairings waiting to be pushed down into place. 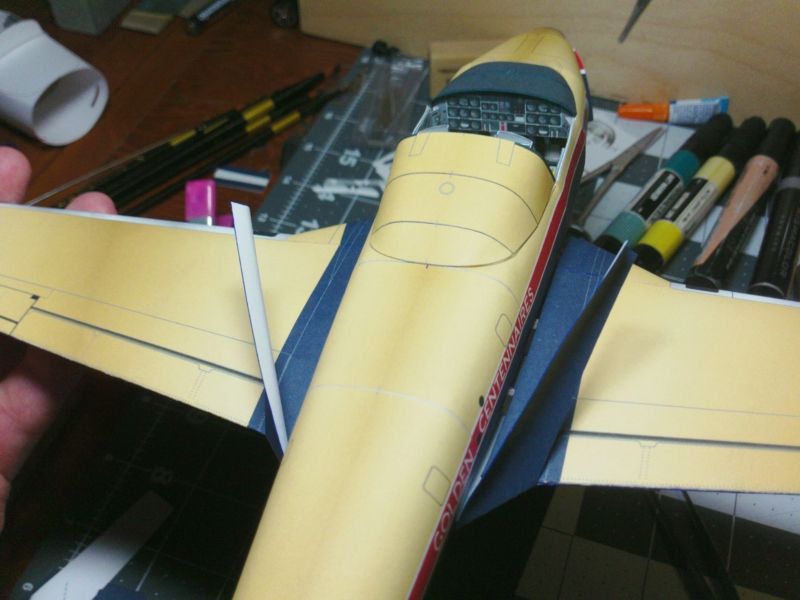 ... And then, just push the parts down and glue into place. With this particular striping graphic on the fuselage, its easy to judge the placement of the fairing. Hopefully on a solid colour aircraft, it will be simple enough to center the curved part in the space between the fuselage and wing. The part really doesn't work any better than the original part from Nobi...you can see how the curve bulges at the rear, but the installation is definitely a lot simpler and quicker with that tabbed connection at the rear. I can live with this. 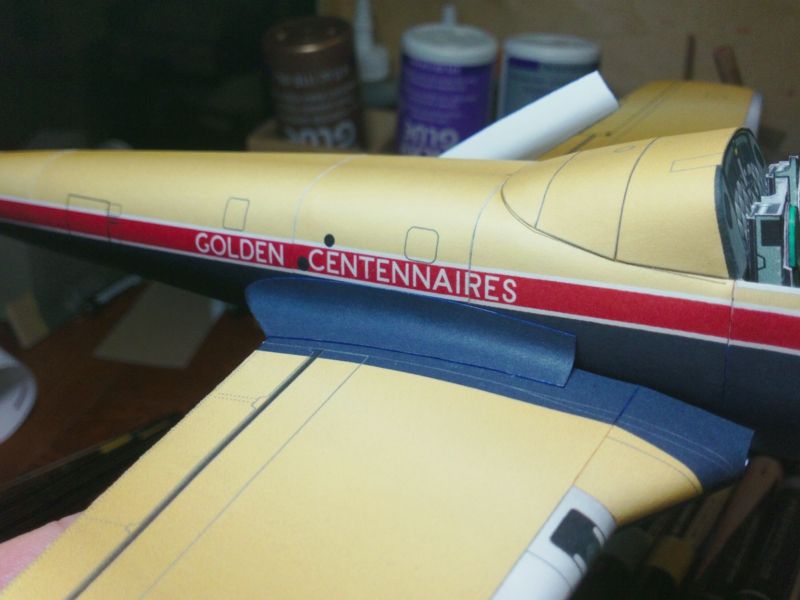
__________________
SUPPORT ME PLEASE: PaperModelShop Or, my models at ecardmodels: Dave'sCardCreations
|
|
#28
11-22-2015, 11:58 PM
|
||||
|
||||
|
I've been reading this thread with great interest. I'm learning a lot about good building technique. I've just chosen not to post anything (until now) to keep the thread dedicated to your build posts and as clean as possible.
__________________
Leo "14thWarrior" M. Lalande
|
|
#29
11-23-2015, 11:26 AM
|
||||
|
||||
|
Now that the wings are in place, and both wing roots have been glued into place,
its time to finish off the fuselage to wing connection with the engine "nacelles". Obviously the single jet engine is mounted in the fuselage, behind the cockpit, and the "nacelles" are really just bulges...air intakes for the engine. And these bulges finish off the wing roots as they transition into fuselage. I showed the construction of the air intakes in my Snowbirds thread, but lets run through it again. First, the Parts collection for both right and left intakes with the inner form pieces separated and glued to a couple more layers of card.  ... Cut out all the parts... normally I only cut single parts as needed, but because I have to work with all these parts at once I do my best to keep them organized throughout the assembly. Start by forming all the parts into their correct curved shapes. I also do some edge colouring. 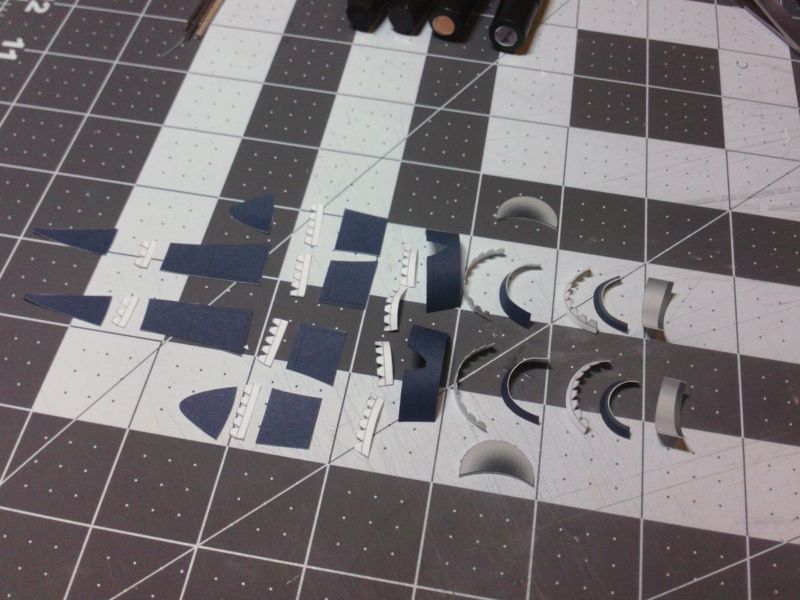 ... After edge colouring, and forming, I attach all the tabbed joiner strips. They must curve as well and must be attached after the parts are curved/preformed. You might have to trim a few ends, keeping the ends well short of the part edges. 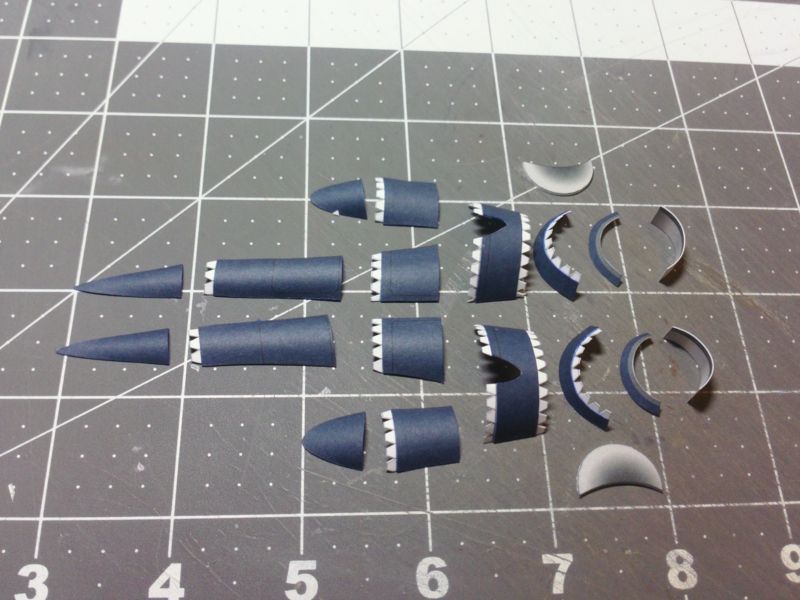 ... I like to start with that central part that has three attachments (on both sides). In this case, I started by attaching the part that goes in front. I also connected other pairs of parts. Note that I angled/bent all the glue tabs to match the related parts. Especially those front sections...prebend those tabs and the part fit is much easier. If the parts are well formed, they will match up quite well...but its still a good idea to glue only part of the connection. Make sure you get the best connection...allow the glue to setup...and then glue the rest. Its important for a part with so many seams and sections, to have the tightest seams and low-visiblity connections. 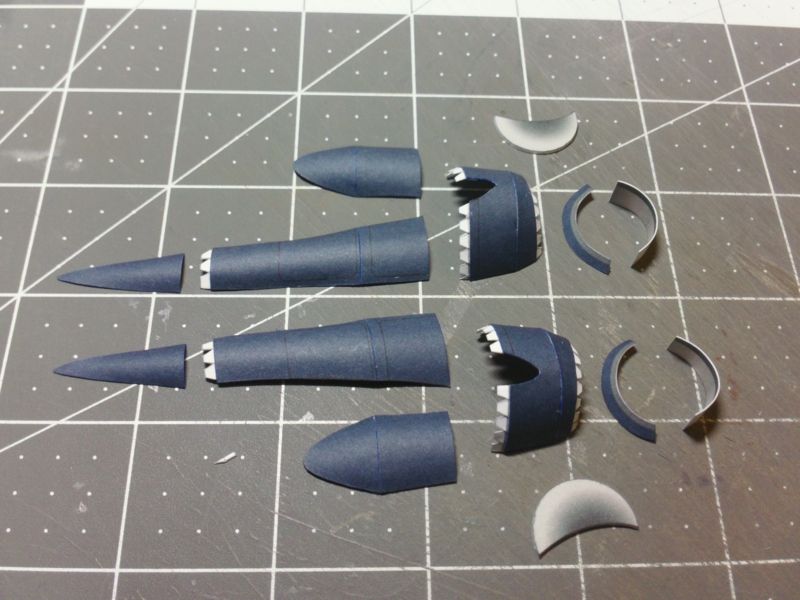 ... Once glue has dried, you can continue to connect all the parts, focusing mainly on those seams and connections. Don't worry too much about the outside edges. You can trim the edges later and create a smooth connection point to the fuselage and wings. Next I install the inner former that will help lock the overall shape and I also have to install the inner intake wall. This is an optional part, since it is very hard to see...and its tricky to install. It must be pre-shaped as much as possible. 
__________________
SUPPORT ME PLEASE: PaperModelShop Or, my models at ecardmodels: Dave'sCardCreations
|
|
#30
11-23-2015, 11:26 AM
|
||||
|
||||
|
continued
... Here is the inner former installed. Plenty of leeway here...just find the best position where the ends of the part line up with the edges of the housing assembly. 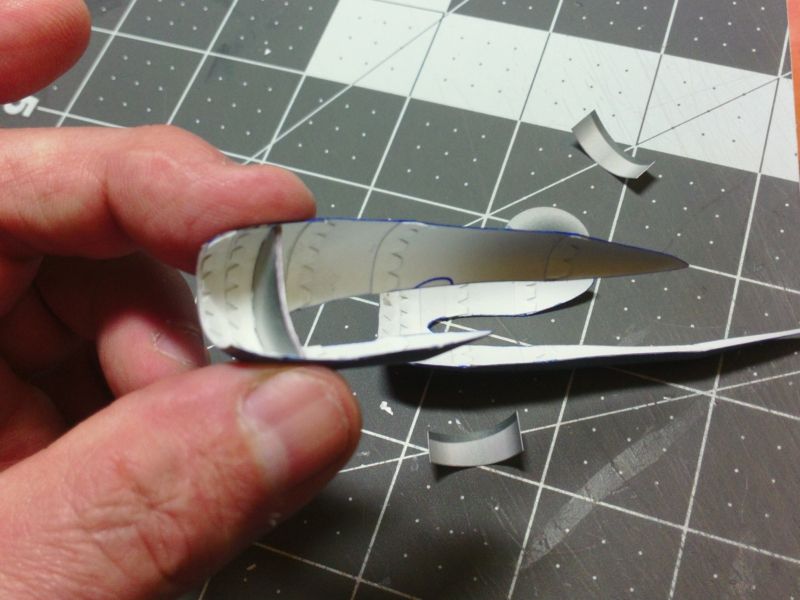 ... The intake walls only contact at the front edge...and this is also where you edge glue the part into place. The trick is keeping the part aligned with the entire intake housing...it tends to fall inwards, into the housing, as you glue it in place. As I said, this is an optional part, since it is very difficult to see on the finished model. The engine intakes are now ready to install onto the aircraft. I use scissors, a sharp hobby knife and a sanding board (nail file) to clean up the edges and make sure the assembly has smooth edges that will give me the tightest connection to the fuselage and wings. Don't forget to touch up the edge colouring after cleanup. 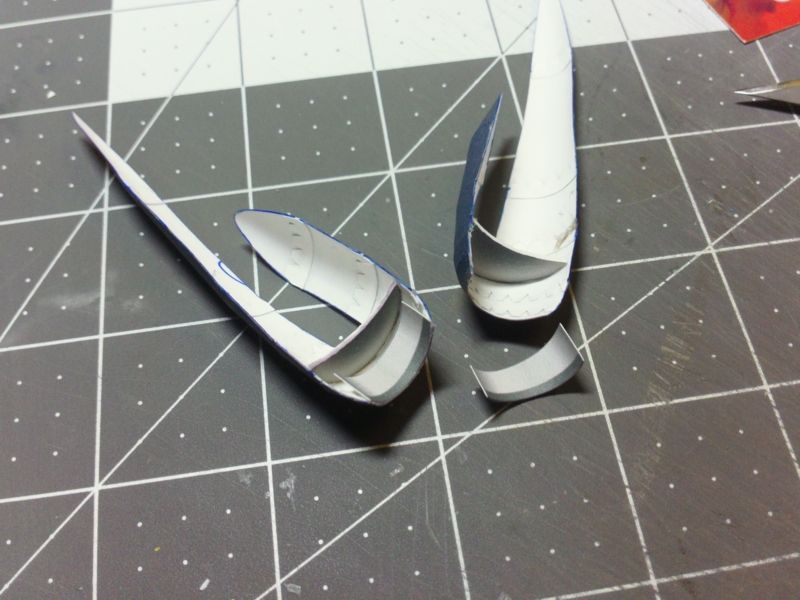 ... Once again, dry fitting and test fitting the part to the model is important. You will need to glue the entire front half (upper and lower) of the engine intake in place, in one go. Don't worry about the rear half of the intake assemblies...you can lift, apply glue, and glue down the rear extensions later. The engine intakes must fit tight against the fuselage...and tight against the leading edge of the wing. My wing shape didn't match exactly to the cut out in the engine intake. I could have trimmed a little bit, but I didn't bother. Just pull it in tightly, and it will force the wing into a closer shape, because the wing skins are not glued to the ribs. Everything is edge glued, with a thin bead of glue applied to the engine intake parts. (As I mentioned, I only glue the front half of the asembly first.) 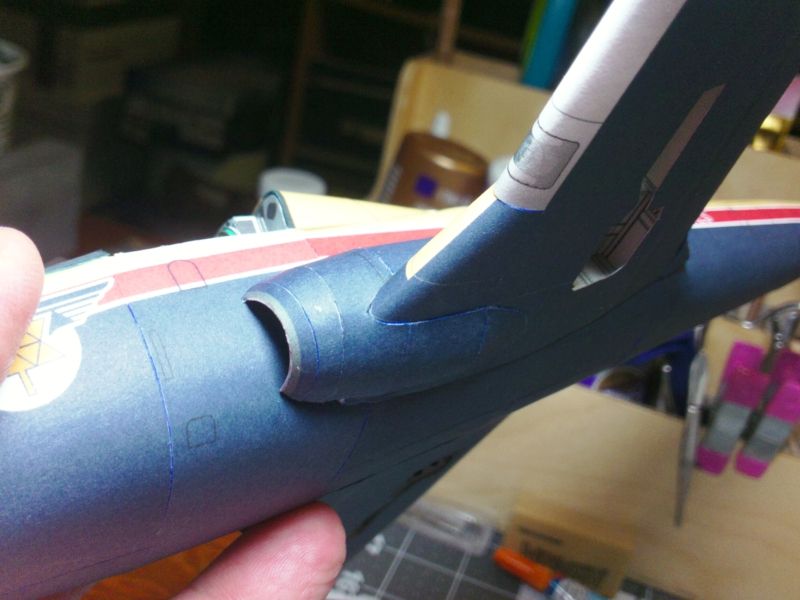 ... After sufficient time...24 hours maybe?...I slid a pair of twezers under the rear extensions (of the engine intake) and applied a bead of glue to the part edges. Then remove the tweezers and press the parts down against the wing root fairing. Its important that the extensions sit close to the center of the fairing radius. Depending on how well you aligned the front half, you might have to force things a bit. 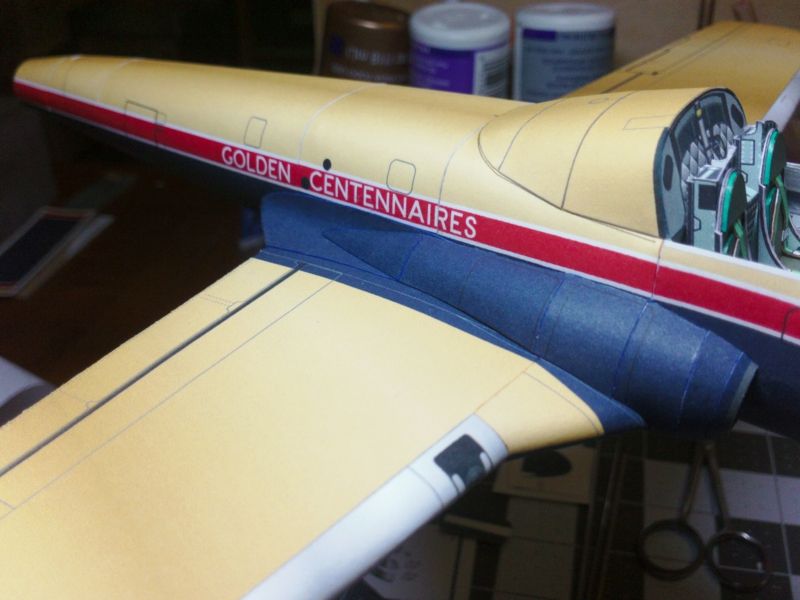
__________________
SUPPORT ME PLEASE: PaperModelShop Or, my models at ecardmodels: Dave'sCardCreations
|
| Google Adsense |
 |
|
|


 Linear Mode

