


|
|
|
#281
 12-14-2016, 06:24 PM
|
|||
|
|||
|
Like the interior

|
|
#282
12-14-2016, 08:51 PM
|
||||
|
||||
|
As quickly as I get back into it...
I am putting it aside again! LOL Just taking a break to work on a Christmas present(model) and finish up another model thats been sittin on the worktable unfinished for quite some time. Then I'll refocus on the Saladin.
__________________
SUPPORT ME PLEASE: PaperModelShop Or, my models at ecardmodels: Dave'sCardCreations
|
|
#283
12-20-2016, 06:24 PM
|
||||
|
||||
|
Still working on the Gun assembly, mantel, etc
...redesigning the mantel and swivel parts. At first I was attempting to lengthen the Gun Barrel... have it run right through the swiveling parts, thru the mantel and inside to support the Breech and interior parts. But it all got a bit complicated. So, I went back to the idea of flat gluing the various elements together. There is enough surface area on parts to get a good solid bond. The Gun Barrel itself is mostly a rolled part, and it ends up with a very large base area that glues flat (easily) to the Mantel plate. I simplified the Turret Mantel and the swivel Gun support to be as few pieces as possible. I also balanced a looser fit, with easier construction. 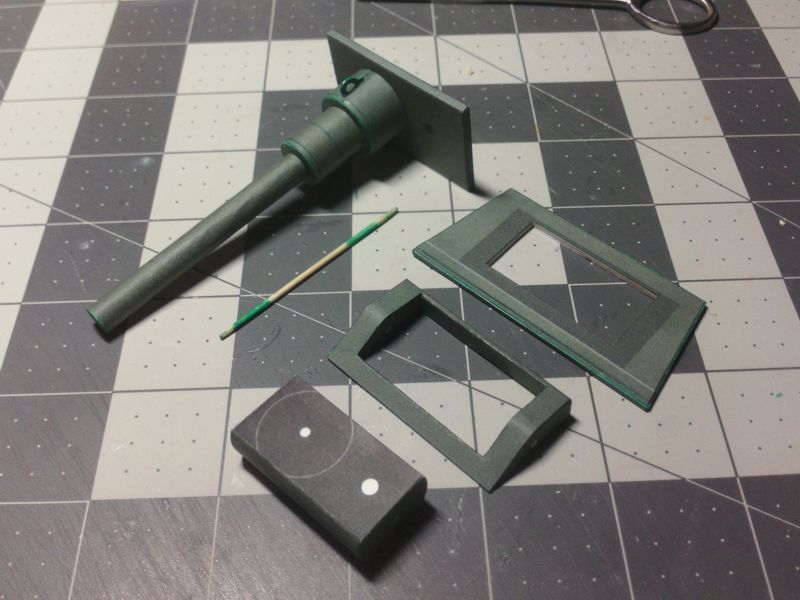 ... The Gun support swivels on a simple 2mm toothpick hinge pin. You have to drill some small holes...in all the connected parts, and then sand a toothpick (or any wooden dowel) until it slides into place. The hardest part of the whole thing is assembling the surrounding part that attaches to the turret mantel. Its not a difficult assembly, but its smaller parts require a little bit of patience. 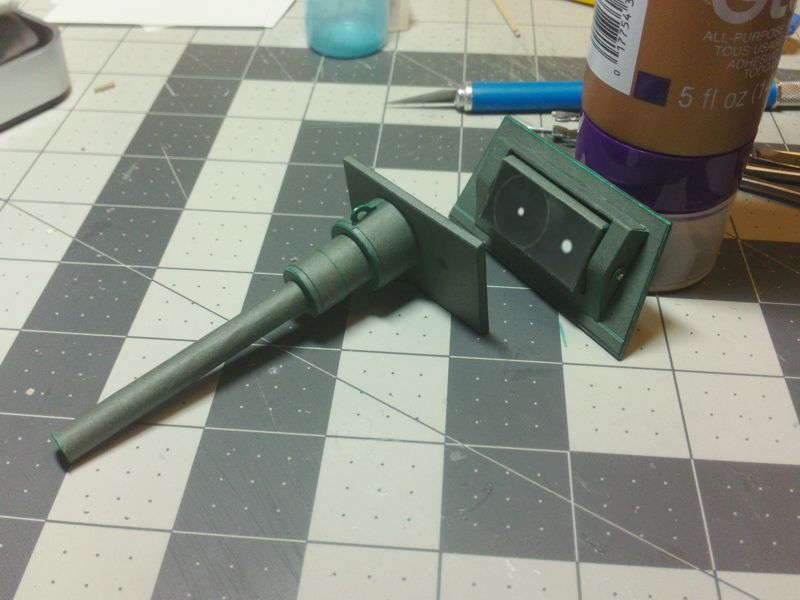 ... I also design the oversimplified inside Gun parts (Breech, Guard, Aiming Gun...) Everything assembles to a flat forward mounting plate, which also glues flat to the swivel mechanism. 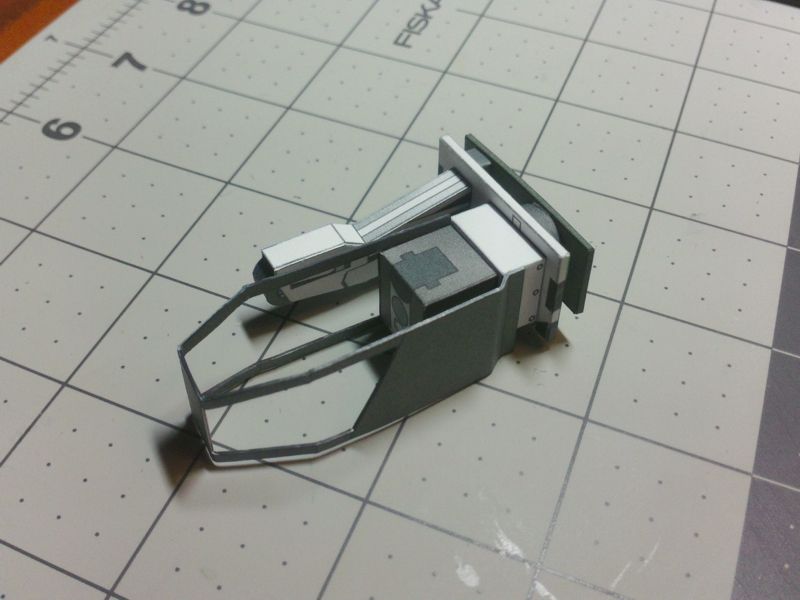 ... Everything can be glued together in proper alignment and left to dry. Once secure, the whole assembly will slip easily into the front of the turret. 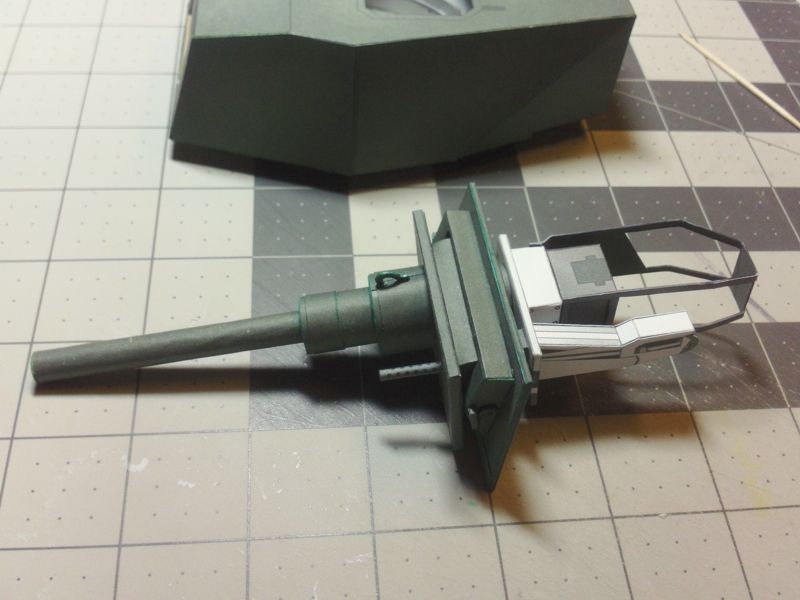 ... I haven't glued it in place yet, but that would be the next step. The large mantel plate butts up to the front of the turret...and glues flat... the bottom edge lines up flush, the top and sides extend a little bit past the turret edges. Its just a thick extra armour plate on the front of the Turret.  ... I'm going to play with more of the interior parts first, before I glue the Gun assembly into place. Just don't want to break anything during handling. And I have to start working on the lower Turret extension. Too much handling! Oh, and I added the small Machine Gun to the front. Its just a simple rolled tube or, you can wrap a sanded toothpick as I did. I drilled a small hole and inserted the end of the toothpick for a stronger attachment. I'll add details on it to the Instructions. 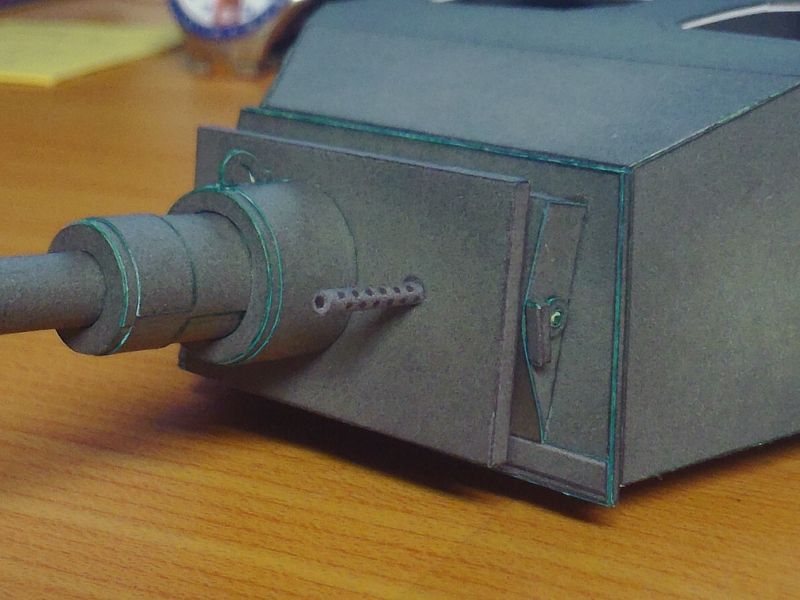
__________________
SUPPORT ME PLEASE: PaperModelShop Or, my models at ecardmodels: Dave'sCardCreations
|
|
#284
12-20-2016, 06:38 PM
|
|||
|
|||
|
I wish I could design. You do some magical stuff.
Looks absolutely fantastic so far. Can't wait to see the finished product.
|
|
#285
12-20-2016, 09:32 PM
|
|||
|
|||
|
I shouldn't be so impressed by your design work after watching all of your previous design threads but I still am.
__________________
This is a great hobby for the retiree - interesting, time-consuming, rewarding - and about as inexpensive a hobby as you can find. Shamelessly stolen from a post by rockpaperscissor 
|
| Google Adsense |
|
#286
12-30-2016, 11:57 AM
|
||||
|
||||
|
Hopefully back on a regular schedule with the Saladin.
Getting a little more done each day. With the Gun and Mantel sorted out, I am focused on the Turret interior...specifically the lower "cage" of the turret. A "dish" floor is suspended below the swiveling Turret. This dish holds the Gunner and Captain's seats, along with various storage containers for Ammo and supplies. 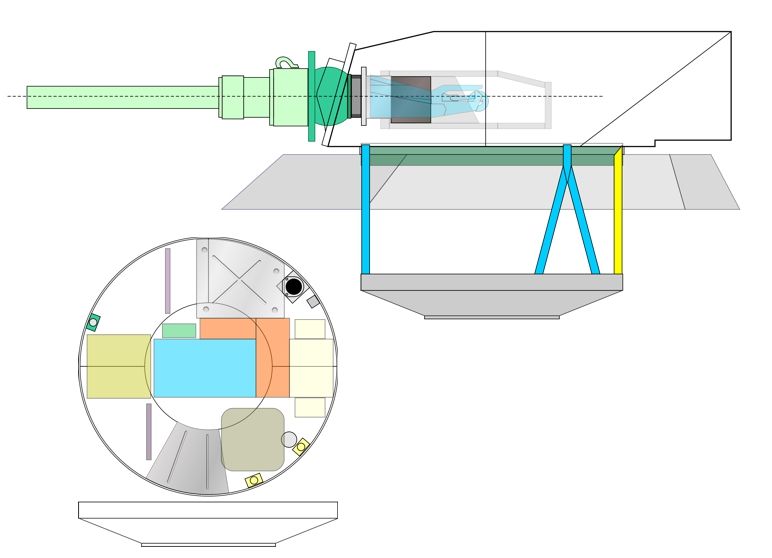 ... At first, I had difficulty understanding how the floor is suspended, but eventually I figured out the three Tube supports. Sorting out the various Bins and Boxes is another challenge... as well as dealing with a circular and steeply angled dish floor. 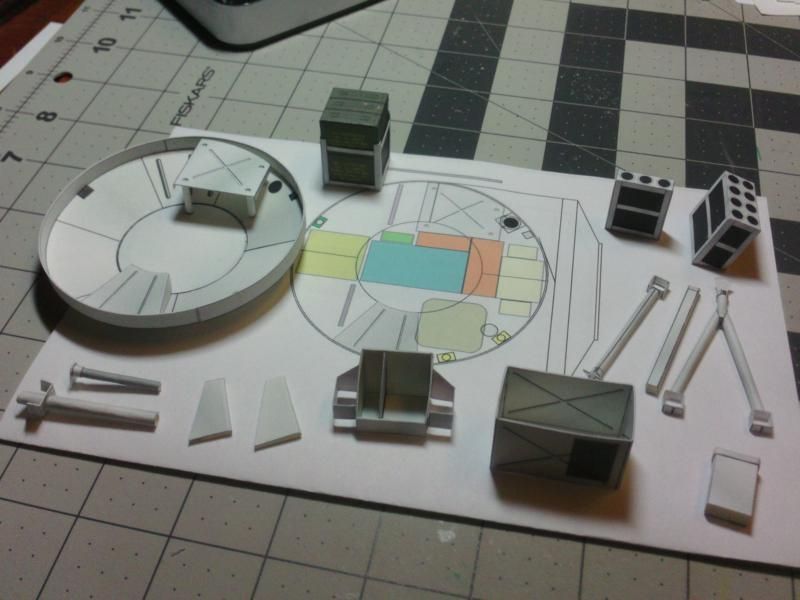 ... The scale sizes of some parts makes them very narrow and light. Support Tubes are quite thin and flimsy at this scale. I decide to exagerrate the thickness of the tubular supports, not only to make them stronger... but also to make them easier to roll. You could opt for some dowels here...thats what I would do. But I still have to provide a working paper part. The other problem is getting all the angles, heights and dimensions of the Bins and Boxes. Everything needs to fit into place, but also conform to the angled floor. I decided to wing it...make up a few parts...and just see how they fit. 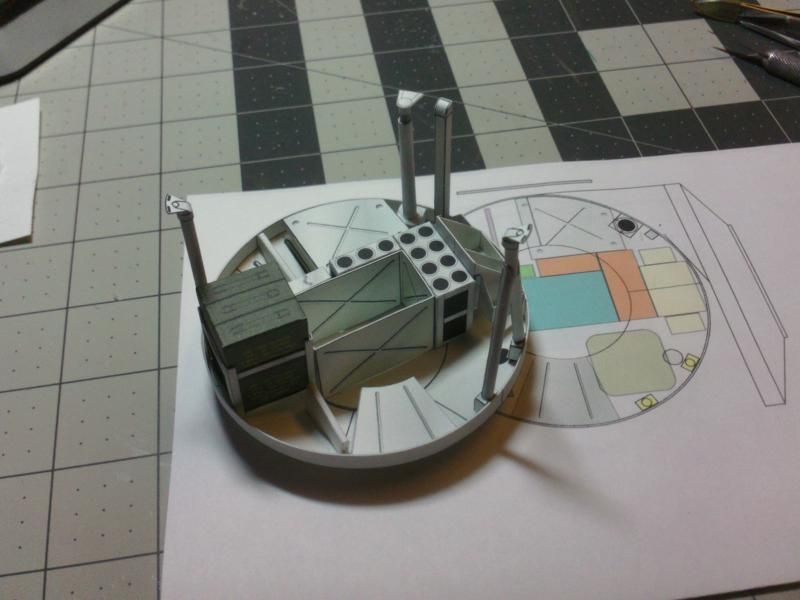 ... I've already found a number of adjustments to make. But things don't look too bad so far. One Bins is too tall, one is too short, a couple of leg supports are needed, Ammo Boxes need resizing, etc. I'll make up new parts and then do another test build. I'll also go ahead and add the two Seats (and related supports). 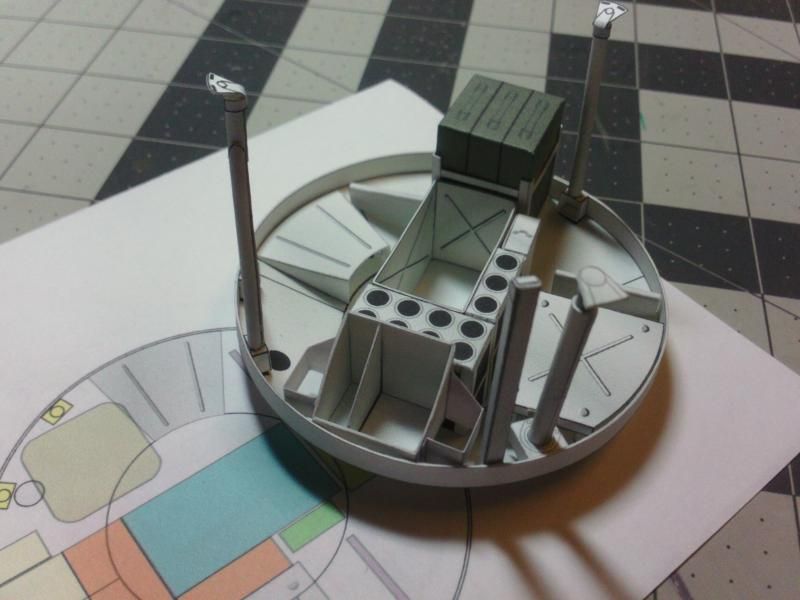
__________________
SUPPORT ME PLEASE: PaperModelShop Or, my models at ecardmodels: Dave'sCardCreations
|
|
#287
12-30-2016, 03:46 PM
|
||||
|
||||
|
I think it looks really good Dave!!! Lets hope 2017 will be a good year for modelling

|
|
#289
01-03-2017, 12:59 PM
|
||||
|
||||
|
Progress Update again...
I think I am finished with the lower Turret parts. The floor pan works...all the containers and bins are in place. And I got the two seats sorted. 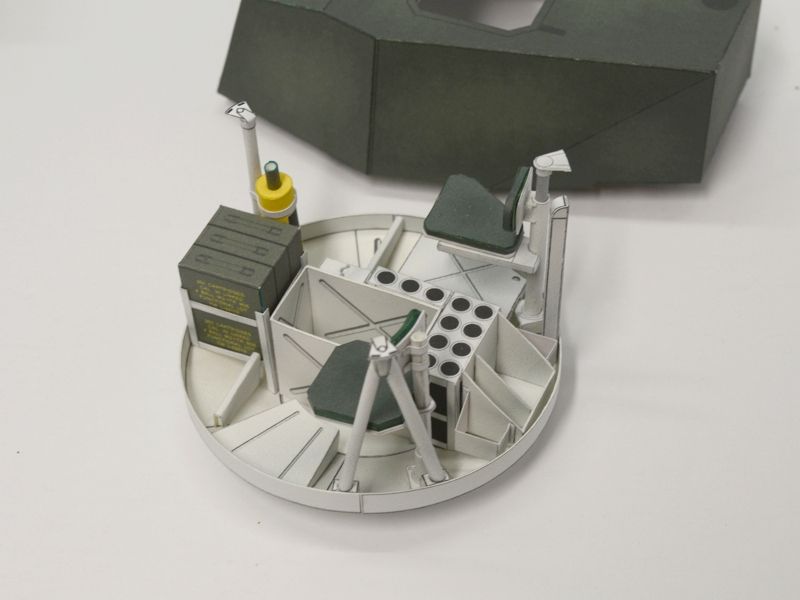 ... Trying not to overcomplicate things. Trying to stick with my "simplified" design approach. And considering much of this is well hidden inside the Vehicle when assembled... 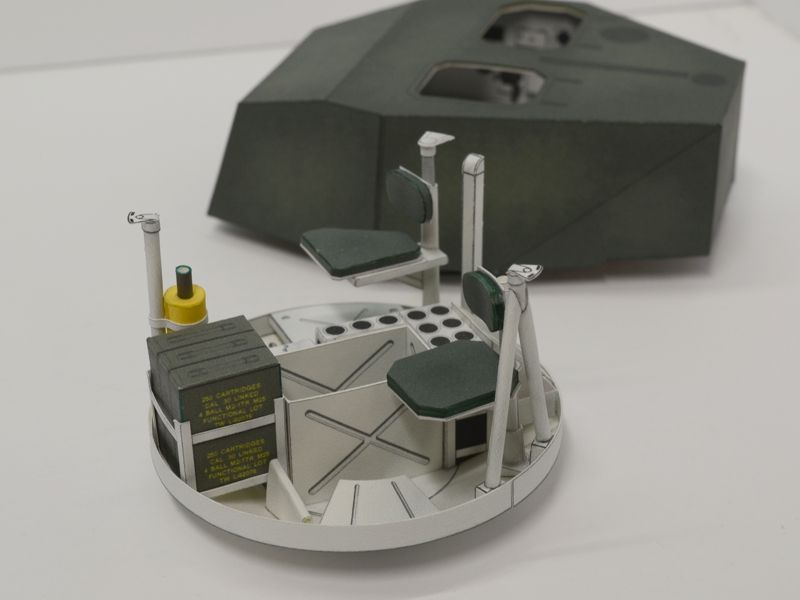 ... I added one more detail item, to throw in a bit of colour... some sort of Gas Canister at the front of the Turret cage. It appears in a few of my Saladin interior photos, but it varies in colour and position. I think it might be a Fire Suppression system, but since I wasn't completely sure, I decided to keep the design real simple. 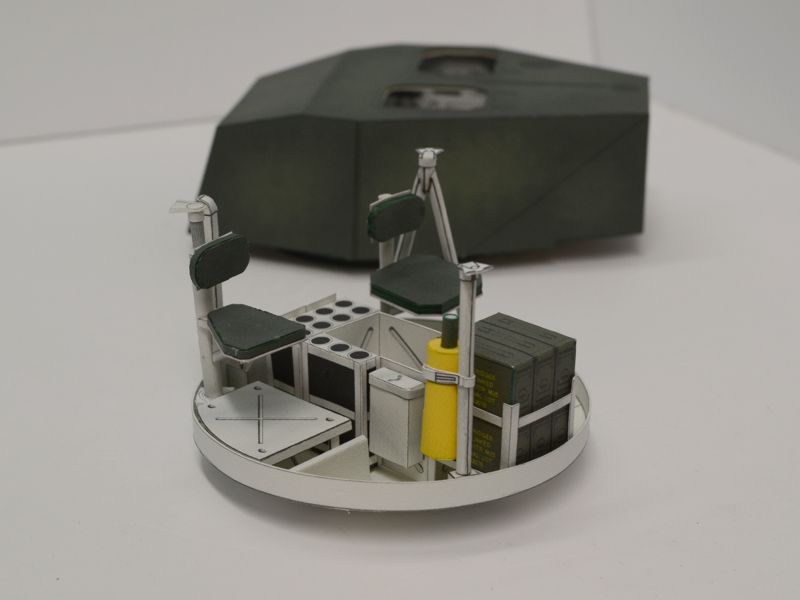 ... As I said, I think thats it for the lower Turret, and my next step is to attach the lower cage to the upper Turret itself. Before I do that, I want to add a couple more interior parts... first up, is the Radio Boxes at the rear of the Turret. Some of this stuff can be fitted afterwards, but its so much easier to do it before the cage is attached. 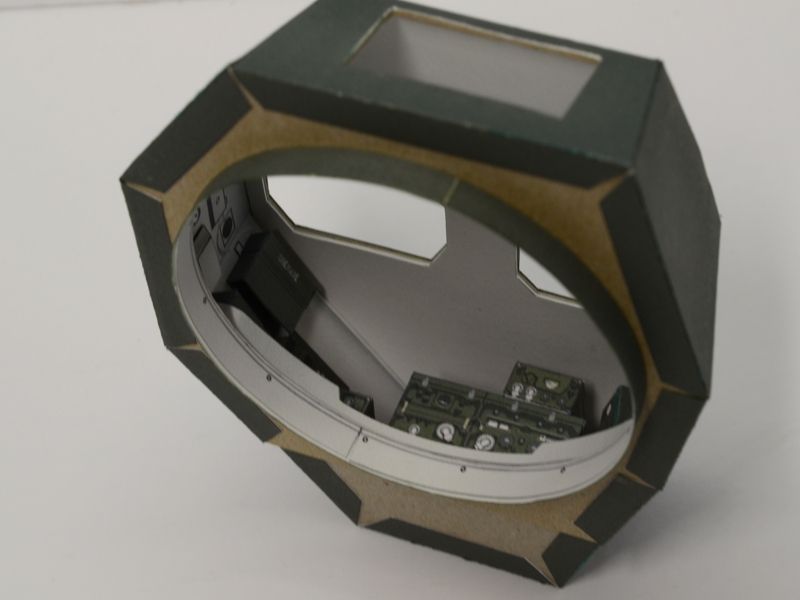 I noticed after I edited and posted these photos, that the lower Turret parts have something of a beige bone white colour. Honestly, the actual colours are more silver gray. Flash and Fluoro lighting doesn't help. I guess I could adjust the photo colour, but I'm already editing for brightness and clarity...and rushing through the process as it is. Just an FYI.
__________________
SUPPORT ME PLEASE: PaperModelShop Or, my models at ecardmodels: Dave'sCardCreations
|
|
#290
01-03-2017, 01:38 PM
|
||||
|
||||
|
Dave, this is looking really good. I have not built a large scale subject in several years, and this may be my next one !
__________________
Ray Respect the Paper, RESPECT IT! GET OFF MY LAWN!
|
| Google Adsense |
 |
| Tags |
| saladin, armoured, car, project, centurion, scale, started, model, matchbox, 1/16, dinky, design, work, toys, tank, issue, basic, kit, profile, army, number, issued, remember, printing, reference |
|
|


 Linear Mode

