


|
|
|
#62
 09-16-2016, 02:12 PM
|
|||
|
|||
|
Yea haw! All Right! TGIF
 and I got the rear Underpan installed! and I got the rear Underpan installed!

|
|
#63
09-16-2016, 02:21 PM
|
||||
|
||||
|
Looking good everyone!
__________________
SUPPORT ME PLEASE: PaperModelShop Or, my models at ecardmodels: Dave'sCardCreations
|
|
#64
09-16-2016, 05:33 PM
|
||||
|
||||
|
Lets prepare the Body Side Panels.
Cut out the two Panels from the Model Sheet. The right side panel has an underside Body connector that must stay in place. It is scored to fold at the bottom edge of the Body. Theres also an end tab on the connector, that must be scored. Cut the sides of the connector first. 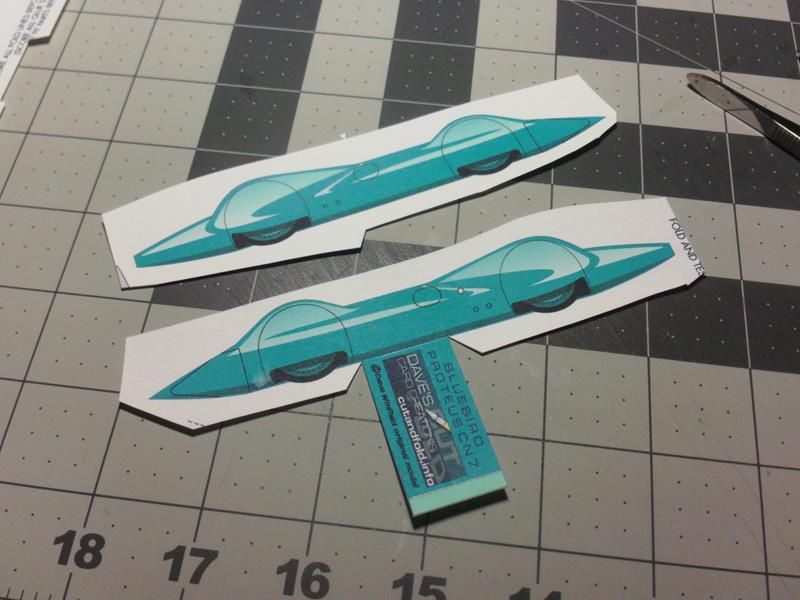 ... Cut out the Side panels carefully using a straight edge wherever possible. Referring back to the earlier image showing the folds in the top panel, you can deduce where the flat, straight sections start and end. 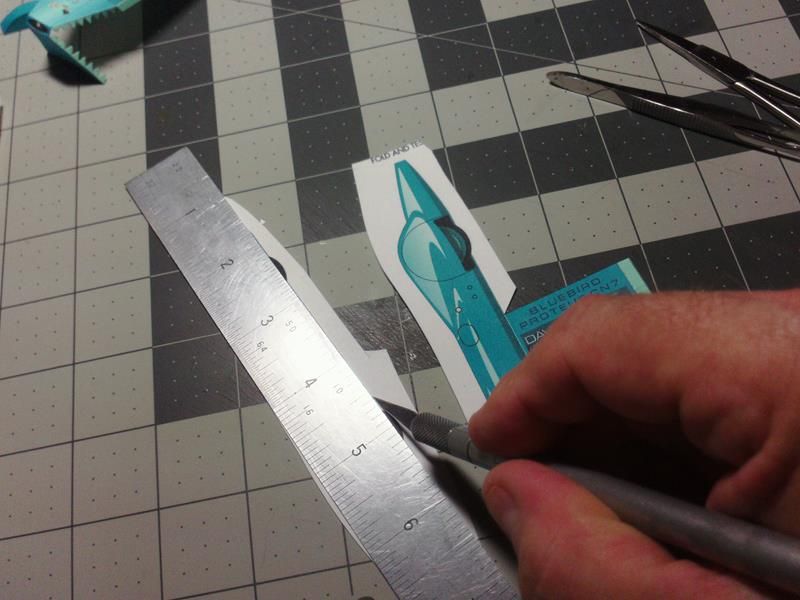 ... You'll find a sharp Hobby Knife works well to trim out the curved sections, like around the four Tires. 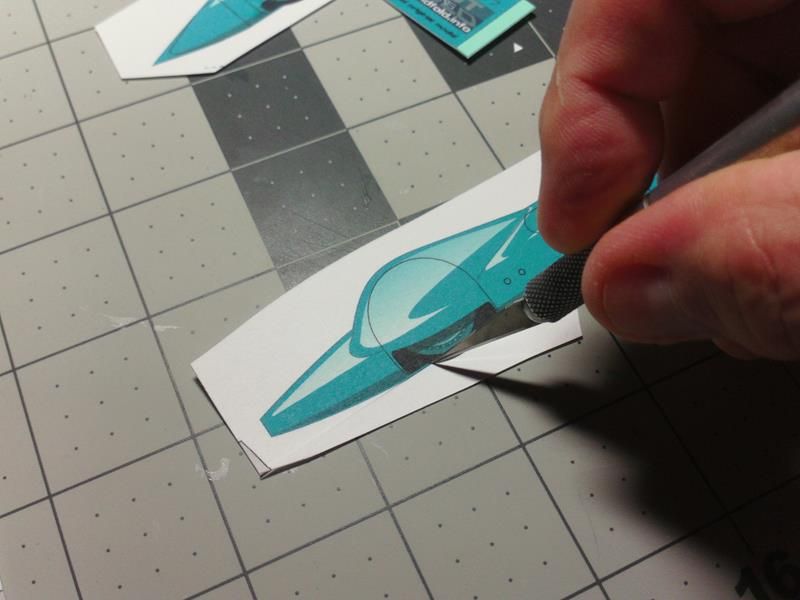 ... Once you lay your cutting edge on top of the Part, you'll see how far the bottom straight sections extend past the wheels. The nose section has curved edges upper and lower. The Tail section is only curved on the lower edge. The upper edge is straight. The final straight edge is between the two Wheel Arches. 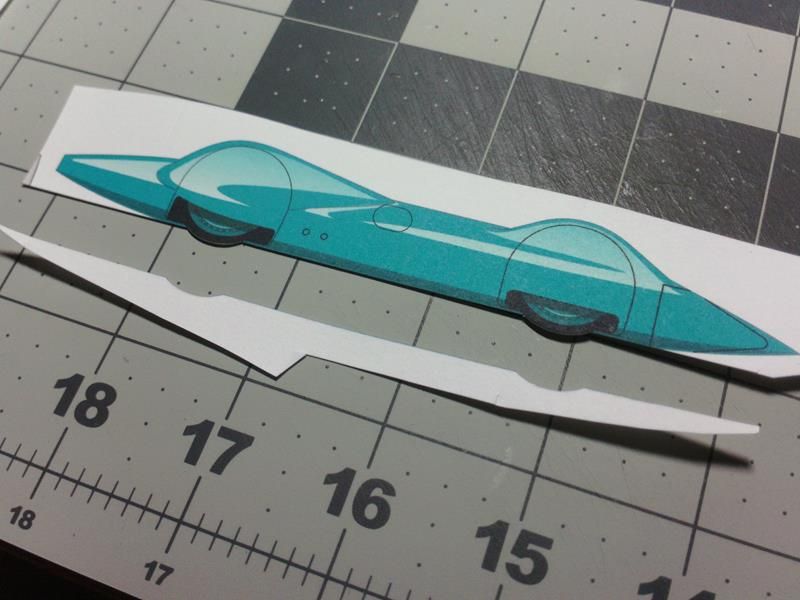 ... Once you've got your parts cut out, its time to edge colour. This is the most visible part of the entire vehicle with a lot of visible edge. So getting the colour right is most important here. 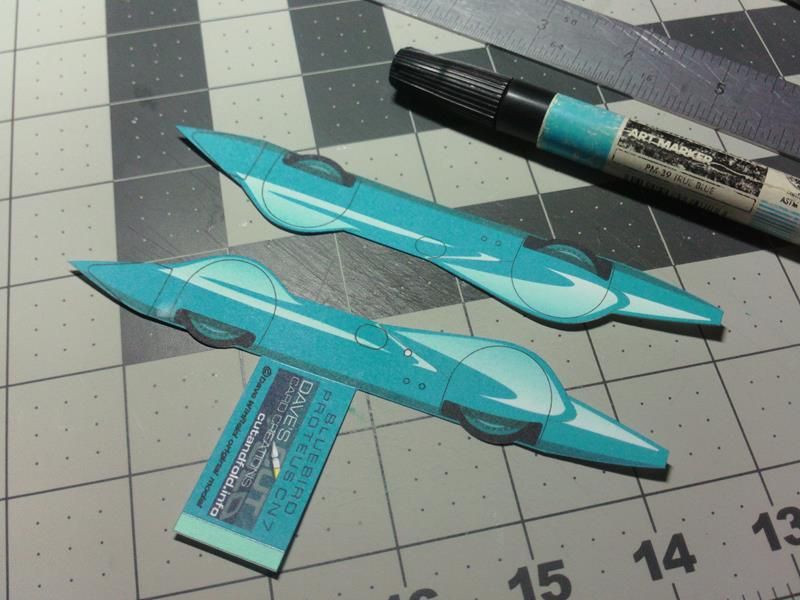 ... You can go ahead and crease and fold the lower connector, but it will need to be unfolded again (so its not in your way during assembly). 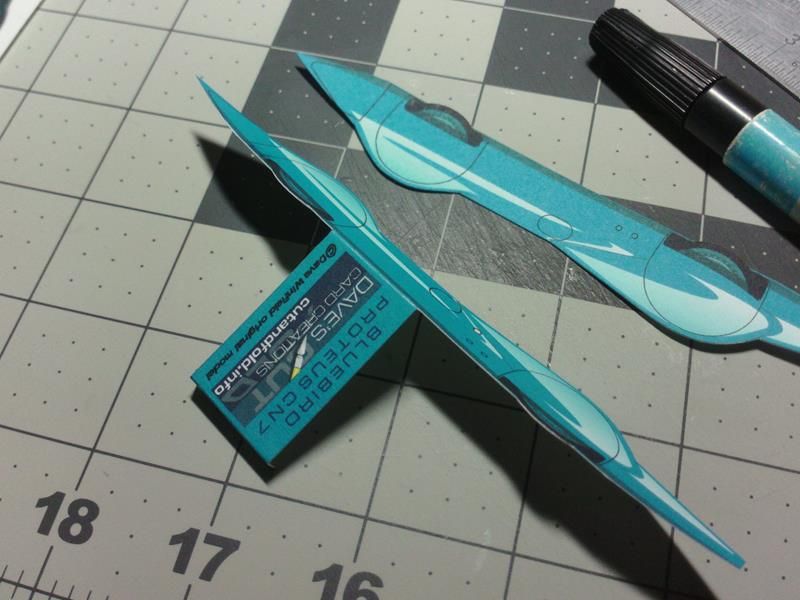 ... Once again, heres an explanation of the curved and straight sections and exactly where the top (center) Body part will attach to the side panels. The arrows indicate the transition (fold) points of the upper Body. 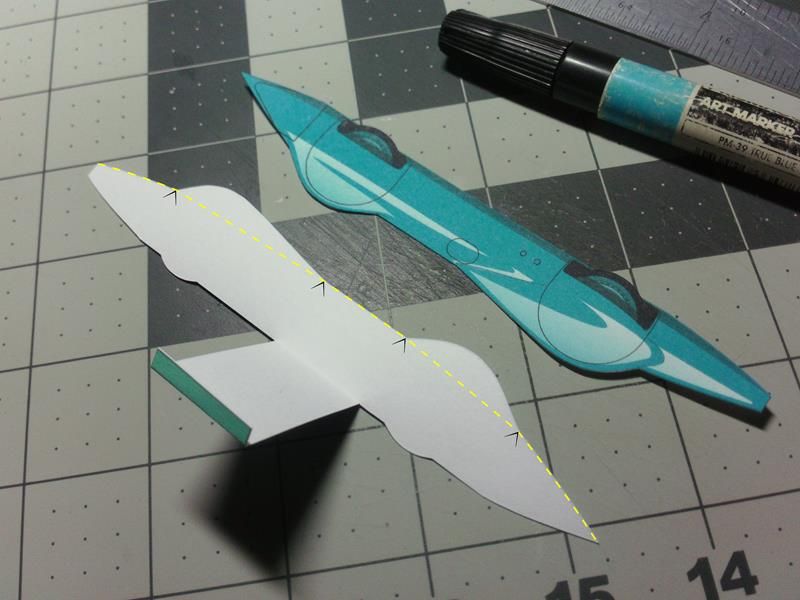 ...
__________________
SUPPORT ME PLEASE: PaperModelShop Or, my models at ecardmodels: Dave'sCardCreations
|
|
#65
09-16-2016, 05:40 PM
|
||||
|
||||
|
Yes....I had an accident.
Laid the part on some glue...made a small water mark. I guess it contacted for too long...the clear coat sealer was not enough protection. Oh well. Paper stuff happens. On a regular build, I would just reprint the part...hoping that the colour matched...and continued on. In this case, since I already have two of these models built, I'm not worried about this third one. So, I won't be fixing it. See, we're all imperfect. 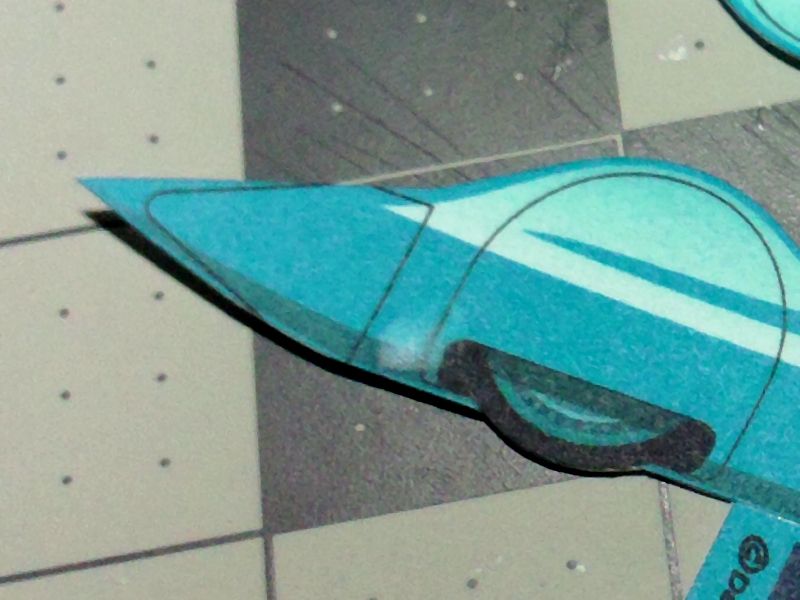
__________________
SUPPORT ME PLEASE: PaperModelShop Or, my models at ecardmodels: Dave'sCardCreations Last edited by elliott; 09-16-2016 at 08:47 PM. Reason: Family-friendly forum y'all :)
|
| Google Adsense |
|
#67
09-16-2016, 07:20 PM
|
||||
|
||||
|
Ok, as promised, I'm keeping up by working on the model in the motel room. There seems to be a rule that motel room light is never all that good, although the desk and chair are quite nice and there's a wastebasket for the trimmings right where I need it. The WiFi drops out occasionally, but all in all this is a good substitute for my workbench at home.
Following Dave's example, I had a small accident. My knife started to stray off line and into the body of the model along the belly between the wheels. Since I cannot print another one here, I carefully faired the cut back onto the correct line. It was a very small straying, and I doubt that anyone else would notice it unless they were told to look for it. Don Boose will, of course, tease me about it at the International Paper Modelers Convention in a month. Also, though I brought some of my watercolors along for edge coloring, I forgot black for the wheels. I did have a nice deep navy blue though, and I think it looks fine. Everyone will have to imagine all of this, since I don't have my camera with me. I should have claimed it was all perfect! 😀
|
|
#68
09-17-2016, 07:25 AM
|
|||
|
|||
|
All set for the real fun to begin.
|
|
#70
09-17-2016, 06:45 PM
|
||||
|
||||
|
Time to attach the Body Sides to the Body Center part.
I'm going to start at the rear. First thing you'll notice is the Side panel is a lot skinnier, tapered to a sharp point. Whereas the center Body is thicker because of all the layers and more blunt. To attach the Side panel, the part must be centered as best as possible. Don't worry, it will match. The Body Sides also bend to match the outer shape. Don't crease or fold anything, just allow the part to take its shape. 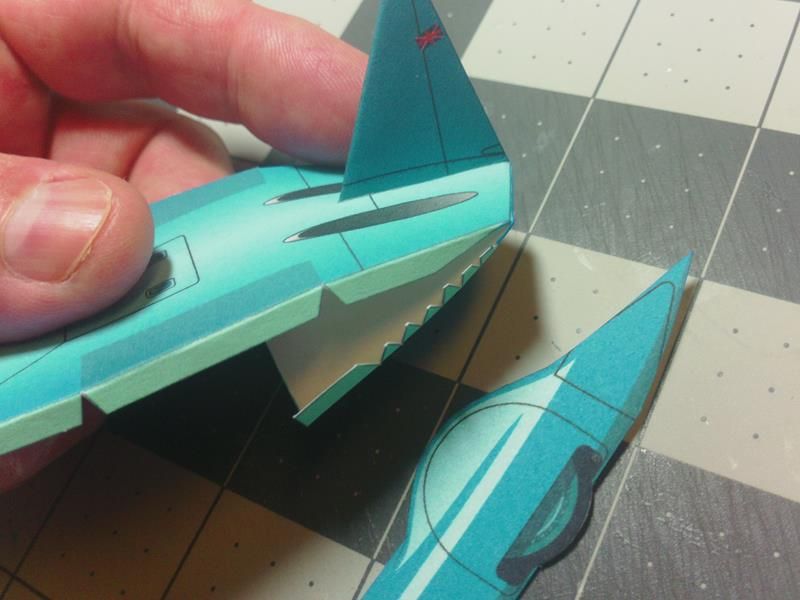 ... I will only attach the top (straight) section at this time but I will (dry-fit) attach the bottom section as well. The bottom has a slight curve to it. I'm just trying to keep the part centered... and make sure the Rear Wheel Arch is properly aligned*. *indicated 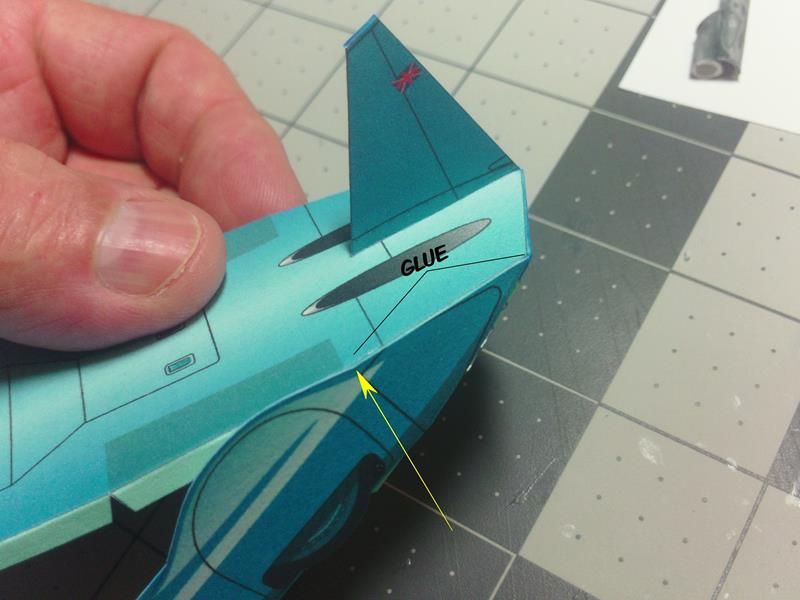 ... Allow time for the first connection to set up and dry thoroughly. You may need to do a little pulling and tugging on the parts to get things to line up. Next...ignore the section behind the Wheel Arch... locate the center flat (straight) section between the two Wheel Arches. It should line up at the two points indicated. Glue it in place (flush edge). 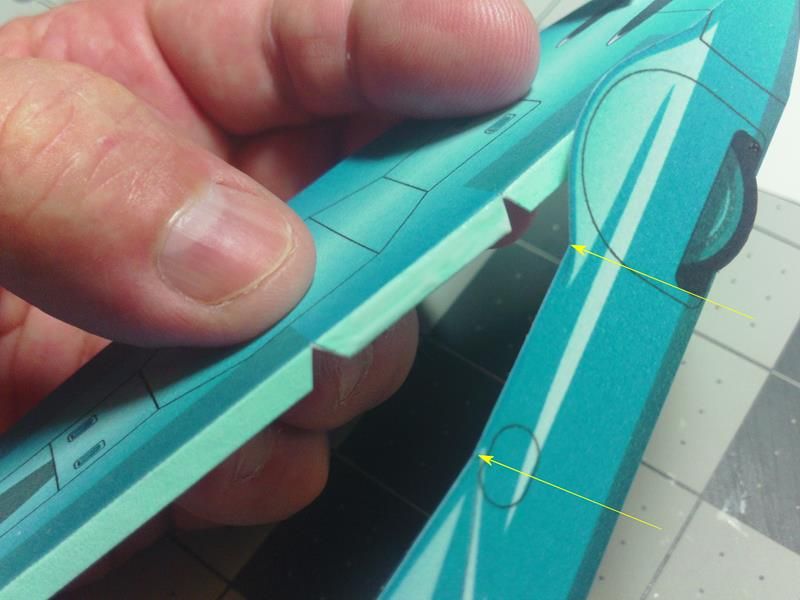 ... Next Wheel Arch section, ignore it too...just angle the Body top downwards as it approaches the Nose. 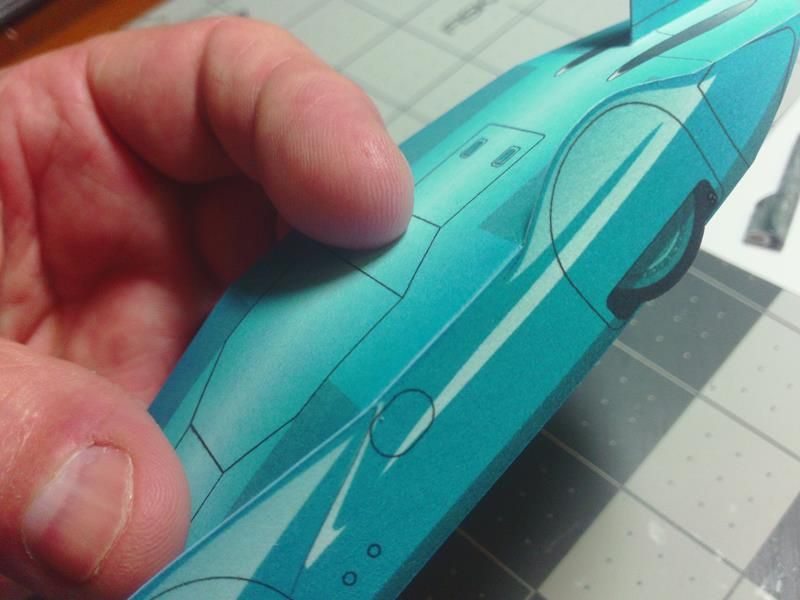 ... The Nose (upper) section is slightly curved downwards and the Body side Panel curves inwards quite a bit. Try not to crease or fold the Body Side, just line up the front and rear points. Its mainly the top Part that has to be manipulated into the correct shape. 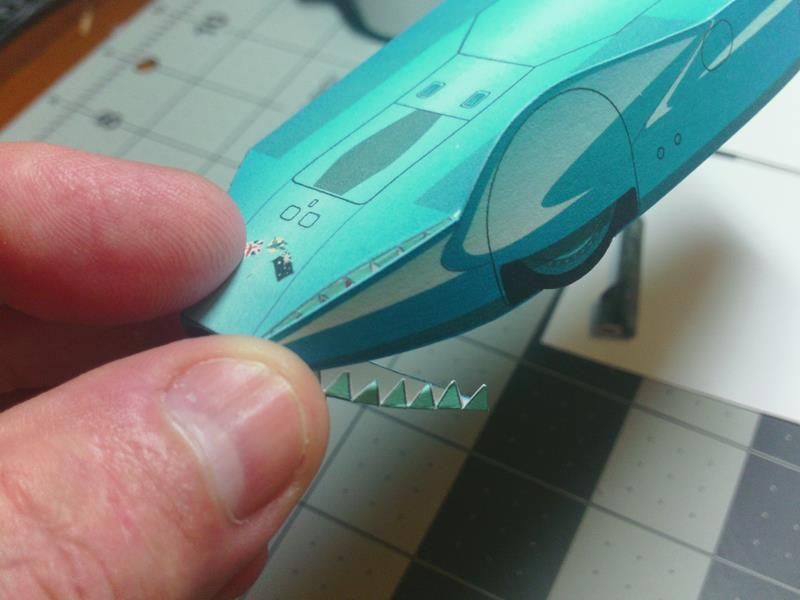 ... Make sure the front corner is as close as possible to the flat front of the vehicle. There is no tab or connection...so you want as little gap as possible. But the main thing is a clean connection along the top of the forward section. 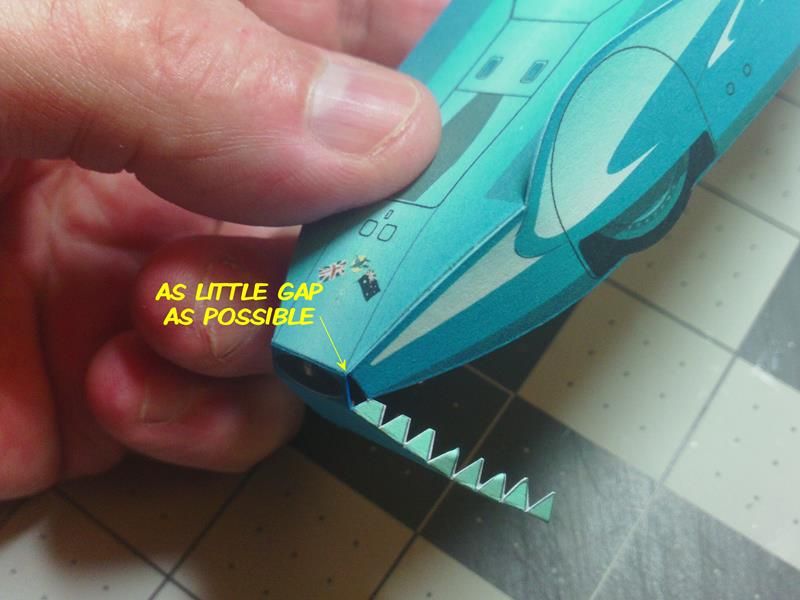 ... Once the last connection has set-up completely, you can glue the two missed sections (at each of the Wheel Arches). Its not overly important that these areas be glued in place, but it will add strength to the model. Just reach underneath and slide a little bit of glue behind the tabs and press them into place. 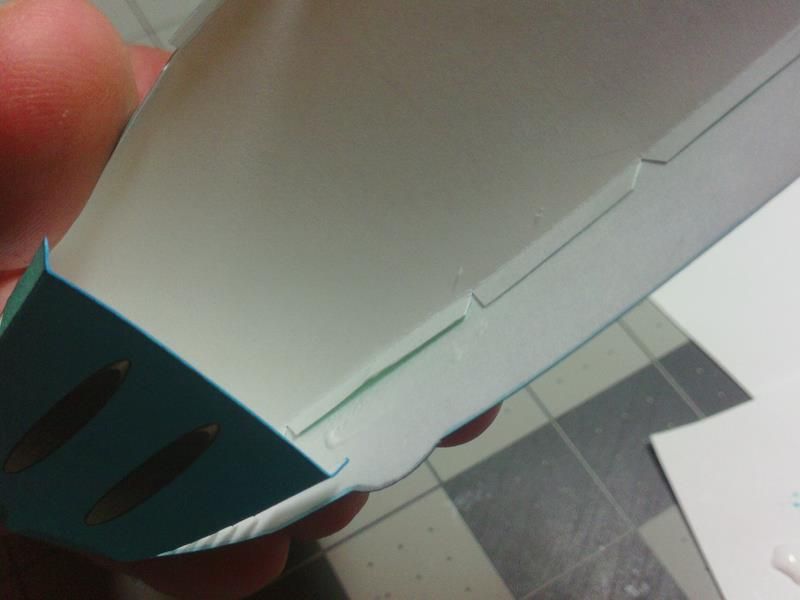 ...
__________________
SUPPORT ME PLEASE: PaperModelShop Or, my models at ecardmodels: Dave'sCardCreations
|
| Google Adsense |
 |
|
|


 Linear Mode

