


|
|
|
#21
 09-27-2016, 03:43 PM
|
|||
|
|||
|
Roof panels all in place.

|
|
#22
09-27-2016, 05:41 PM
|
||||
|
||||
|
nana nana nana nana Next aaaahh...
Cut out the three Roof Wings...the front Wing is two separate smaller Wings. 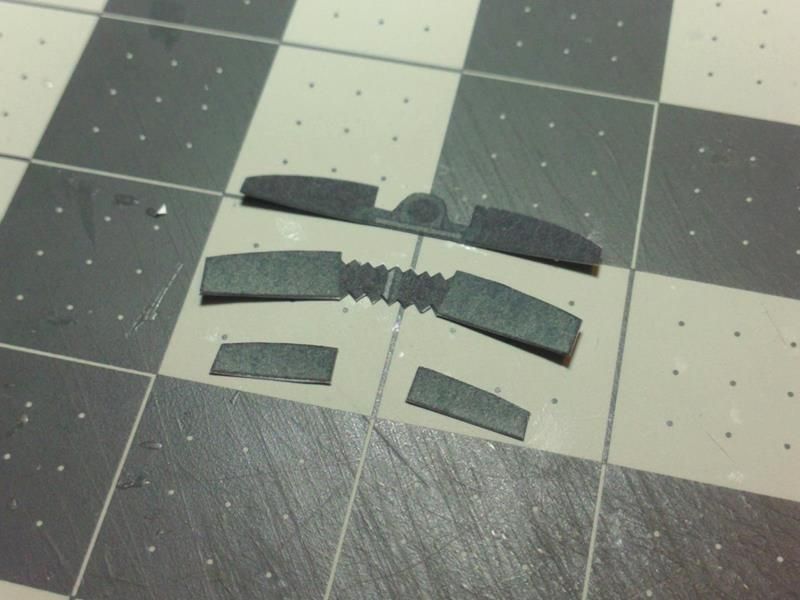 ... Use a narrow dowel to roll each Wing part and create a curved surface. Not a lot of curve, but enough to be seen. 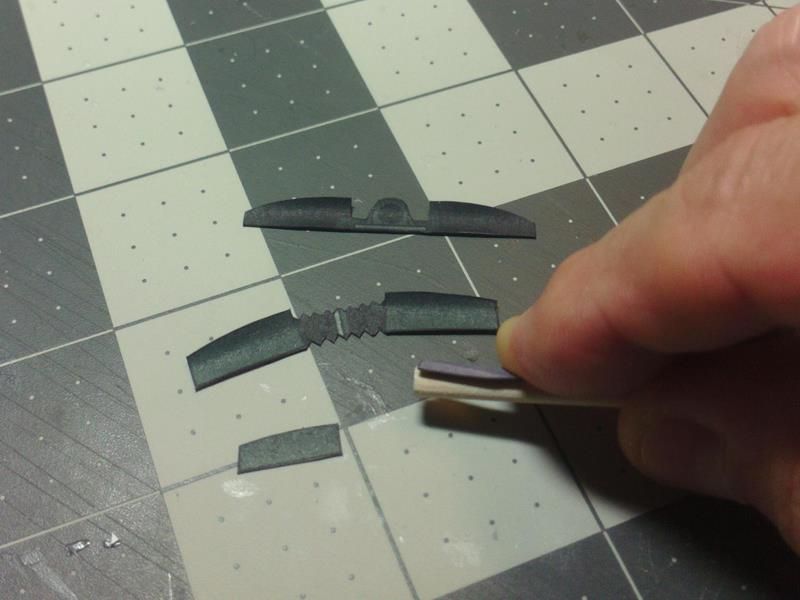 ... To attach each Wing part, you need only contact the leading edge of the part, allowing the curved wings to rise up away from the Body. Apply a thin bead of glue under the leading edge to affix the part.  ... Start with the rearmost Wing and attach across the rear set of "brackets". Repeat with the next Wing...gluing only the underside of the leading edges, line up the Wing across the next row of "brackets. **Make sure you are centering the Wings side to side. 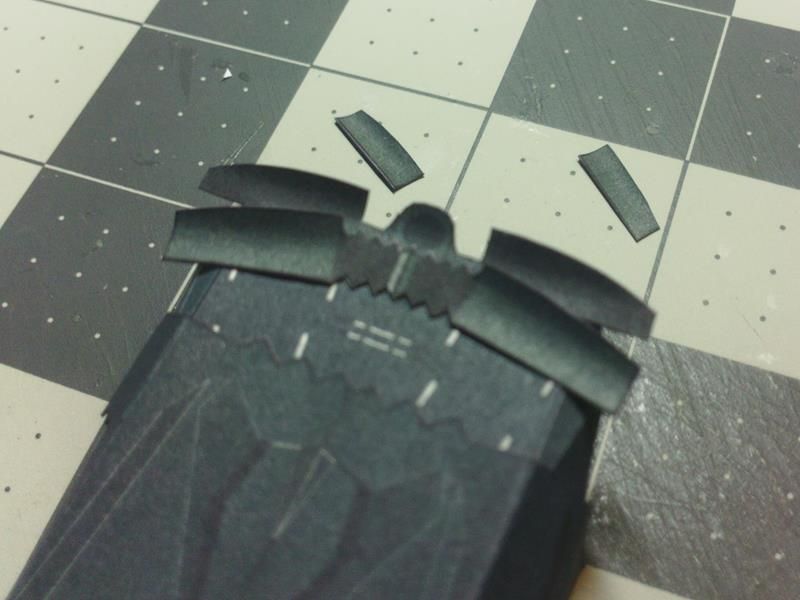 ... The final (front) set of Wings are attached independantly, but in the same manner. Stage 3 of the Body assembly is complete! 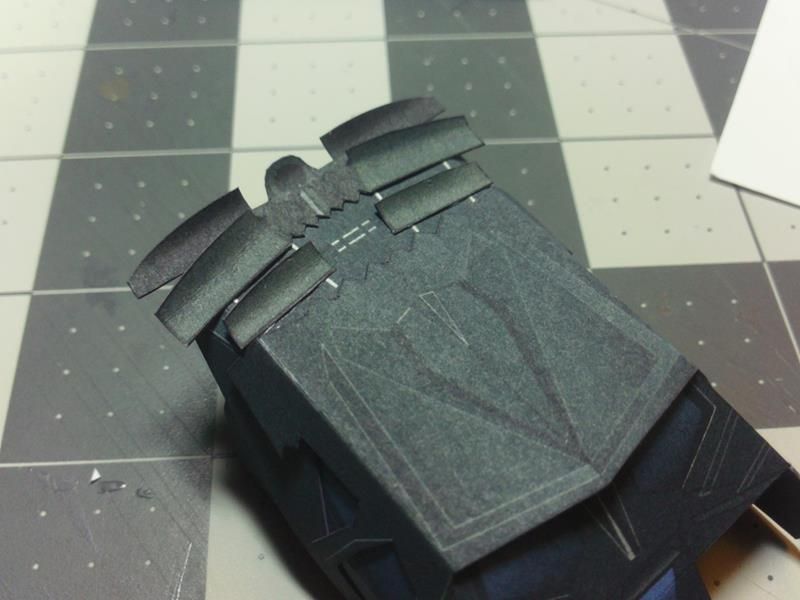 ...
__________________
SUPPORT ME PLEASE: PaperModelShop Or, my models at ecardmodels: Dave'sCardCreations
|
|
#23
09-27-2016, 07:14 PM
|
||||
|
||||
|
Playing catch-up here. I had a good modeling session after dinner and got Sunday and Monday's lessons completed. Having stayed up way too late to watch the American presidential debate, I'm not alert enough to attempt three consecutive lessons. (About the debate, I shall be non-partisan and simply say that I found it extremely interesting.) Assembly of the body was fairly challenging, getting all the parts to align properly. That was a lot of detail cutting around those roof panels, and a lot of edge coloring as well. I tried another experiment -- for the back coloring on the wings, I used a black colored pencil. I haven't started working with the wings yet, so I'm reserving judgment, but so far they are a pleasant, if slightly uneven, dark gray, and colored pencil is at least guaranteed not to bleed through. I should be able to make wings tomorrow and be back on schedule.
|
|
#24
09-27-2016, 08:27 PM
|
||||
|
||||
|
I'm playing catch-up, too
  My new Sharpie pen is ticking me off. It tries to bleed terribly, but then the edges fade and I have to edge repeatedly. For the back of the wings, I decided to try black acrylic paint
__________________
A fine is a tax when you do wrong. A tax is a fine when you do well.
|
|
#25
09-27-2016, 09:06 PM
|
||||
|
||||
|
Yeah Sharpies are not a good choice.
Got something to do with being permanent Markers. Too much solvent I think, they bleed terribly. The black paint would work well, I'm guessing.
__________________
SUPPORT ME PLEASE: PaperModelShop Or, my models at ecardmodels: Dave'sCardCreations
|
| Google Adsense |
|
#28
09-28-2016, 01:37 PM
|
||||
|
||||
|
I must say, most of the print jobs seen here look pretty good.
Considering the scale, the artwork, colour and details are printing nicely. Nice to see. ... Wheels are up next!
__________________
SUPPORT ME PLEASE: PaperModelShop Or, my models at ecardmodels: Dave'sCardCreations
|
|
#29
09-28-2016, 02:48 PM
|
||||
|
||||
|
Quote:
I'm just hoping it doesn't crack trying to get the curl into the wings. I'm hoping acrylic won't have too many issues
__________________
A fine is a tax when you do wrong. A tax is a fine when you do well.
|
|
#30
09-28-2016, 03:33 PM
|
|||
|
|||
|
Bat wings are on!
 To color the under side of the wings I used a Speedballart Elegant Writer calligraphy felt marker. (boy that was a mouth full) I had no bleed through issues. To color the under side of the wings I used a Speedballart Elegant Writer calligraphy felt marker. (boy that was a mouth full) I had no bleed through issues.
|
| Google Adsense |
 |
|
|


 Linear Mode

