


|
|
|
#41
 09-29-2016, 05:33 PM
|
||||
|
||||
|
An optional thing at this point is to apply some edge colour around the Tabs.
If the Wheel faces don't contact tightly, some of the glue tabs may be visible. A little edge colouring will help hide that. 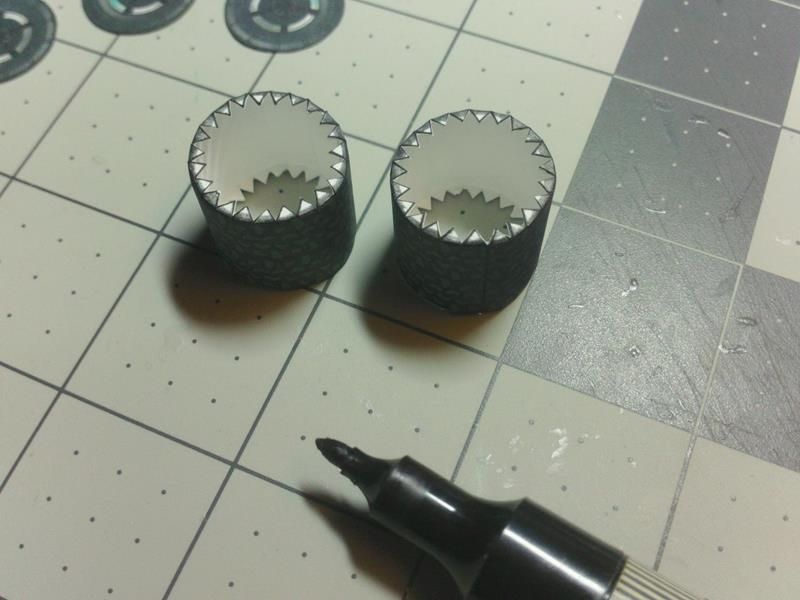 ... To attach the wheel faces, apply glue to the face parts or to the tabs, mainly around the edge of the Tread. 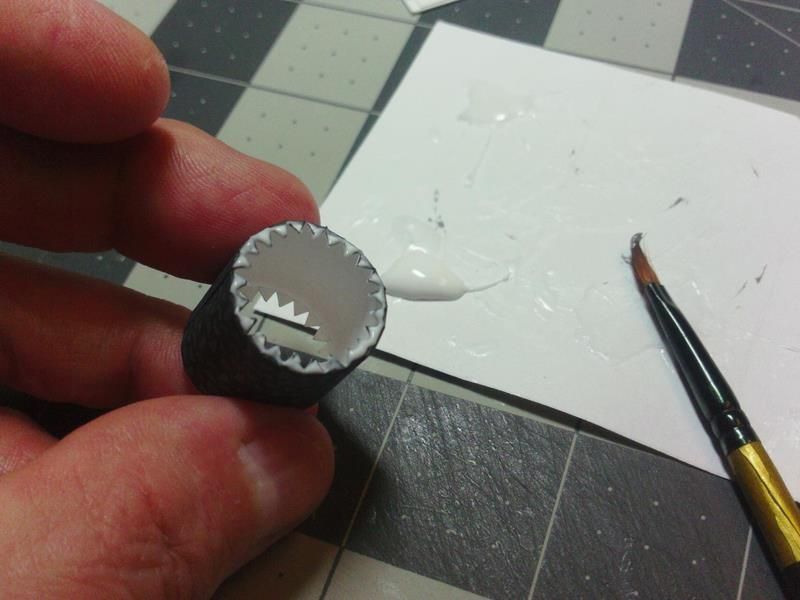 ... Center the Wheel face on the Tread hoop and apply some pressure. Keep the part centered as best as possible while applying pressure all the way around the part. It may take some time to get the face secured...just keep applying pressure and working the connection. 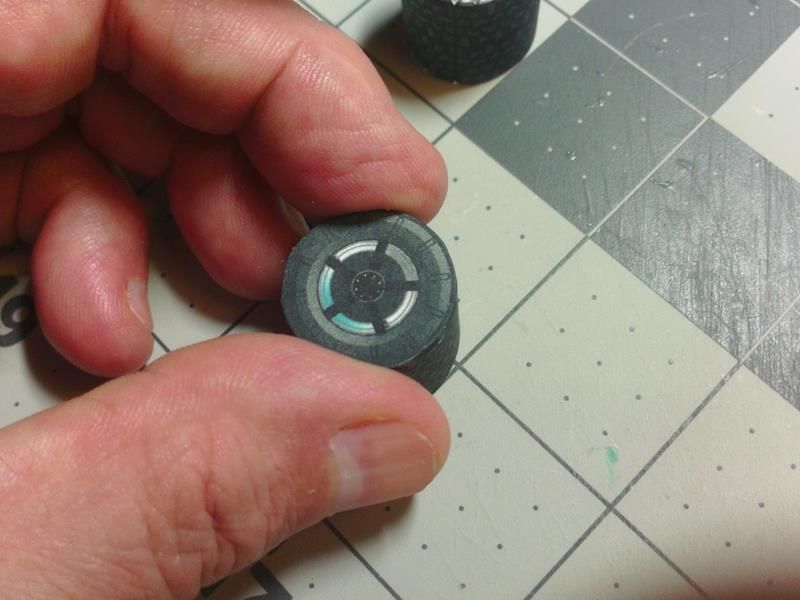 ... Allow time for the glue to dry...prepare the second tire while you wait. Then, after sufficient time, affix the opposite side faces in the same manner. This will complete the 2 (4) Rear Wheels. 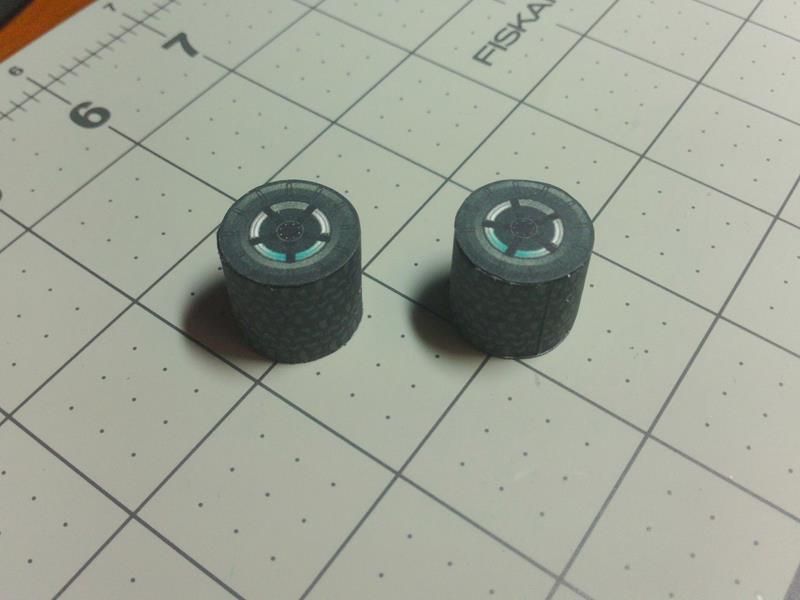 ... I have provided a center axle locator (not shown) on the inside face of the rear Wheels. This is the dead center of each wheel if you wanted to use an axle support, like a wooden toothpick. On either side of the Engine Housing (rear Body extension) are two more center/axle locators along with marked locations showing you where to fit the rear Wheels. Use these locations to align the rear Wheels to the Body. The wheels were not designed to rotate, so normally the Rear Wheels are just glued flat to the Engine Housing extension. But you are welcome to use a 2mm dowel (toothpick?) to support the Wheels. 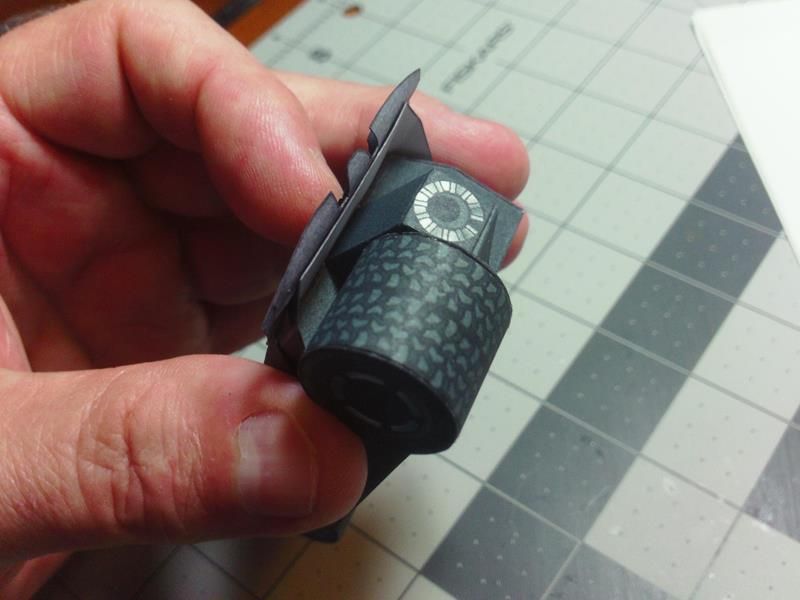 ... Once both Wheels are glued into place...wait a sufficient amount of time (for the glue to cure) before you stand the vehicle on its wheels.. 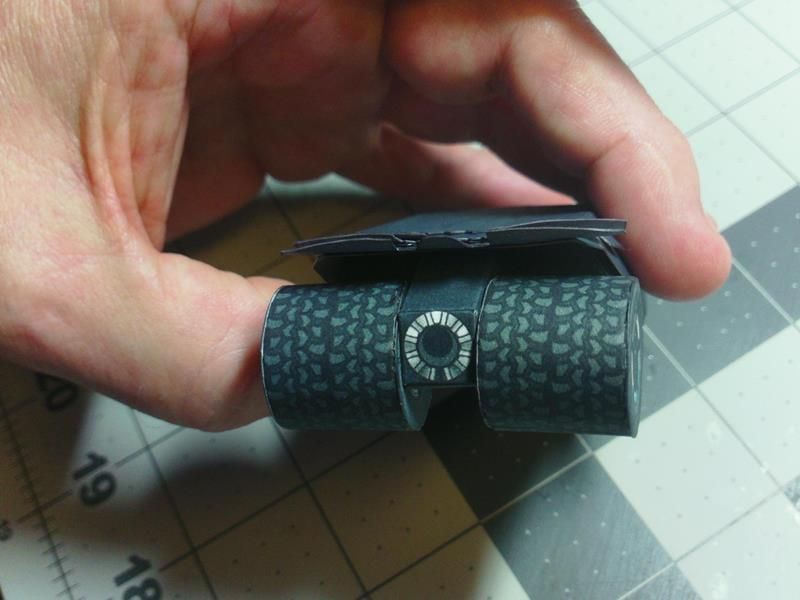 ...
__________________
SUPPORT ME PLEASE: PaperModelShop Or, my models at ecardmodels: Dave'sCardCreations 
|
|
#42
09-29-2016, 11:13 PM
|
||||
|
||||
|
Caught up again. Two days in a row!
 The red dragon is from Printable Heroes. It was designed to be a 2d standee, but I thought I would see if I can turn him into a 2.5d piece. The artwork is amazing. Anything that looks 'off' is something I did in trying to do the 2.5d conversion
__________________
A fine is a tax when you do wrong. A tax is a fine when you do well.
|
|
#43
09-30-2016, 12:01 PM
|
||||
|
||||
|
Rear Wheels On
I won't be able to attach the final parts until Sunday evening. Tomorrow, youngest son, Don III, and I will be steaming down the Chesapeake Bay aboard the last surviving WWII Liberty ship, SS John Brown Living History Cruise
Wish me luck as you wave me goodbye. Don
|
|
#44
09-30-2016, 01:04 PM
|
||||
|
||||
|
Don your such a lucky guy. The Liberty ships are such a rare treat to go aboard and walk in the places where our fight men and women once stood and defended our country. When I was a security tech the SS Jeremiah O'Brien(https://en.wikipedia.org/wiki/SS_Jeremiah_O%27Brien) was one of my accounts. I had total freedom to explore every inch of the ship. Was a treat. I envy you. wc
|
|
#45
09-30-2016, 02:55 PM
|
||||
|
||||
|
To complete the model, we must just install Air Brake Flaps on either side of the Body.
Find the parts on whatever is left of your model sheet... 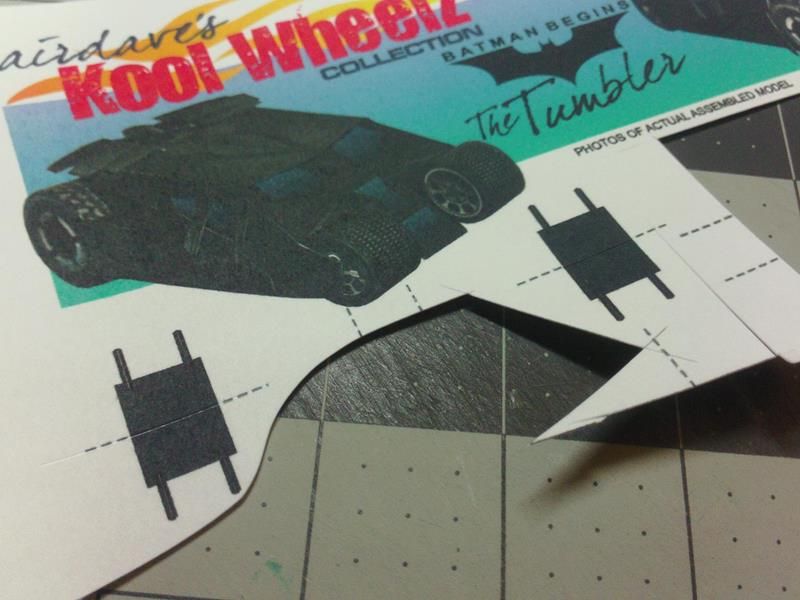 ... Cut out the parts by cutting along each side of the parts. Use a straight edge to get the most precise cuts. Cut out extra material at each end of the Parts. 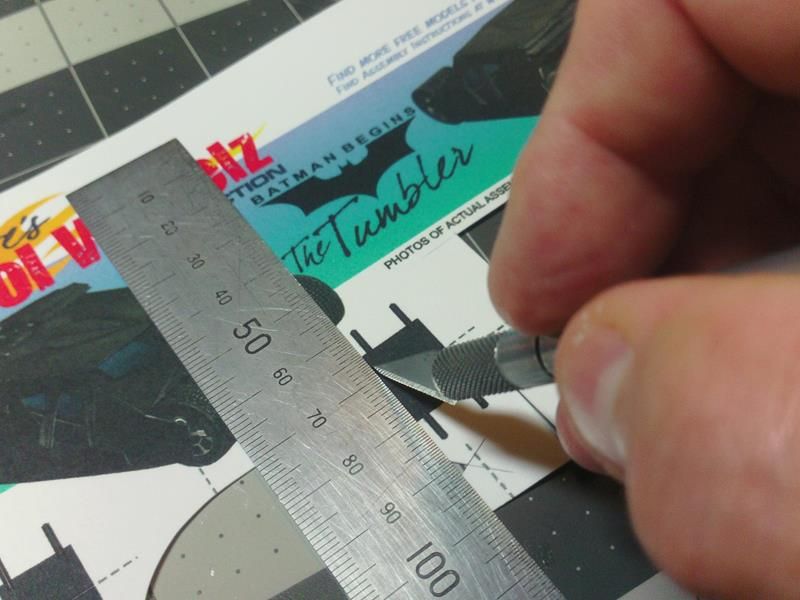 ... Your cut parts should look like this (below). Cut across each end, precisely, across the ends of the supporting brackets. The Part is scored along the center line. Each cut side should be a mirror image in size and shape.  ... Fold over the part so that the ends meet precisely and glue flat. 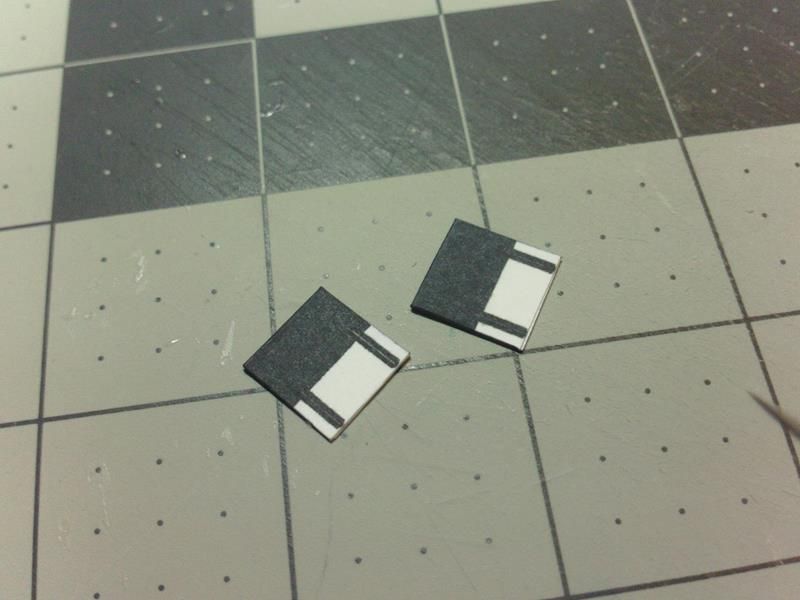 ... Wait for the part to fully dry before attempting to cut it out! Then, cut out the Flaps with the mounting brackets attached. 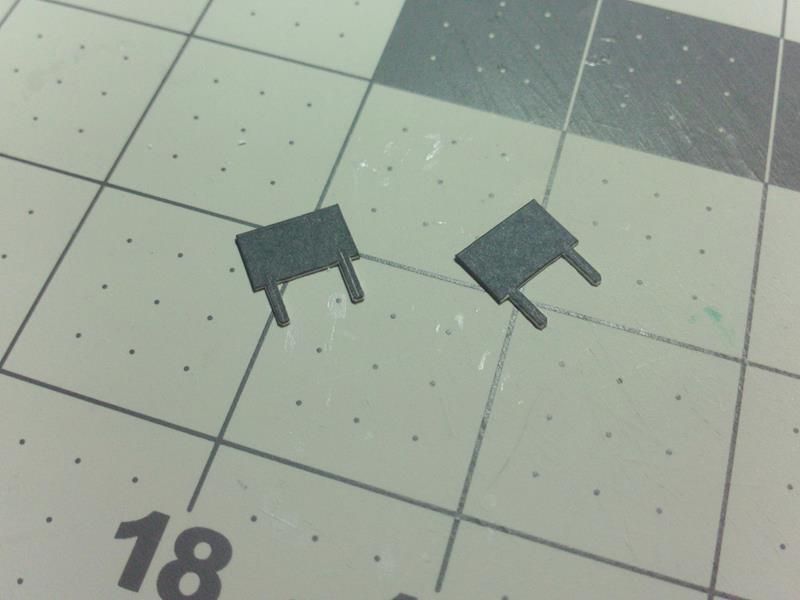 ... Using a clamp or tweezer, and apply bends in the mounting brackets, about 2-3mm from the Flap. 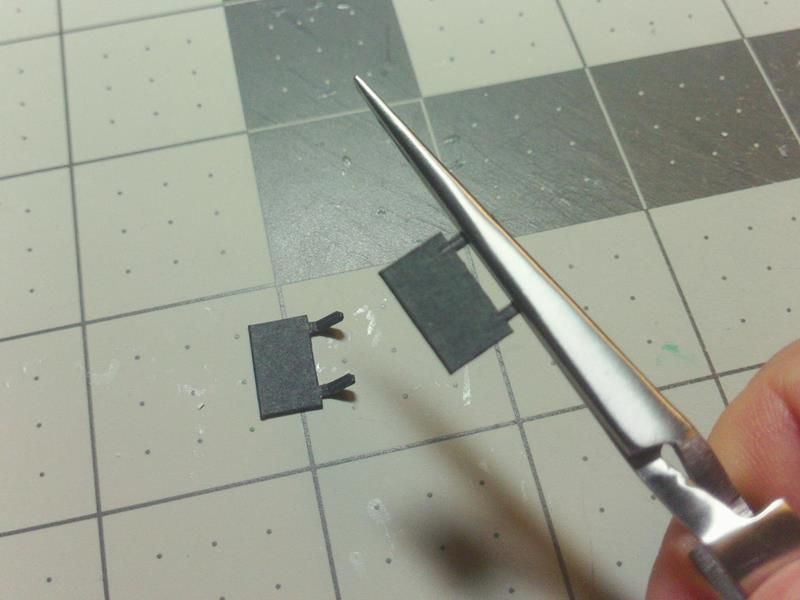 ... Mount and glue the Brake Flaps in place at the marked locations on the sides of the Body. There is no right and left, just mirror the installation. 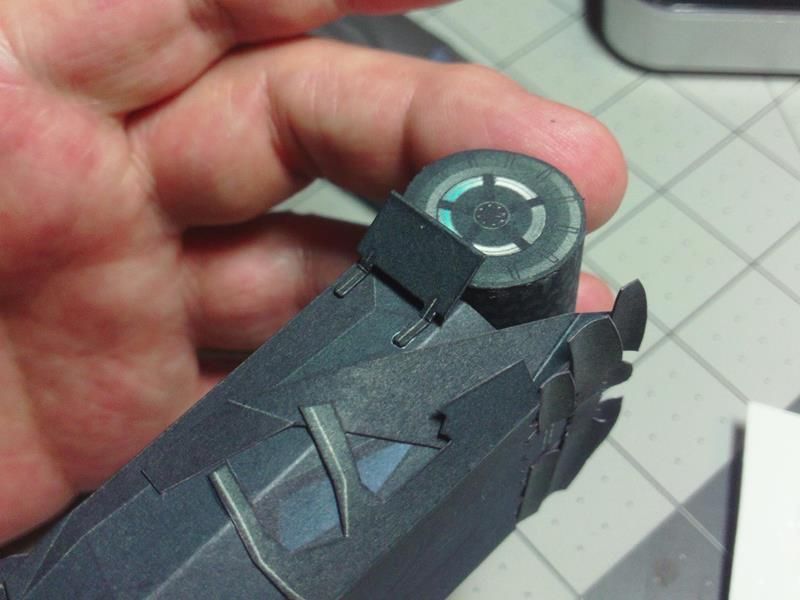 ... Position the Flaps so that they are tucked in as close as possible while still clearing the rear Wheels. 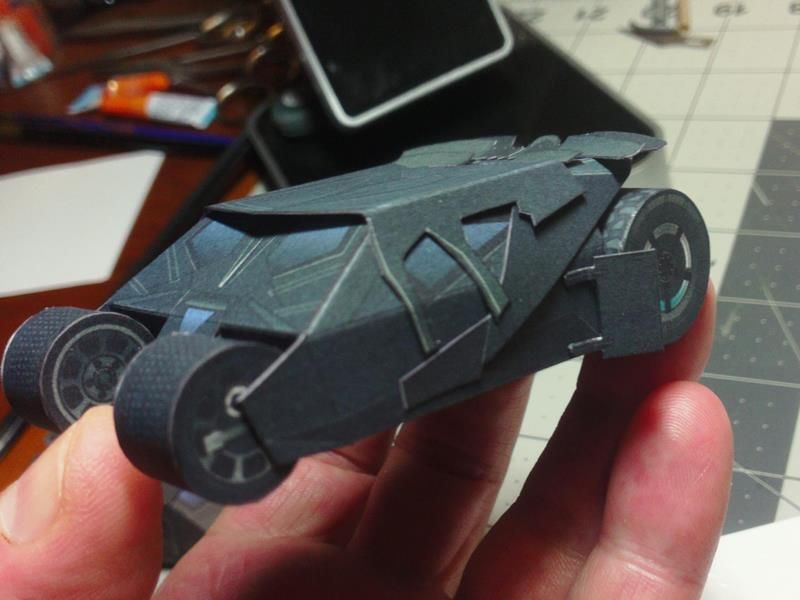 ... Thats it!
__________________
SUPPORT ME PLEASE: PaperModelShop Or, my models at ecardmodels: Dave'sCardCreations
|
| Google Adsense |
|
#46
09-30-2016, 03:12 PM
|
||||
|
||||
|
Now...if you are all finished building your models,
you have two choices: Put it on the shelf and look at it with satisfaction. or Toss it away, and download the updated Tumbler, and build it again! LOL Thats right...theres a 3rd gen updated Tumbler!! Let me explain... I was wrapping up things yesterday and realized that half the changes that I was going to make to the Tumbler model (with the last updated version) I did not do. There was a whole list of things that bothered me for a long time. And I wanted to redesign a lot of the Tumbler model. But when I rushed to get the 2nd gen Tumbler ready for this tutorial, I didn't make all the changes I had planned. And now, finishing up this tutorial, I am unhappy with the final model. So....yesterday, I went back and did some more redesigning. I made more changes. I threw out some ideas, and adapted others. I printed parts...did a complete build last night... and today I swapped out the new Model sheet, and a new Assembly sheet. ... At quick glance, you might not notice a big difference. but there are a number of modifications. 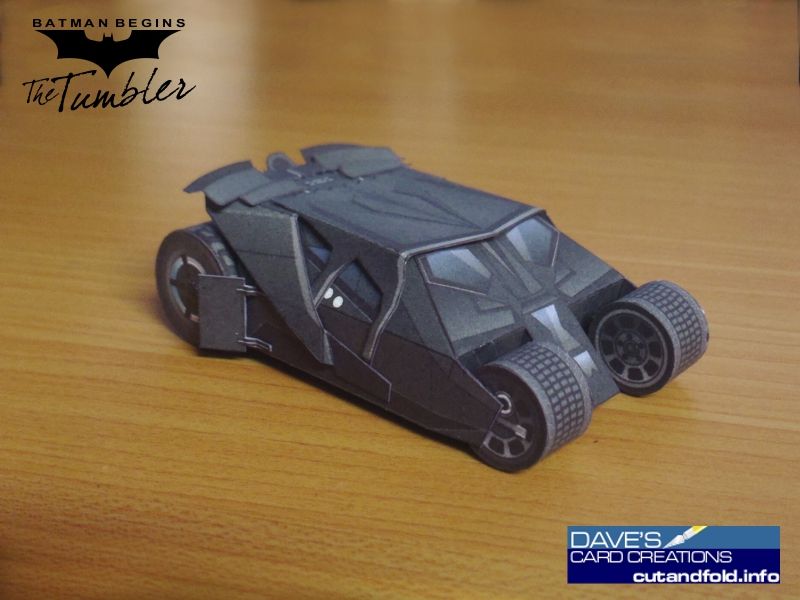 The 3rd Gen Tumbler has a narrower cockpit. The roof is narrowed and the sides are angled more. I've modified a lot of the artwork. The roof attachments have been slightly altered, and repositioned. I've changed the way the Body and floor pan go together and I even added an Exhaust Nozzle. 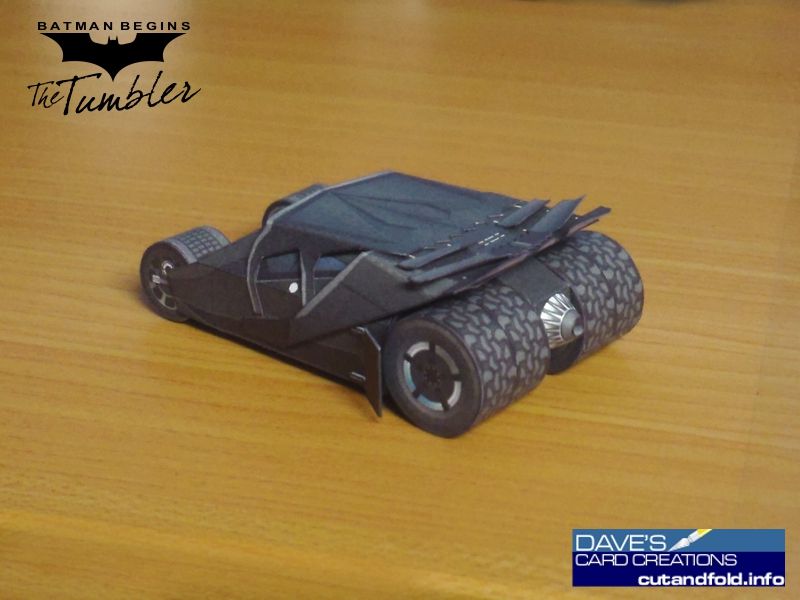 I will be altering the entire Tutorial (at my forum) to reflect this new version as soon as I get all my photos edited and some new copy written. Unfortunately I can't alter this tutorial (here), I will only be able to add the new set of photos and instructions at the end. So, hopefully, whomever uses this tutorial in the future, will read through and find the updates. To be honest, the tutorial here will still get you through the build with a few obvious differences that any builder should be able to figure out. Sorry, if this incoveniences anyone, but I had to make the changes to my model.
__________________
SUPPORT ME PLEASE: PaperModelShop Or, my models at ecardmodels: Dave'sCardCreations
|
|
#47
09-30-2016, 03:48 PM
|
|||
|
|||
|
You're sadistic Dave. LOL
__________________
This is a great hobby for the retiree - interesting, time-consuming, rewarding - and about as inexpensive a hobby as you can find. Shamelessly stolen from a post by rockpaperscissor 
|
|
#48
09-30-2016, 03:59 PM
|
||||
|
||||
|
I wish I had at least one of my first-gen tumblers around. I'd kind of like to get a group shot
__________________
A fine is a tax when you do wrong. A tax is a fine when you do well.
|
|
#49
09-30-2016, 04:41 PM
|
||||
|
||||
|
Well don't rush...because I am doing a fourth Tumbler!!
LMAO However, this one will be based on this latest version (Gen 3) but it will be camo colours! I have the Hot Wheels camo Tumbler, so I guess I better do a KoolWheelz version! No, not the Dark Knight Rises version (with the roof Cannon). The original Tumbler, before Bruce Wayne orders it in black. 
__________________
SUPPORT ME PLEASE: PaperModelShop Or, my models at ecardmodels: Dave'sCardCreations
|
|
#50
09-30-2016, 05:53 PM
|
||||
|
||||
|
Where's the like button?
__________________
A fine is a tax when you do wrong. A tax is a fine when you do well.
|
| Google Adsense |
 |
|
|


 Linear Mode

