


|
|
|
#31
 10-09-2016, 05:01 PM
|
|||
|
|||
|
I'm still here
 Power and internet came back on this afternoon. We faired just fine a lot of downed trees though. We did have to eat everything in the fridge. Power and internet came back on this afternoon. We faired just fine a lot of downed trees though. We did have to eat everything in the fridge.  Since i was outa touch with the world for a few day I completed everything on step 3 from the assembly sheet. Since i was outa touch with the world for a few day I completed everything on step 3 from the assembly sheet.

|
|
#32
10-09-2016, 05:32 PM
|
||||
|
||||
|
Finishing the Suspension means assembling and attaching the Wheels (and fenders).
There are four wheels and four fenders. Each fender is made up of two parts. Front and rear fenders are different size. The glue tabs (on the fender strips) need to be prescored. 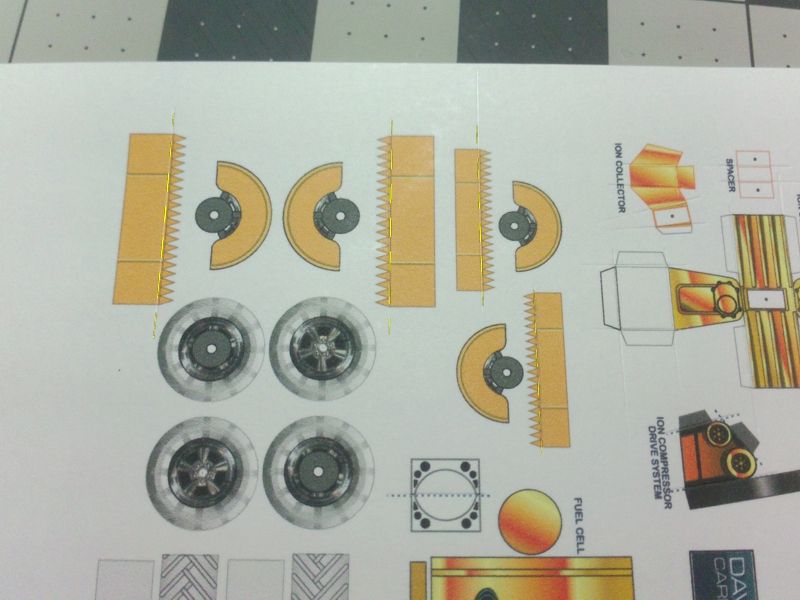 ... I like to cut the tabs first using a sharp Hobby Knife. 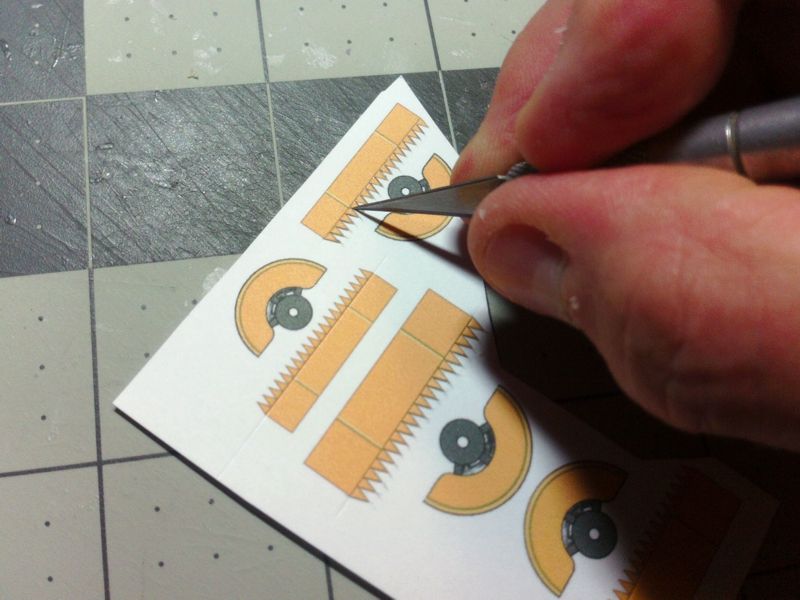 ... Then cut out the entire fender strip using a straight edge. 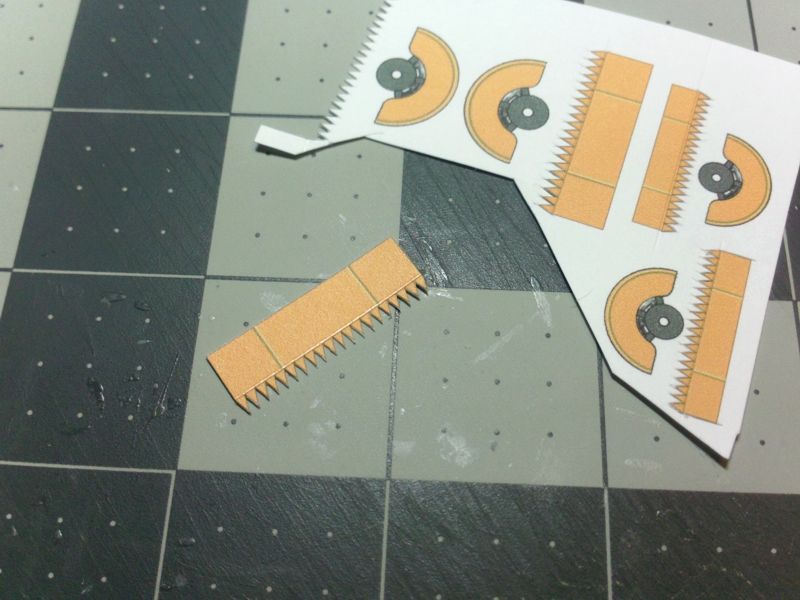 ... [Shown] Four fender strips and four fender interiors ready to assemble. Edge colour the parts at this point. Its up to you if you want to colour the reverse side of these parts to hide the plain white card. Honestly, I didn't bother with colour...the reverse sides are not really visible. 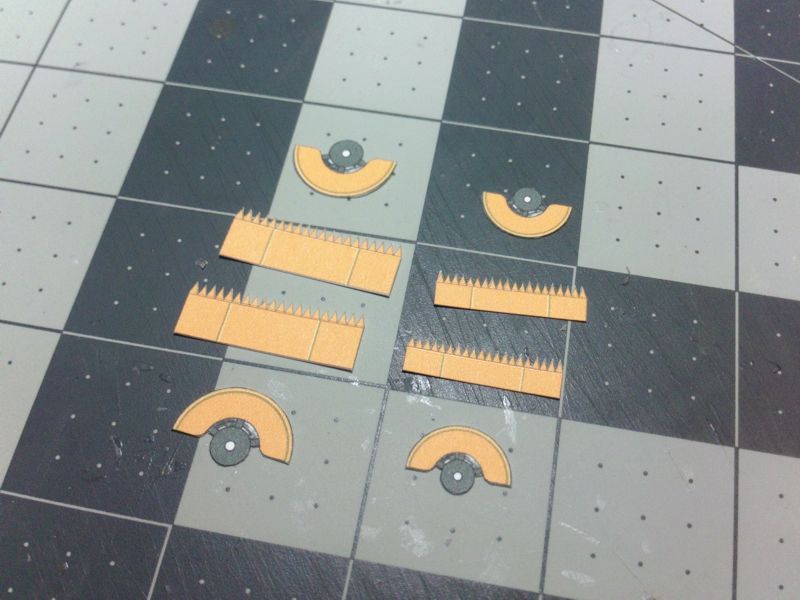 ... Using a dowel or cylindrical object, preshape the fender strips to match the curve shape of the interior parts. Shape them as closely as possible. 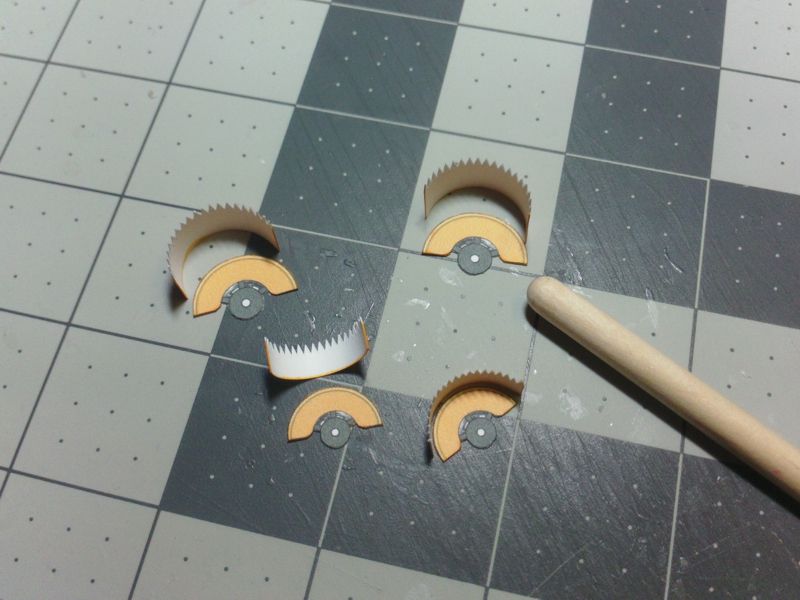 ... Flatten the parts back out again...and use a straight edge or clamping tweezer...and fold the glue tabs over. Fold the tabs well...give them a sharp crease. They need to stay folded on their own. 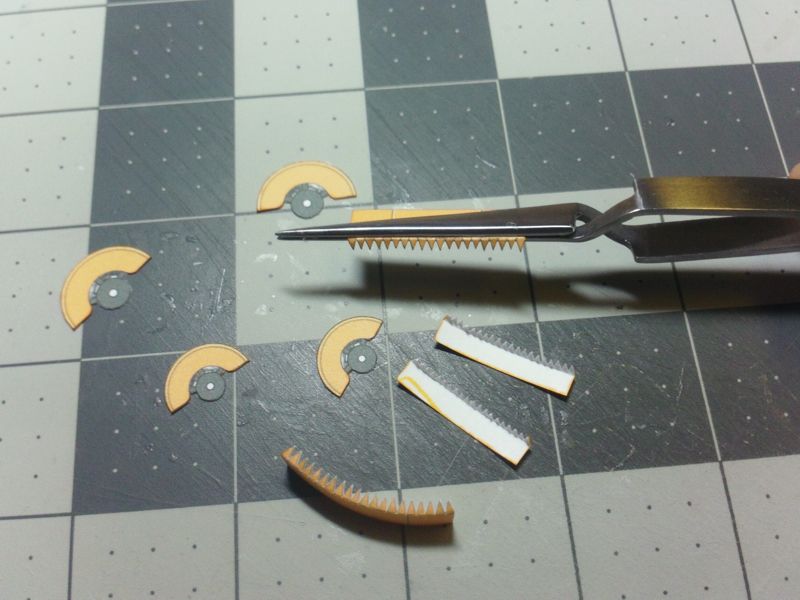 ... Use the dowel again, to recurve a fender strip...try not to unfold the glue tabs. Curve the strip again to match the interior part. 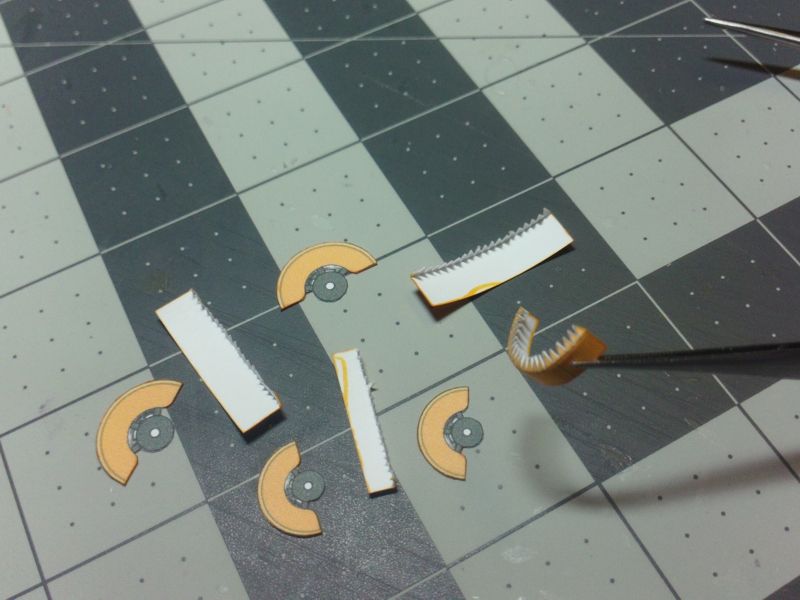 ... Apply glue to the unfinished side of the interior part, and attach the matching fender strip. Probably best to align one end and wrap the part around. It should curve flush with the interior part and line up with the opposite end. 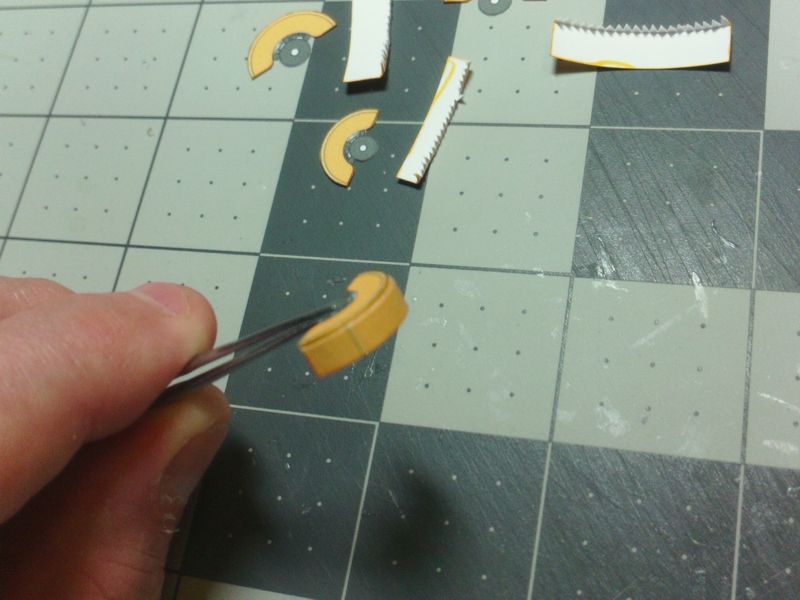 ... A view from the inside showing the connection of fender strip to fender interior part. 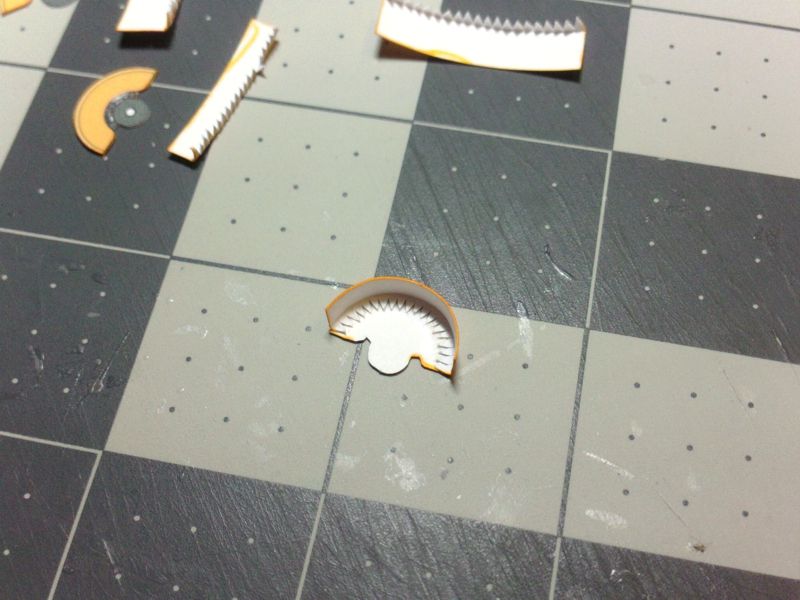 ... Apply pressure to the glue tabs to speed up the gluing process. You can align the parts this way, by moving the fender at each glue tab - aligning the outside edges. 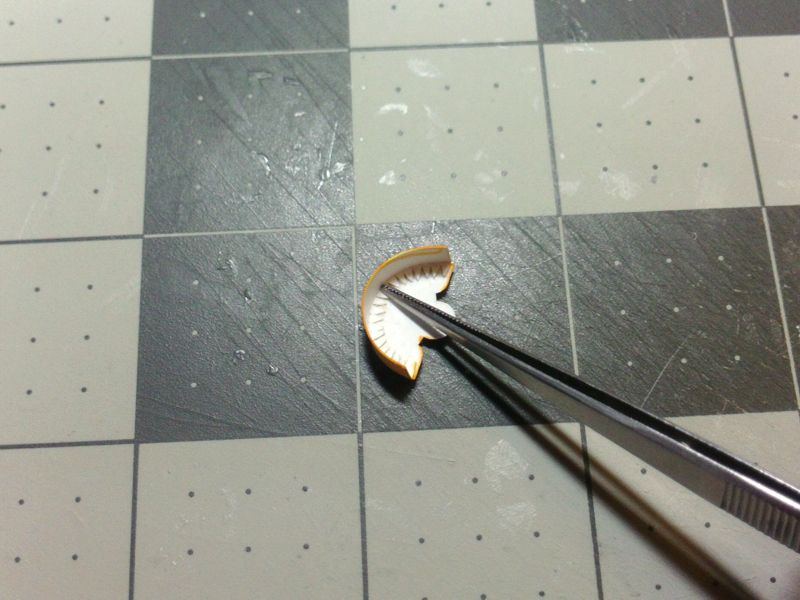 ... The fender strip should end up flush with the outside edge of the interior part. The folded tabs actually give a rounded visual effect at the seam. 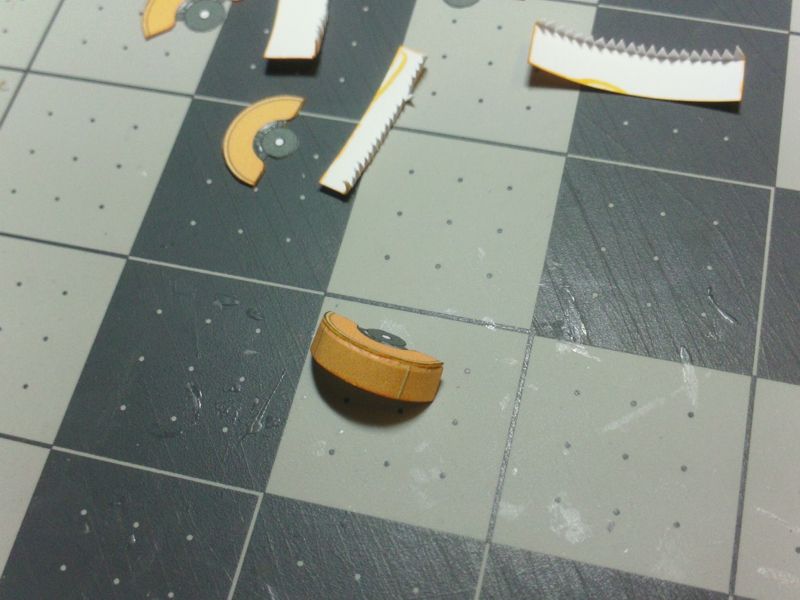 ... Repeat the process for all four fenders. 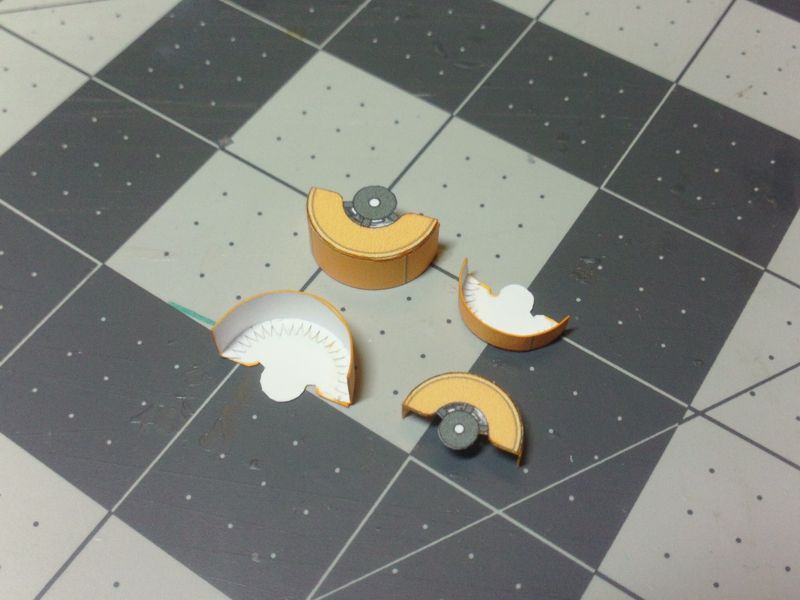 ...
__________________
SUPPORT ME PLEASE: PaperModelShop Or, my models at ecardmodels: Dave'sCardCreations
|
|
#33
10-09-2016, 05:35 PM
|
||||
|
||||
|
Quote:
Thats why axles can't be used. (I see some holes where your wheels will attach?) Your control arms don't appear to have the downward angle needed. This will just mean your car will sit a bit low. Can we not jump ahead on installations until I have posted? I'm not ready to install the A and B parts yet.
__________________
SUPPORT ME PLEASE: PaperModelShop Or, my models at ecardmodels: Dave'sCardCreations
|
|
#34
10-10-2016, 10:36 AM
|
||||
|
||||
|
Moving ahead on the fenders. Since I am a U.S. fed (eek!), I get today off because it's Columbus Day, so I am putting the time to good use working on my models. Wow, I had an epiphany when I cut all those glue tabs first as instructed, and was rewarded with not having to clean up all those tiny little white triangles -- useful lesson learned. I glued all four fenders in the same session, gluing a few tabs at a time on each one, then moving to the next to give the glue a little time to grab. It all went well, and I may even have time to work on another model today in between other things. BTW, the first picture was taken just after I took the weights off the chassis, and as shown it was perfectly straight. But by the time I took the second picture, it was starting to twist again. I'm assuming that later parts of the assembly will help hold it in a more orthogonal shape.
|
|
#35
10-10-2016, 11:05 AM
|
||||
|
||||
|
Anne...nice job on those Fender parts! very clean.
yes, your Chassis is too badly twisted. I don't know how you got it that badly twisted! LOL There is nothing else to be attached, that will fix that. And your Wheels are probably not going to sit flat. Only thing I can suggest, is live with it or try to build the chassis again. (I'm sure you can slice off the Control Arms) Heres my thinking... paper model assembly is a balance between being as precise as possible and being as relaxed as possible. Does that make sense? You have to "score on the line", "cut on the line", "fold on the line", apply glue carefully and attach parts precisely... but all with a very gentle and relaxed hand. If you squeeze too tightly, or push too hard, or twist too much, or pull too far... it all goes wonky (no matter how precise you are).
__________________
SUPPORT ME PLEASE: PaperModelShop Or, my models at ecardmodels: Dave'sCardCreations
|
| Google Adsense |
|
#36
10-10-2016, 11:12 AM
|
||||
|
||||
|
Anne, make a display base with the rover crawling over some Lunar rocks. That should disguise the twist.
__________________
~Doug~ AC010505 EAMUS CATULI! Audere est Facere THFC 19**-20** R.I.P. it up, Tear it up, Have a Ball
|
|
#37
10-10-2016, 11:42 AM
|
||||
|
||||
|
Quote:
__________________
A fine is a tax when you do wrong. A tax is a fine when you do well.
|
|
#38
10-10-2016, 12:04 PM
|
||||
|
||||
|
Dave, where do I find this relaxed hand? wc
PS - What you modelers consider quality paper? In the area I live in(just south of San Francisco) there are to many places for me to walk in to and ask/find the paper I need. So far I have found 32lb, 67lb and 110 paper from Neenah. I have no problem to ordering the paper but where? Thanks again for any input. wc
|
|
#39
10-10-2016, 01:37 PM
|
||||
|
||||
|
Fenders complete
Anne - It's easier the second time. My first one warped because of too much glue, I think, but I am suspicious that you caused your to warp just to make me feel better.
Waddie - I am using 67 pound Neenah Bright White premium cardstock. It is 0.19mm thick and seems to be working out just fine for these builds. If you want really fine paper, I recommend going to Blick art supply and buying a pad of Borden & Riley #234 Paris Bleedproof paper for pens. Borden & Riley Paris Bleedproof Paper For Pens - BLICK art materials It is also about 0.19mm thick. If you buy the 9x12" book of 40 sheets, you can slice 1/2" off the right side and you have something close to A4 paper for models that come in that size. Some printers will accept the 9x12 sheets without modification. It is expensive, but lovely to work with. You can use the Neenah for most models and save the Borden & Riley for special projects. Don
|
|
#40
10-10-2016, 01:42 PM
|
||||
|
||||
|
Thank you Don, I will look into it. I have the Neenah Bright White premium which I do use from time to time depending what part of the model I'm working on. Most of the time I use 110lb paper from same company. Is using the 110lb alright? I need every tip I can get my hands on. Thank you again. wc
|
| Google Adsense |
 |
|
|


 Linear Mode

