


|
|
|
#111
 05-29-2019, 02:24 PM
|
||||
|
||||
|
Well, things didn't go perfectly...but they could have gone a lot worse!
I managed to cut off all the parts that needed to be removed with the expected amount of surface damage to the frame rails. Minimal tearing...I was able to sand everything fairly smooth. Next, print some frame chassis parts on thin paper, for some layering repairs...  I should have enlarged the parts slightly, they didn't quite cover everything. Plus, I experimented with a torn feathered edge on the first frame fix (to help hide the edges) but it didn't work very well. I coloured the reverse side of the part edges but it shows through too dark. Just makes that feathered edge stand out even more. Oh well. For the other side,I just cut straight edges...worked just as well. I covered three sides of the frame rails, and the lower plate (that supports the Guide Pulleys). Good enough to receive some new parts that will cover most of it anyway! Crisis averted! Moving forward! 
__________________
SUPPORT ME PLEASE: PaperModelShop Or, my models at ecardmodels: Dave'sCardCreations 
|
|
#114
05-30-2019, 07:11 AM
|
||||
|
||||
|
Well, I put the new parts on last night (while watching 633 Squadron with Cliff Robertson)
First...a much simpler construction. Less parts (I think) and easier to build. So thats a good thing. My only issue is my twisted Frame Rails. I have cut this Frame apart so many times, removed and replaced various cross members, the Rails have shifted and are slightly angled at the rear. A fresh build will not have this problem. Nothing that stopped me from attaching more parts though. In fact, the new part help hide the frame twist. And this is the new look:  As always, (while building) I made a list of any required tweaks and alterations and today I'll go back into Corel and make adjustments. In the meantime, I am thrilled that I got this sorted.
__________________
SUPPORT ME PLEASE: PaperModelShop Or, my models at ecardmodels: Dave'sCardCreations
|
|
#117
05-30-2019, 10:39 AM
|
||||
|
||||
|
Quote:
I'm not a big Cliff Robertson fan and this is not a great movie. Laughable in many places. But I still like these old films. At least the cast were all real Brits! I was worried when I saw that it was an American film. I thought it might be another bunch of Americans who think they can pull off English accents. Luckily it was not like that...it had a very British feel to it. And some good real flying sequences with real Mosquitoes... cool to see, even if they weren't accurate wartime Mossies. The story, however, was not believable or realistic...and a bit silly. I need to find "The Mosquito Squadron" and rewatch that one. ... On a side note, I just binge watched the new Catch-22 mini-series. 6 hours I think it was? I have never seen the original Catch-22 film, or read the book, so I didn't really know the story. It was pretty good. Don't look for real wartime accuracy, but its a very good "war film". Lots of B25 action and flying scenes. Good story...although the ending leaves a lot to be desired. I have heard wind of second season. Not sure how, since the book is basically wrapped up in the six parts. Maybe they think they can expand on the story.
__________________
SUPPORT ME PLEASE: PaperModelShop Or, my models at ecardmodels: Dave'sCardCreations
|
|
#119
06-05-2019, 08:45 AM
|
||||
|
||||
|
Last week I confirmed some info on the Fuel Tanks.
Basic dimensions, and how the Tanks mount. And I also needed to know where the filler necks were positioned on the BeetleBack bodied trucks. *they are accessed through holes in the floor of the cab interior, so I won't be bothering with them. I have rough idea of the space and mounting position (on the frame rails and under the body) but I am going to hold off attaching the tanks until the Body is dealt with. No point in gluing them in place, only to have to cut them off to move them 1mm! ... For the last few days, I have been trying to work on an Exhaust system. I decided two things: first, the Muffler/Silencer is the most important part to install. And the exhaust piping will be an advanced option for the builder. I will provide something, but not waste too much time on it. My biggest problem so far is research. I have yet to find any photos or collect any information from CMP vehicle owners, I am guessing at the cross over Y-pipe as seen on other Ford flatheads of this period. I am guessing at the position of the Silencer. I don't know how the Silencer is mounted/bracketed. I don't know how much Tailpipe there is, or where it exits. So, this is what ya got! Its fiddly, and difficult to build. And messy. And, I am not really interested in redesigning it. I think I've wasted enough time on it. 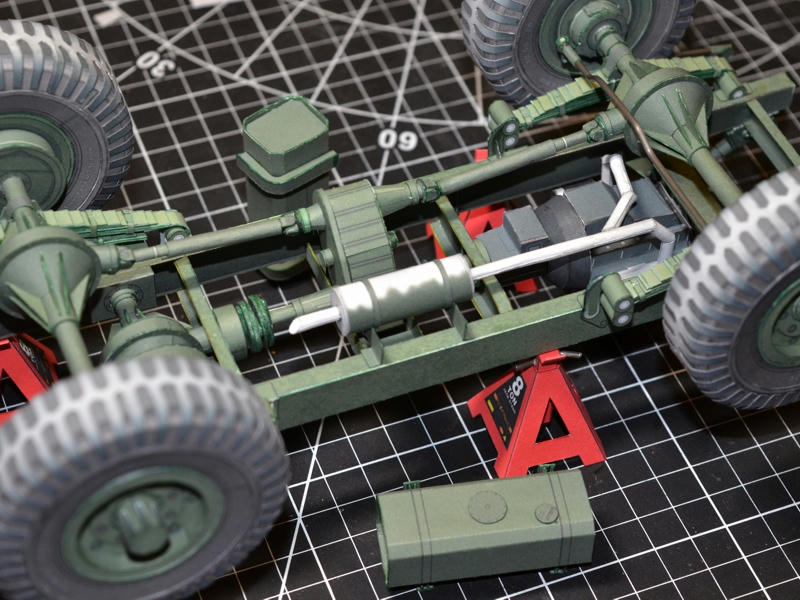 
__________________
SUPPORT ME PLEASE: PaperModelShop Or, my models at ecardmodels: Dave'sCardCreations
|
|
#120
06-05-2019, 10:52 AM
|
||||
|
||||
|
Bringing myself up to speed with your Field Artillery Tractor was a great way to spend a lunch hour. This looks like another good source of inspiration with clean precise work throughout.
Mike
|
| Google Adsense |
 |
|
|


 Linear Mode

