


|
|
|
#61
 04-21-2019, 09:33 AM
|
||||
|
||||
|
would soaking the part with thin CA and then cut out and sand be more effective?
maybe even finish "coloring" the hook with a pencil/graphite to make it look shiny from wear, might allow you to get away with not painting the part
__________________
"Rock is Dead, Long Live Paper and Scissors" International Paper Model Convention Blog http://paperdakar.blogspot.com/ "The weak point of the modern car is the squidgy organic bit behind the wheel." Jeremy Clarkson, Top Gear's Race to Oslo 
|
|
#62
04-21-2019, 09:49 AM
|
||||
|
||||
|
Thats okay...You aren't understanding my question.
I'm sure there are all kinds of ways for modellers and pros to finish the part and make it look better than what the kit intended. But I can only concern myself with what the kit can offer. Whats the best thing I can offer as a paper part? I can't think of another way to build this Coupler, that would be easier, or better, or more appealing? Is a Hitch Coupler, like this, available in any other kit from any other manufacturer? and how did they tackle the design? I guess that may be the question I am asking?
__________________
SUPPORT ME PLEASE: PaperModelShop Or, my models at ecardmodels: Dave'sCardCreations
|
|
#63
04-21-2019, 09:56 AM
|
||||
|
||||
|
Any hook or coupler I have seen has been made up of laminated parts, I have seen hooks on tanks that have been laminated and then shaped.
Maybe the Armor guys can pipe in and add their 2 cents, Greg/Kevin/Johnny
__________________
"Rock is Dead, Long Live Paper and Scissors" International Paper Model Convention Blog http://paperdakar.blogspot.com/ "The weak point of the modern car is the squidgy organic bit behind the wheel." Jeremy Clarkson, Top Gear's Race to Oslo
|
|
#64
04-21-2019, 10:00 AM
|
||||
|
||||
|
Quote:
but that thing has something that looks more like a block and pin (rather than a hook)!! lol no help there. I wouldn't worry too much about this, but because of the scale, and because theres a good chance I will be making Trailers, I need a proper hook style Hitch.
__________________
SUPPORT ME PLEASE: PaperModelShop Or, my models at ecardmodels: Dave'sCardCreations
|
|
#65
04-21-2019, 06:13 PM
|
|||
|
|||
|
If I were assembling the hook, I would cut out one side of the hook and then trace the hook on a blank sheet of 110 card ( create about 14 blanks). Glue these blanks, one at a time, to the hook kit part that I cut out, until I obtain the thickness required. I can always add more blanks, if necessary. Then I would cut out and add the other hook kit part and glue it to the stack. Then I would use a small needle file or sanding block to smooth the edges. Finally I would use colored pencils to match the edges to the color of the sides. I know, it sounds boring and labor intensive, but that is how I would tackle the problem. I use this for spoked wheels on coaches and steering wheels, shift levers, etc. That's my two cents.

|
| Google Adsense |
|
#66
04-21-2019, 08:01 PM
|
||||
|
||||
|
Quote:
I just glued each side of the coupler to thicker card (about 1mm) and cut them out carefully. Then glued them both together, giving me about 2mm total thickness. Cutting out such a small part, with intricate shape, is the hardest part. And making them both exactly the same, is virtually impossible. It would be easier to cut out thinner layers of card and build them up, as you suggest, but that would be a time consuming cutting so may parts. I opted for the thicker card to start, but it was definitely a lot harder to cut. ...and sanding/filing them into shape is the only option to finish. And then edge colour with your choice of medium. I don't suppose there is any better option for a paper part. So, I'll just include the left and right sides, and suggest they be laminated to a thicker size.
__________________
SUPPORT ME PLEASE: PaperModelShop Or, my models at ecardmodels: Dave'sCardCreations
|
|
#67
04-22-2019, 08:51 AM
|
||||
|
||||
|
It was suggested to me, that maybe a hollow Hitch Hook might be an idea.
Fit an outer strip around the shape of the part...edge gluing it in place. Sounds like an option... unfortunately the Hook is very small...maybe too small to assemble it that way. 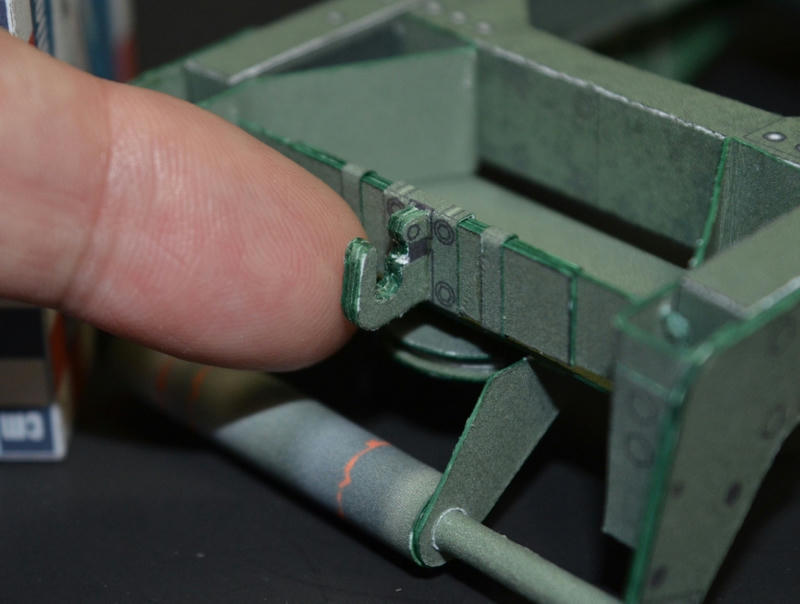 The entire part is only 8mm tall. It would be very tricky shaping the edge strip and gluing it in place. And glue tabs at that scale would be almost impossible to cut and fold. And it might be too weak (if hollow) to connect the two trailers? But...speaking of shape...I have decided to streamline the shape a bit more. Its not as accurate to the real thing, but it will make it easier to cut out! 
__________________
SUPPORT ME PLEASE: PaperModelShop Or, my models at ecardmodels: Dave'sCardCreations
|
|
#69
04-23-2019, 07:37 AM
|
||||
|
||||
|
okay...so, last night I built the newly redesigned Hitch.
The streamlined shape made cutting a bit quicker and easier. The edge wrap was a little tricky to install (due to its size) but not bad at all. The end result was a cleaner look, although it suffered from my edge colouring with some new ink markers. I made up a new mounting plate for the hitch and swapped out the parts on my frame. 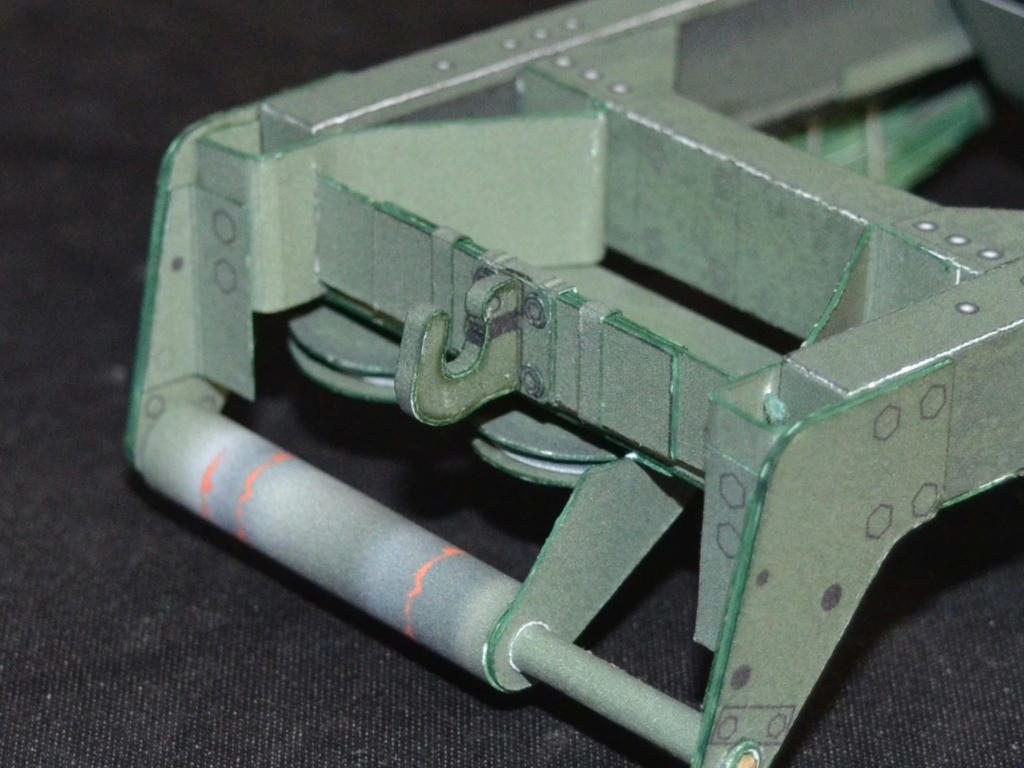 ... Then I took another gander at my original reference photos to compare the final look. Not only is the streamlined shape a bit different from the real thing... I discovered a much larger....or smaller?...problem! It should look more like this: 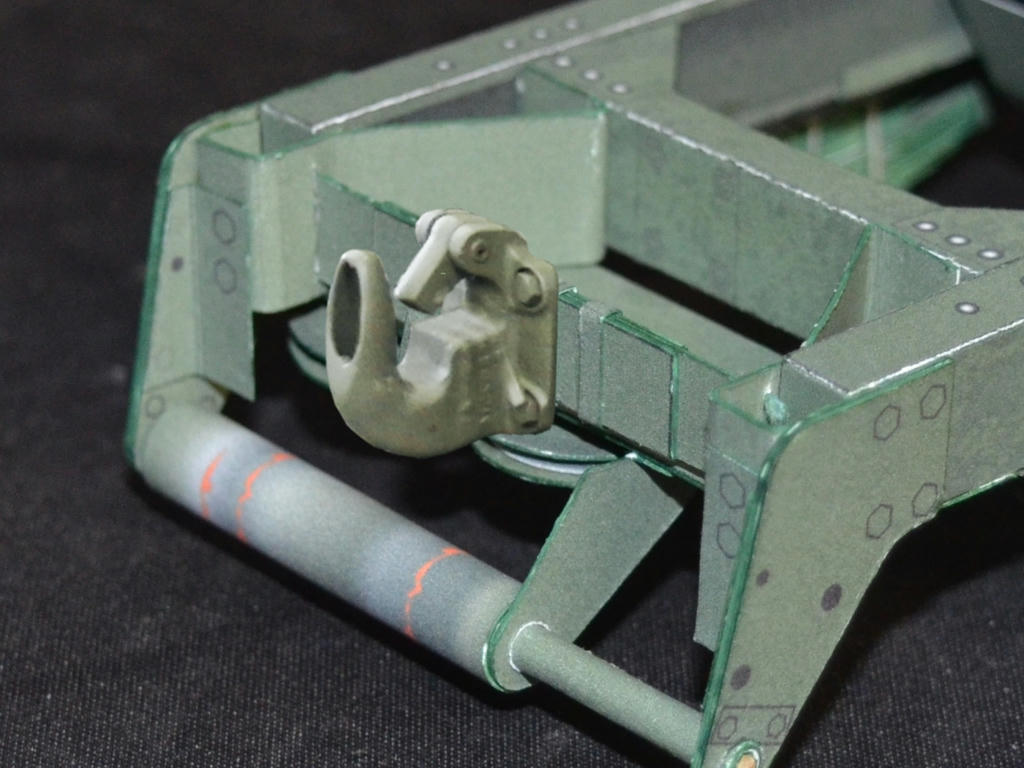 !!!!!!!!!!!!!!!!! Seems somewhere along the trail of design, I completely lost the relative scale between the frame and the Hitch Hook! The hitch is not even in scale with the leaf spring mounting it is attached to! So, I am going to have to go back to the corel-drawing board and redesign the Hitch...again. In fact, I think I will not redesign this one...just throw away my artwork, and start from scratch. The hitch needs to be twice its current size...which will change the assembly method as well. A boxed, hollow construction might be more in line! More to come.
__________________
SUPPORT ME PLEASE: PaperModelShop Or, my models at ecardmodels: Dave'sCardCreations
|
|
#70
04-23-2019, 07:47 AM
|
||||
|
||||
|
Razzum frazzum riggum biggum rum rip!
__________________
A fine is a tax when you do wrong. A tax is a fine when you do well.
|
| Google Adsense |
 |
|
|


 Linear Mode

