


|
|
|
#51
 04-15-2019, 05:31 PM
|
||||
|
||||
|
Once the Tire is built up, we need to add a thin raised ring around the sidewall...both sides of the tire.
Only about 1.5mm wide, so it requires some careful cutting. Just one of the molded surface details of the rubber Tire. Place the strips over the marked (darkened) locations on the sidewall. Glue one end down, and then slowly glue all the way around. It'll probably require trimming at the end to butt it up tightly. 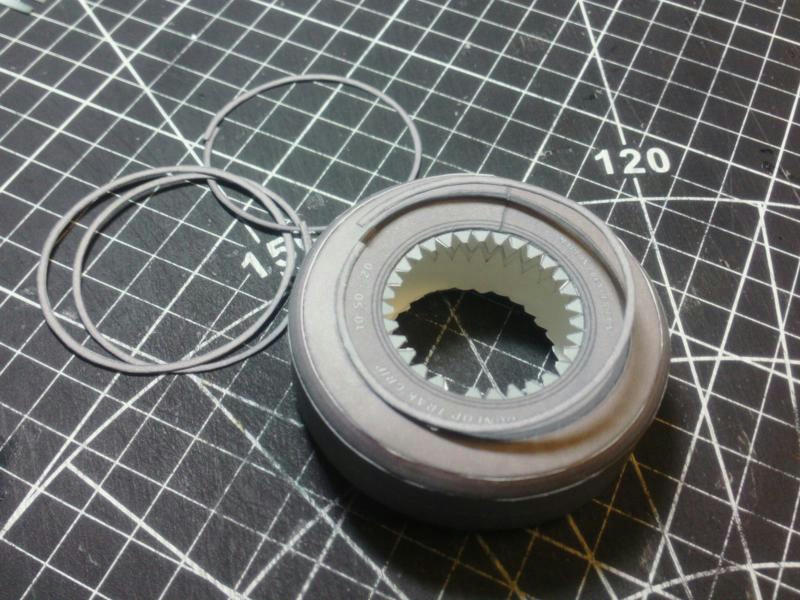 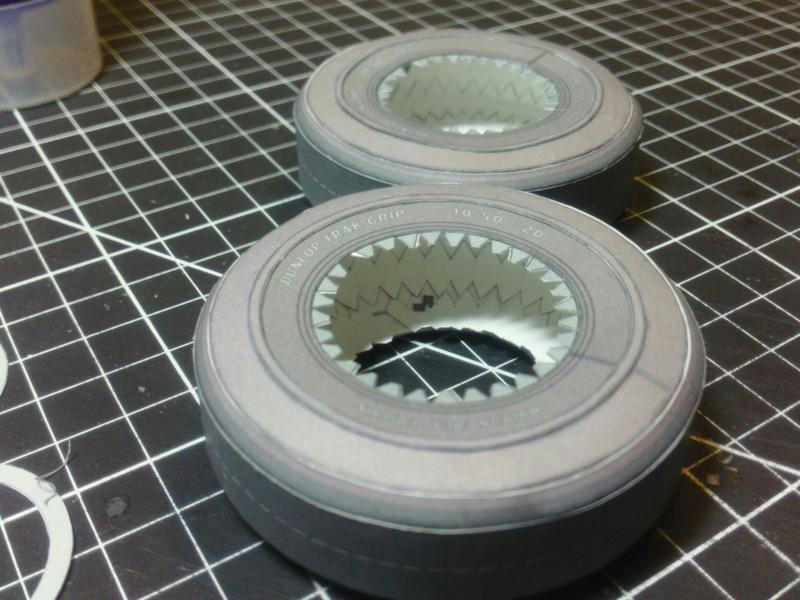 ... And to finish each side of the Tires, insert and glue into place, the Wheel/Rim support. This disc supports the Road Wheel but will be completely hidden under the edges of the Rim. 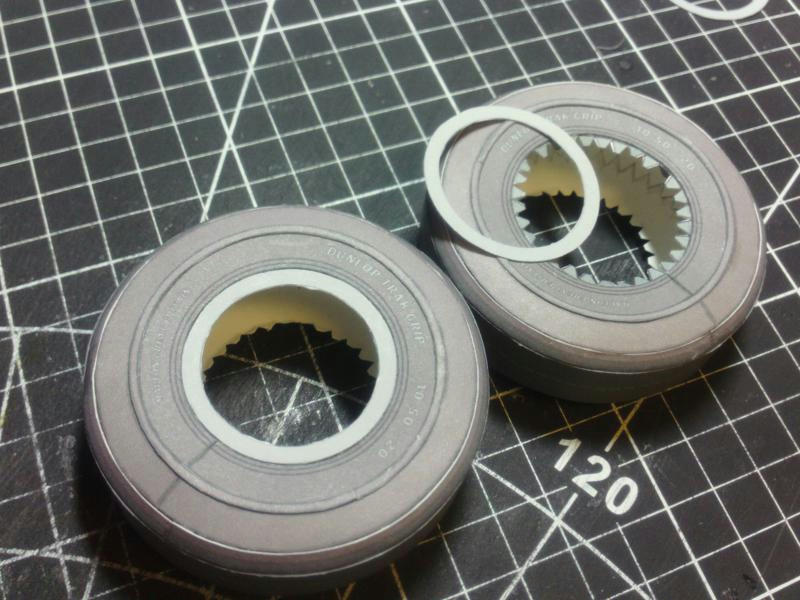
__________________
SUPPORT ME PLEASE: PaperModelShop Or, my models at ecardmodels: Dave'sCardCreations 
|
|
#52
04-15-2019, 05:32 PM
|
||||
|
||||
|
Now its time to finish the tire by adding the raised tread details.
Its important that the tread is positioned in the centerline of the tire, so that the treads cover the same amount on each side. I have added a dotted centerline to help the placement of the tread...but its still a bit tricky. I haven't got one perfect yet! Start by gluing one end of the tread part to the Tire. Right now, we only glue the very center strip of the tread part. Slowly wrap the Tread part around the tire, gluing it in place, until the ends meet. There is no need to wrap it tightly, just let it fall into place, so as not to overlap the ends. if the ends do overlap, a little trimming is required. 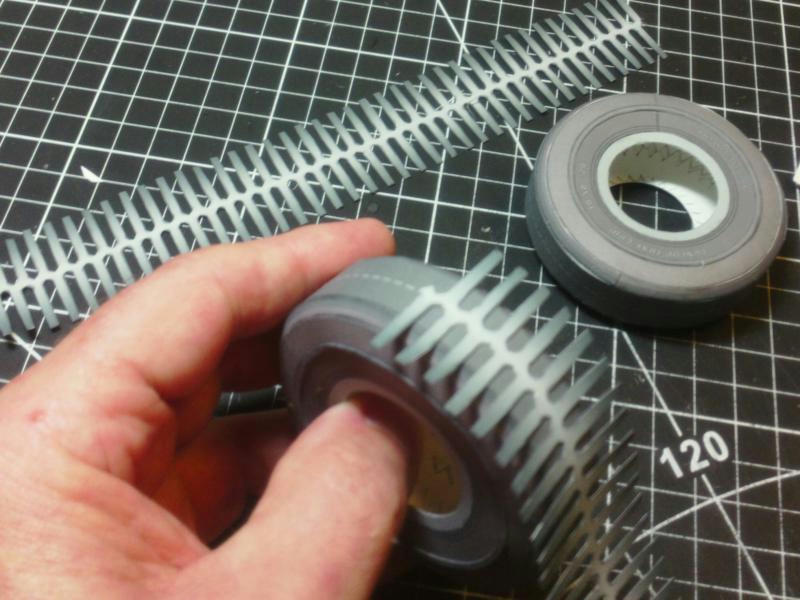  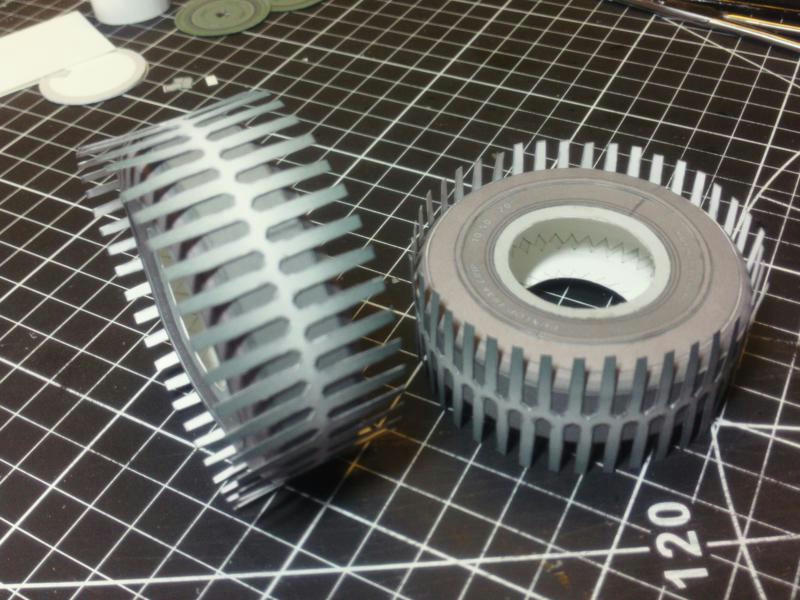 ... Once the Tread part is in place, each tread extension has to be glued down to the tire. Each tread will fold around the tire and be glued flat, and should fall short of the raised bumper strip on the sidewall. if you got the Tread part centered around the tire, it will do this! If not, it might be a tight fit on one side of the tire. I used a paintbrush to apply glue and glued two treads at a time, working my way around the tire. Its important to make sure each tread is firmly glued flat to the tire surface. 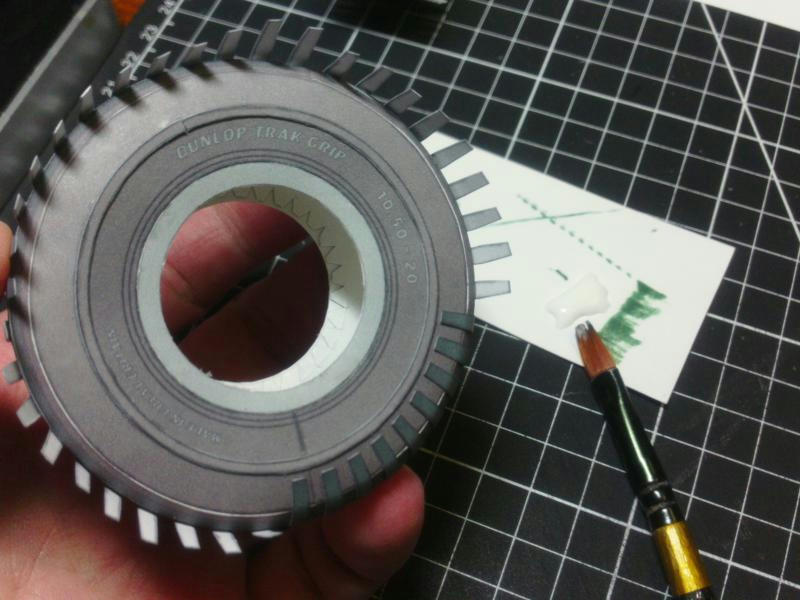 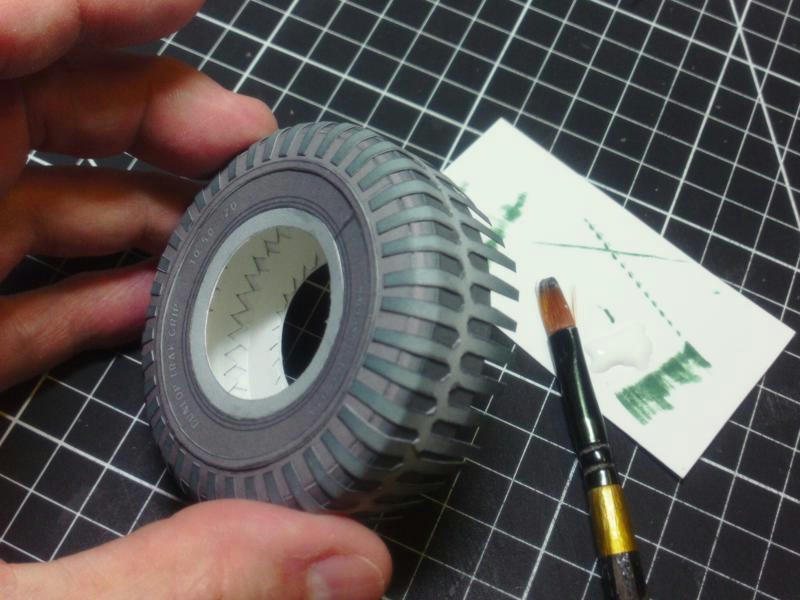 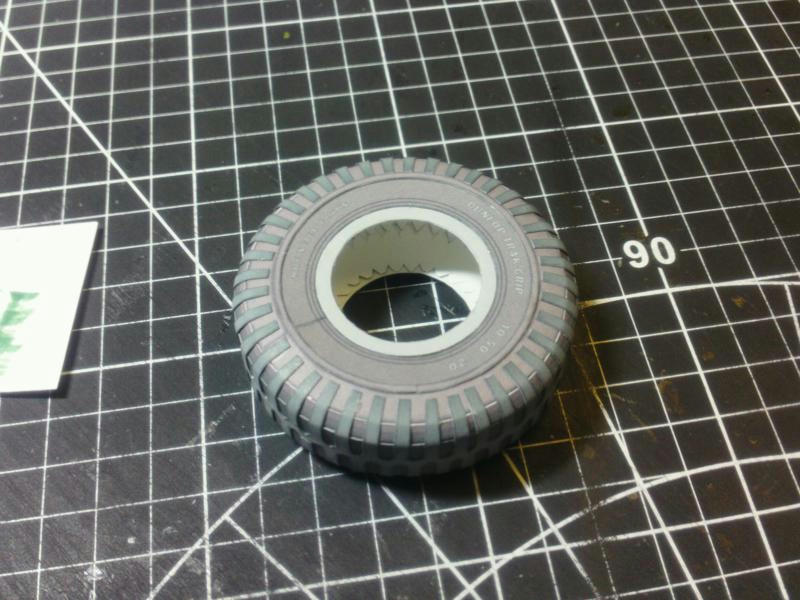
__________________
SUPPORT ME PLEASE: PaperModelShop Or, my models at ecardmodels: Dave'sCardCreations
|
|
#53
04-15-2019, 05:44 PM
|
||||
|
||||
|
Now its time to fit the Rims (Road Wheels).
The Rim...minus the back plate...should squeeze into the rim support ring. Its a tight fit. If its too tight (your cutting, not my fault) then just use some sandpaper or an emery board to enlarge it until the Rim squeezes in. Push it all the way in until the edges of the Wheel contact the support ring. Its not necessary to glue anything here. 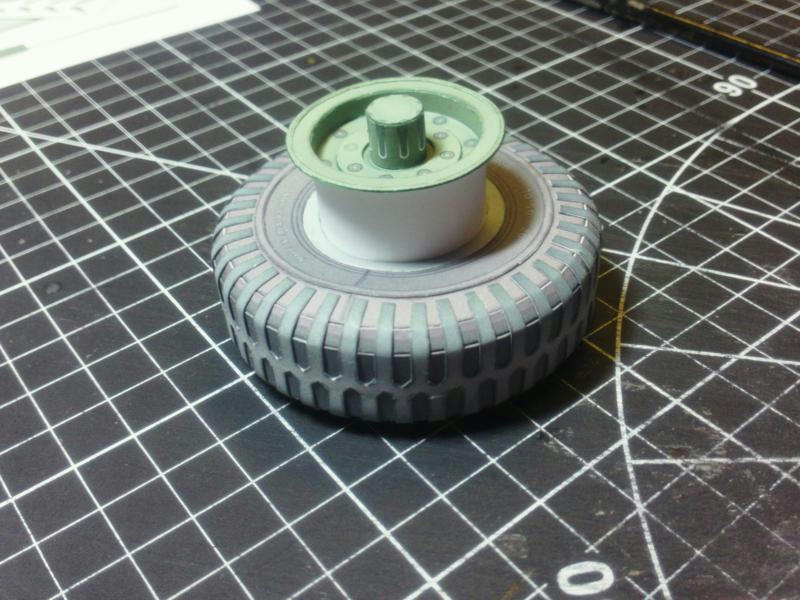 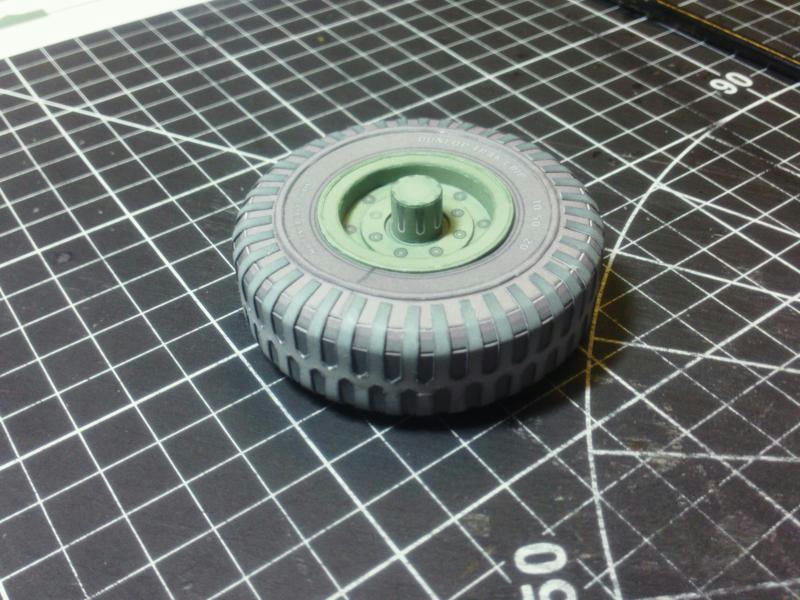 ... Turn the entire Wheel over and judge the rear opening. The Rim should be aligned (tightly) and centered in the Support Ring opening. A little pressure on the rim should get it flush. Now apply a bead of glue around the support ring and around the edge of the Rim itself. Center the back plate of the wheel against the Tire and press firmly in place. Apply even pressure around the edges of the Rim, keep the wheel and plate in contact until the glue sets up. I found I was applying pressure to the front of rim keeping it firmly in place in the tire and pressing all around the back plate to make sure I had good contact all around. You have to squeeze the Tire a bit, but be careful not to crush the tire! Hopefully you remembered to cut the axle hole and tested it before you assembled anything... if so, the the wheel is complete and ready to install. 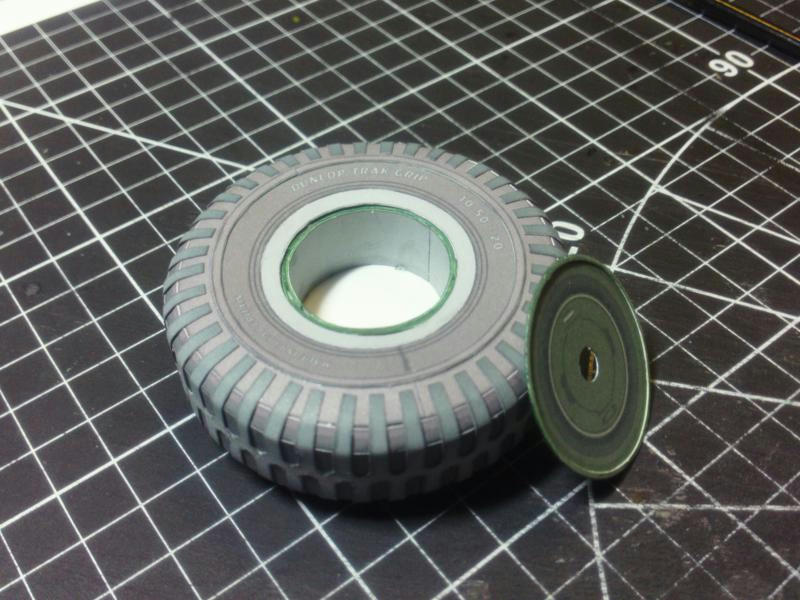 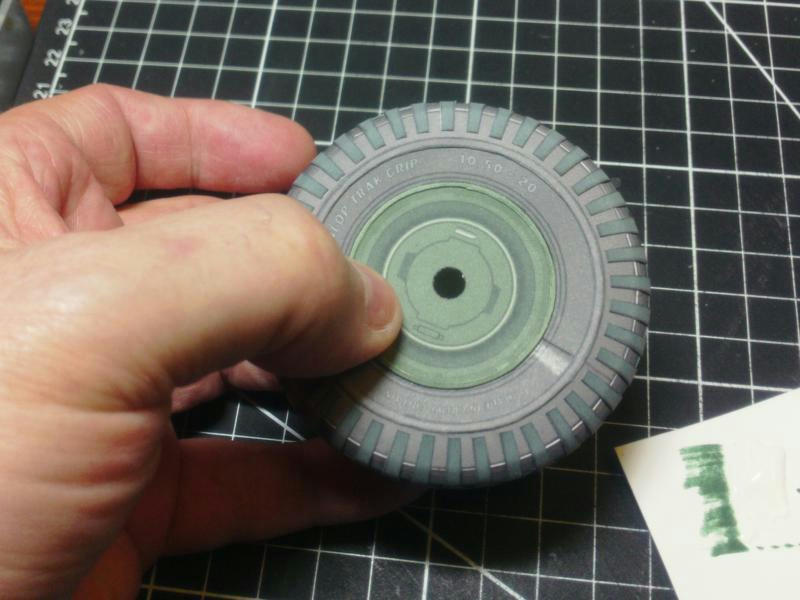 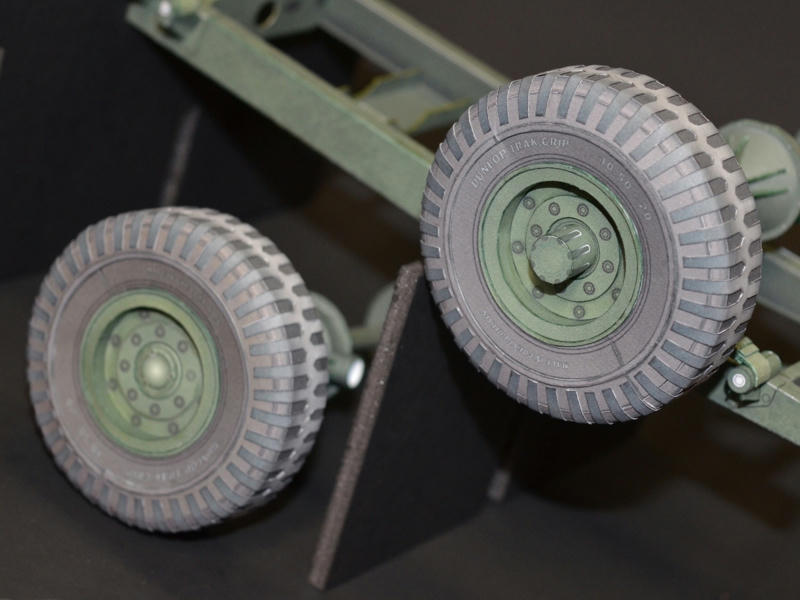
__________________
SUPPORT ME PLEASE: PaperModelShop Or, my models at ecardmodels: Dave'sCardCreations
|
|
#56
04-16-2019, 06:49 AM
|
||||
|
||||
|
I forgot to add that I will include plenty of extra wheel and rim Bolts/Nuts.
Layer those on top of the Wheel and it should be a great 3D look. I am much to impatient and lazy to cut out all those parts, but I know there are plenty of builders who love that small detail stuff!
__________________
SUPPORT ME PLEASE: PaperModelShop Or, my models at ecardmodels: Dave'sCardCreations
|
|
#57
04-16-2019, 01:09 PM
|
||||
|
||||
|
Just for fun, another photo update...
I test fitted the Axles again, along with the newly added Power Take Off. In this case, its an adapted Axle/Differential used to drive the power winch/tow cable. I need only to complete the Drive Transfer unit and then I can sort out all the driveshafts. Engine and Transmission are still on hold until I decide what to do about Body, floor pan, and interior components. 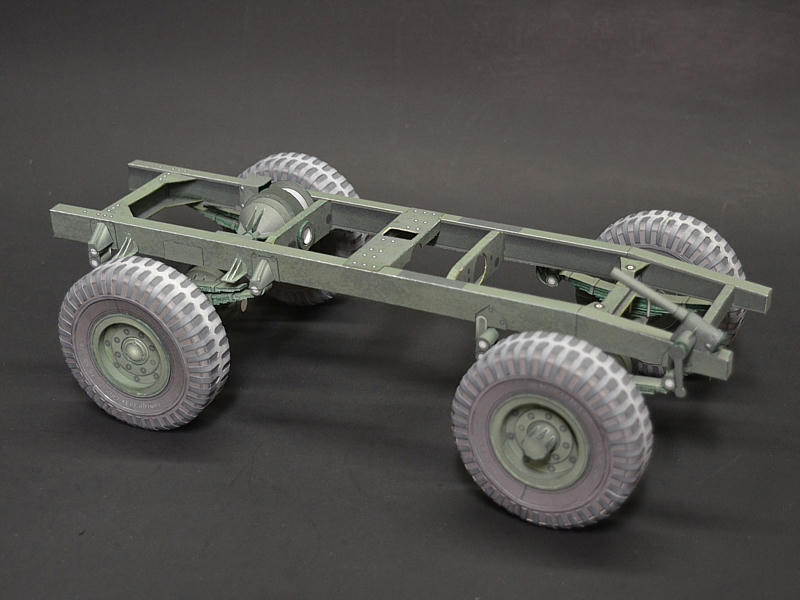 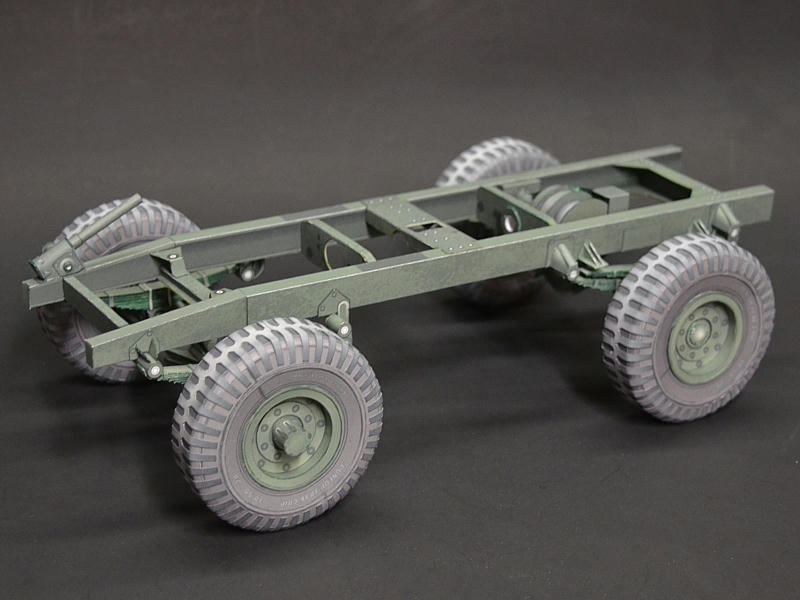 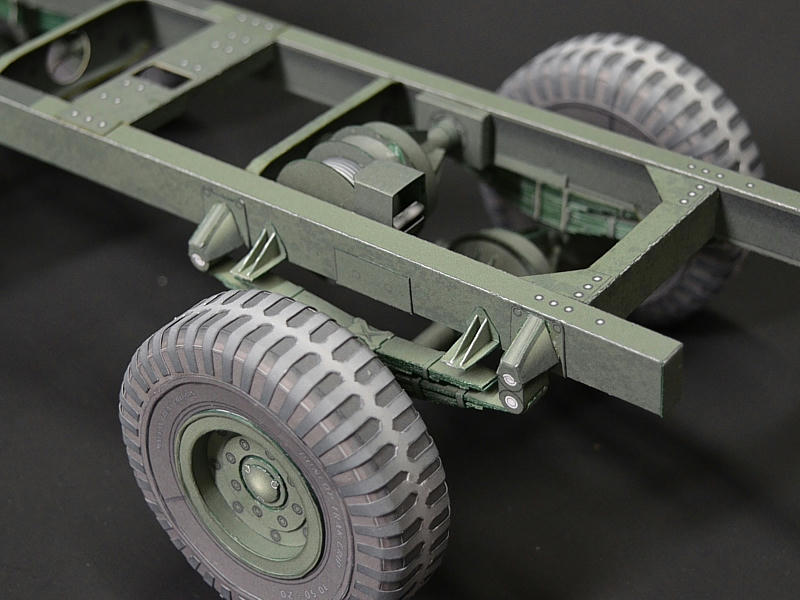 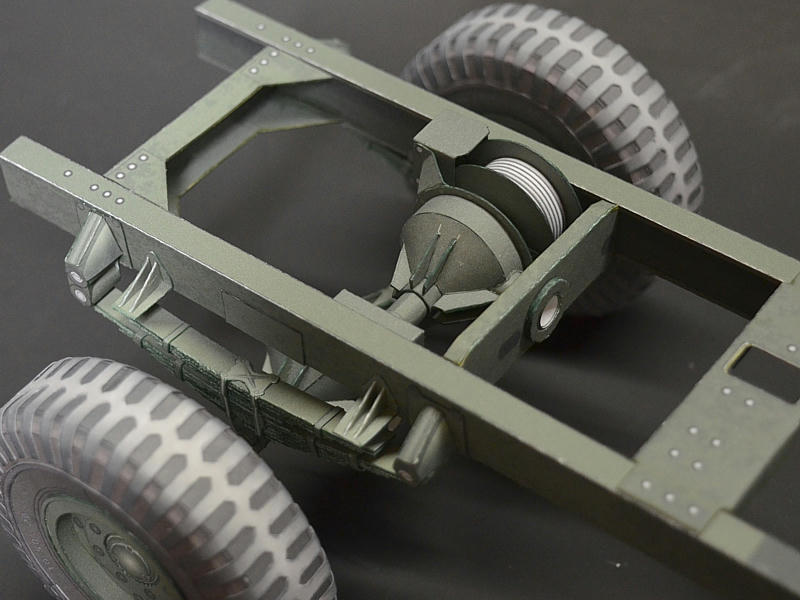 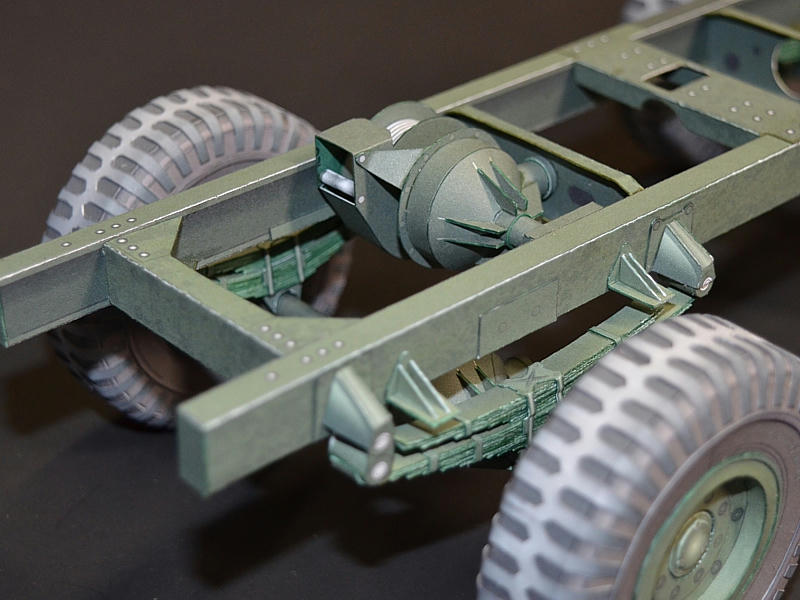
__________________
SUPPORT ME PLEASE: PaperModelShop Or, my models at ecardmodels: Dave'sCardCreations
|
|
#58
04-16-2019, 02:35 PM
|
|||
|
|||
|
Looking better all the time. You must be getting tired of all the compliments. 8-)
|
|
#59
04-16-2019, 03:09 PM
|
||||
|
||||
|
__________________
SUPPORT ME PLEASE: PaperModelShop Or, my models at ecardmodels: Dave'sCardCreations
|
|
#60
04-21-2019, 09:12 AM
|
||||
|
||||
|
At the very rear of the Frame are all the components related to the Towing Hitch and Winch.
A spring mounted framework for the Hitch Coupler itself. The Coupler is directly mounted to a "leaf spring" which is suspended between to shock absorbing brackets. There are also guide spools for the Towing Cable, and a roller guide. As well as a lot of flat plates and angle brackets. A lot of these parts required laminating layers to create double sided thickness. And I had to trim and tweak a few things during this prototype assembly. I've already adjusted all the parts in the kit to reflect my modifications. 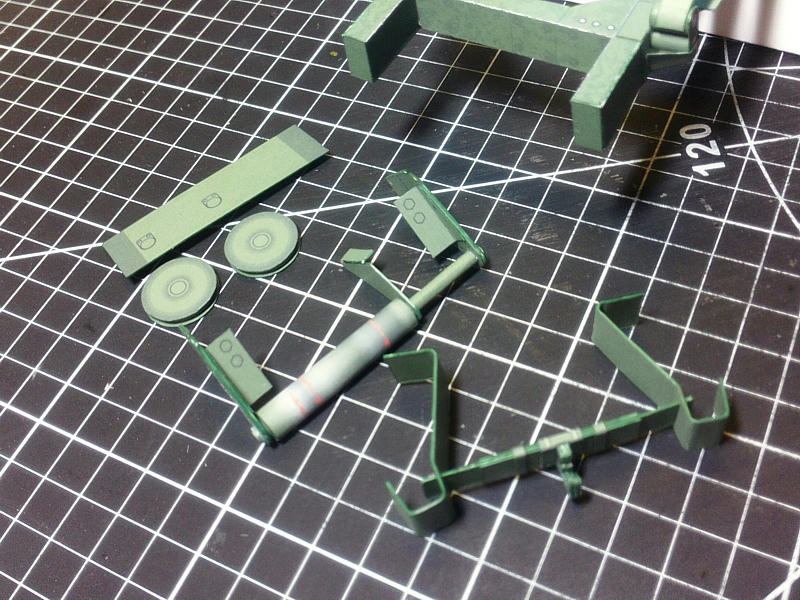 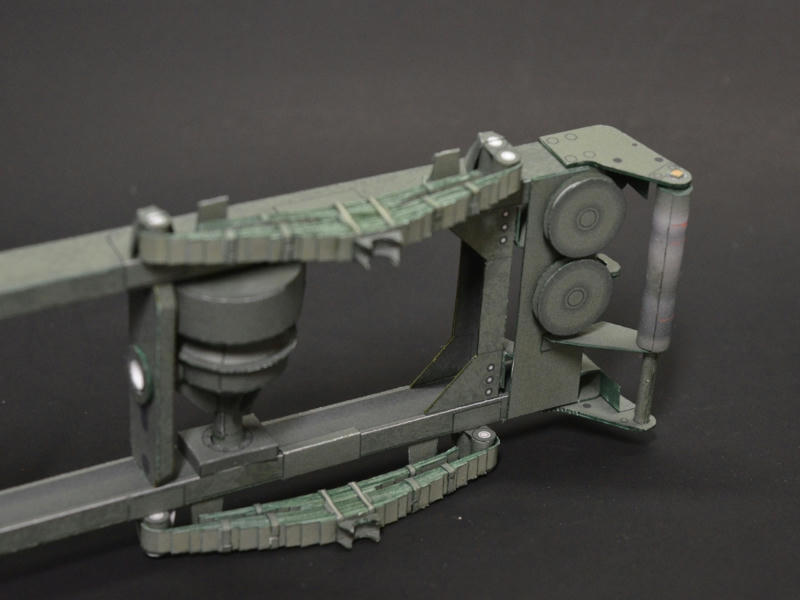 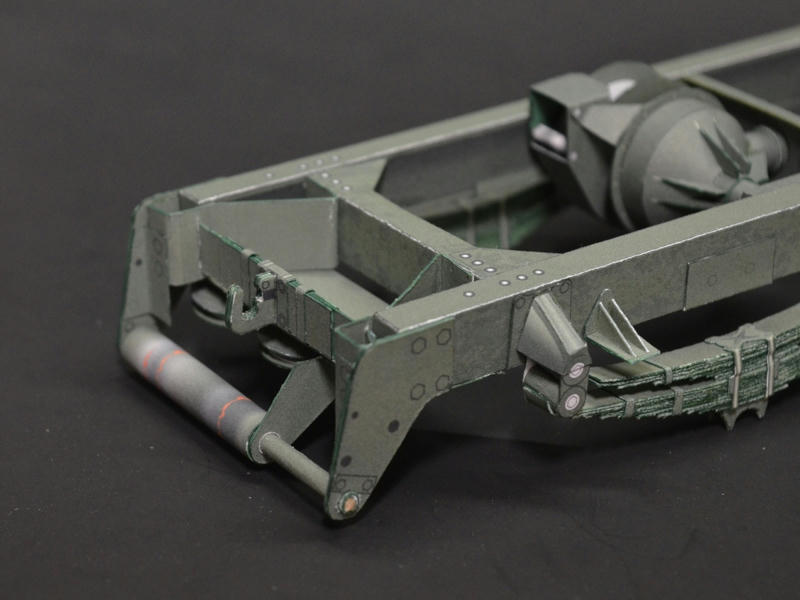 One thing I am unsure about, is the assembly of the Hitch Coupler. First off, my Coupler is too short...and I have already stretched it longer/bigger. But, how to assemble it? any suggestions? I made this one by printing a right and left part...then laminating those to thicker card. Then I cut out both with a hobby knife...very tricky...and glued them back to back. This gives me the 1.5mm-2mm thickness I desire. But the edges are rough, the parts don't match perfectly. I've tried sanding the edges (difficult) and edge colouring (messy). I don't want to paint the part...and I can't recommend painting in the kit. Obviously this is an option for any builder. But is this the best I can get from a paper part? 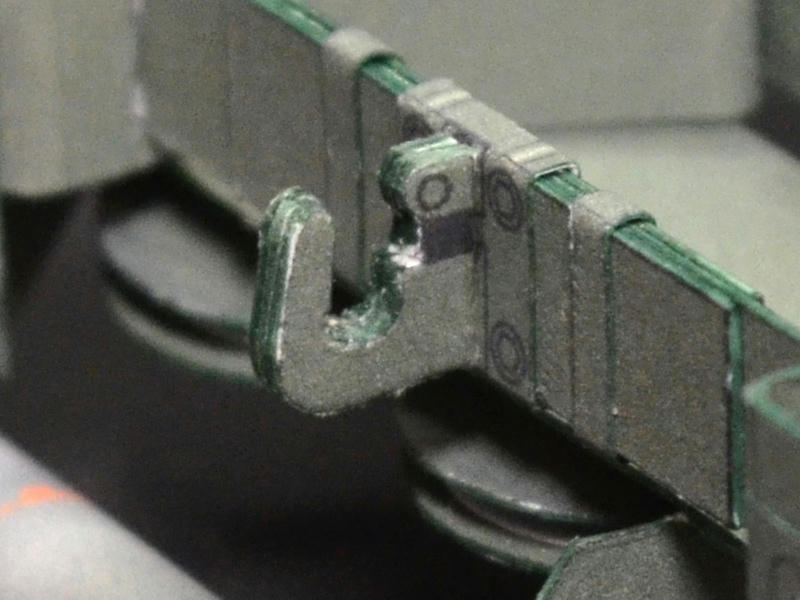
__________________
SUPPORT ME PLEASE: PaperModelShop Or, my models at ecardmodels: Dave'sCardCreations
|
| Google Adsense |
 |
|
|


 Linear Mode

