


|
|
|
#11
 07-28-2019, 10:56 AM
|
||||
|
||||
|
Very interesting. Thank you.
I have never used a sealant, but this information about the product and your experience with it will be valuable if I decide to. 
|
|
#12
08-01-2019, 08:39 PM
|
||||
|
||||
|
This is not only an exciting model (I love WWI kits), but its a detailed and excellent build thread.
Thanks! DC
__________________
"One does not plow a field by turning it over in his mind..."
|
|
#13
08-01-2019, 09:02 PM
|
||||
|
||||
|
Working on Leaf Springs right now...tedious work.
I'll have a report soon.
__________________
SUPPORT ME PLEASE: PaperModelShop Or, my models at ecardmodels: Dave'sCardCreations
|
|
#14
08-02-2019, 03:52 PM
|
||||
|
||||
|
slow work right now...working on the Leaf Springs.
There are 5 springs in total to assemble. Each has around ten spring leaves. And each has some very small add-on detail parts. Its all very simple and easy...but tedious, because there are so many parts to prepare and assemble. But, its got to be done. This is the three springs that make up the rear suspension. The rear of each axle Leaf Spring is mounted to a third cross mounted leaf Spring. Not sure how they came up with this arrangement...or why they didn't just add more leaves to the main springs. I'm guessing it delivers a smoother ride when the vehicle is under-loaded. Each set of paper springs requires scoring each pair of leaf, cutting them out, and folding them over. Once glued, you have a set of stacking leaves. 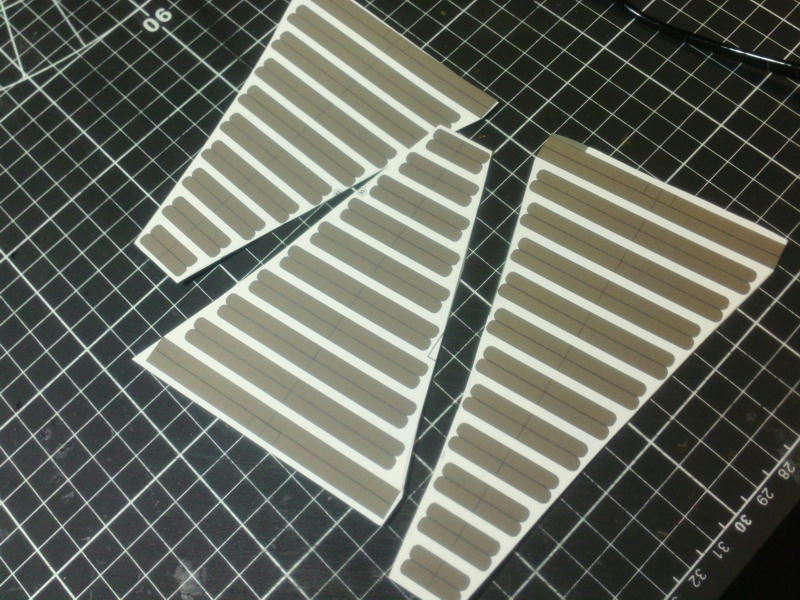 ... Assembly is real simple, but the only drawback to the folded leaf method, is each leaf can end up with a slightly thicker edge (on one side...the folded side) And if the leaves are stacked all the same way, with the folds on one side, the spring ends up leaning (crookedly stacked). Best way to combat this, is slice off the folded edge (and edge colour the cut). But that is an extra step...and the spring gets slightly narrower. I cheated. I ran a scrap sheet of cardstock through the printer, and printed a field of solid green. Then I glued it to the backside of the sheet with the leaf Spring parts. Now, I will cut out only one of each of the spring leaves (it will be two layers thick, and green on the reverse. Both edges will be fresh cut edges that I can colour. And my Springs will be full intended width. 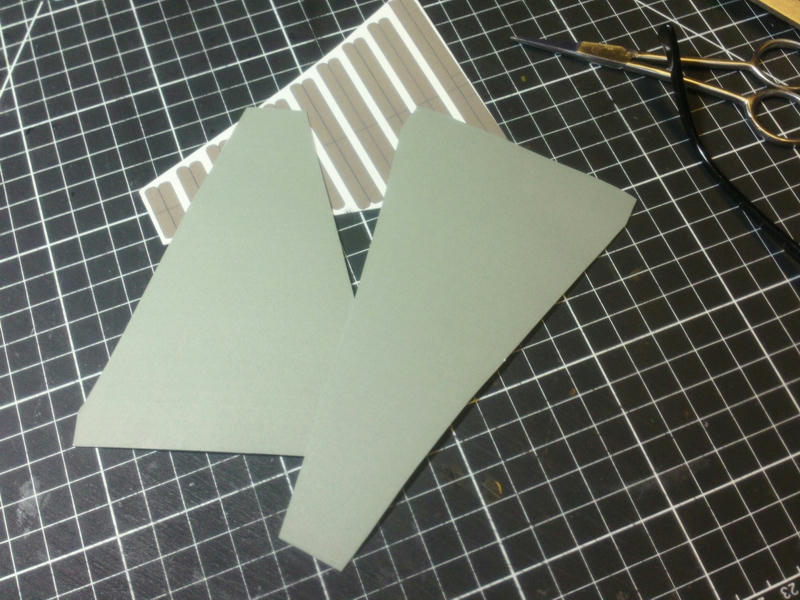 ... Anyway...the end result is the same... a set of individual leaf springs, that will be stacked and shaped into the proper Spring assembly. Here they are, ready for stacking. 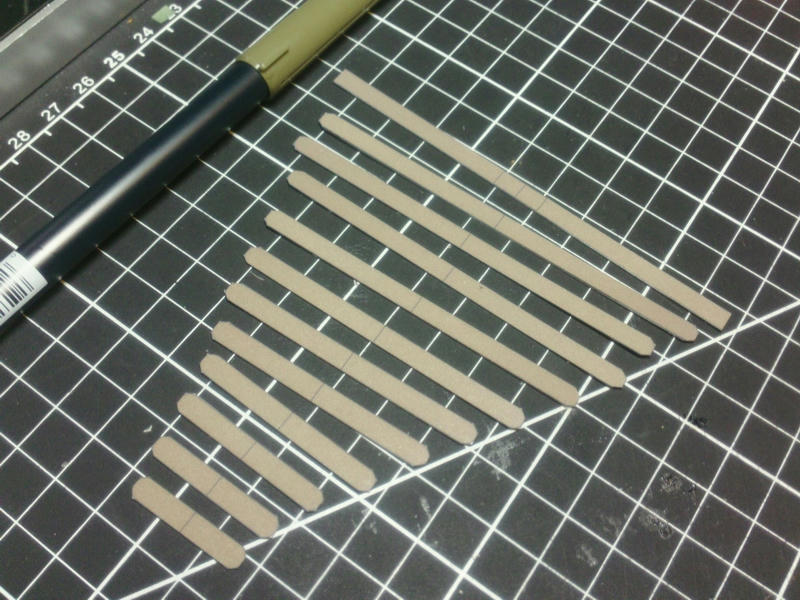 ... Here are the three templates, that can be used to shape the springs during assembly. I made the mistake of gluing the card printouts to some 6mm corrugated cardboard. I should have used something more solid. 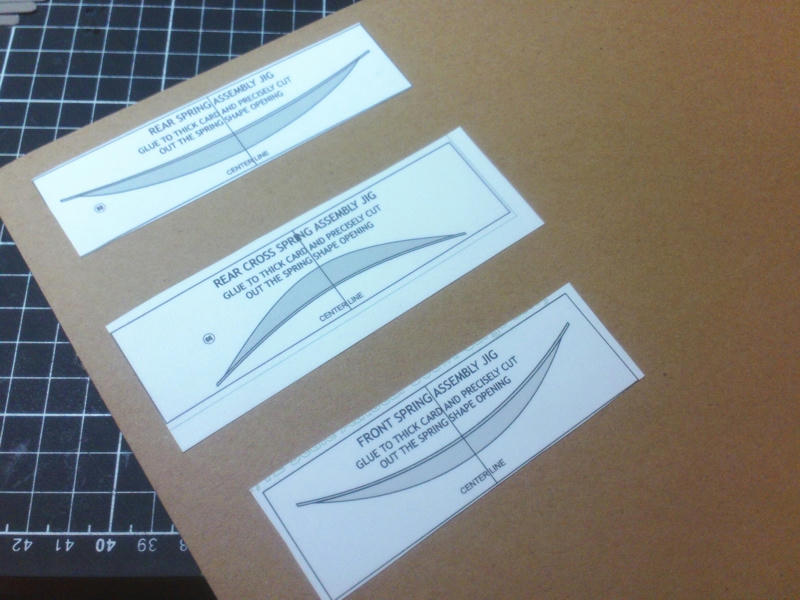 ... Cutting out the spring shapes precisely was impossible. The corrugated card tears and collapses and deforms. Luckily the template cutout need not be that precise... you only need the basic shape to form the Springs. 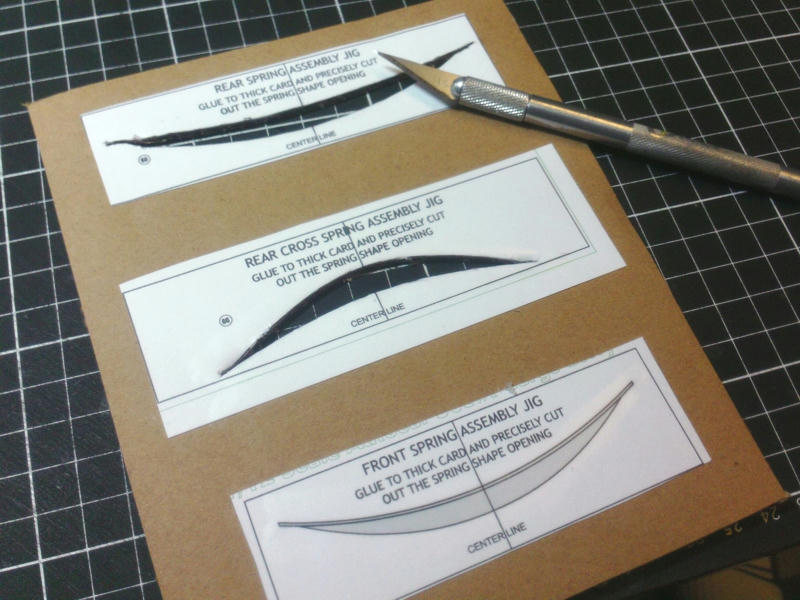
__________________
SUPPORT ME PLEASE: PaperModelShop Or, my models at ecardmodels: Dave'sCardCreations
|
|
#15
08-02-2019, 03:53 PM
|
||||
|
||||
|
Here is my set of Leafs, preformed and ready for stacking.
I referred to the template and gently curved each leaf, close to the shape they need to be. 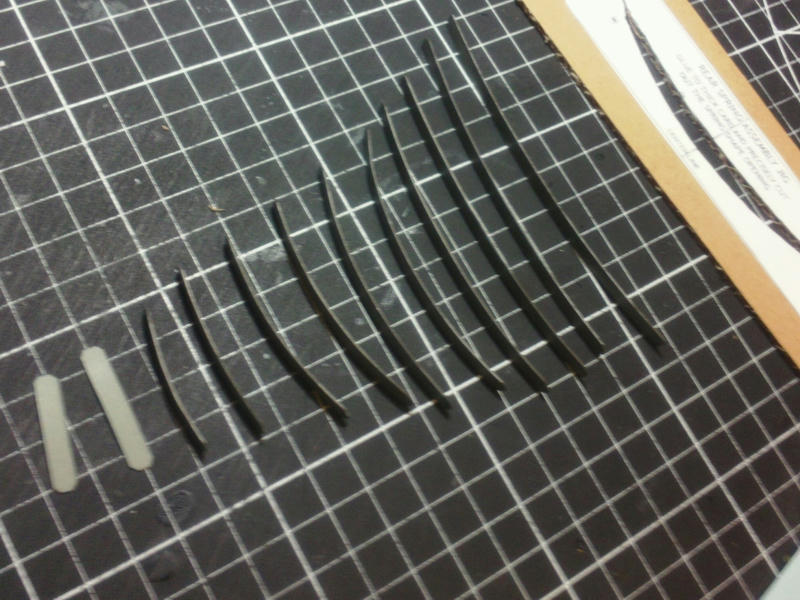 ... Now, I will stack and glue the springs...but only gluing the centers. Gluing all the way across might result in a stronger spring, but since the spring still needs to be shaped, I figured it might be better to allow the spring to flex more easily. Anyway...  ... I keep referring to the template, and try to match the shape, until all the springs are glued together. Then force it into shape to fit it into the template. Leave it there to set up while I work on another spring. 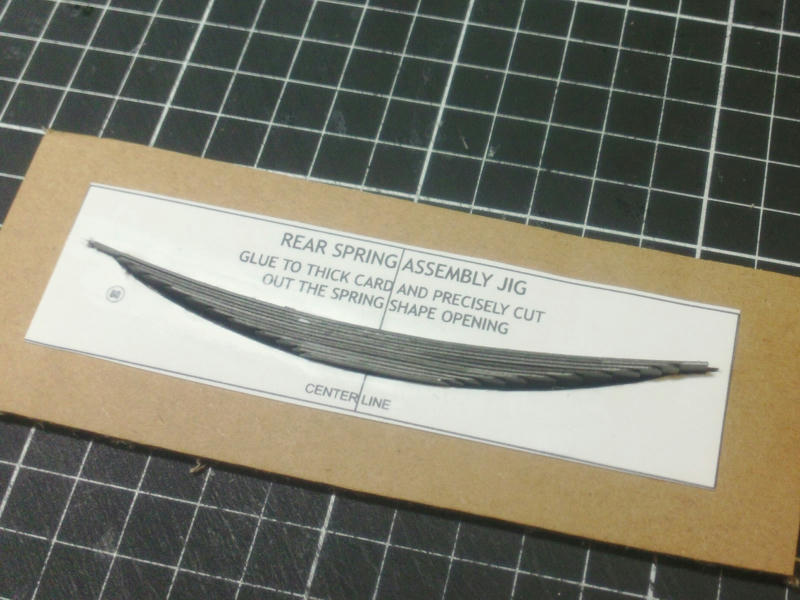 ... Lastly, after the springs are each assembled, I will coat the springs in CA Glue. Actually, while the spring was in the template, I carefully applied glue to the sides of the Spring, being careful not to glue the Spring to the template! The glue appeared to seep between the leaves, maybe because they hadn't been completely glued together? Hopefully this make the springs solid enough to retain their curved shapes over time. 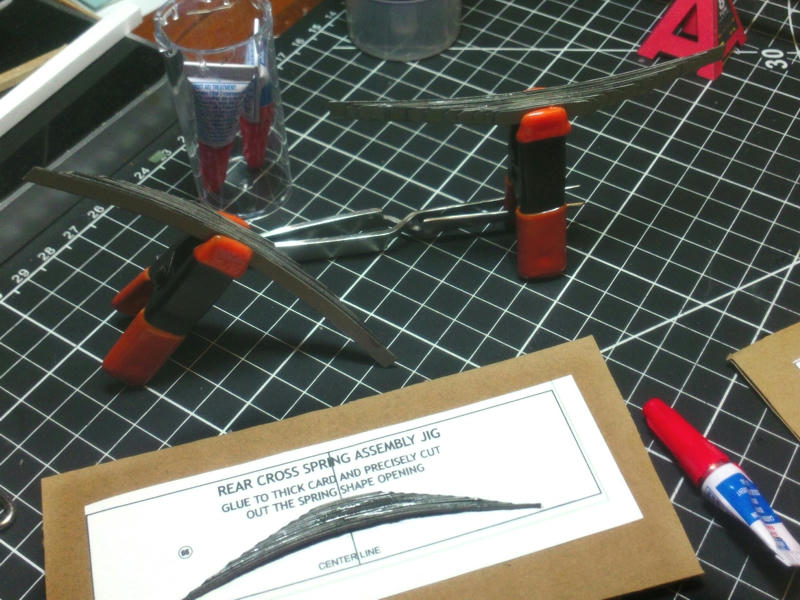 ...
__________________
SUPPORT ME PLEASE: PaperModelShop Or, my models at ecardmodels: Dave'sCardCreations
|
| Google Adsense |
|
#16
08-02-2019, 03:53 PM
|
||||
|
||||
|
Now that all three Rear Springs are assembled, I start work on the connecting shackles.
These are shackles at each end of the three springs. They are connected like Chain links, and are free to move around. I guess you call it a "floating connection"? 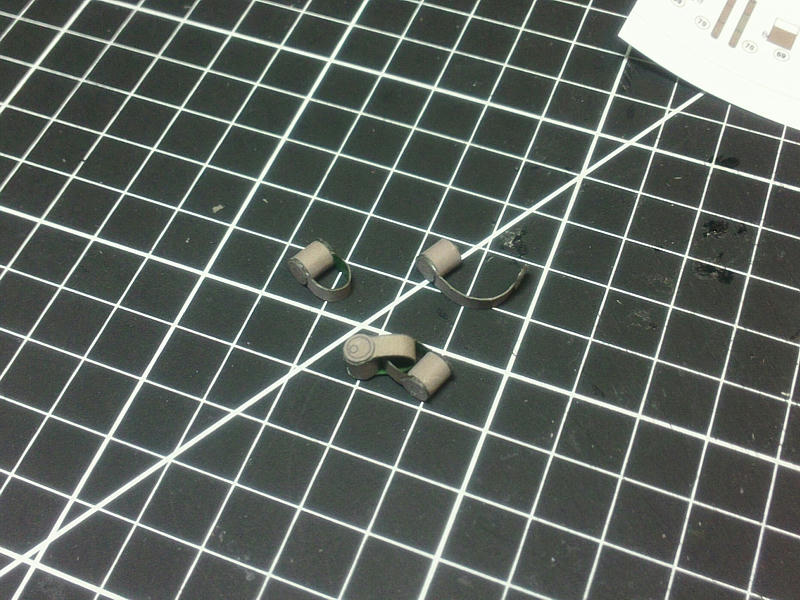 ... Other parts that have to be attached to every spring are small straps and the center buckles and hanger bolts. Lots of tiny bits...tedious cutting...careful edge colouring... I keep losing bits in the carpet, or in the wastebin! lol I keep having to cut new ones...luckily I printed extras! Once I get all these bits on, I'll assemble the three springs onto the Frame and attach the rear axle. Then, focus on the front springs. 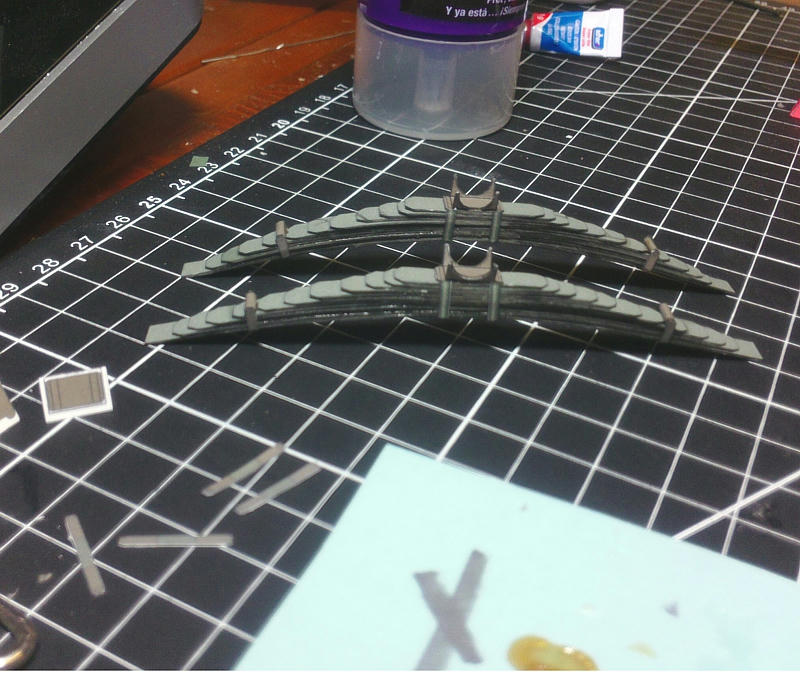
__________________
SUPPORT ME PLEASE: PaperModelShop Or, my models at ecardmodels: Dave'sCardCreations
|
|
#17
08-02-2019, 06:25 PM
|
||||
|
||||
|
I watched you make leaf springs for the Field Artillery Tractor.
You have this technique mastered. Lots of work, but you get highly detailed assemblies.
|
|
#19
08-04-2019, 12:58 AM
|
||||
|
||||
|
That's some real dedication-springs!
__________________
"One does not plow a field by turning it over in his mind..."
|
|
#20
08-07-2019, 11:44 AM
|
||||
|
||||
|
Now that the local Military Museum Open House day is behind me,
and I have all the photos and measurements I needed for the Gun Tractor Limber model, I am restarting work on that. As such, this Lorry build has taken a backseat. But, whenever I get the chance to sit down in front of the TV, I'll put in some build work and report. This past Monday, I managed to get the rear Springs finished and installed onto the frame. Starting with the rear "cross" Spring...which is glued to the rear Frame member first. Note, the shackles already attached to the Spring. 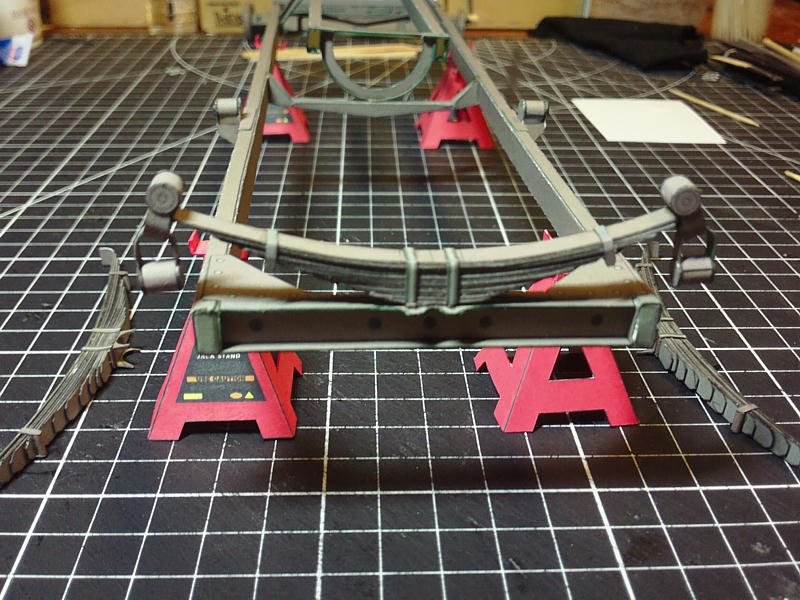 ... Once the rear spring is securely glued to the frame, I can fit the two main Leaf Springs. But first, I preshape the ends to better fit the shackle mounts. *In this case, I curved the Spring ends TOO much...they only need a very slight curvature. So I had to straighten them back out when installing them. 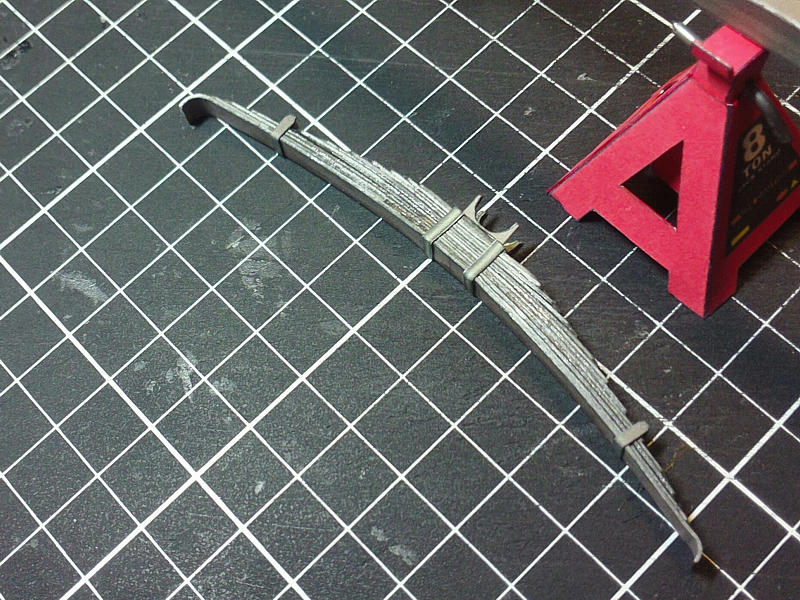 ... Glue is applied onto each shackle point (front and rear) and then the Spring sits down into place. With the frame upside down like this, gravity helps you place them. They only need some pressure at each contact point to get good glue adhesion. If the Springs are arched a bit too much, as mine are, they will be short. Note how the rear shackles are angling forwards to meet the Springs. This is not a bad thing, because once weight is applied to the chassis, the springs will begin to flatten out. In fact, if you haven't applied enough glue to the springs, they will collapse fairly quickly under the vehicle weight.* *I found this out with my Armoured Car this past weekend). After 5 years sitting on the shelf...and with all the handling and transporting to shows... the Springs have severely sagged, and the vehicle sits too low. I have since blocked the springs to help support things. I guess this is a disadvantage of making leaf springs out of paper, instead of steel!  ... The rear axle will mount to the rear Springs like this (photo), but first I must finish the rear Wheel hubs and Brake Drums. In this case, the axle appears to be square enough...not perfect...to continue with frame assembly. If you waited to glue the axle mounting brackets, you could align the axle more precisely on the frame. 
__________________
SUPPORT ME PLEASE: PaperModelShop Or, my models at ecardmodels: Dave'sCardCreations
|
| Google Adsense |
 |
| Thread Tools | |
| Display Modes | |
|
|


 Linear Mode

