


|
|
|
#111
 11-10-2019, 02:06 PM
|
||||
|
||||
|
Quote:
Thanks - I guess the Australian Army didn't have a requirement for long range fire or anti-tank use since most of its combat post-1941 was in the jungles of New Guinea. Did South Africa manufacture the 25 Pounder during WW2 as the Australians did? Regards, Charlie 
|
|
#112
11-11-2019, 12:18 AM
|
||||
|
||||
|
To be honest, I actually don't know - but probably it is very very likely as South African was a major supplier of arms, munitions and armoured vehicles during WW2. The gun also had its own designation (G1)
Two interesting items supplied by South Africa: - 2.5 billion cigarettes for the Allied Forces - 768 million rounds of .303 rounds ammunition - 45% of those used by the Allied Forces. - 2.5 million mortar bombs - 12.5 million boots - 2.2 million tons of vehicle spare parts. In terms of the 25 pounders (90mm), these are still used here by reserve regiments and were used actively in the various bush wars. A number were also provided to Rhodesia, in addition to the 25 pounders the latter had.
__________________
The SD40 is 55 now!
|
|
#113
11-16-2019, 09:43 AM
|
||||
|
||||
|
Thank you guys, for adding to the information about these Guns.
Its nice to learn a bit more about the subject, other than "heres a model of one". For those of you that can't understand why my posts read like novellas.... I'd like to explain my process. I'm not one for posting a photo and saying "look, this is what I did" and thats it. You're going to get a detailed explanation of how it all came about, my design process, or just how I feel about it. Don't want to read it? Can't read it? Then just look at the pretty pictures and ignore the writings! Its not that hard. Nobody is forcing you to read what I write. But if you want to see my stuff...this is how it works, this is what you get. This is how its always been. Stop whining about it! lol For the rest of you, I hope you take away something more than "dave is longwinded and boring". .............................................. I'm still holding off on permanently fixing the Gun to the Carriage Cradle since removal of the Gun allows me access for more design and test build purposes. But I'll be glad when its properly fixed down! One of the things that needs to be fitted to the Gun before it is installed is the Rack and Pinion Gears that raise and lower the Gun. I was actually considering some real teeth on these gears and a meshed assembly. I even thought about connecting a real Cranking handle so the gun could actually be raised or lowered by the gears. (As it is, the gun pivots manually) Had the scale been much larger, it might have worked! (Like maybe 1/4 scale!!) At this scale, the gears are less than a millimeter thick...the width of the gear rack is only 2.5mm. In the end I created a simple Rack and basic bracketry that attaches it to the Gun. The pinion gear assembly is much simplified, attaches to the Frame, and there is a sufficient gap between the two to avoid any friction. 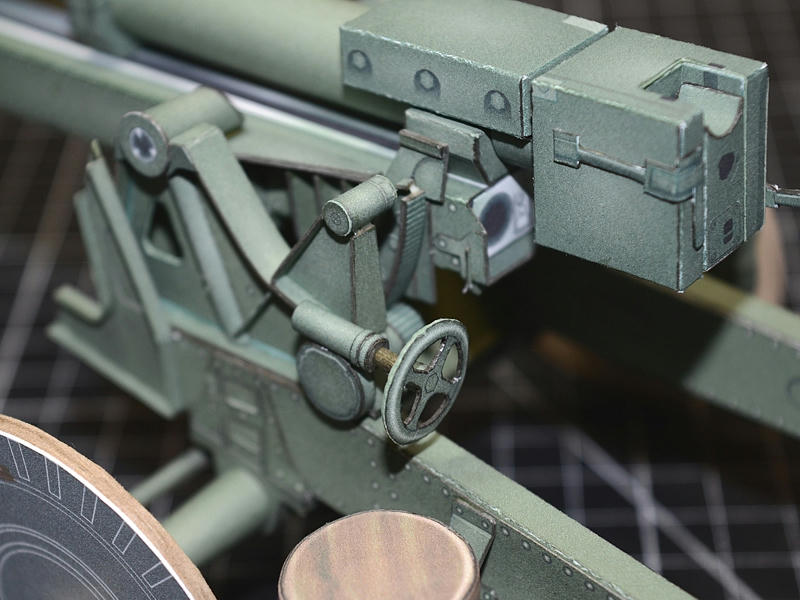 ... It was at this point I found the gun would not elevate completely!! The rack was contacting a lower under-carriage component when the gun was fully elevated. dammit! Did it raise enough though? I checked, and sure enough this Gun has a very wide range of elevation. -5 degrees below horizontal, up to 45 degrees vertical/elevated. I'm not even sure the front Shield allows for that much range, but I was forced to modify the frame. (Unshown) I modified the box Frame spreader component that is underneath gun...made it shorter. I had to cut apart the frame and install the new parts. Everything got a little sticky and tense (lol) but I managed to perform the surgery with minimal scars. Now the gun elevates to about 45 degrees, no problem! 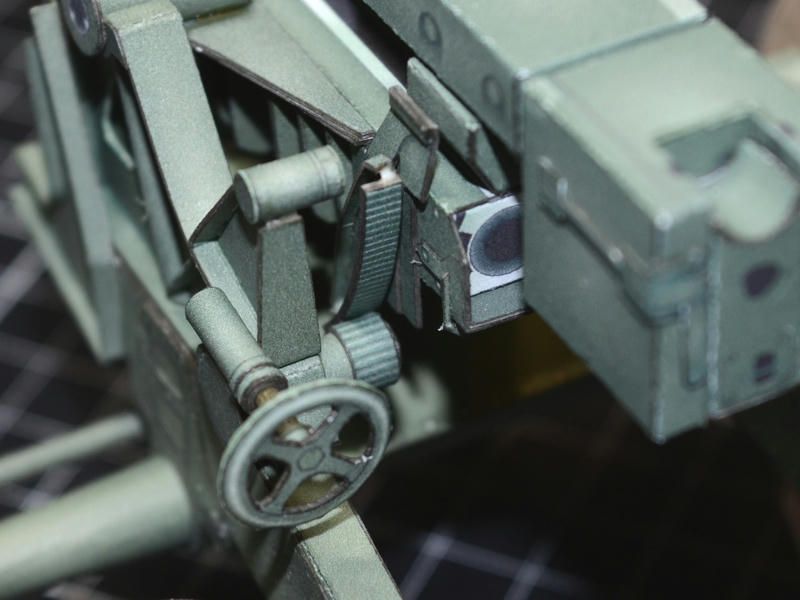 ... Continuing on, I had to figure out what to do with the Gunners aiming hardware. The gun has an elaborate set of mechanicals for adjusting the Guns firing position. My first problem is I have no real understanding of how it all works, or how it all goes together. I don't have clear photos of every possible angle...and some things were still unclear to me. And not all the guns in all the photos had the same parts...some parts were missing/removed... and some were just different versions/models of a similar thing. And then, the fact that the parts move around (with the gun or by operators movements), made each photo more confusing. I'm also trying to create something thats simpler...less parts...more representational than accurate. I tried to narrow it down to the most important visual elements and design it in such a way that "mortals can build it". This is what I came up with. 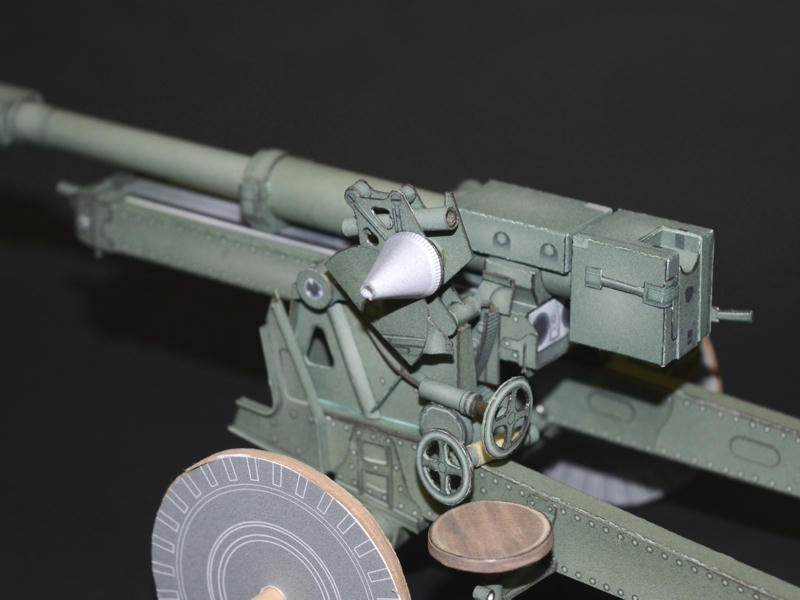 ... Theres only about a dozen parts shown here. Three flat(ish) plates that connect together with some small rolled tubes. That conical aiming device also connects everything ...and then theres the two Crank Controls. (One raises and lowers the Gun, the other twists the base of the gun laterally about 4 degrees. I guess its a fine tune adjustment that saves rotating the entire Gun Carriage?) Its not perfect, or technical accurate, but I think it gives you something visual and an idea of some of the mechanisms and mechanical components. Once the front Shield is in place, some of the view will be hidden. And once again, I am trying to keep the model simple and buildable. The builder could easily add more details if they wanted to. Here's a couple more angles with the gun raised and lowered. 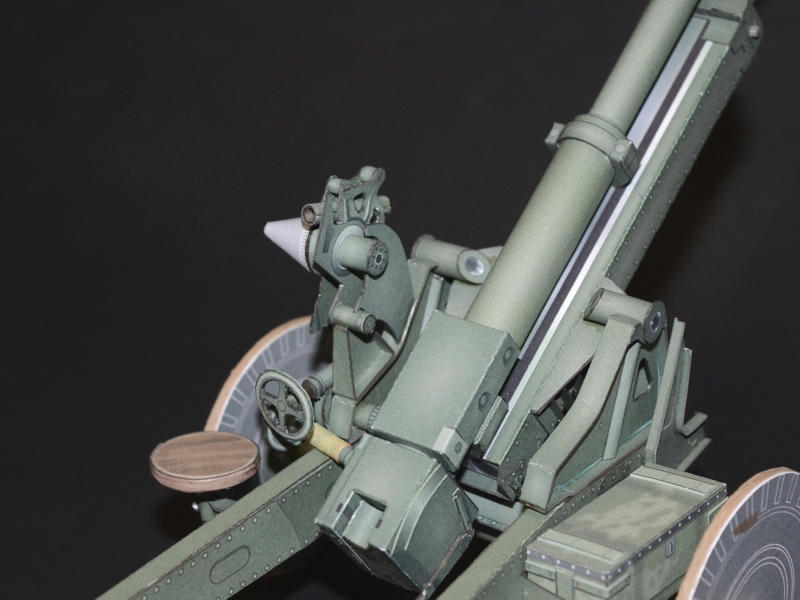 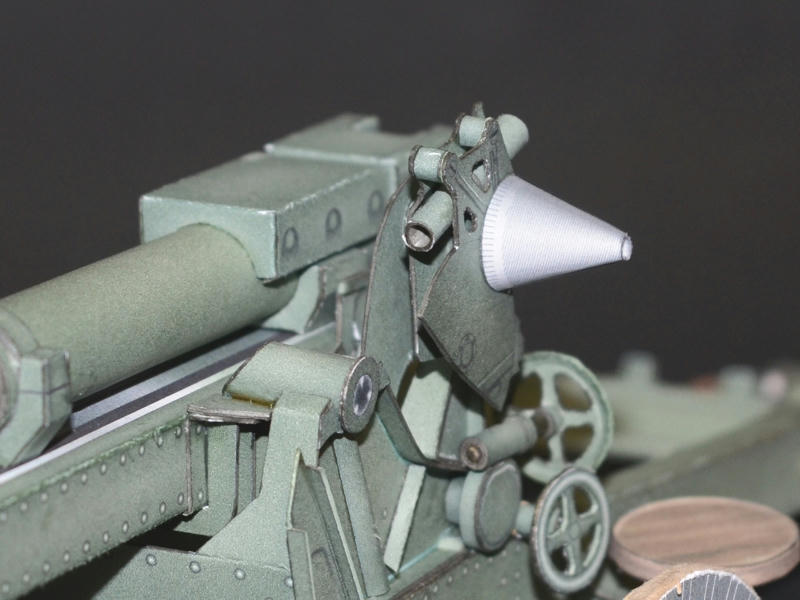
__________________
SUPPORT ME PLEASE: PaperModelShop Or, my models at ecardmodels: Dave'sCardCreations
|
|
#114
11-16-2019, 10:50 AM
|
||||
|
||||
|
Quote:
For me, Dave's writing is one of the things I look forward to when I break for lunch during the workweek. It is great reading, and it covers quite a bit of territory, from history to some of the lighter things connected to modeling. Combined with the images, builders of his models have a terrific resource to go to. Mike Last edited by rickstef; 11-16-2019 at 12:18 PM.
|
|
#115
11-16-2019, 10:59 AM
|
||||
|
||||
|
Thanks Mike....I wasn't expecting a response, but its very nice to hear the feedback.
__________________
SUPPORT ME PLEASE: PaperModelShop Or, my models at ecardmodels: Dave'sCardCreations
|
| Google Adsense |
|
#117
11-16-2019, 02:23 PM
|
||||
|
||||
|
I'll pipe up too and say how much I am enjoying the designing and build (and re-design, re-building). Frustrating at times I suppose, Dave, but entertaining and educational to follow.
__________________
"It's all in the reflexes."
|
|
#118
11-16-2019, 03:49 PM
|
||||
|
||||
|
The narrative (and associated discussion) is half the fun. The beautiful images are the other half. I think the regular readers all enjoy learning about your design and building techniques and about the actual military hardware the you are reproducing to scale in paper.
Don
|
|
#119
11-16-2019, 04:21 PM
|
||||
|
||||
|
Thanks guys!
__________________
SUPPORT ME PLEASE: PaperModelShop Or, my models at ecardmodels: Dave'sCardCreations
|
|
#120
11-17-2019, 05:13 PM
|
||||
|
||||
|
Dear AirDave:
I am stuck on one of the earlier posts with the simple 2d wheel... So simple so easy get the right height off the ground allowing one to go on with the build without getting bogged down on the D**m wheel builds.. Gobb smacked brilliant, Miles I don't know if Budweiser is still doing your Beer or not
__________________
If man could be crossed with the cat it would improve man, but it would deteriorate the cat. - Mark Twain Notebook, 1894
|
| Google Adsense |
 |
|
|


 Linear Mode

