


|
|
|
#21
 08-25-2019, 07:49 AM
|
||||
|
||||
|
Part of the main box has to be built separate...basically an additional plate added to the rear.
This is the result of the additional strengthened framework. (The frame for the rear doors and other mounting points for various parts.) This is that extra Former part that is to be laminated to 1.5mm... and then wrapped with a "skin". Once the Limber Pole hole is cut, it is glued flat to the rear of the Limber box. 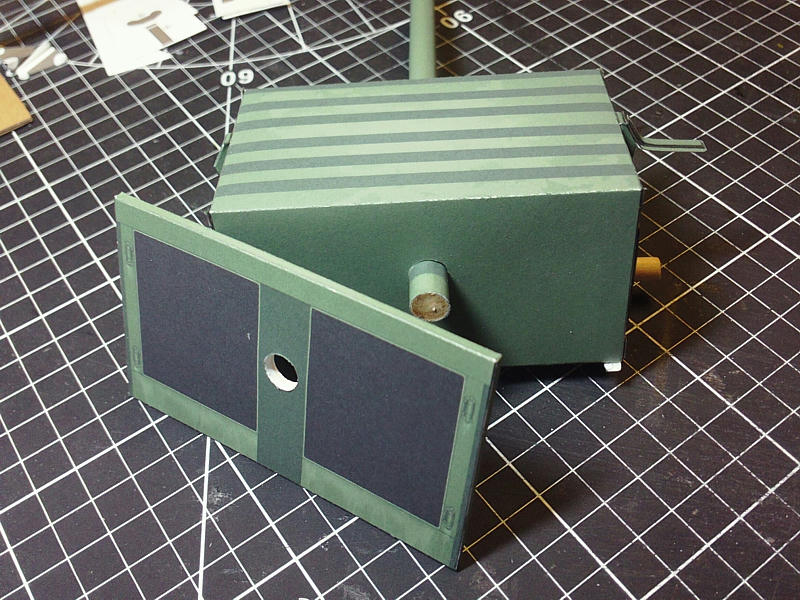 ... In the next photo, you can see I started to wrap the exposed ends of the "axle" dowel to hide the wooden dowel and create the "Hubs". 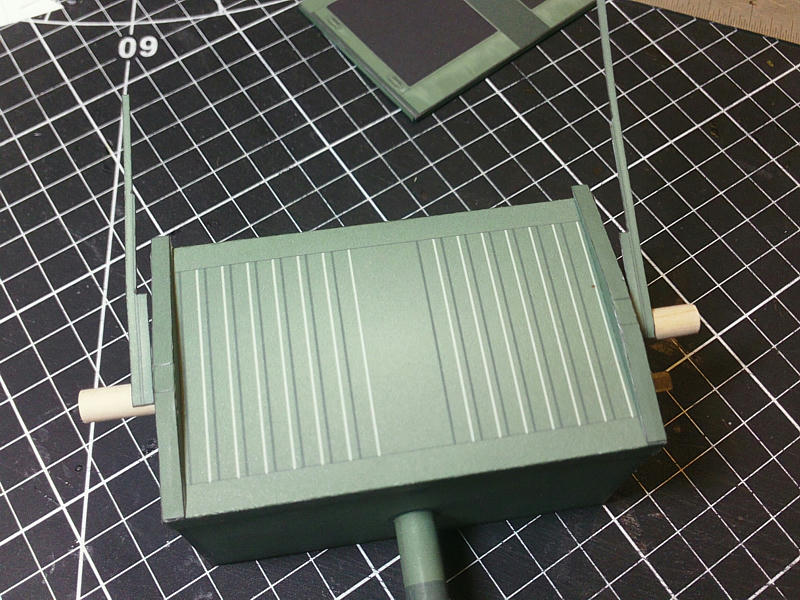 Three layers of wrapping creates a stepped section on the axle dowel (this is the first part of the axle Hub) 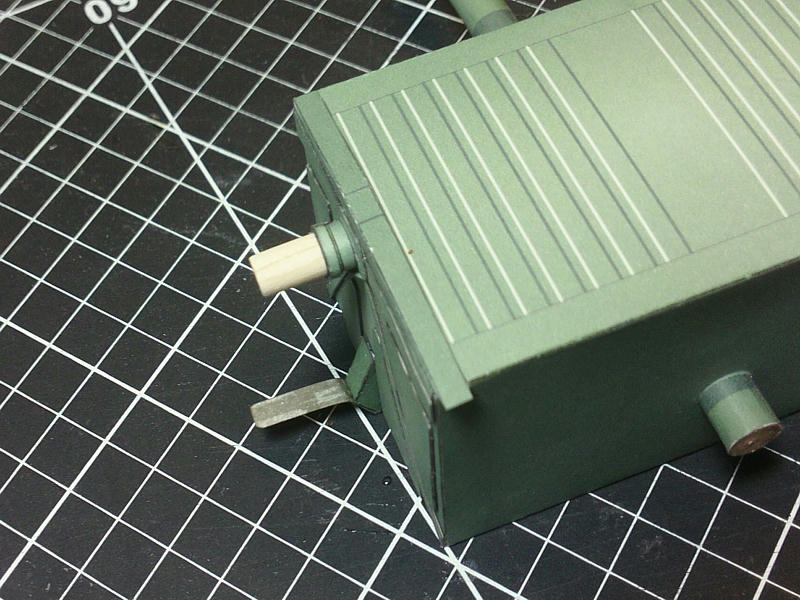 ... Next "hub" part, is the connection to the Drums that support the Road Wheels. Small parts...fiddly bits...much hair pulling...satisfaction. The back of the Wheel Rims will slip onto the wooden axle, and butt up against the Hubs. 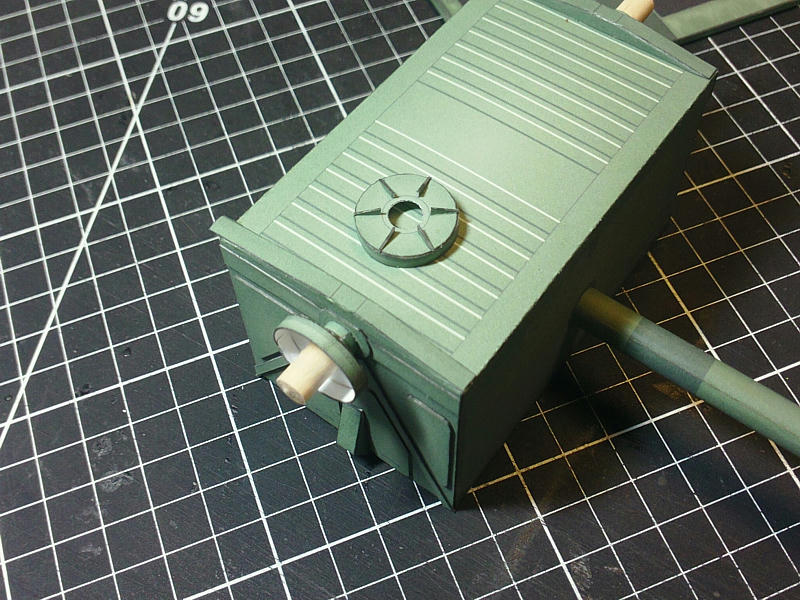 ... Upper Fender brackets assembled and installed. There are three mounting points for each fender...this is the main upper mount from which the fender hangs. And another view of the side panel layering and raised panels. See how my raised sections are too thick? One layer would have looked better. Oh well. 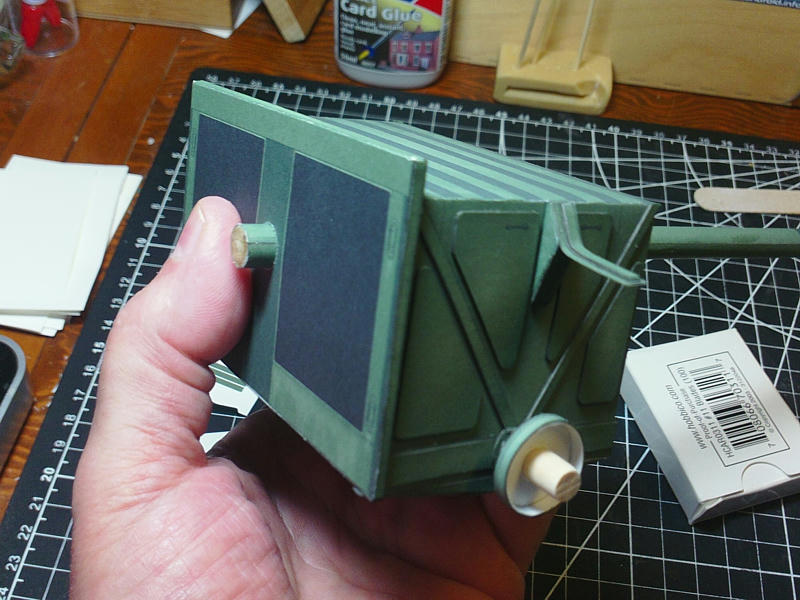 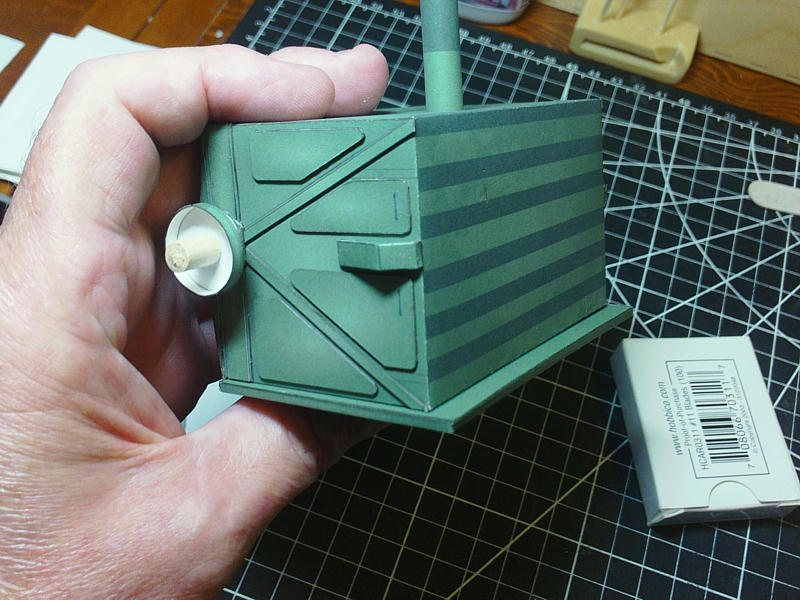
__________________
SUPPORT ME PLEASE: PaperModelShop Or, my models at ecardmodels: Dave'sCardCreations 
|
|
#23
08-25-2019, 02:00 PM
|
||||
|
||||
|
Looking good.
Always a fan of clean precise work.
|
|
#24
08-26-2019, 12:31 PM
|
||||
|
||||
|
...
still building... I struggled with a method for the top of the limber box. Its actually a ribbed panel on the top, with castelated side panels, welded together. But at this scale, forcing the builder to cut out 2mm raised tabs and then score and fold the top panel to match, would be quite advanced (I think). So, I settled on making the "ribs" separate entities that could be assembled more easily and then glued on to the top. There are five of the shorter ribs, and one taller one, to assemble. Each of the shorter ribs are two parts each: a squared tube (former), and a folded exterior skin. 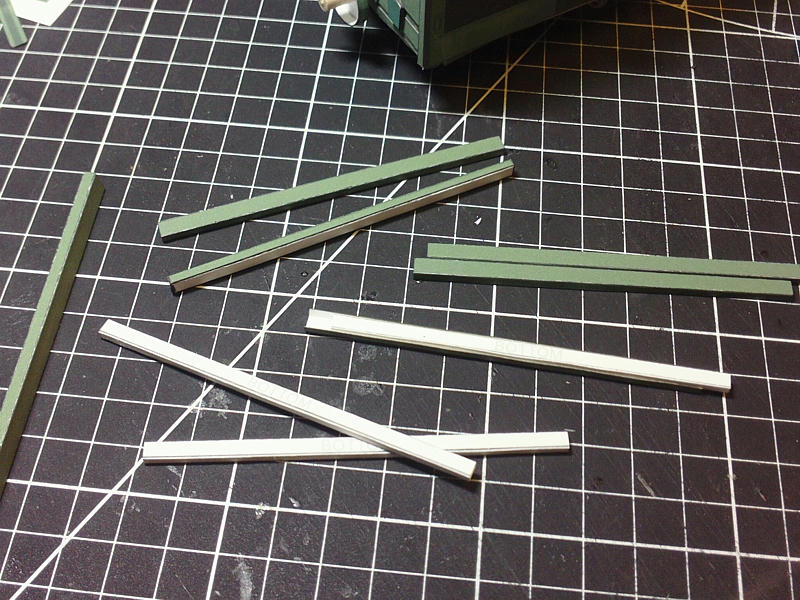 ... If you take your time, and score each part carefully, then fold precisely and glue, they fit together quite nicely...and it works. I set them aside for a day to properly cure before gluing them flat to the top panel.  ... The front "rib" is much taller, and angled at the front. It sort of matches the rear extended panel, to create mounting points for other hardware. It also extends slightly out from the box and is supported by an additional front detail strip. With all the ribs in place, its really starting to look like the real thing! 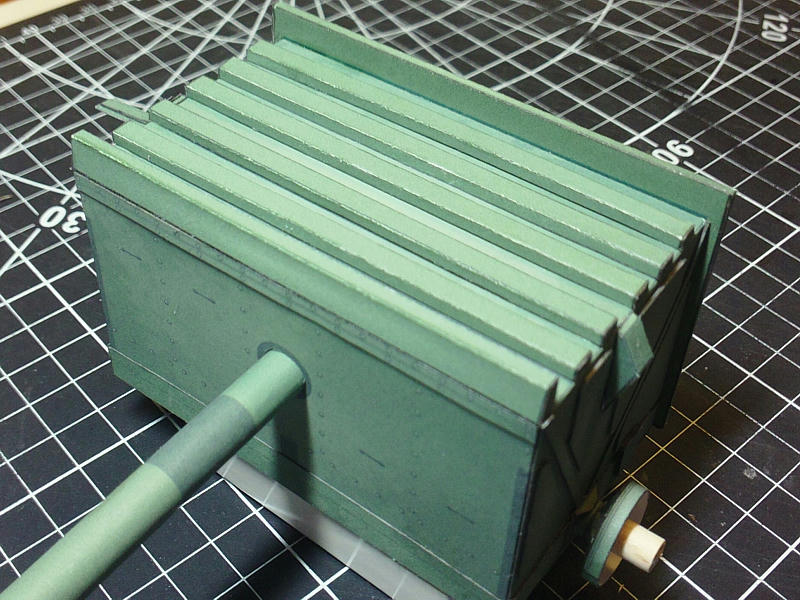 ... More surface bracketry attached...these appear to be strengthening gussets for the rear panel. Once again, its surprising how small some of these parts are, and although these brackets look simple, they have narrow folded sides...its tricky to get a clean score and fold. 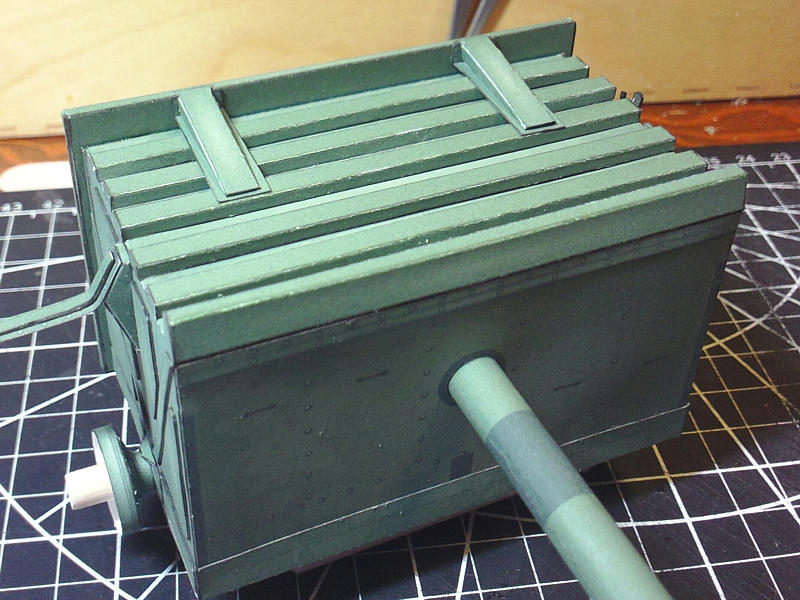 ... 1/16 scale seems big...but some of the bracketry is just too small and complicated. And I hate having to deal with things that have Pins and Metal Rods. From this point on I am simplifying and stylize some things. Like these four braces. 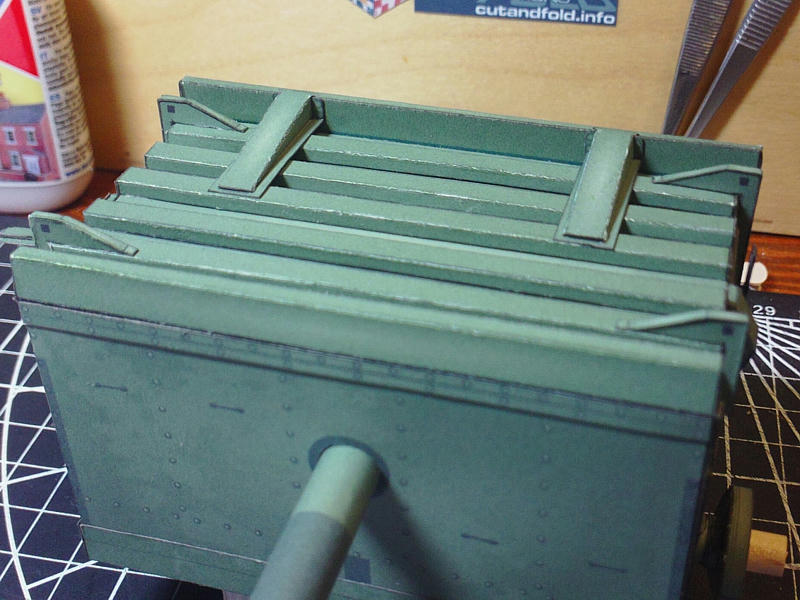 ... And these four corner brackets will have to do...the smaller hardware that is partially hidden underneath will have to be a builders option. Last thing to place on the top (for now) is the base plate for the spare Wheel Hubs. I won't be adding a "spare wheel hub" but the mounting plate is a good feature to break up the area. 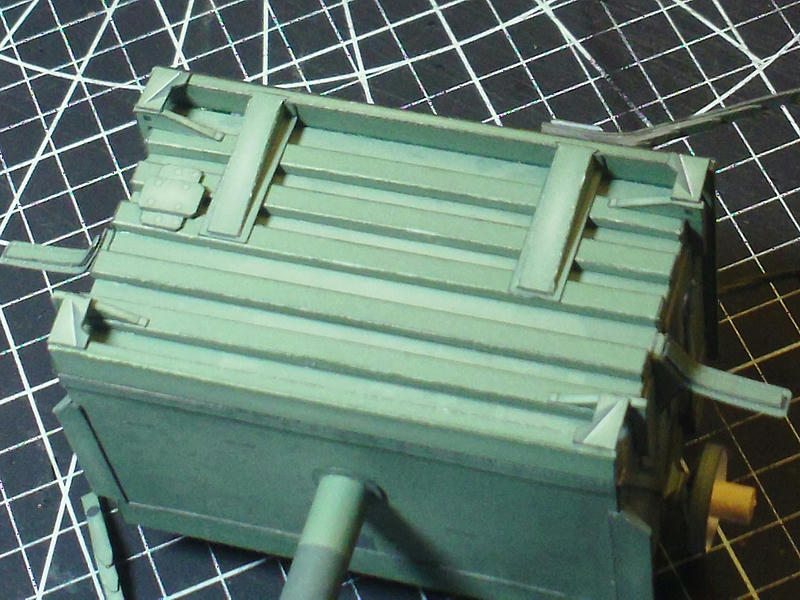
__________________
SUPPORT ME PLEASE: PaperModelShop Or, my models at ecardmodels: Dave'sCardCreations
|
|
#26
08-27-2019, 04:06 AM
|
||||
|
||||
|
Quote:
Remember it's very unusual for artillery pieces to deploy individually - a battery of 25 Pounder guns was 4 guns and back in WW1 many of the combatants used 6 gun batteries. If a target wasn't knocked out or thoroughly suppressed after 100 or so rounds were fired then the field guns were too light for the job and something larger needed to be used. The guns can't stay in battery for long since sound detection will identify the location of a battery when it fires and bring counter battery fire. Regards, Charlie
|
|
#27
08-28-2019, 02:24 AM
|
||||
|
||||
|
That's right Charlie.
Another factor is the limber needs to be capable of manhandling - this limits the size and capacity.
__________________
The SD40 is 55 now!
|
|
#28
08-28-2019, 05:23 AM
|
||||
|
||||
|
Quote:

__________________
Keep on snippin' ... Johnny
|
|
#29
08-28-2019, 07:39 AM
|
||||
|
||||
|
Moving back around to the rear facing panel of the Limber, I start preparing the layered details for there.
First, a top strip and two narrow outer edge strips (already attached in the photo). These are single layer applied directly to the surface. Then I prepare the center bulkhead piece that fits over the Limber Pole...this is double layer, with the small upper hatch detail as a third layer. The two Ammunition Doors are single layer, but with Hinge Brackets and Reflector details added. Note: most restored Limbers have road lights and whatever it takes to make them roadworthy for today's modern traffic laws. I wasn't sure about the originality of the rear door reflectors (WW2 issue?) but I liked the added colour and surface detail. If anyone points out to me that they are completely inaccurate, I can remove them. 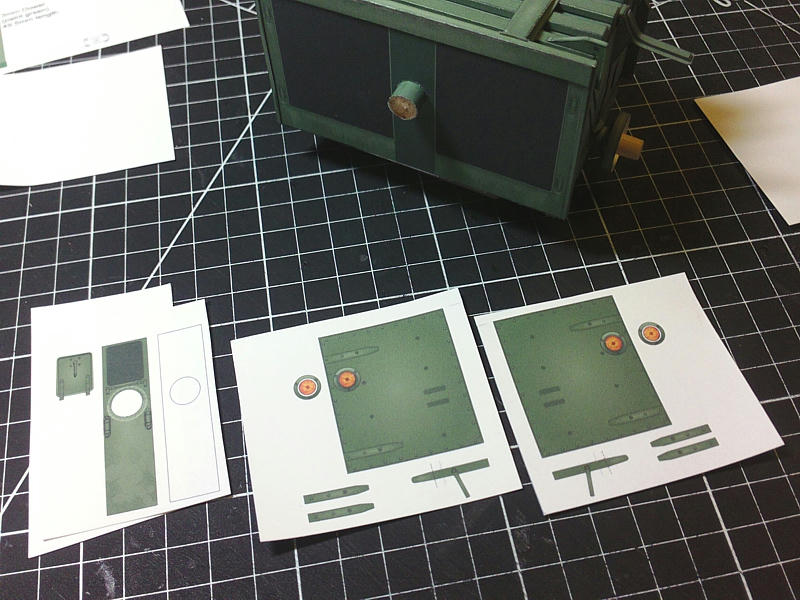 Previously mentioned parts attached, except for the Hinge bracketry...I was still contemplating a change there. Everything is well edge coloured...I am using a slightly deeper green art marker...but the camera flash still tends to wash it out, and make it appear as though edges are bare. I did some extra weathering on this back panel...pulled some of the weathering art from the Field Tractor model. In fact, all the panel colouring and weathering is pulled from that model, so things should match. 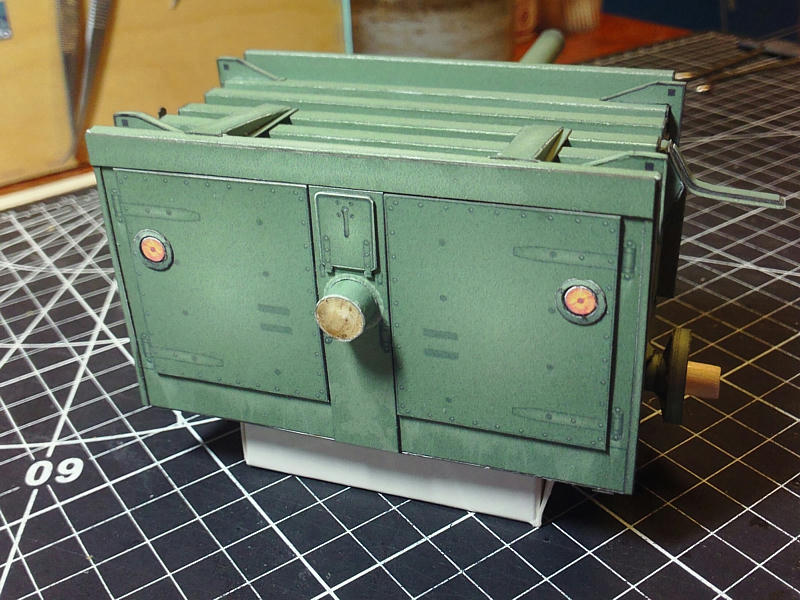 These are the lock-down bracketry for the doors...single layer, folded into shape...with a rolled end to simulate the hing pin tube. Since the artwork is already in place on the bulkhead panel, this should work nicely. 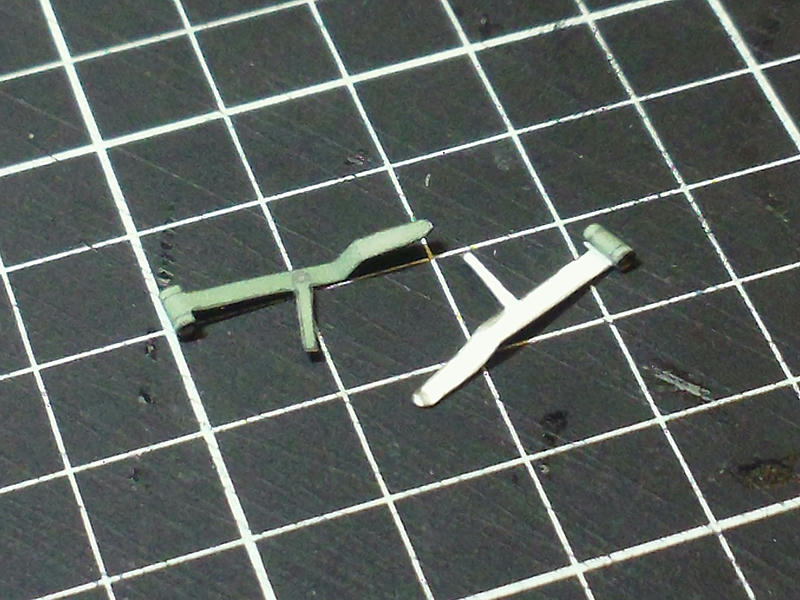 In place, it looks good. I also laminated and cut out the other door hardware, including the pull handles (which are laminated thicker) You can also see the final door hinges which extend across the doors and on to the panel frame. I've also started to complete the rear part of the Limber Pole and the Tow Hitch. First, a cap for the end of the Limber Pole, and then the flat steel extension, to which the end plates are welded. (The Hitch itself is bolted to the end plates) 
__________________
SUPPORT ME PLEASE: PaperModelShop Or, my models at ecardmodels: Dave'sCardCreations
|
|
#30
08-28-2019, 07:48 AM
|
||||
|
||||
|
Last thing for the rear panel, are these leaf spring contraptions.
I honestly have not looked into what they are, or how they function. They seem to elaborate door stops, for when the Ammunition Doors are opened. Odd. I wonder if they are an anti-jack-knife contraption? Anyway, quite an elaborate construction...five springs of various lengths are constructed of double layer card. The main Leaf is wrapped at the end, around a 2mm pole (made from a dowel wrapped in paper). At first I just painted a wooden dowel, but i didn't like the colour. So I added a paper wrap. The builder can choose to create this part any way they like. Once the main leaf is glued and secure, I attached the other smaller leaves, and then bent everything into shape. (I'll include a paper pattern for this) 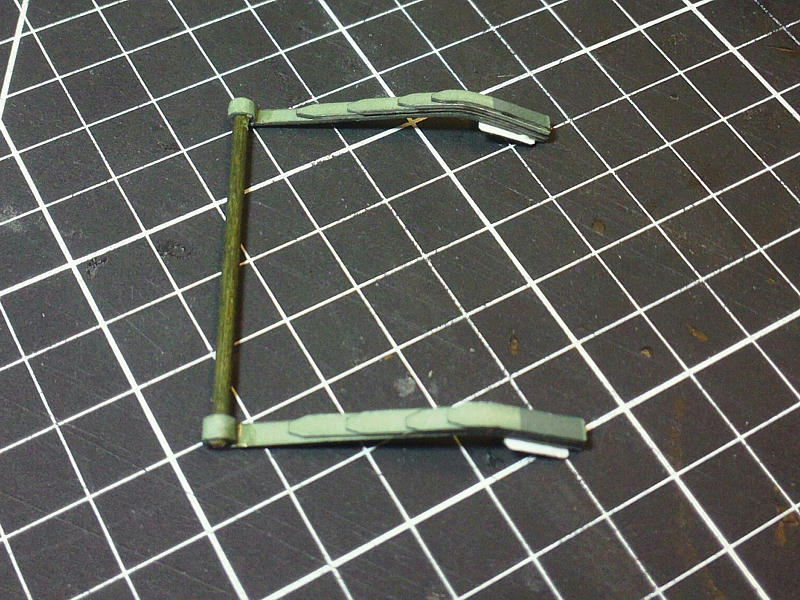 I soaked some underside areas of the springs in CA glue to help them hold their shape. The two spring contraptions are attached flat to the rear panel, with the added top plates. After they are completely secure, I bent and twisted them for the best look. Paper tends to do funny things when layered and glued! lol You can also see the Hitch mount plates installed...this is the first time I added some bolt details. It really needed it here. I always include extra 3D bolt parts in my kits, but I am usually too lazy personally to use them! lol 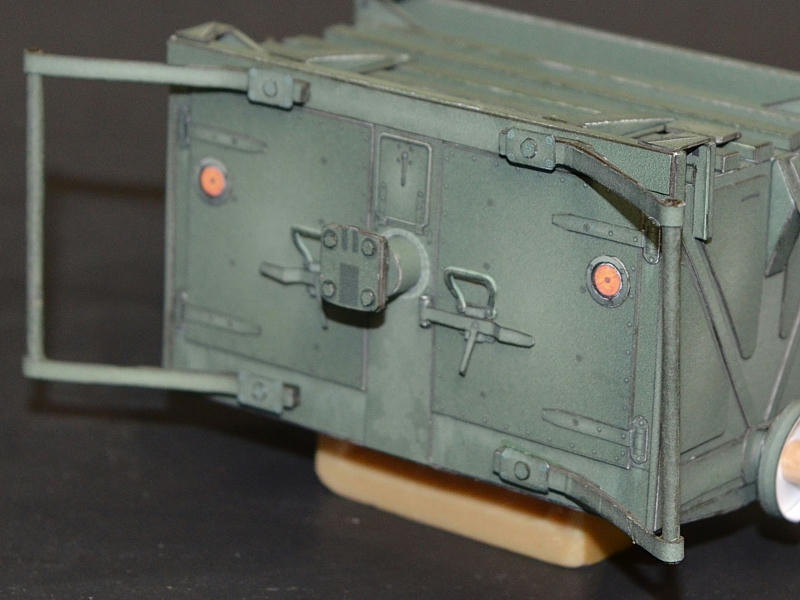 Another view(s) of those springs...as well as the Tow Hitch assembled and installed. The Hitch Hook is the same as used on the Field Tractor, but this Hook is a bit shorter. Which has resulted in a narrower gap for the Gun Trailer tow eye to connect. It may not fit. I may have to trim off some of that angled upper bracket. I will make adjustments to the kit parts to open up the Hook a bit.  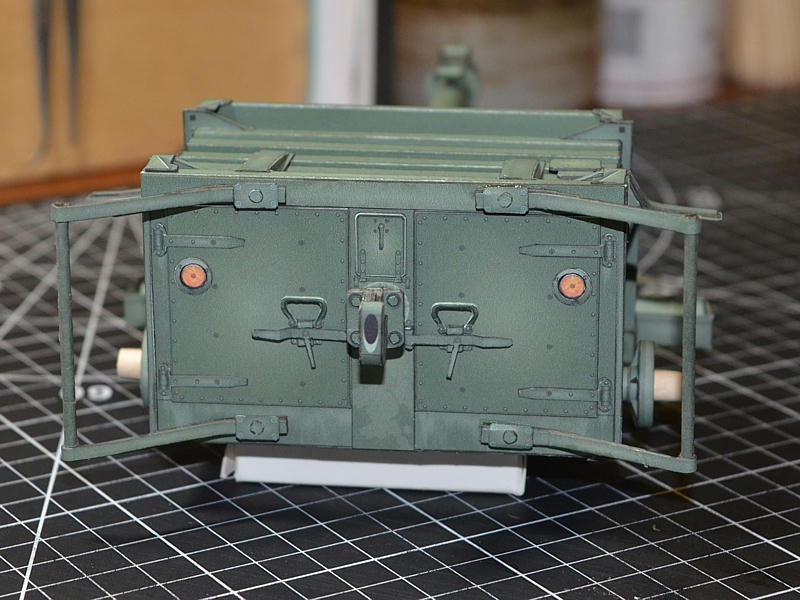
__________________
SUPPORT ME PLEASE: PaperModelShop Or, my models at ecardmodels: Dave'sCardCreations
|
| Google Adsense |
 |
|
|


 Linear Mode

