


|
|
|
#131
 11-22-2019, 02:17 PM
|
||||
|
||||
|
Quote:
I'm one who is always guilty of wondering "why did <he,she, they, whoever, singular and/or plural> do it THAT way?" I am also a recovering perfectionist, and more often than not used to talk myself out of various projects for fear of "not getting it right". Having someone narrate a process, especially a design process such as this is both terribly fascinating and tremendously educational/instructional as well. "XYZ" didn't work- Ok, *why*? Oh, that's why... And here's the fix (after much redoing and redesigning)! I read what I want to, skip some, and come back later to read the rest. Thank you for at least giving us an option, and insight into the design process!
__________________
Glenn 
|
|
#132
12-15-2019, 04:08 PM
|
||||
|
||||
|
Work on the 25pdr has been slow for the last 3 weeks.
I've only designed and added two small detail parts to the frame. (A manual Brake Lever at the right wheel hub, and a locking arm for the gun that is hidden inside the frame.) My next goal is to get the swivel base attached to the underside of the Frame and create and install all the necessary brackets. Then, a few final details. In the meantime I have tried to start work on Instruction pages and assembly diagrams for the kit. I already had parts for the wheels printed, so since I had nothing else to build these last few nights, I decided to go ahead and get those finished. I worked slowly on them, over the last 6 or 7 days, and everything went as planned ...and the wheels are now glued in place. While it almost looks like a complete model, I still haven't secured the Gun, or attached the front Shield...I'll do that once the base is attached. 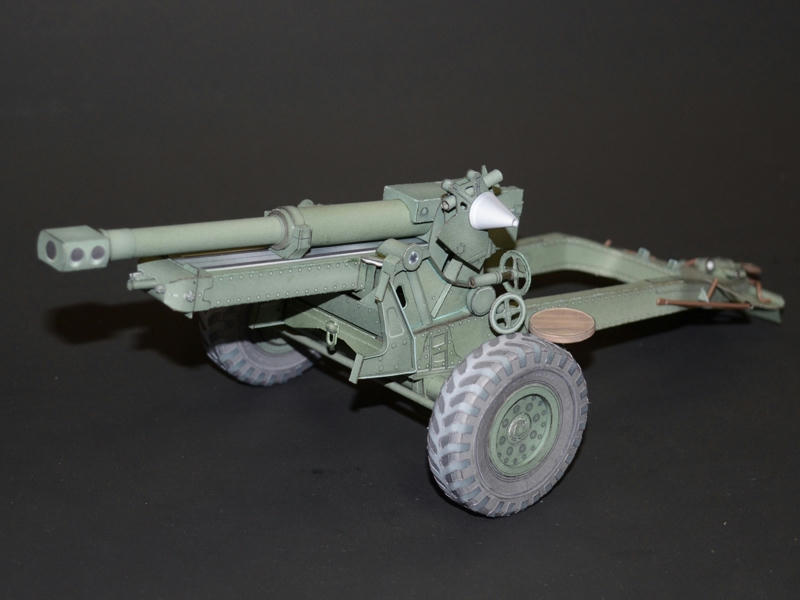
__________________
SUPPORT ME PLEASE: PaperModelShop Or, my models at ecardmodels: Dave'sCardCreations
|
|
#133
12-15-2019, 06:28 PM
|
||||
|
||||
|
Glorious photo of a great piece.
I know you create these things with simplicity in mind, and ease of construction. Even so, from the viewpoint of a non-experienced armor builder, these are highly detailed. I think your thorough descriptions of the work are indispensable to builders. Mike
|
|
#134
01-06-2020, 08:22 AM
|
||||
|
||||
|
okay, time to wrap this up!
In the final stretch now! I already mentioned adding the Locking Arm Mechanism to the Frame...here it is (in the photo below). I decided not to get complicated with it...its not an actual swing arm. At final assembly now...wheels are on...time to attach the Lifting Platform. Starting with the Frame Rail Guides (blue arrows), there is one front abut it helps the builder to attach the platform. The platform fits snugly within the Guide brackets and holds in place while you glue other things. 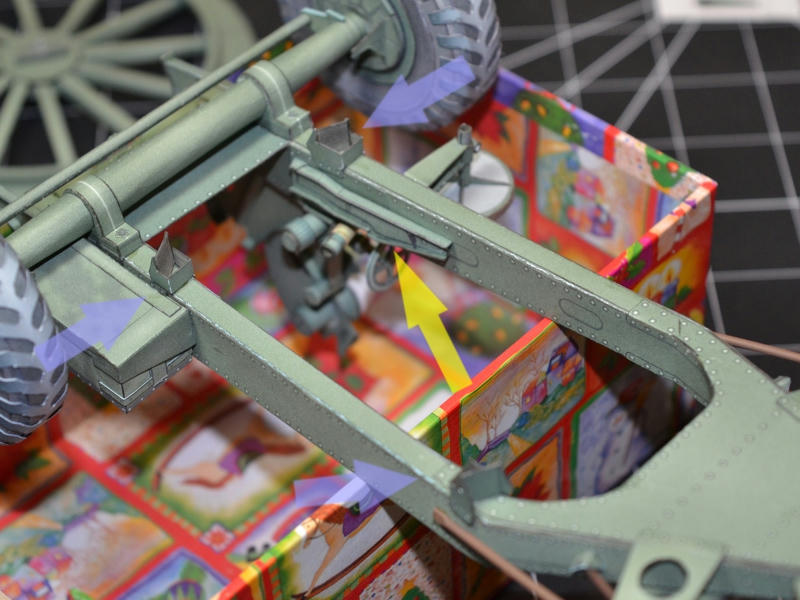 ... Here is the platform dry fitted and hanging on by friction only. I still have to install the Lifting Ladder to the top of the Platform.  ... This is all the components ready to go together... the Lifting Ladder, the Frame rail brackets, and the platform itself. However, I discovered the Ladder was not sized properly and will need to be altered. So I am redesigning and rebuilding it. 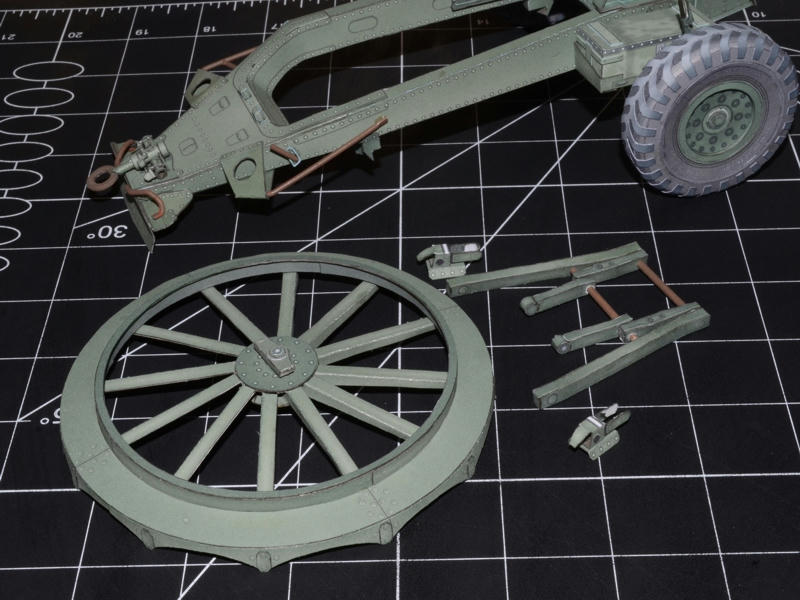 ... A closeup of the Ladder parts with wooden dowel pins painted green. There really isn't a need for articulated parts here, since the Platform is designed to be glued in place, but the bendy parts help during the installation and attachment, and if someone wanted to place the Gun on the platform, the articulated Ladder will be a help. 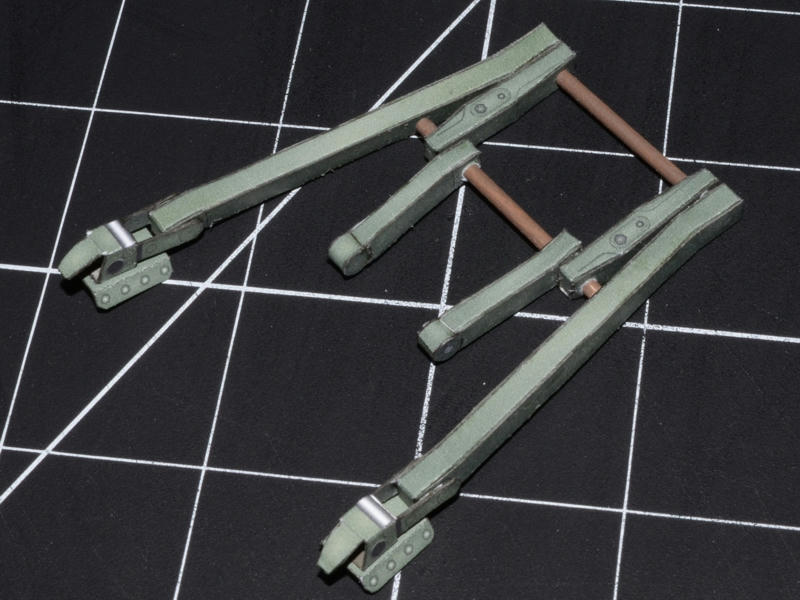 ... And this is all the parts together ready for attachment to the Frame. 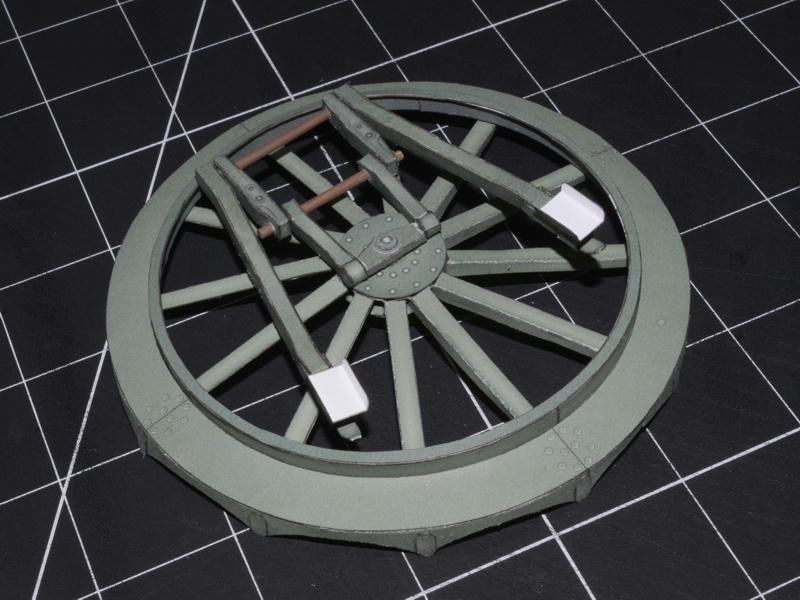 ...
__________________
SUPPORT ME PLEASE: PaperModelShop Or, my models at ecardmodels: Dave'sCardCreations
|
|
#135
01-06-2020, 08:29 AM
|
||||
|
||||
|
From underneath the platform fitted into the Guides...
next step is to glue the Frame brackets. As you can see, there is access from underneath and from the sides to glue them in place. 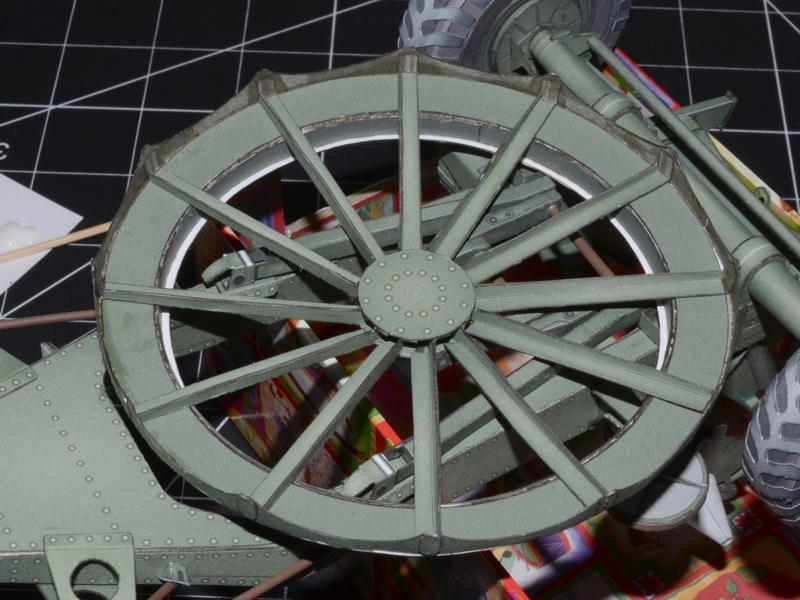 ... The Frame brackets are just pushed up to the frame and glued. Then the sides are glued down. 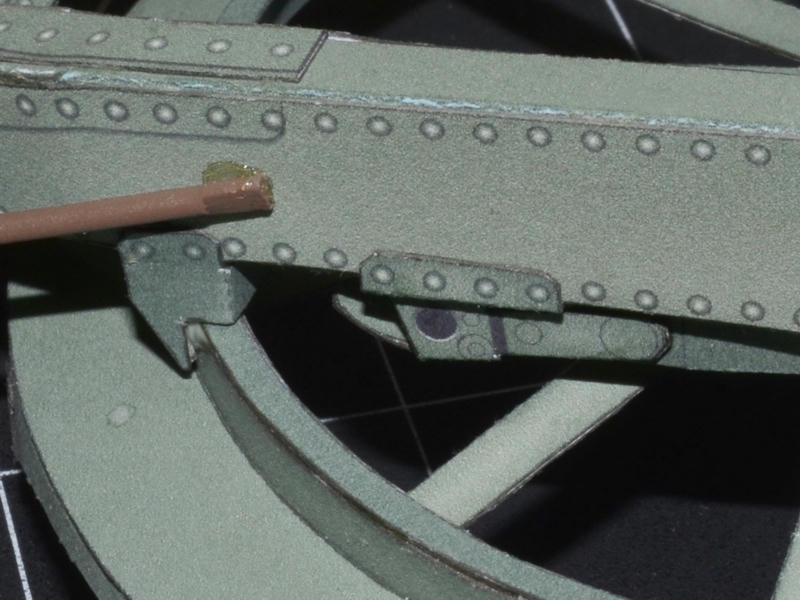 ... Everything in place...time to seat the Gun for the final time. 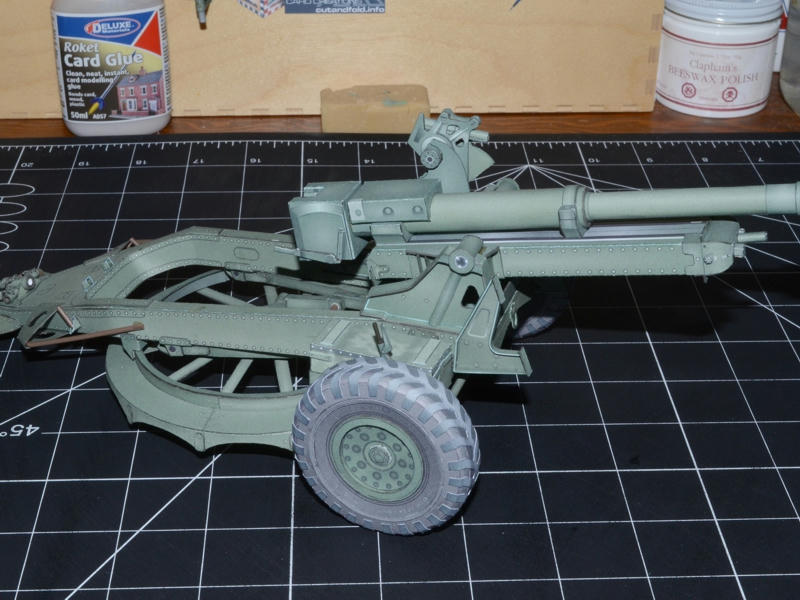 ... A couple more frame details added. There are two (right and left) lifting and locking handles. These connect to the Platform via some chain links and threaded rod, and lift and lock the platform for transport. I'm not going to try to recreate the connectors in paper, I just stuck with the Handles and mechanisms. At the very top right of the photo, you can see the caps installed that lock the gun in place. 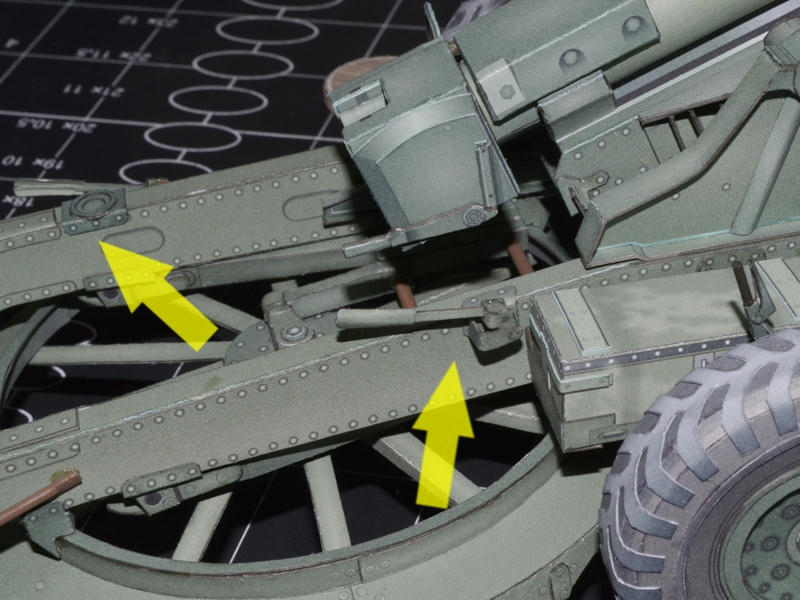 ... The opposite side lifting handle. 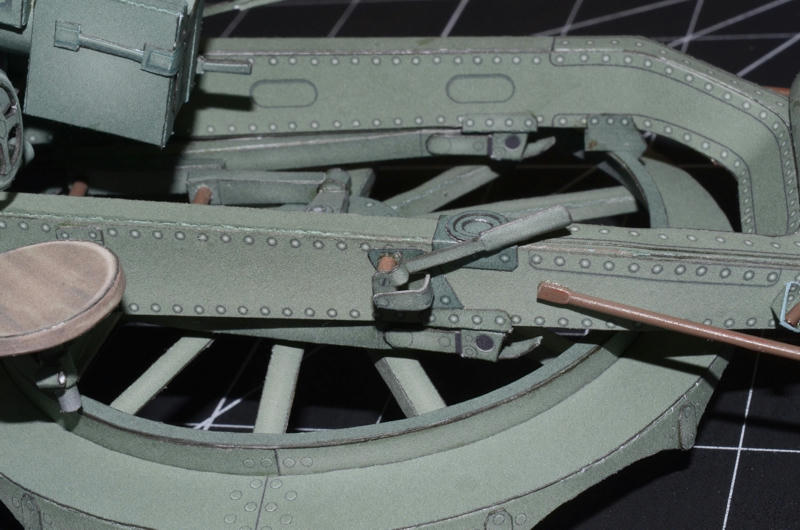 ... This is a skid tray...that is carried in this position and is used under the tail plate when the Gun is on its platform. It acts like a sled under the tail plate allowing the gun to swivel and slide easily on the ground. I have not attached this part, but I will include it in the kit. 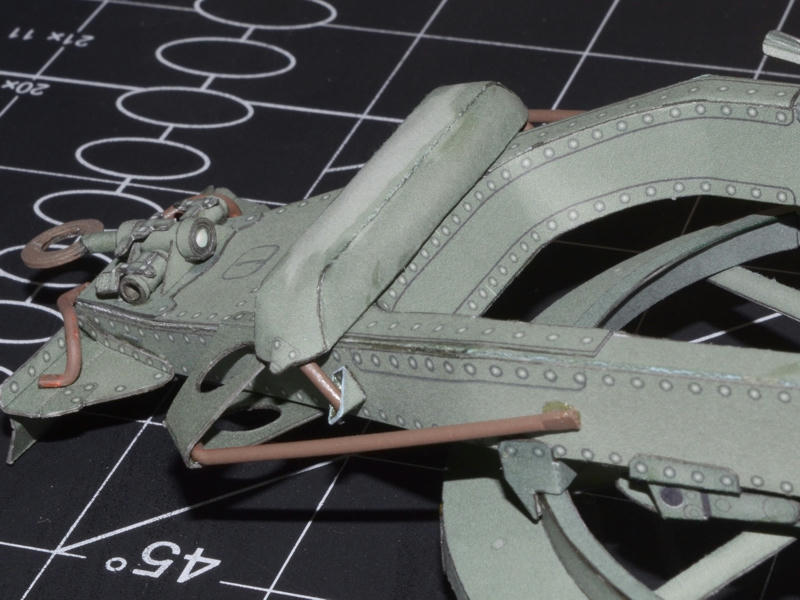 ... One more Frame detail and thats about it. There's probably more things I could add, but I have to stop somewhere. Time to focus on completing the Instruction pages. 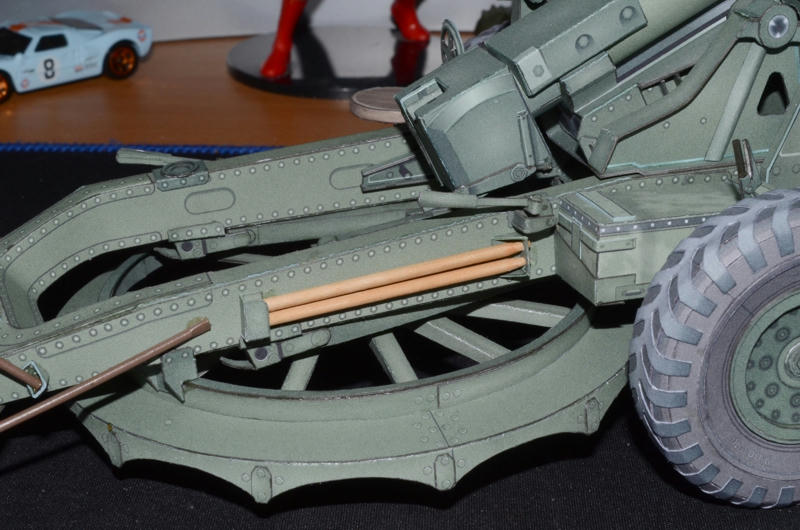 ... The Limber and 25pdr in 1/16 scale. In a straight line: 50cm (19.5") long. This will be the second kit...standalone, or as an accessory to the Ford Tractor. 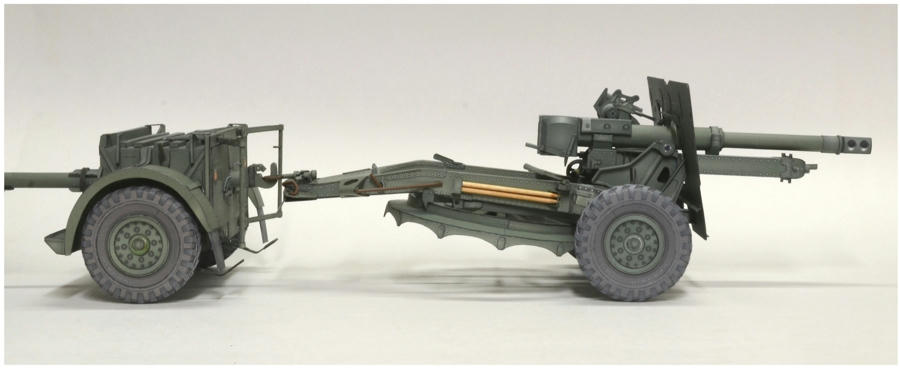 ... Next: take some photos of the Tractor, Limber and Gun all together. Have to find a spot big enough to do that!@!
__________________
SUPPORT ME PLEASE: PaperModelShop Or, my models at ecardmodels: Dave'sCardCreations
|
| Google Adsense |
|
#138
01-06-2020, 11:03 AM
|
||||
|
||||
|
Nice Dave.
Over Christmas was somewhere where they had the real things - and being bored they offered to set one up in firing mode. Did not take long and was very interesting!
__________________
The SD40 is 55 now!
|
|
#139
01-06-2020, 11:34 AM
|
||||
|
||||
|
No disappointments here.
This work really looks good. I can see armor and gun builders getting many satisfying hours out of these. Mike
|
 |
|
|


 Linear Mode

